
Easily Create a “Fake” Perspective Transparent Phone Wallpaper Using iPhone
Using iMovie’s Green Screen Effect to Composite Videos
Anyway, I’m free
Recently, while mindlessly relaxing, I came across a common wallpaper app ad that showcased an eye-catching perspective-transparent wallpaper; but as expected, it’s impossible— even with the rear camera’s real-time view, the angle can’t match that perfectly!

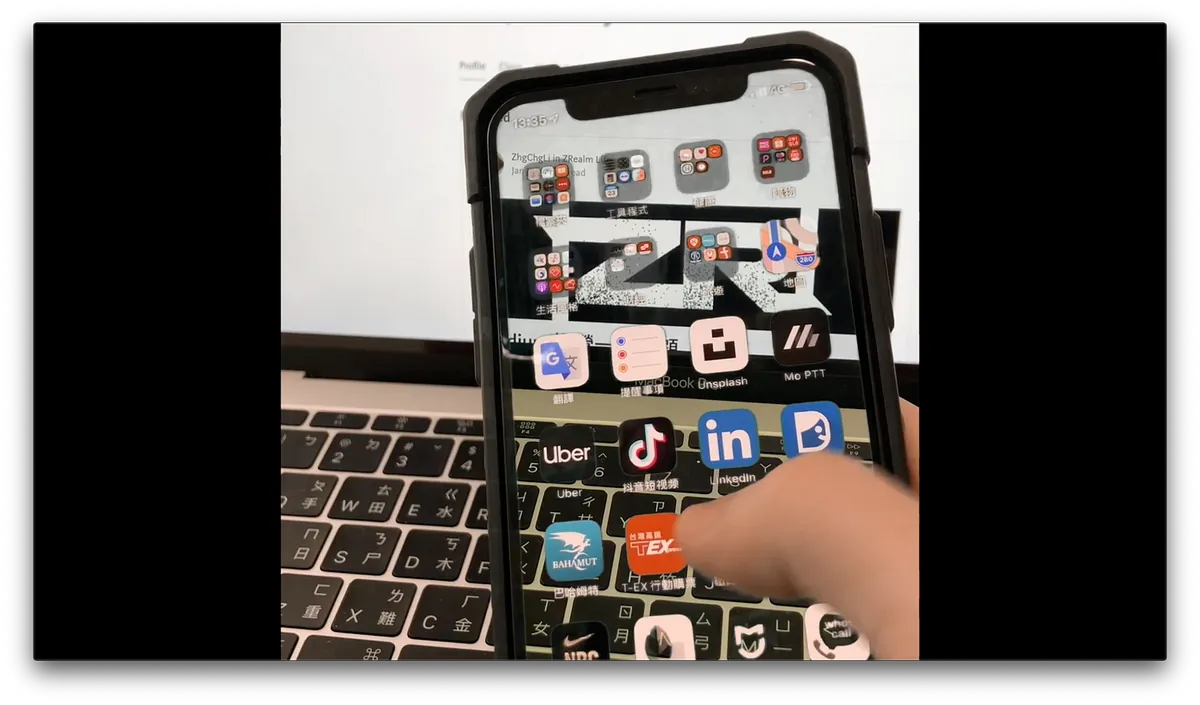
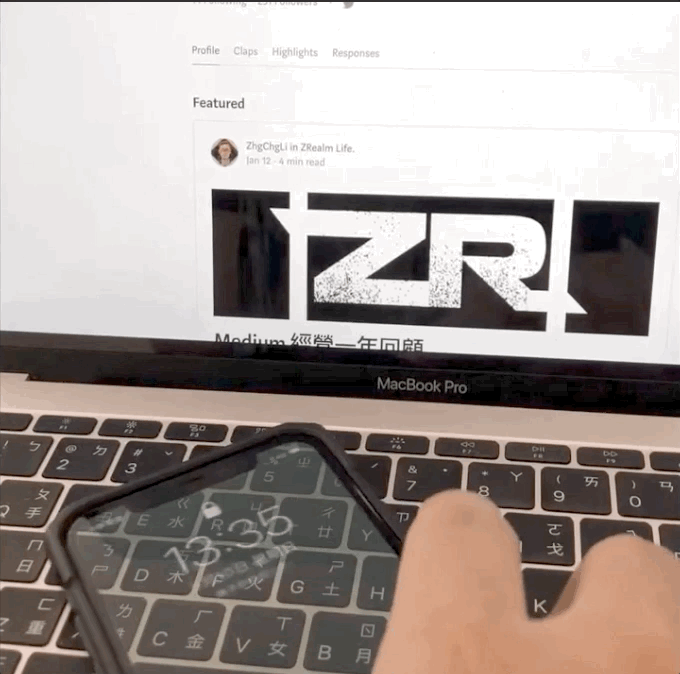
Final Result
我們要做個有腦的青年!
Although I knew it was a special effect, I thought it would be very complicated; I didn’t expect the iPhone’s built-in iMovie app could create it with just a few simple taps.
You only need:
-
One iPhone (to use iMovie directly), and a phone to appear in the shot
-
A phone or camera for filming
-
Phone stand, water bottle… or any object that can support the phone
-
iMovie APP (Free Download)
-
Green Background (Green Screen)

You can directly download this image or get it from the web
These 5 items are all you need to create the perspective effect!
Specific Steps:
-
Set up the phone used for filming
-
Record a clean video (without the phone in the frame)
-
Set the wallpaper of the phone being filmed to a green screen background
-
Record another video showing the phone in use
-
Open the iMovie APP for compositing
-
Done
Getting Started
1. Set up the phone stand and find the right shooting angle
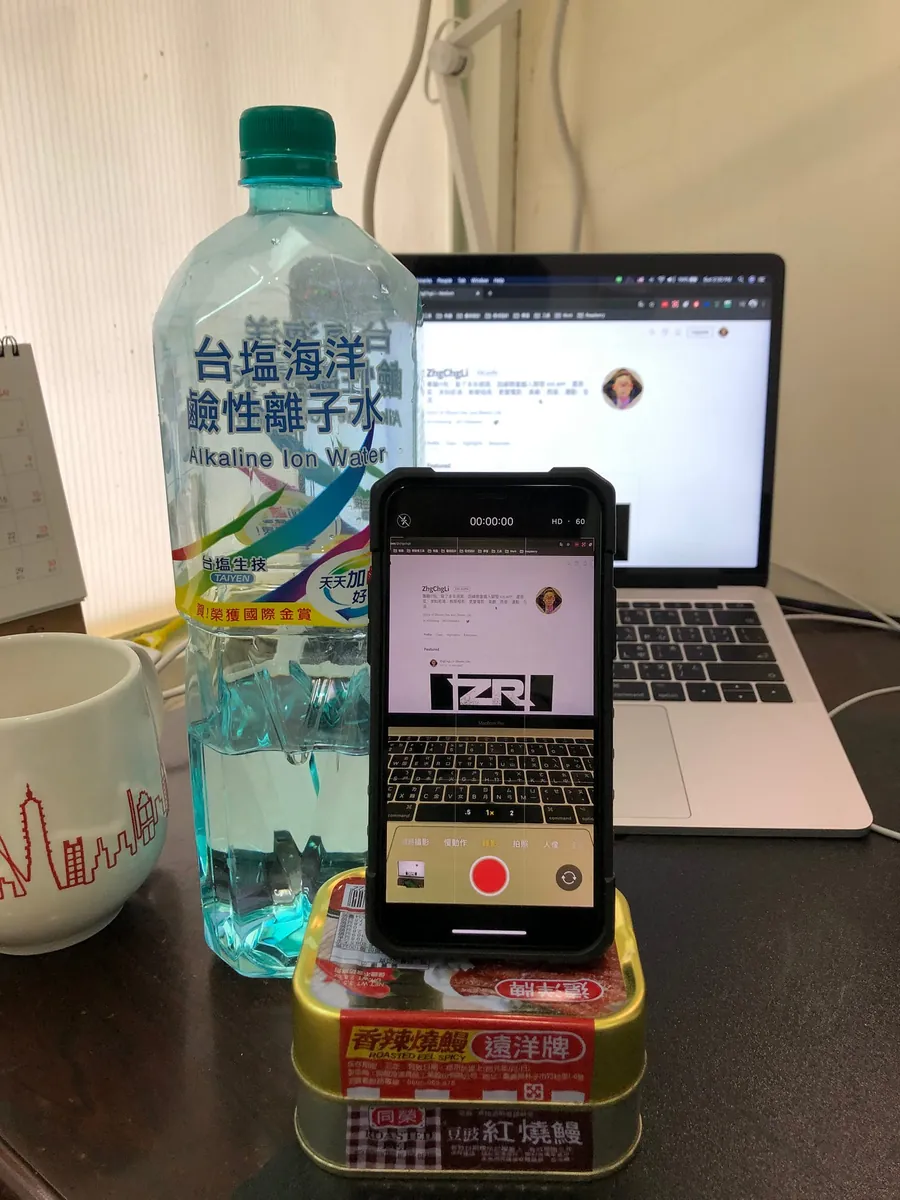
I used two cans of eel and a bottle of mineral water as a phone stand (of course, a vertical phone stand is even better!)
The purpose of using a phone stand for filming is to ensure both videos have the same angle. Otherwise, there will be frame shifts, and the effect won’t look as good. Holding the phone by hand makes it impossible for both videos to have 100% identical viewpoints.
2. Shoot a Clean Video Segment
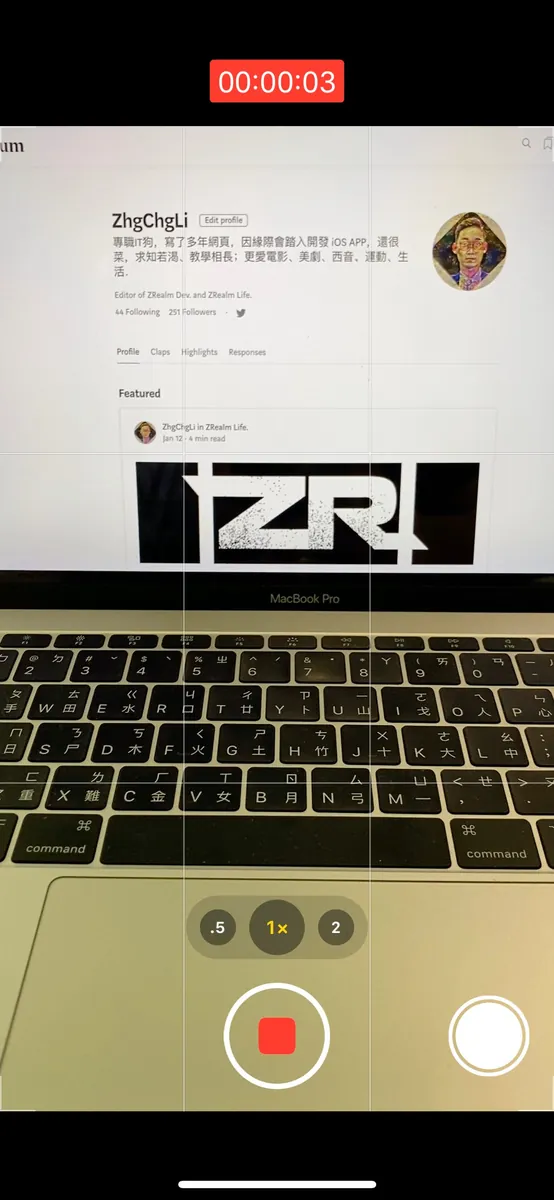
Record the clean footage for as long as you want the final video to be.
3. Set the wallpaper of the phone in the shot to a green background
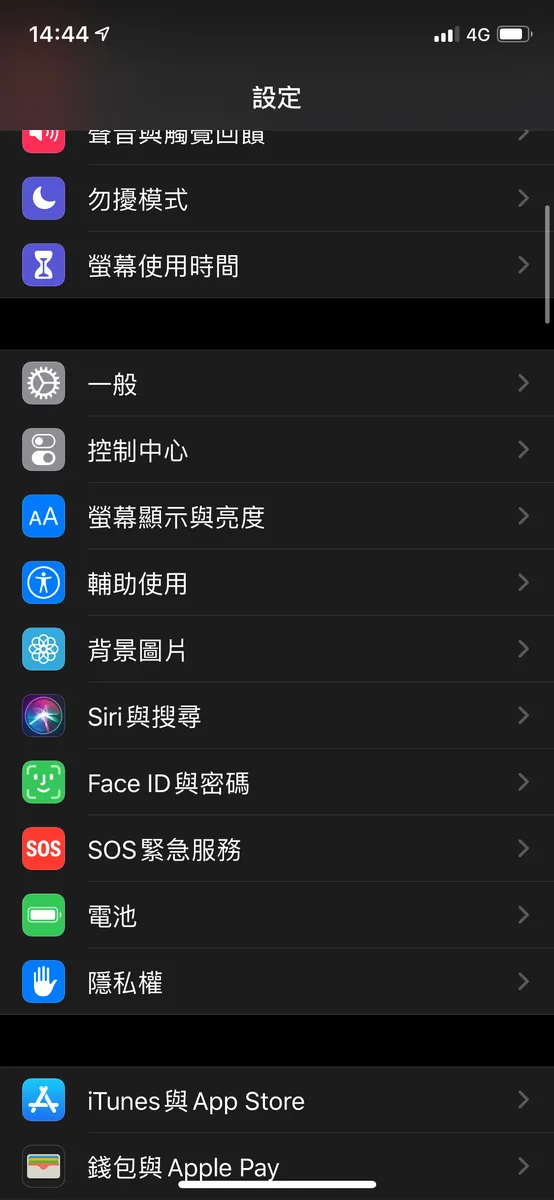
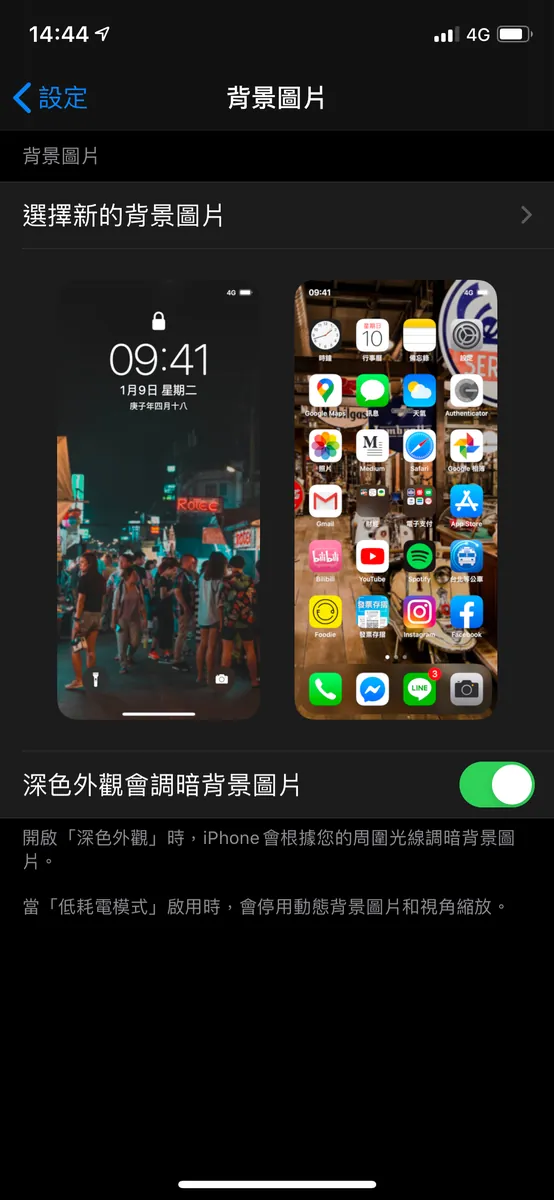
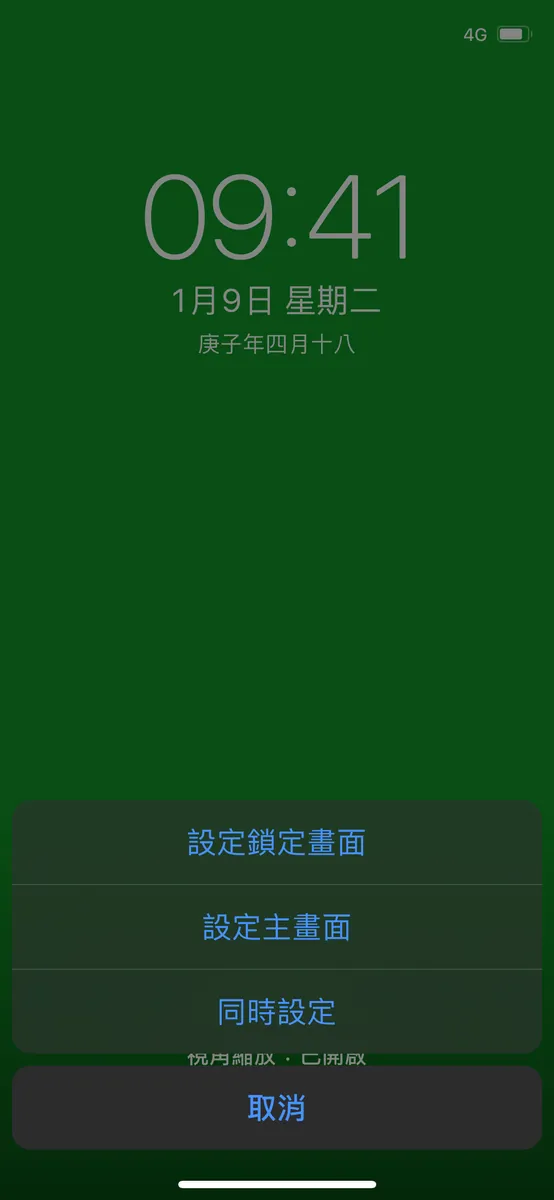
“Settings” -> “Wallpaper” -> “Choose the downloaded green background” -> “Set Both”
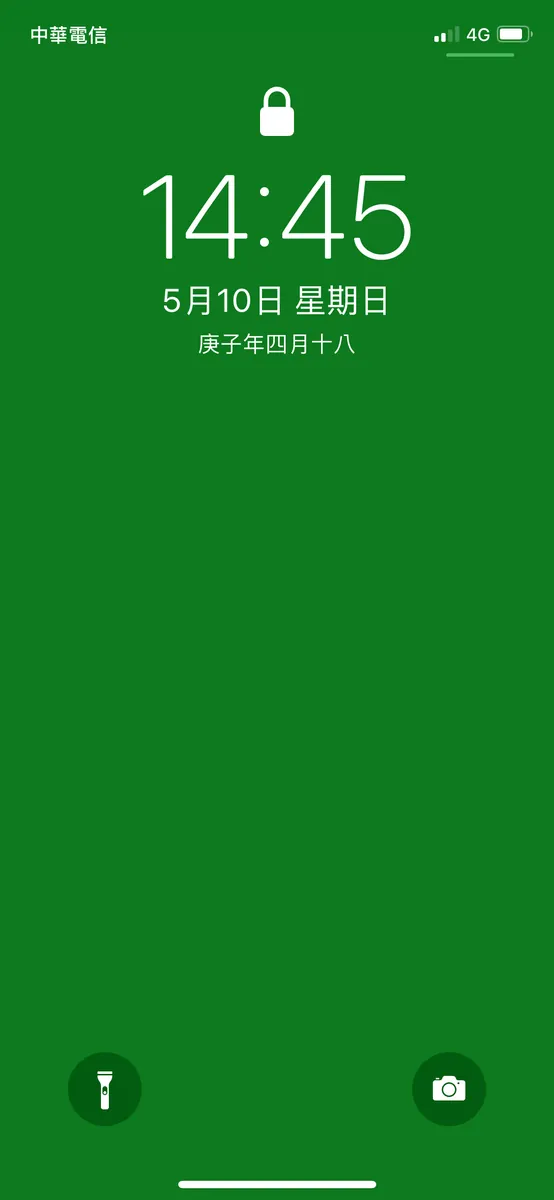
Final result image
4. Shoot a video of the phone in the frame operating
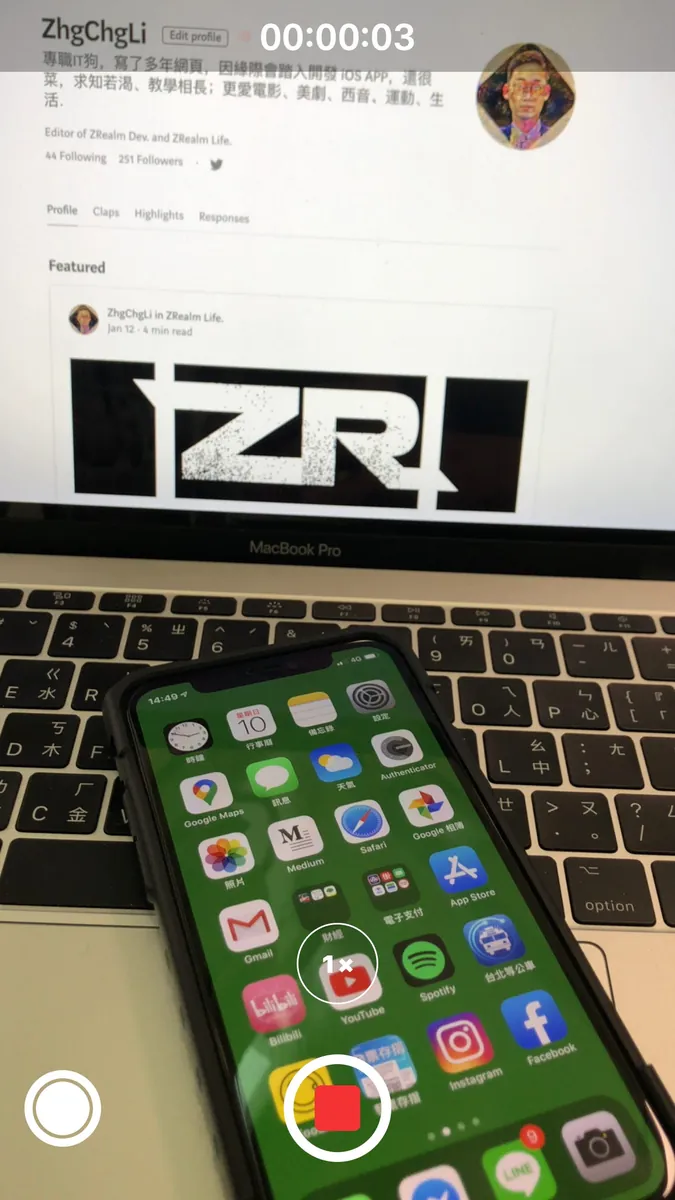
Video length should be the same as 2. Clean video; longer is fine, you can trim it later.
5. Open iMovie APP and Create a Project
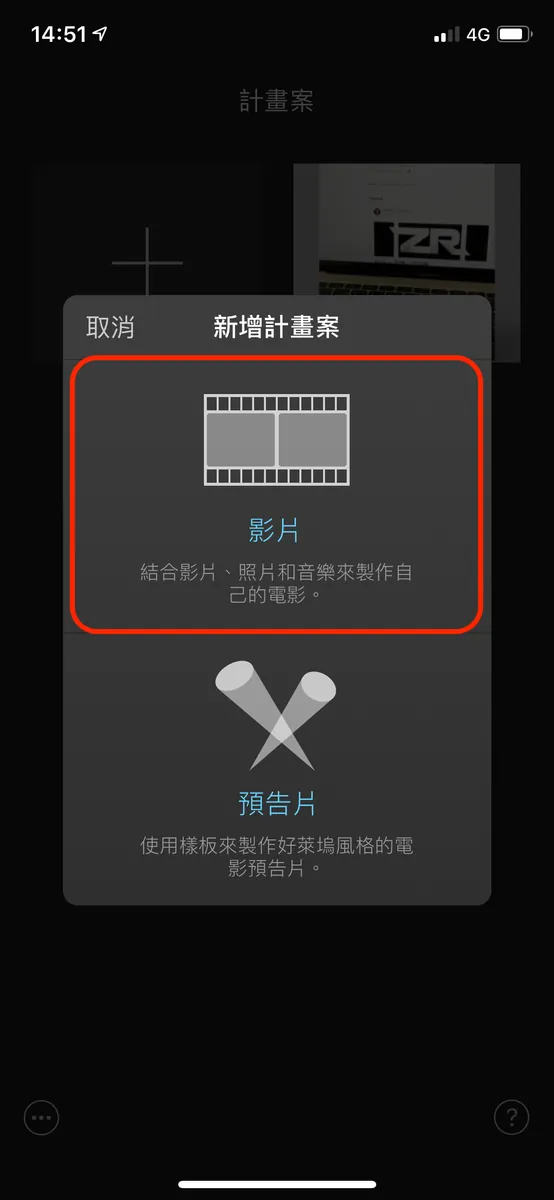

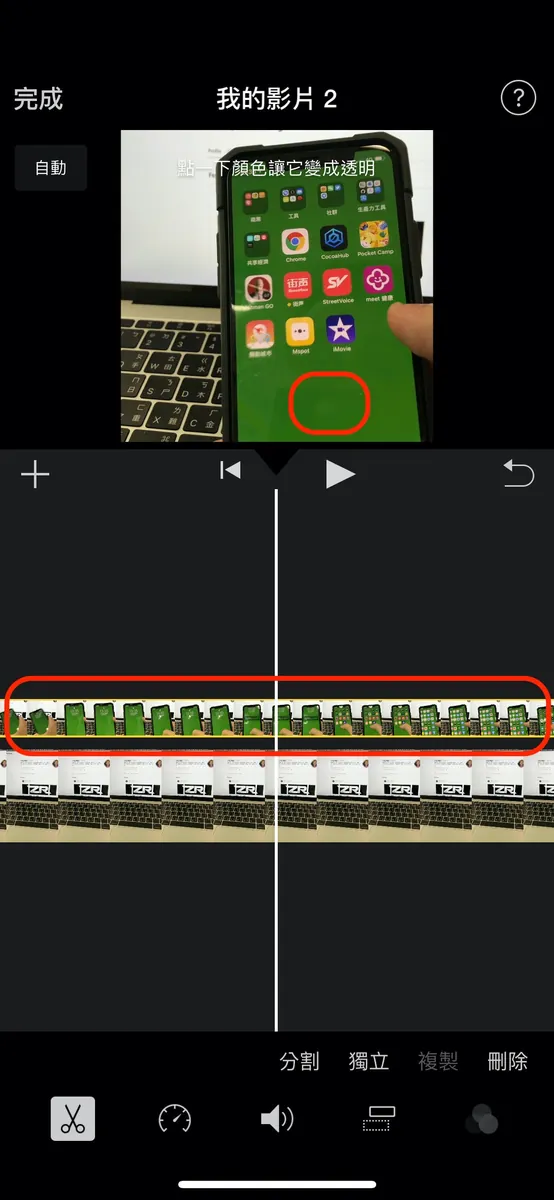
”+” -> “Video” -> Select “Clean video” -> “Create Movie”
Insert the clean video into the project.
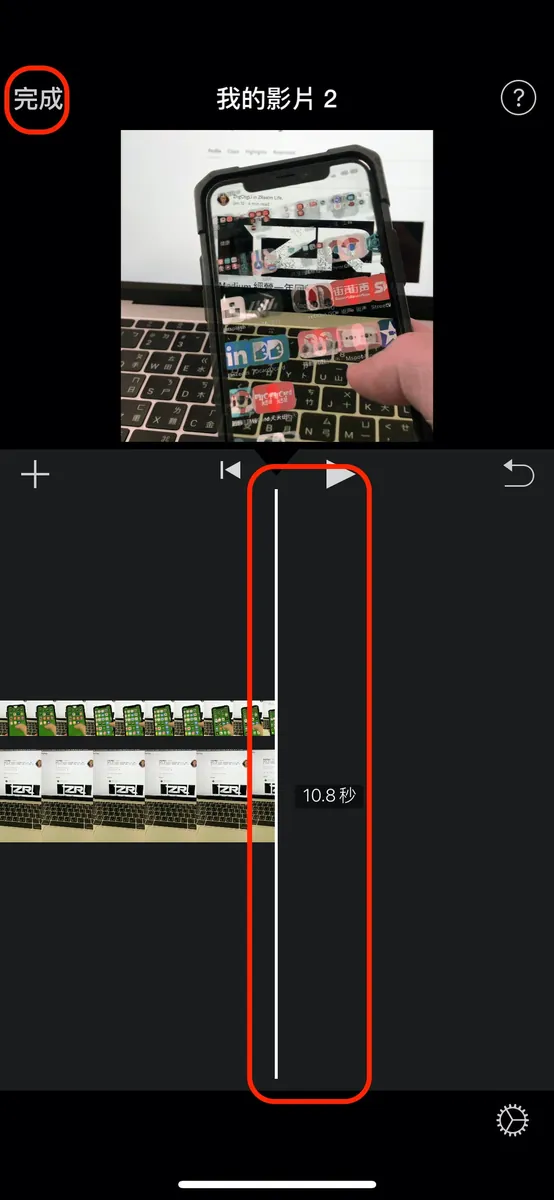
6. Move the playhead to the beginning
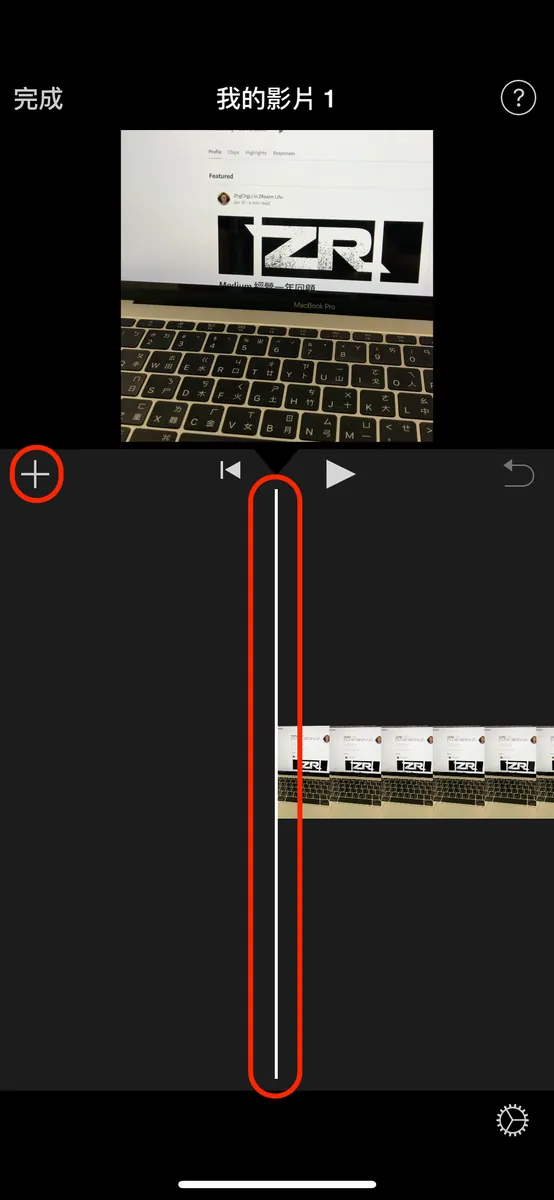
If you do not move the clean video’s playback position to the start, inserting the green screen video later will cause the message “Move the playhead away from the end to add an overlay”.
7. Insert the video of the phone in the shot performing actions
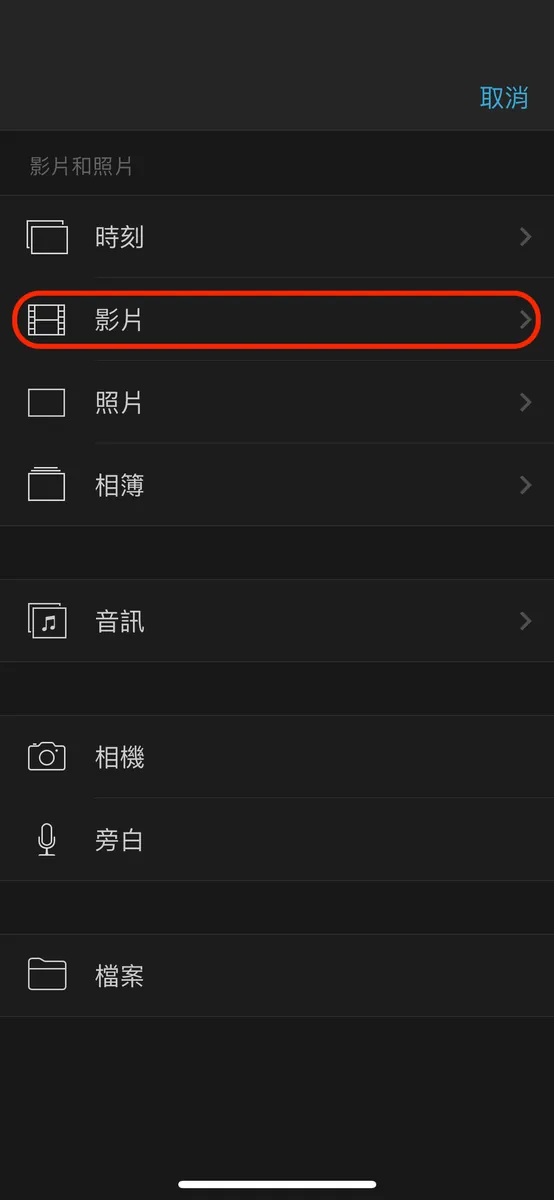
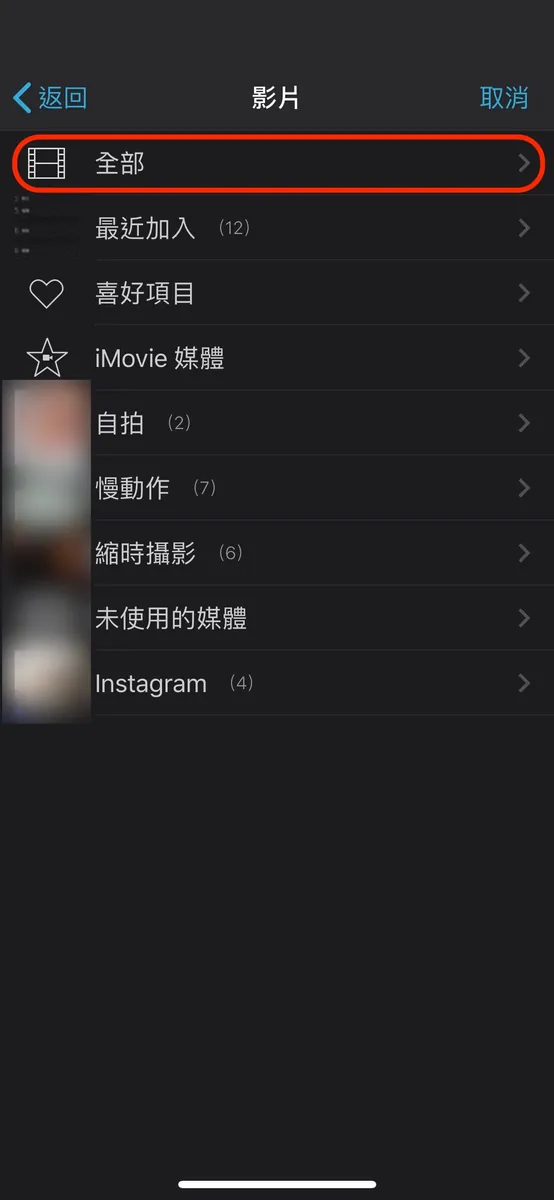
Click the top right “+” -> “Movie” -> “All”

Select the “In-frame operation video” -> “…” -> “Green/Blue Screen” (commonly known as: chroma key)
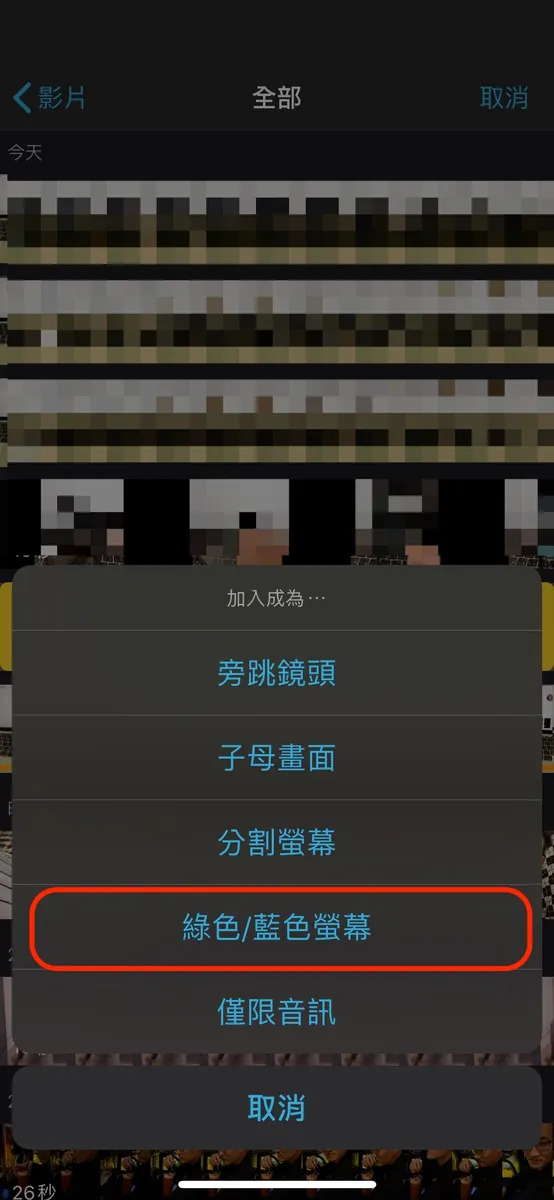
Click on the top “In-frame Operation Video” -> “Scroll to the frame with the green wallpaper” -> Click the “green area” -> Complete the perspective transparency
8. Composition Complete! Export the Video
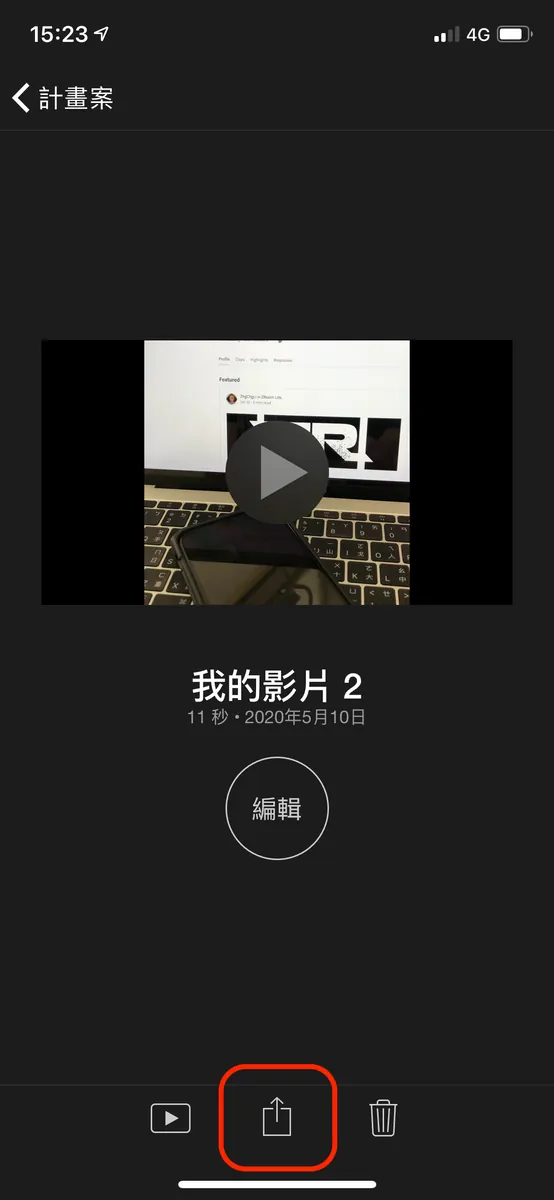
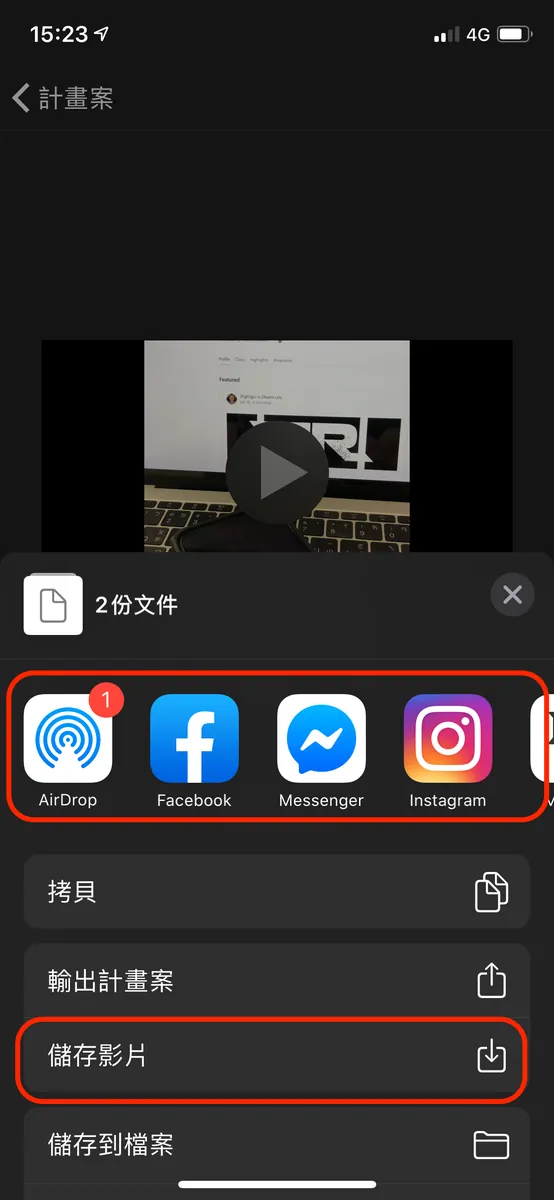
Make sure the end times of both videos match, tap “Done” at the top left -> tap “Share” at the bottom -> choose the export destination -> complete the export.
9. Completion
Tips
-
You can first hide apps with green icons, such as Line and Messages, to prevent mistakes (since the keying is based on green).
-
You can also use a blue background and key out the blue; other colors work too (but green/blue give the best results).
-
There are more ways to play with the same principle, waiting for you to discover!
Conclusion
just for fun… I didn’t expect iMovie to be this powerful!

Comments