
[Travelogue] 2025 Tokyo Area — 5-Day Free Trip to Kawagoe Little Edo and Atami Sea Fireworks Festival
Tokyo City + Suburbs 5 Days 4 Nights Free Travel: Complete Guide to Transportation and Experiences for Atami Fireworks Festival and Kawagoe Day Trip
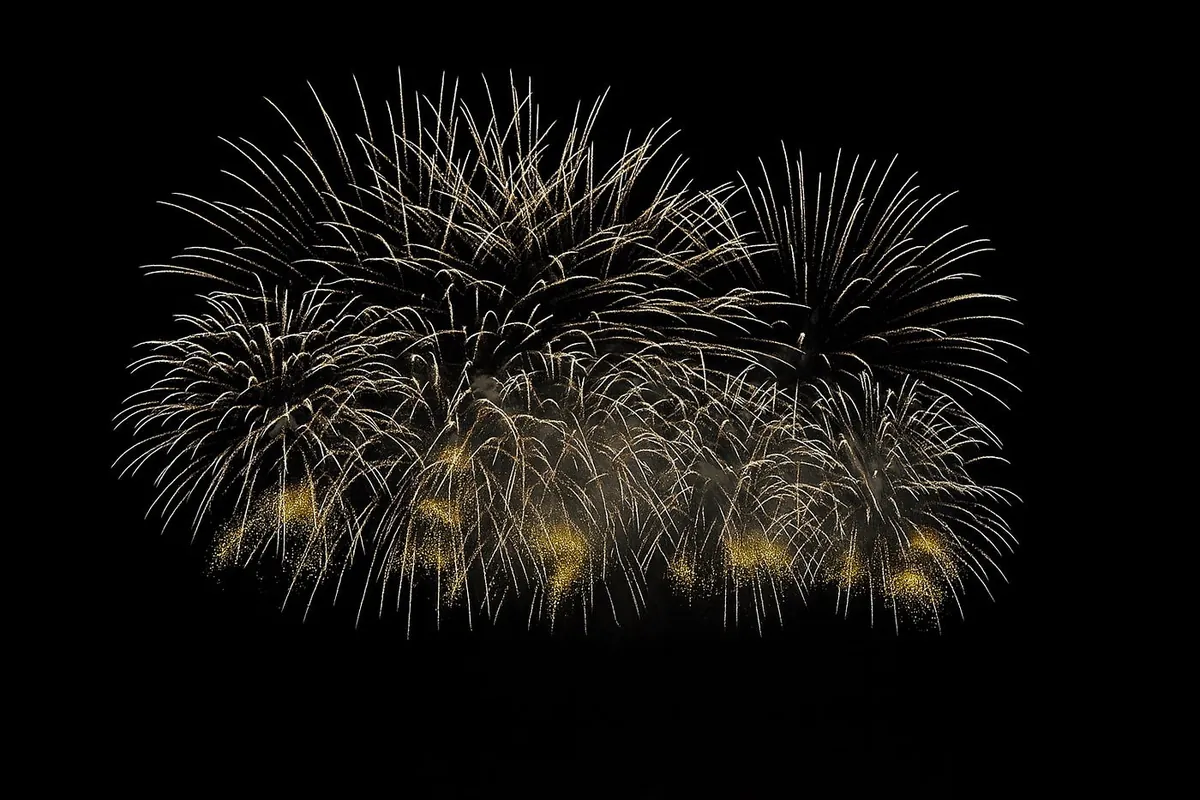
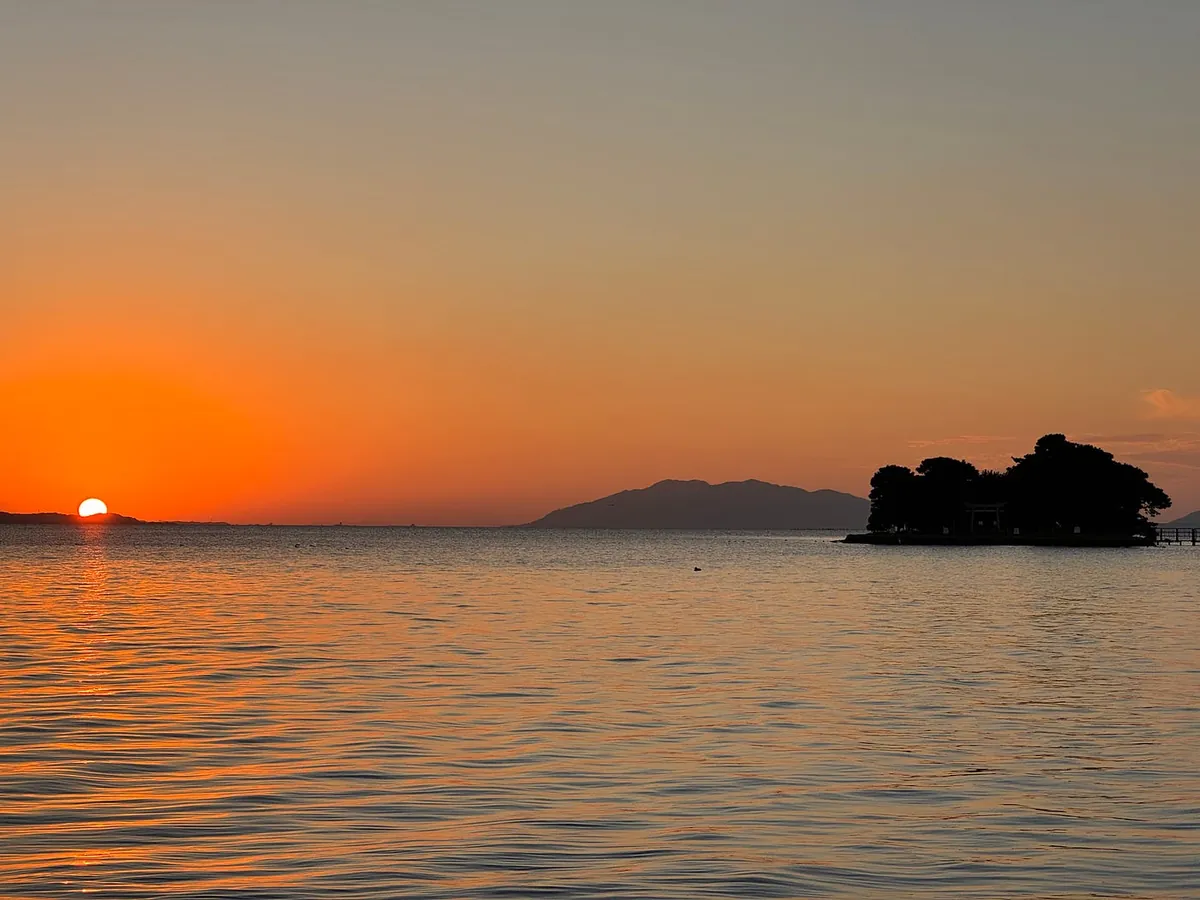
Summer Fireworks in Atami
Taking advantage of the start of my new job to recharge, Revisiting Tokyo — experiencing a once-in-a-lifetime Japanese fireworks festival and a day trip to Kawagoe near Tokyo.
Last Trip Itinerary
Last time, in the trip “[Travelogue] 5 Days Free Trip to Tokyo 2023” in June 2023, it was not as hot as in September. The main spots visited were: Tokyo Tower, Shibuya Sky, Tokyo Skytree, Asakusa Kaminarimon, DisneySea, Yokohama Gundam, Yokohama Cable Car, Odaiba, Shinjuku, and the Imperial Palace.
Interested friends can check it out.
Fun
-
Day 1 (09/13 Sat) — Arrive in Tokyo, Shibuya, Shibuya Sky
-
Day 2 (09/14) — Kawagoe Day Trip, Evening Shopping in Ikebukuro
-
Day 3 (09/15 Mon) — Tokyo Station Underground Mall, Atami Fireworks Festival
-
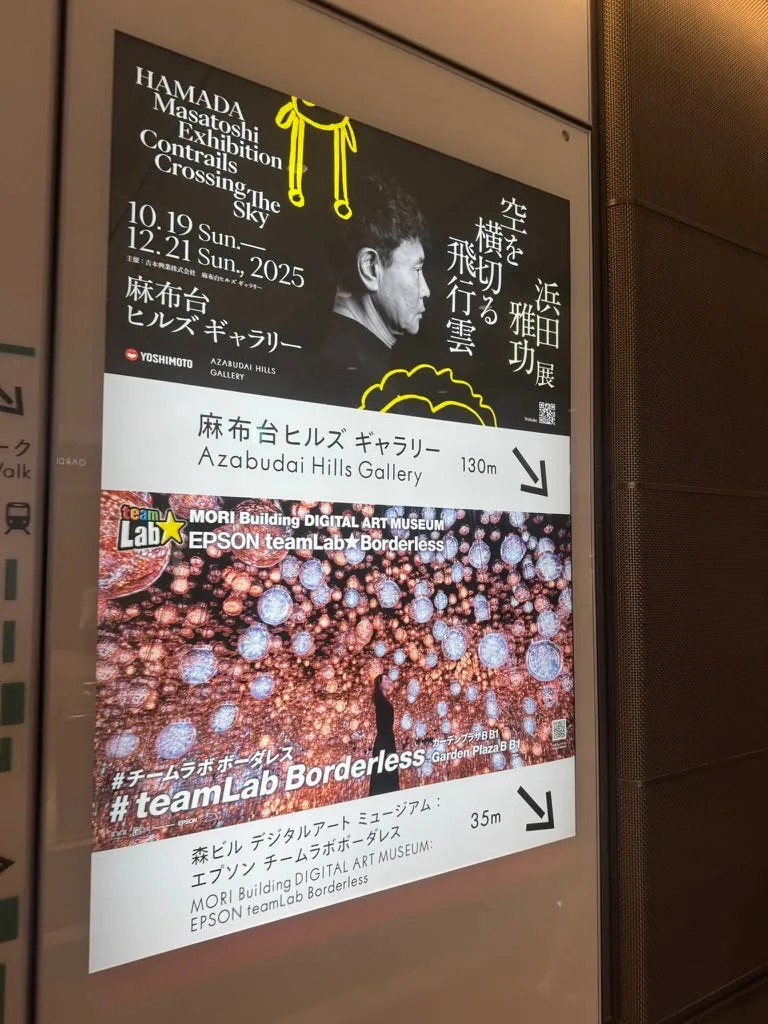
Day 4 (09/16 Tue) — Azabudai TeamLab, Harajuku Shopping, Harajuku HARRY Otter Café
-
Day 5 (09/17 Wed) — Stroll around Ueno, Return Trip
Shibuya Sky
-
Shibuya Sky tickets are very popular, so be sure to purchase them in advance.
-
Official Website Ticket sales start at 11:00 PM Taiwan time. You can buy tickets for dates more than 2 weeks ahead.
Please register as a member and get familiar with the purchase process before buying tickets on the official site. The ticket holder’s name can be a nickname; it does not have to match the passport name exactly. -
We bought tickets for the 18:40–18:59 night view slot. You can also choose an earlier time to watch the sunset or the last session at 21:00 after dinner.
-
Other purchase options: KKday Shibuya SHIBUYA SKY Observatory Ticket|Instant Use
Price: ¥3,400 JPY/person
[Atami Fireworks Festival
Atami Fireworks Festival](https://hoshinoresorts.com/zh_tw/hotels/risonareatami/activities/13288/){:target=”_blank”} official website.
-
2025 Fireworks Dates: 3/23, 4/20, 4/28, 5/31, 7/25, 8/5, 8/8, 8/18, 8/25, 9/15, 9/23, 10/13, 11/3, 11/24, 12/7, 12/19.
-
July and August showtimes: 8:15 PM~8:40 PM, 25 minutes
-
Other months’ display time: 8:20 PM~8:40 PM, 20 minutes
The beach is open to the public for free with no paid seating. It’s within walking distance from JR Atami Station. For safety, just make sure to book your round-trip JR tickets or accommodation in Atami in advance.
It is highly recommended to bring your own picnic mat! It is highly recommended to bring your own picnic mat! It is highly recommended to bring your own picnic mat!
We attended the fireworks show on 9/15 at 8:20 PM.
Azabudai TeamLab (teamLab Borderless: MORI Building DIGITAL ART MUSEUM)
-
There are quite a few tickets available, but it is still recommended to purchase them in advance before departure.
-
Other purchase options: Tokyo teamLab Borderless Digital Art Museum Tickets
Price: ¥4,800 JPY/person
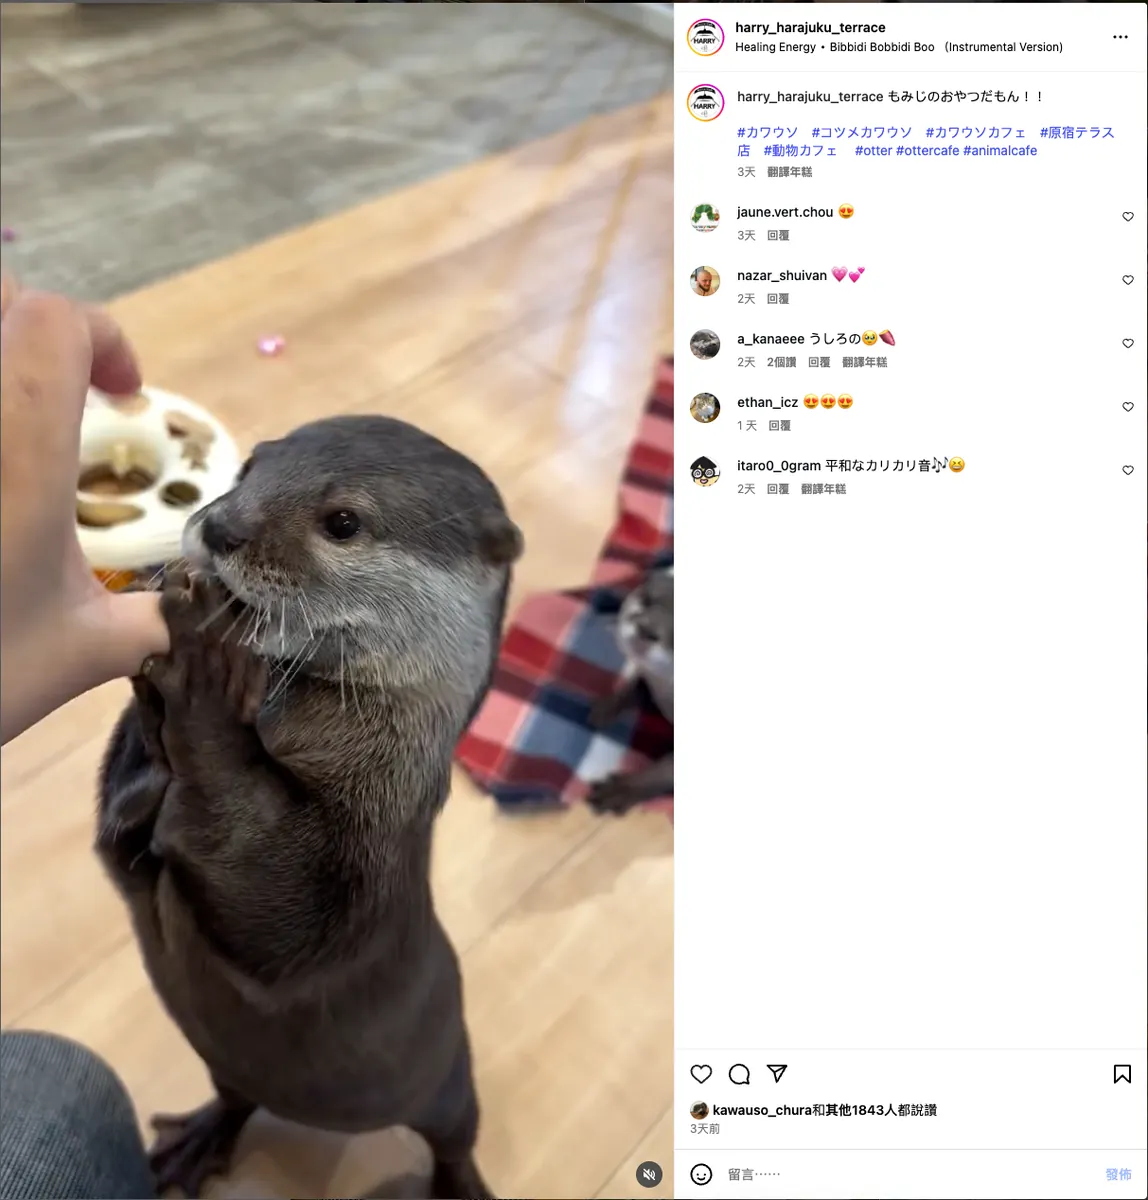
HARRY Harajuku Terrace Otter Cafe
The cafe where you can interact with otters, which I saw on Instagram before.
https://www.instagram.com/p/DPBKurVD99c/
-
There are branches in other areas of Tokyo as well. Check the official website.
-
Booking in advance is recommended; same-day visits may have no availability.
-
If the itinerary changes before the date, cancellation is free.
-
Time: 16:30–17:30
Price: ¥3,080 JPY/person for one hour basic fee + ¥880/person on-site for 5 minutes of close interaction with otters.
But later research suggests another place, カワウソ_若林の家, is better with longer interaction time.
Transportation
Flights — Japan Airlines
-
Outbound September 13: JL802 Japan Airlines — 10:00 TPE Taoyuan International Airport T2 -> 14:25 NRT Narita Airport T2
-
Return Flight September 17: JL809 Japan Airlines — 18:10 NRT Narita Airport T2 -> 18:10 TPE Taoyuan International Airport T2
Price: NT $12,324 per person
JR Shinkansen Tokyo <-> Atami (~= 45 minutes)
I bought the tickets in advance to avoid the risk of no trains available on the day.
-
Sale Time: Tickets for dates +4 weeks ahead can be purchased starting at 11:00 PM Taiwan time
-
You can purchase from the official website or through KKday / Klook (compare prices yourself)
What we bought:
- Tokyo 14:57 -> Atami 15:42 — Kodama 735
- Atami 22:02 -> Tokyo 22:48 — Kodama 752
Price: NT $1,882 + NT $56 (seat preference fee on booking platform) / person
Skyliner Keisei Electric Railway Ticket (~= 41 minutes)
This is probably the fastest way to get from Narita Airport to central Tokyo (Ueno).
-
No unreserved seating
-
KKday Purchase: Skyliner Keisei Electric Railway Ticket
-
Buying online first is cheaper, then reserving seats at the station offers good flexibility.
Price: NT $912 (round-trip for two tickets)/person
Note that when you buy a round-trip ticket on KKday, you will receive two separate tickets. Don’t mistake this for an error.
Kawagoe Pass (Train + Bus) (~= 30 minutes)
-
Tobu Tojo Line round trip: Ikebukuro Station -> Kawagoe Station or Kawagoe-shi Station
-
Unlimited rides on Tobu buses all day (including Tobu Koedo Loop Bus)
-
Please note: There are Seibu and Tobu buses; this ticket is for Tobu.
-
KLook Purchase: Kawagoe Discount Pass
-
No need to exchange; just redeem online before use and show the QR code to the train or bus driver.
Price: NT $214/person
Airport Transfer
-
KKday Airport Transfer Booking / Klook Airport Transfer Booking
-
Currently, both K services offer affordable, safe, and fast airport transfers. You can compare prices and choose freely.
Taipei and New Taipei -> Taoyuan Airport
Price: NT $752 per unit
eSIM
Also purchased the 5G unlimited data eSIM directly on KKday. This time, no special issues or speed throttling were encountered in Tokyo, Atami, or Kawagoe.
- KKday Purchase: Japan eSIM Unlimited Data KDDI / Softbank
Price: NT $309 / 5 days / unlimited data
Visit Japan
Accommodation
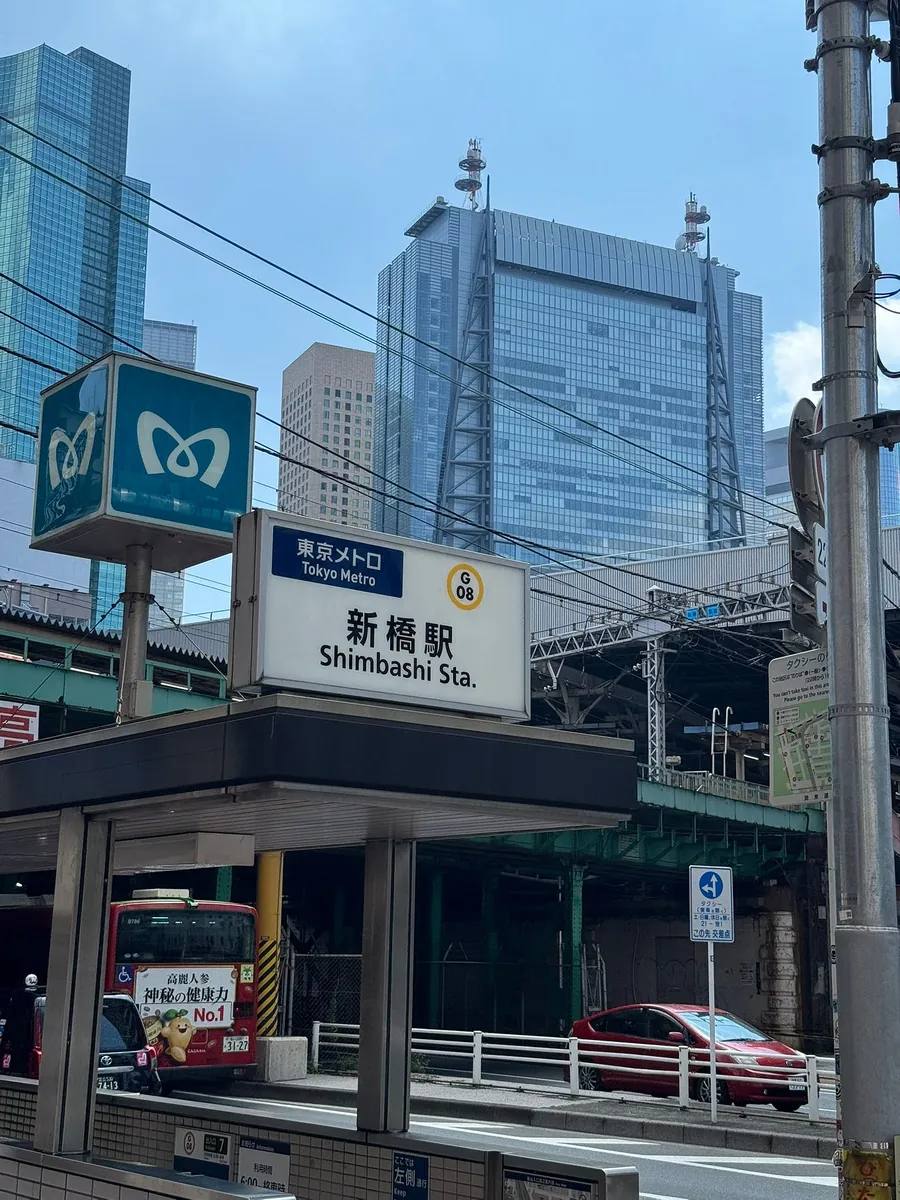
Because the booking was close to the departure date, after comparing prices and convenience, I chose to stay near Shimbashi Station. (Last time I stayed in Shiodome, but Shimbashi felt more convenient.)
Daiwa Roynet Hotel Shimbashi, Tokyo (4 nights)
Tokyo Shimbashi Daiwa ROYNET Hotel
-
About a 2-minute walk from Shimbashi Station, very convenient.
-
Stay for five days and four nights without changing hotels.
Price: NT$ 18,404/4 nights/2 persons/standard double room, about NT$ 2,300/person per night.
Ready to go! Let’s start!
Day 1 (09/13 Sat) — Arrive in Tokyo, Shibuya Sky
06:50 Take the airport shuttle
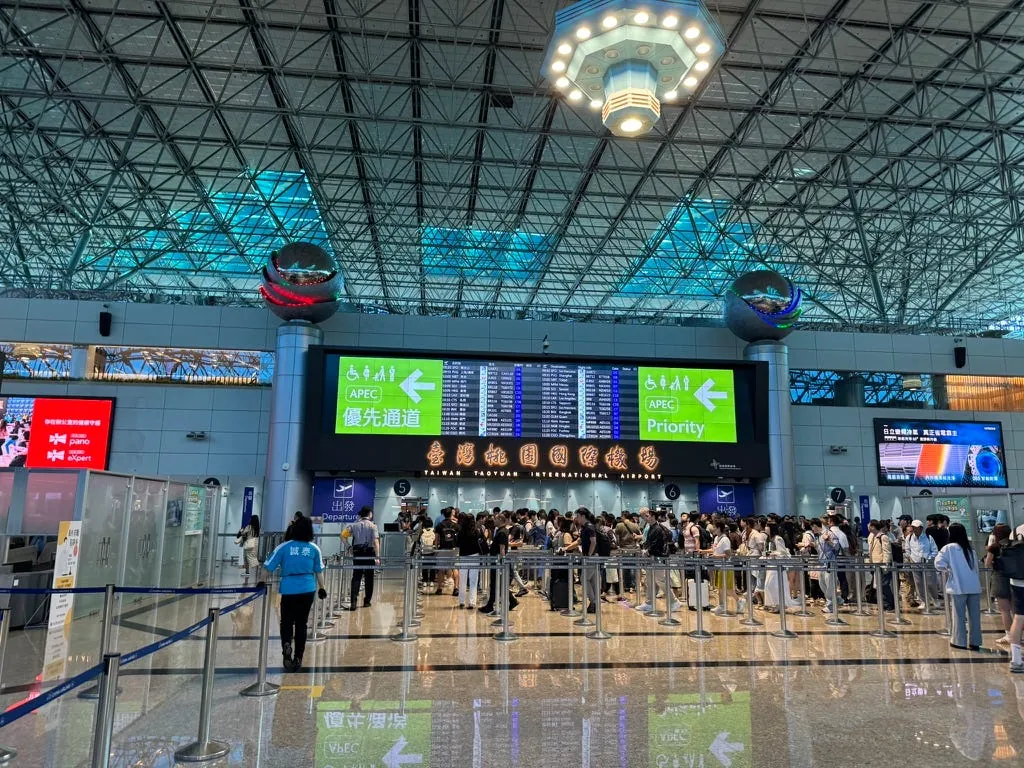
07:20 Arrive at Taoyuan Airport Terminal 2
07:30 Pack and Check-in Luggage
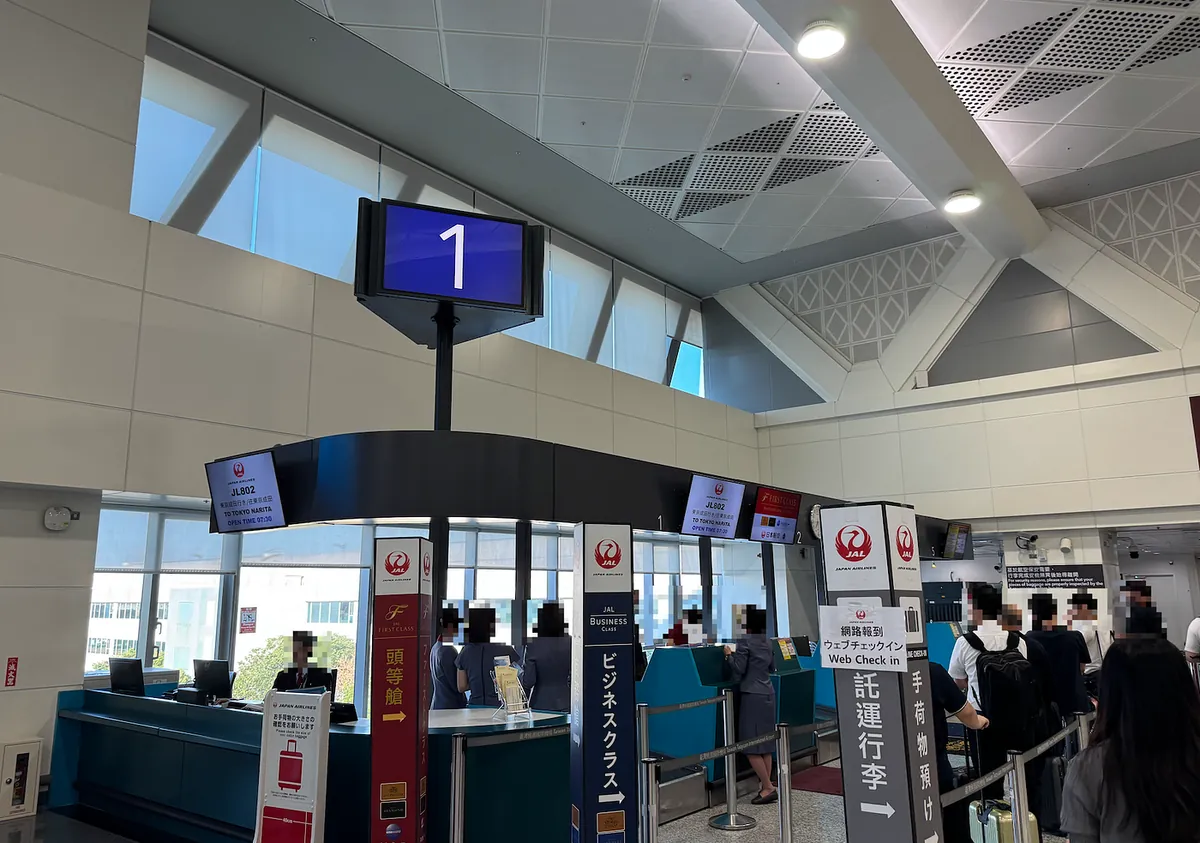
Assigned to counter number 1 at the corner, I had already completed online check-in and went straight to check in my luggage. However, the people ahead took a long time, so it took about 30 minutes to finish the luggage check-in.
~= 08:20 Complete security check and immigration clearance

There were quite a few people early in the morning. I finished security and immigration around 8:20 and went to the second floor to have Mos Burger for breakfast. The assigned boarding gate was also the farthest one, D1.
Terminal 2 Departure Duty-Free Shop Le Labo
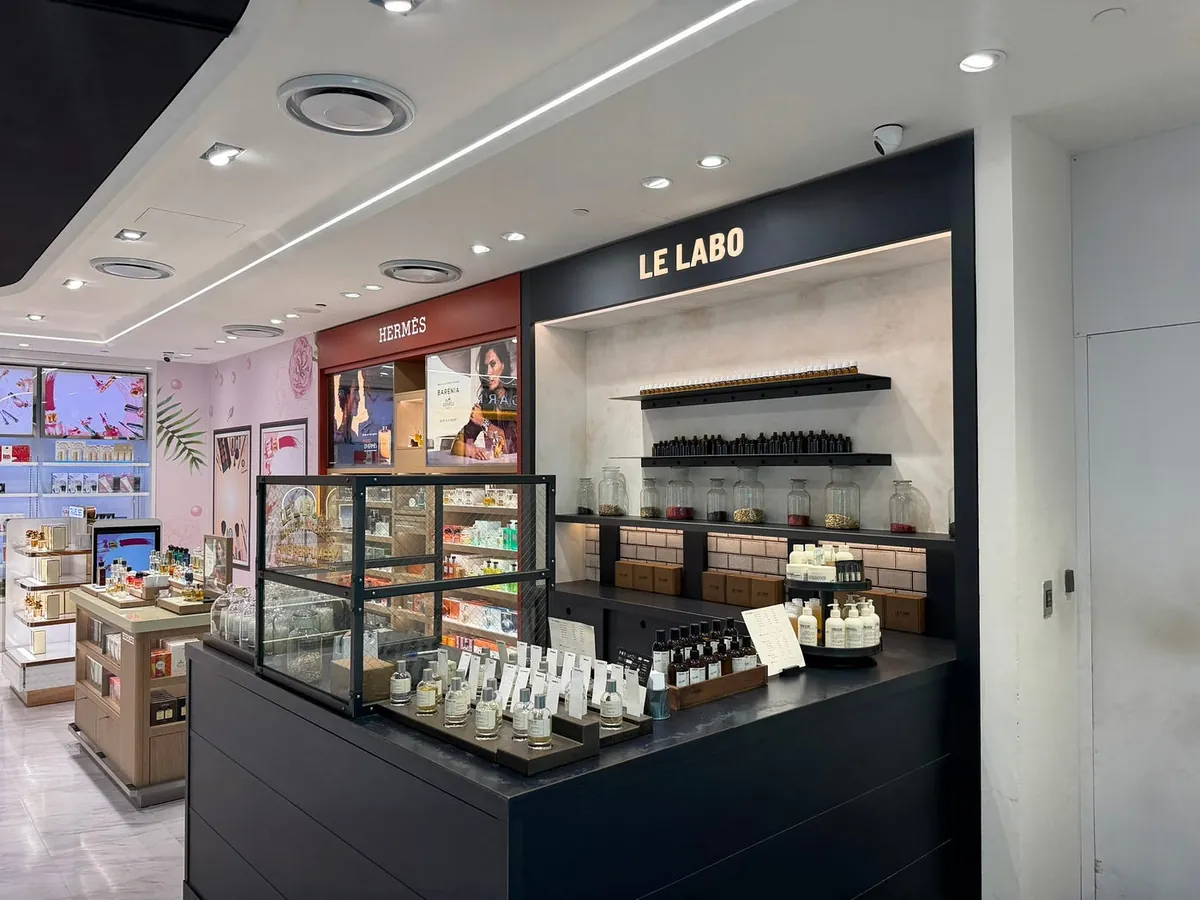
Unexpectedly found Le Labo at Terminal 2 departure duty-free shop. The sales clerk mentioned a promotion where new members get a coupon, making the 50ml price NT $5,500, cheaper than buying inside Japan (about NT $5,800).
Latest Price List for 2025 — 50ml:
-
Taiwan Store Price: NT $7,600
-
Taiwan airport store duty-free price: NT $5,500 (promotional price)
-
Tax-refunded price at Japanese stores: approximately NT $5,700
-
Japan Airport Stores Duty-free price: about NT $5,200 🤩 — I bought mine at the very end after departing from Narita Airport Terminal 2.

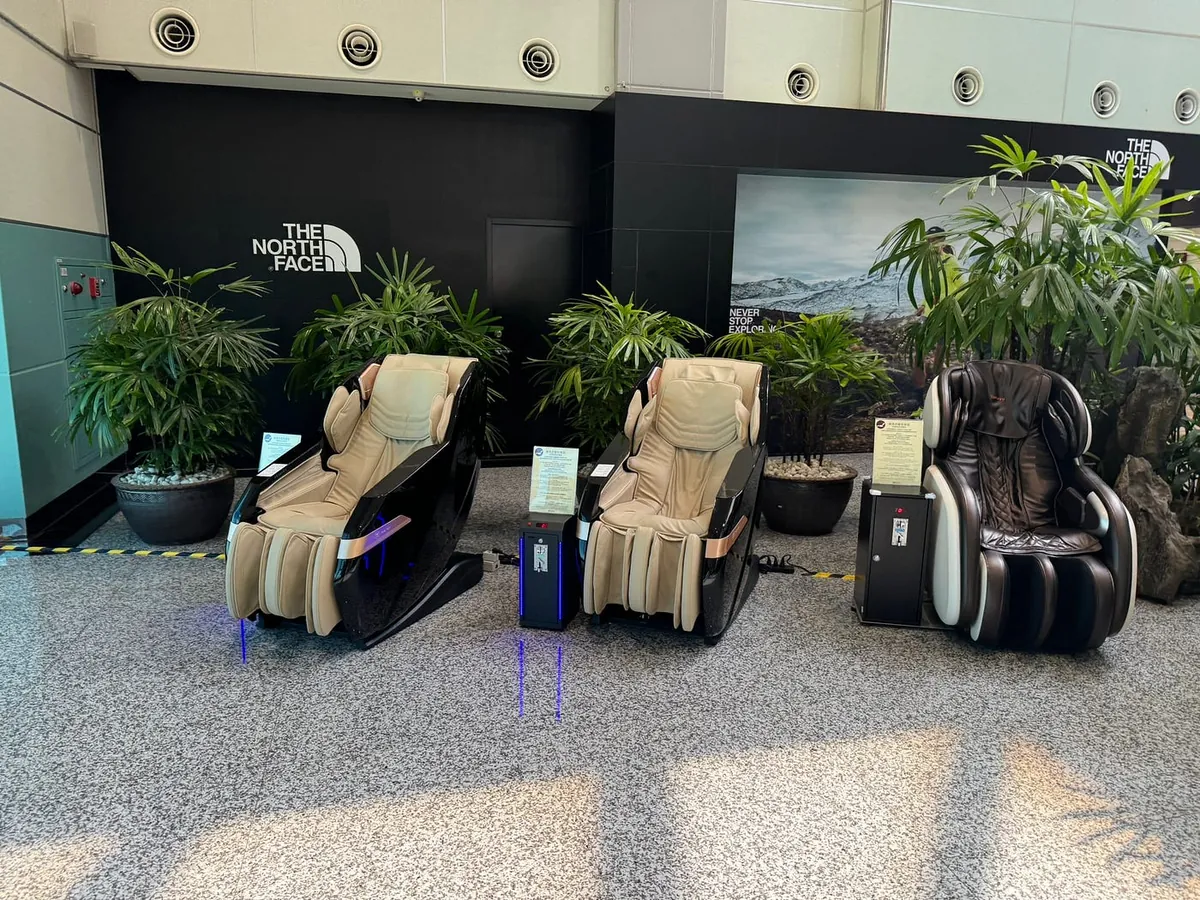
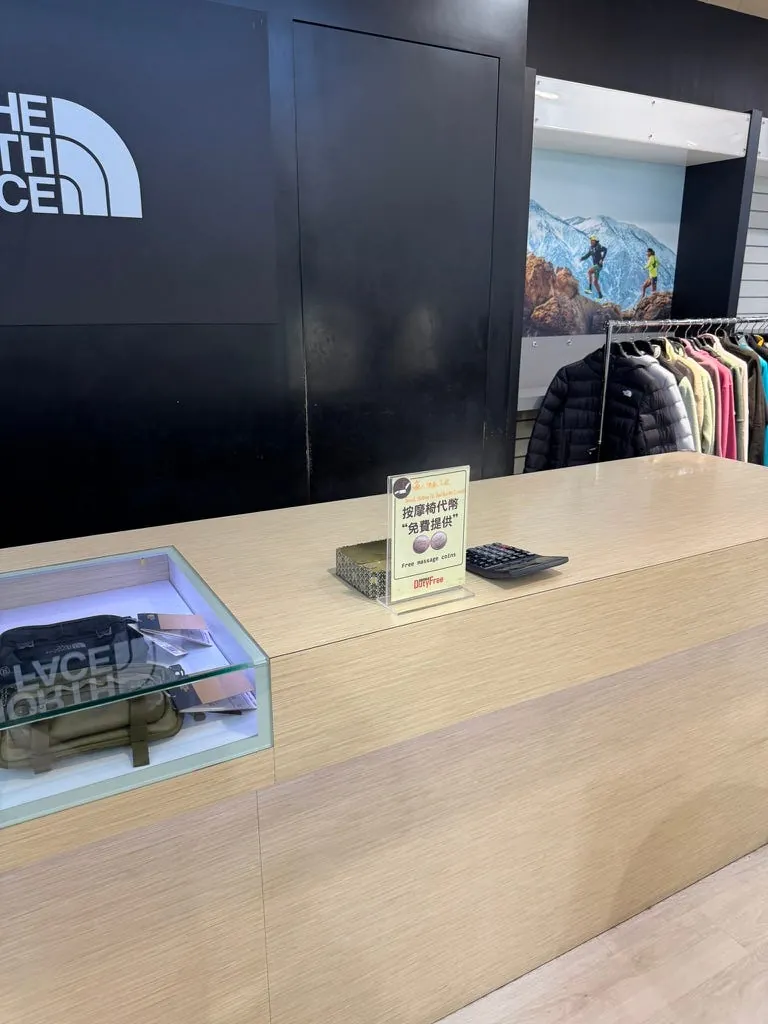
While wandering around the airport waiting for boarding, there are two rows of free massage chairs next to The North Face on D1 (you can get free tokens from nearby stores to use them).
09:40 Head to the gate to prepare for boarding
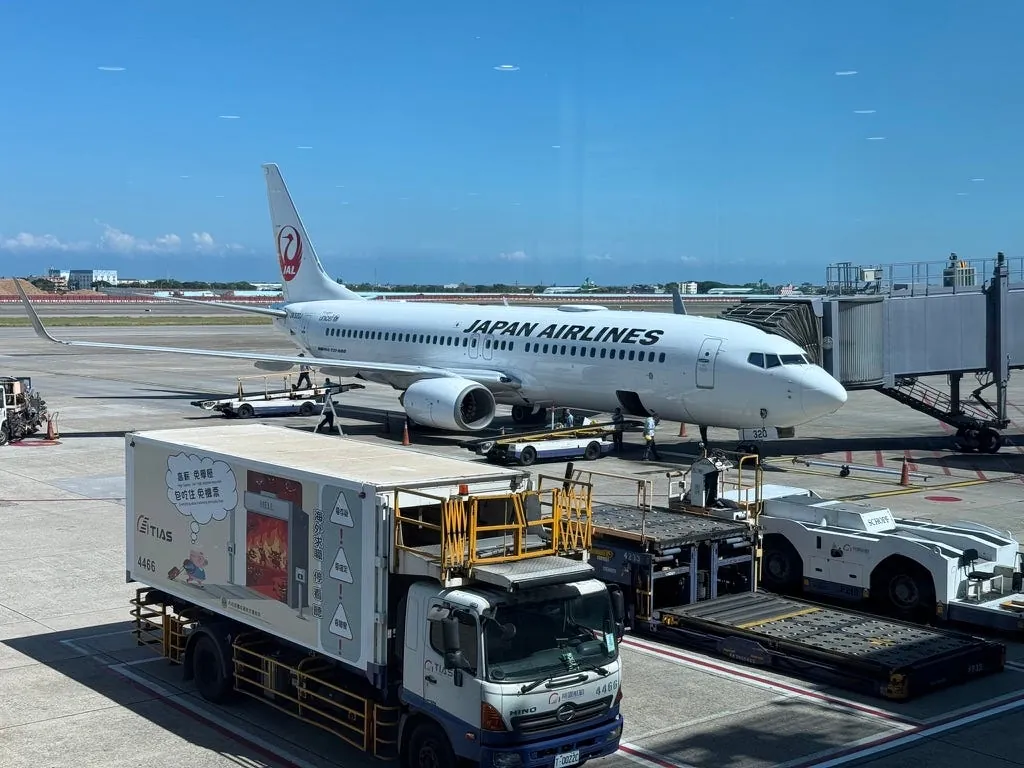
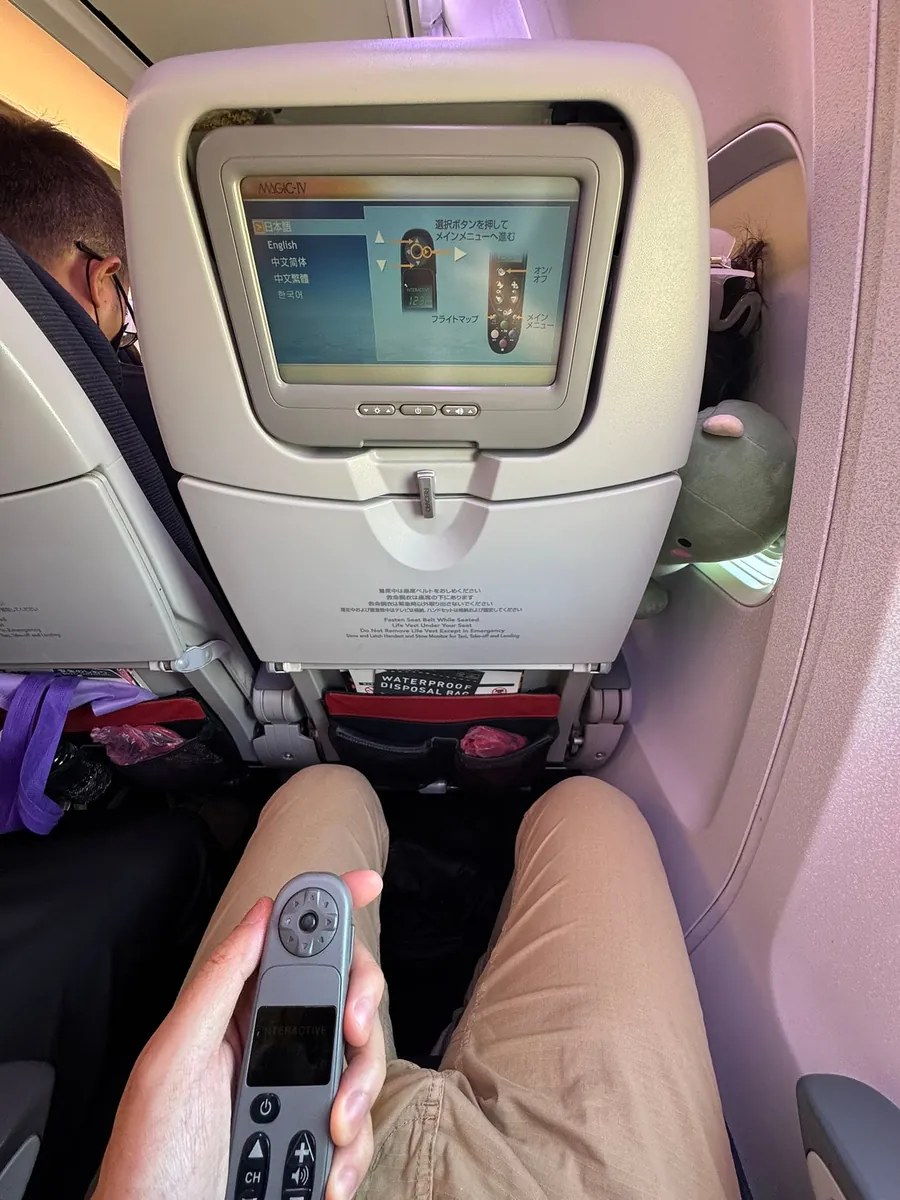
The plane I took this time was a BOEING 737–800 model, which is a bit outdated.
But I only found out after returning that the plane offered free one-hour onboard WiFi.
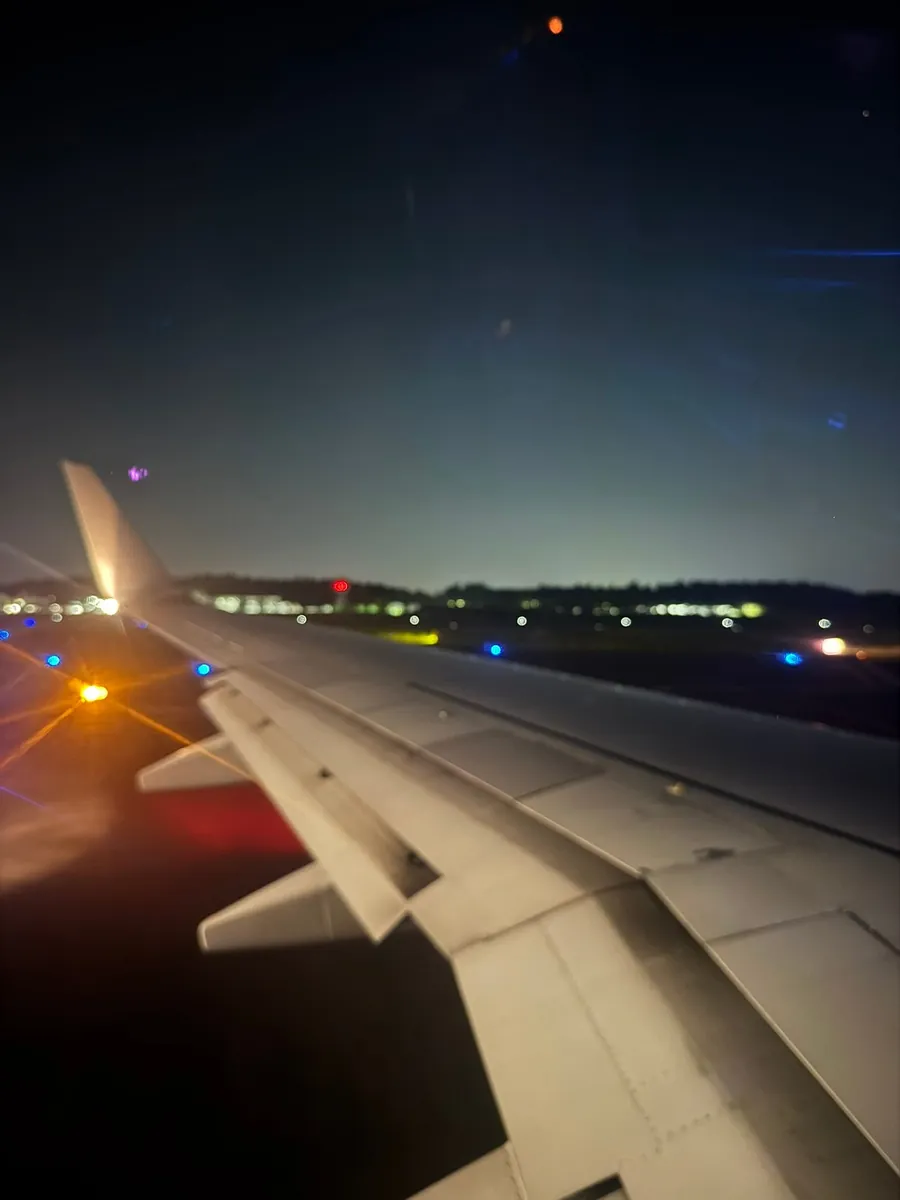
10:06 Takeoff
JAPAN AIRLINES In-flight Meals
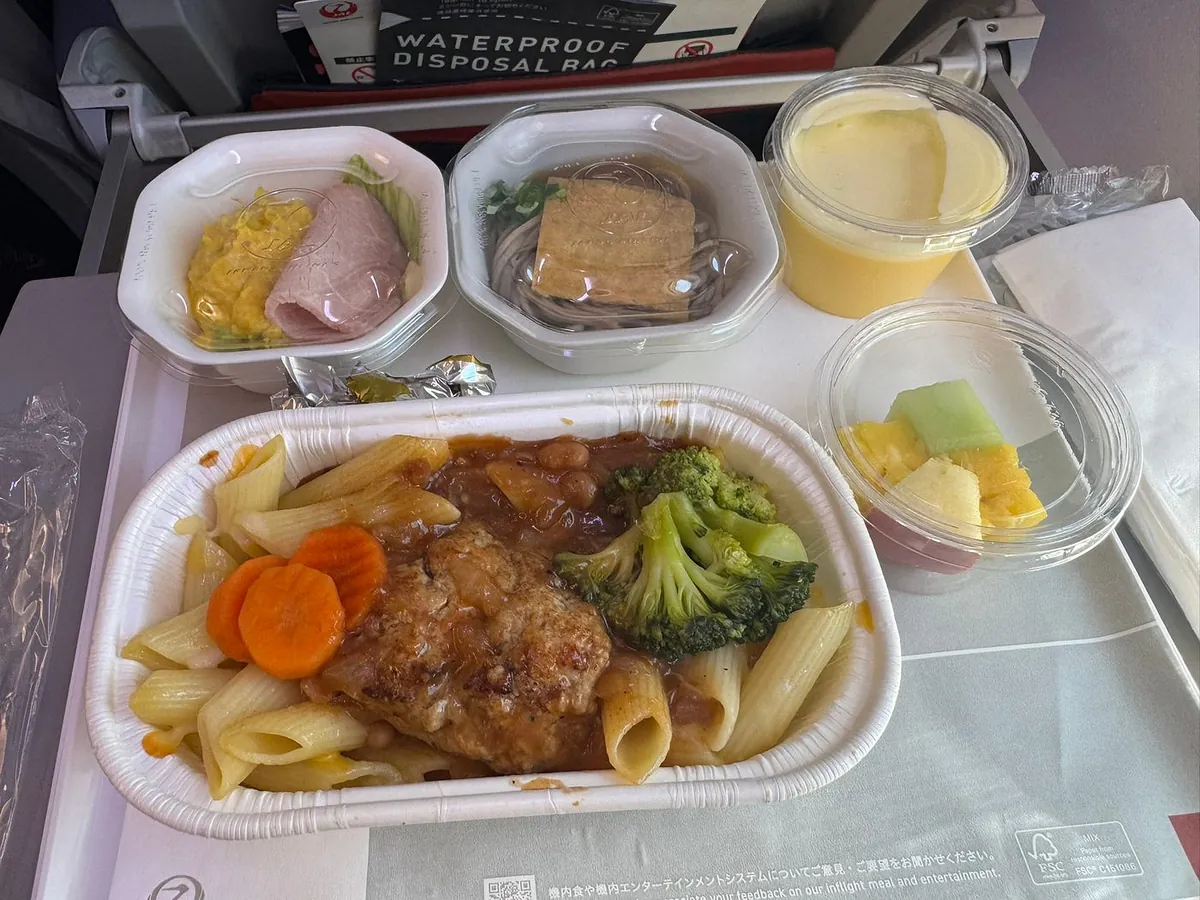
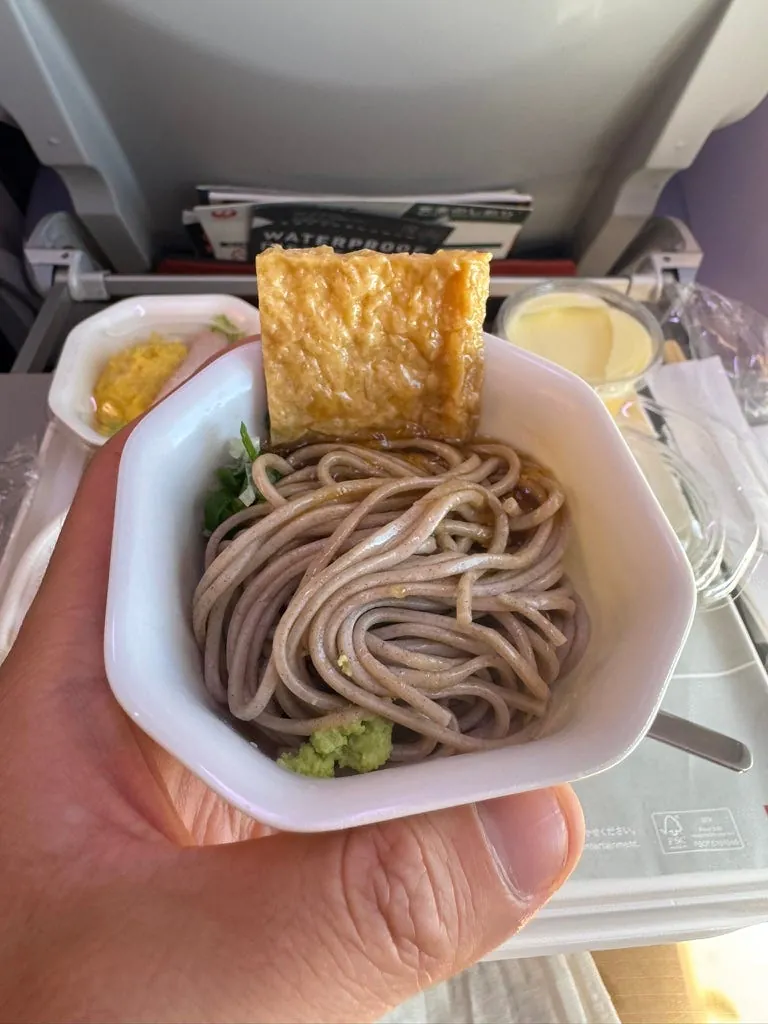
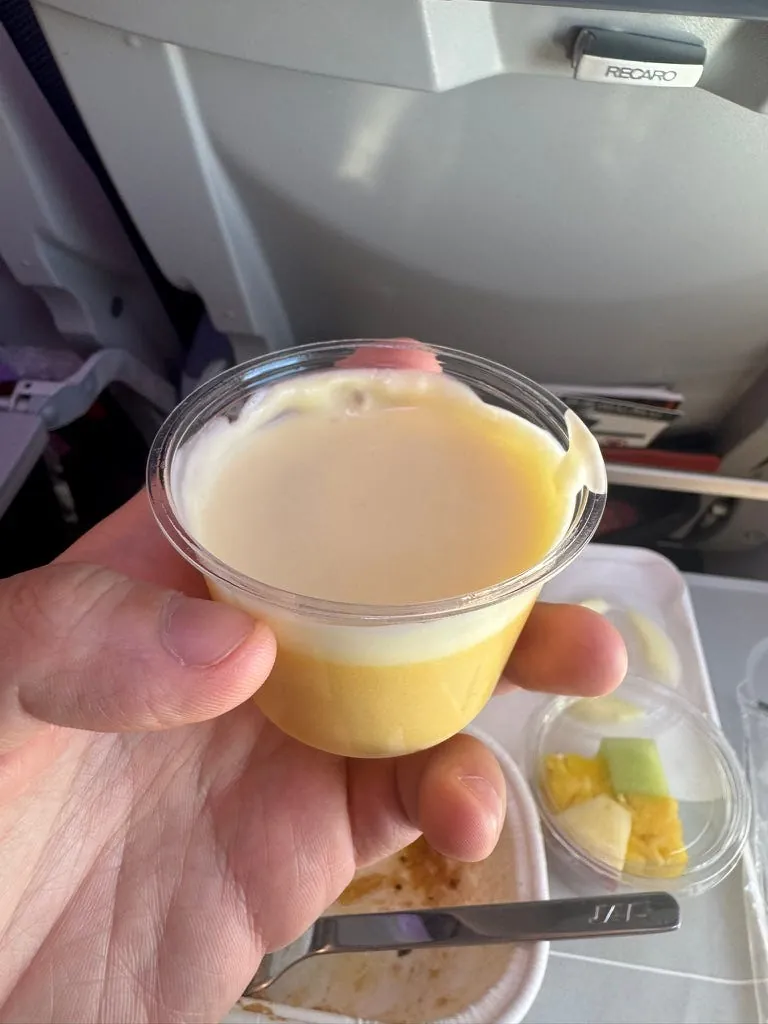
Although the plane is a bit old, the in-flight meal was really good: hamburger meat sauce with penne pasta, a small bowl of cold soba noodles with tofu skin, and a lemon pudding dessert (delicious!).
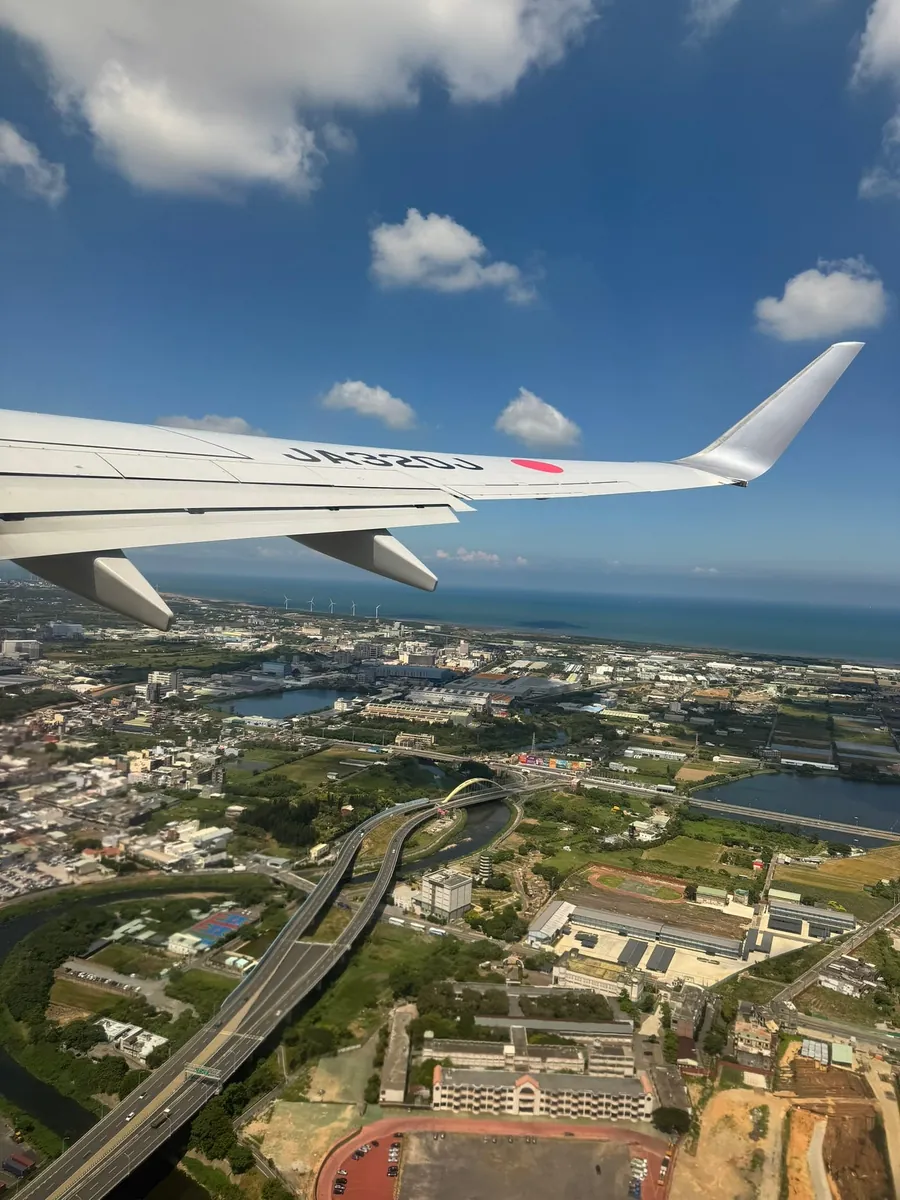
14:39 Landed at Narita International Airport, Japan (14 minutes delayed)

The floor was a bit wet, and the weather was cloudy, indicating it had rained earlier; after arrival, we started the Narita Airport scavenger hunt (it takes about 5 minutes to walk from the plane to immigration).
~= 15:05 Complete immigration procedures + pick up luggage and exit the airport
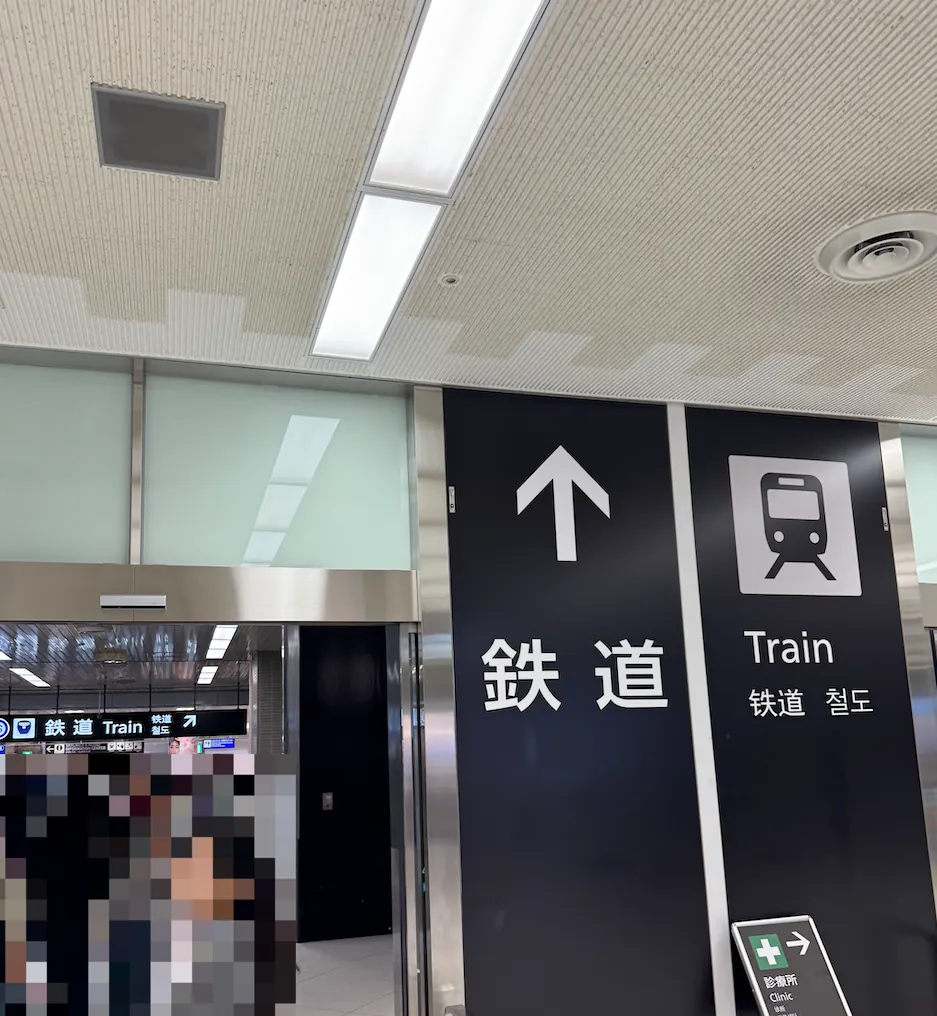
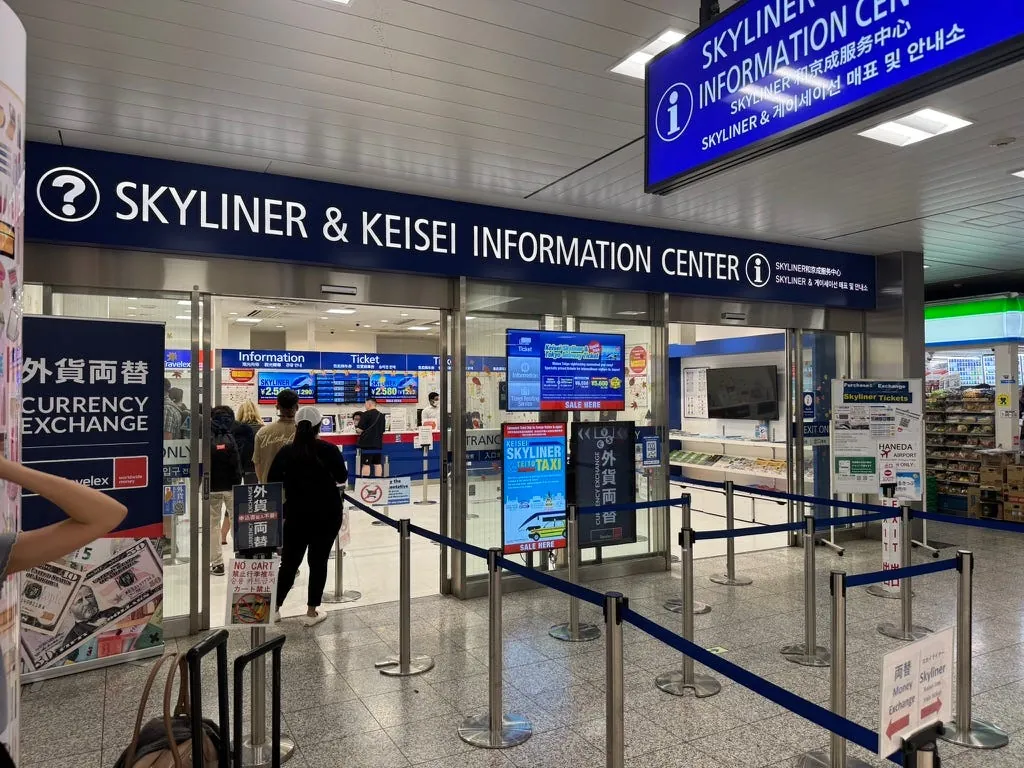
After exiting the airport, take the escalator down to the “Railway” direction. Find the “SKYLINER & KEISEI INFORMATION CENTER” counter and show the pre-purchased Skyliner Keisei Railway ticket QR code to the staff to exchange it for the next train ticket.
Note that there are other railway INFORMATION CENTERS at the station; please make sure to identify the INFORMATION CENTER shown in the picture.
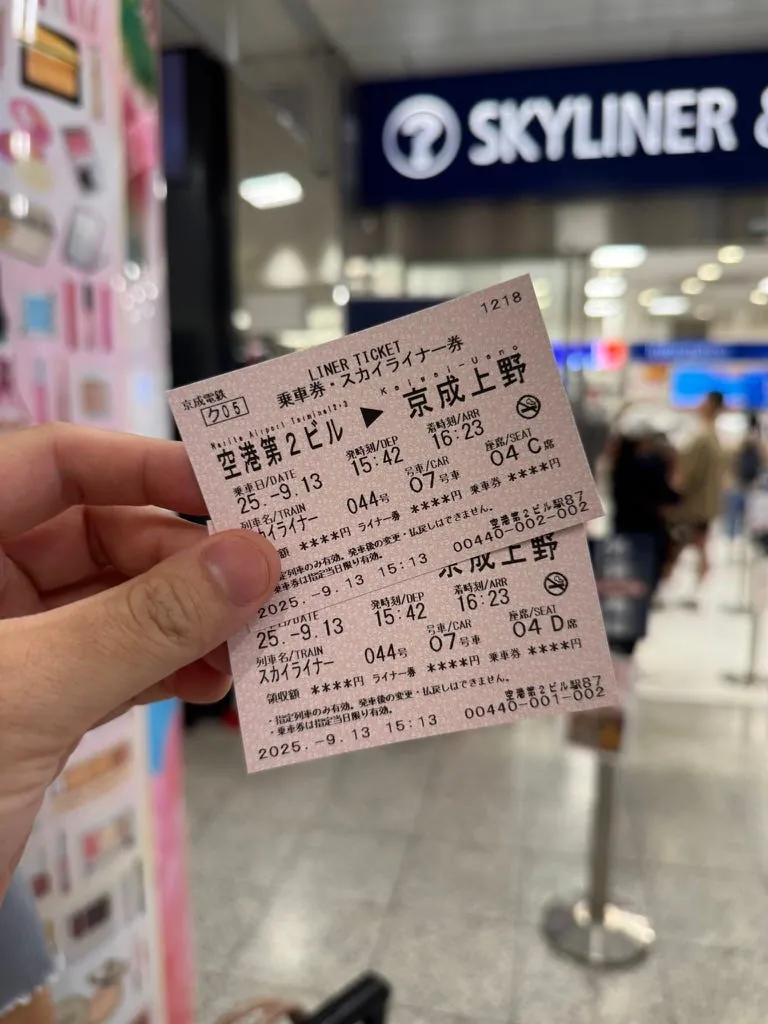
Couldn’t get a seat on the 15:16 train, so I have to take the 15:42 one.
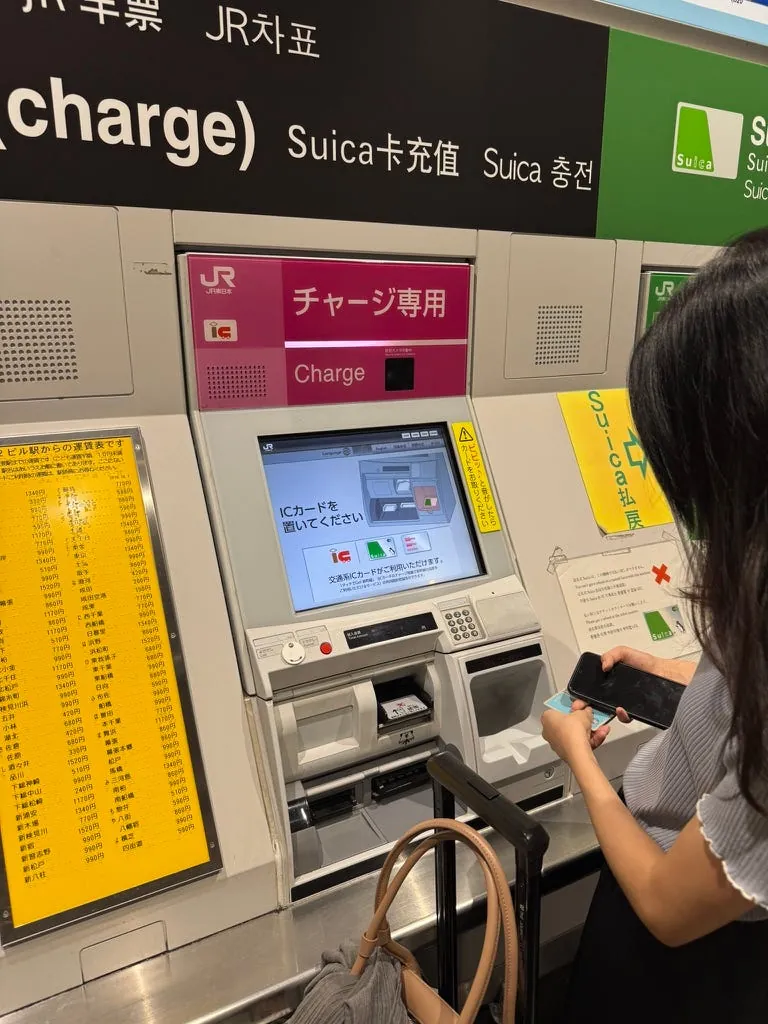
At the station, you can buy the Welcome Suica (must be used within 28 days) and use the regular Suica card recharge machines. You can top up the amount needed for your trip while waiting for your train. (But I personally find using Suica on my iPhone more convenient and easy!)
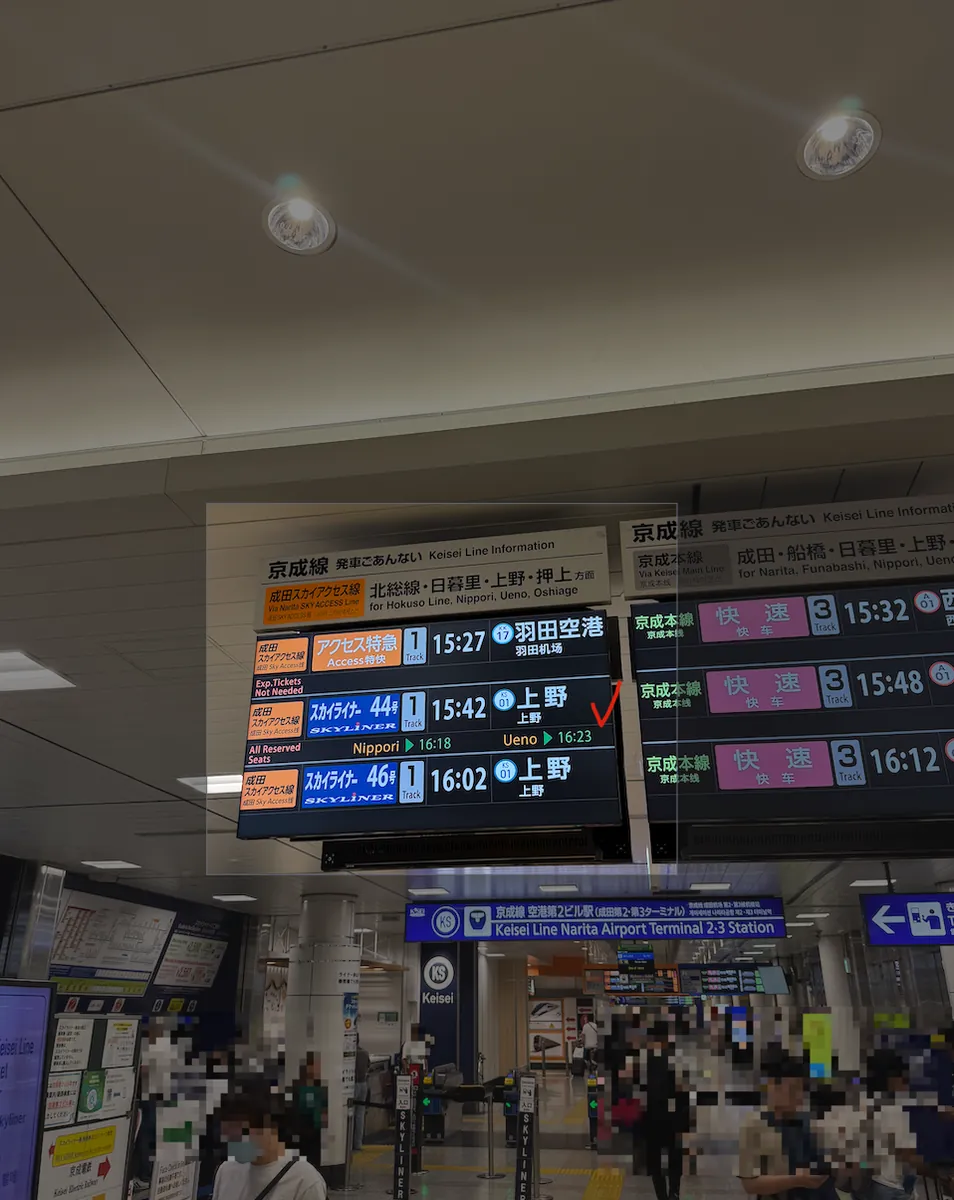
Follow the signs for the “Keisei Line” to enter the station, then find the corresponding platform to wait.
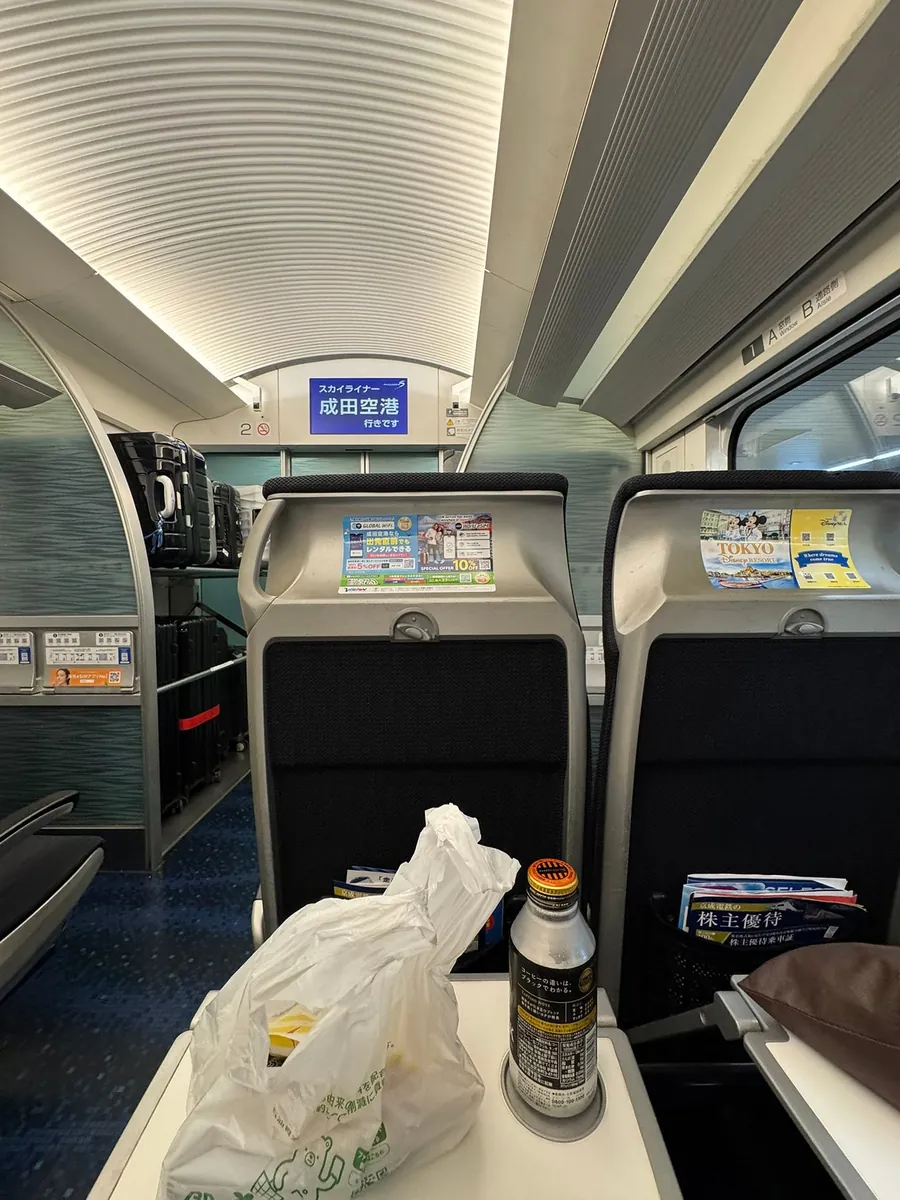
~= 15:42 Boarding
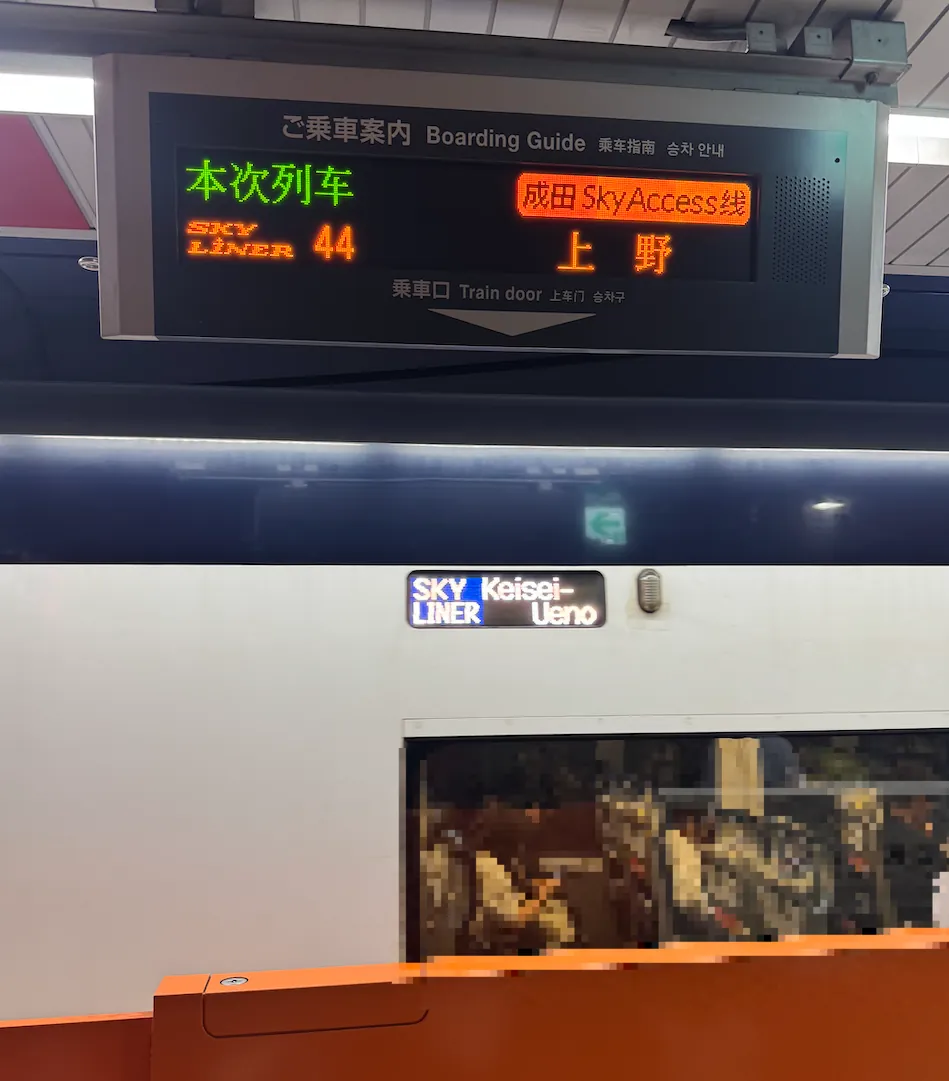
Many types of trains stop at this platform, so please make sure to check before boarding; staff will also announce along the way. You can show your ticket for confirmation. Narita Express is fully reserved seating with no non-reserved seats , do not board without a ticket.

The seats on the Narita Express are spacious enough to fit a 28-inch suitcase. If it’s tight, you can place your luggage in the areas in front of or behind the seats, or on the luggage rack (just be careful when taking it down).
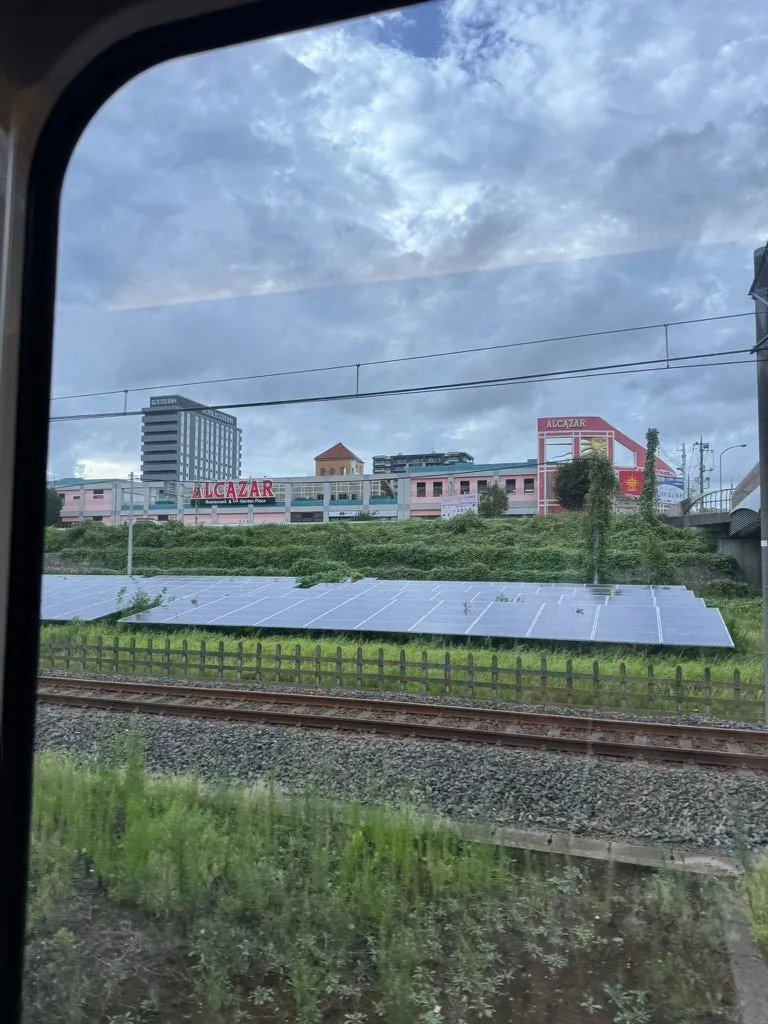
The weather is cloudy.
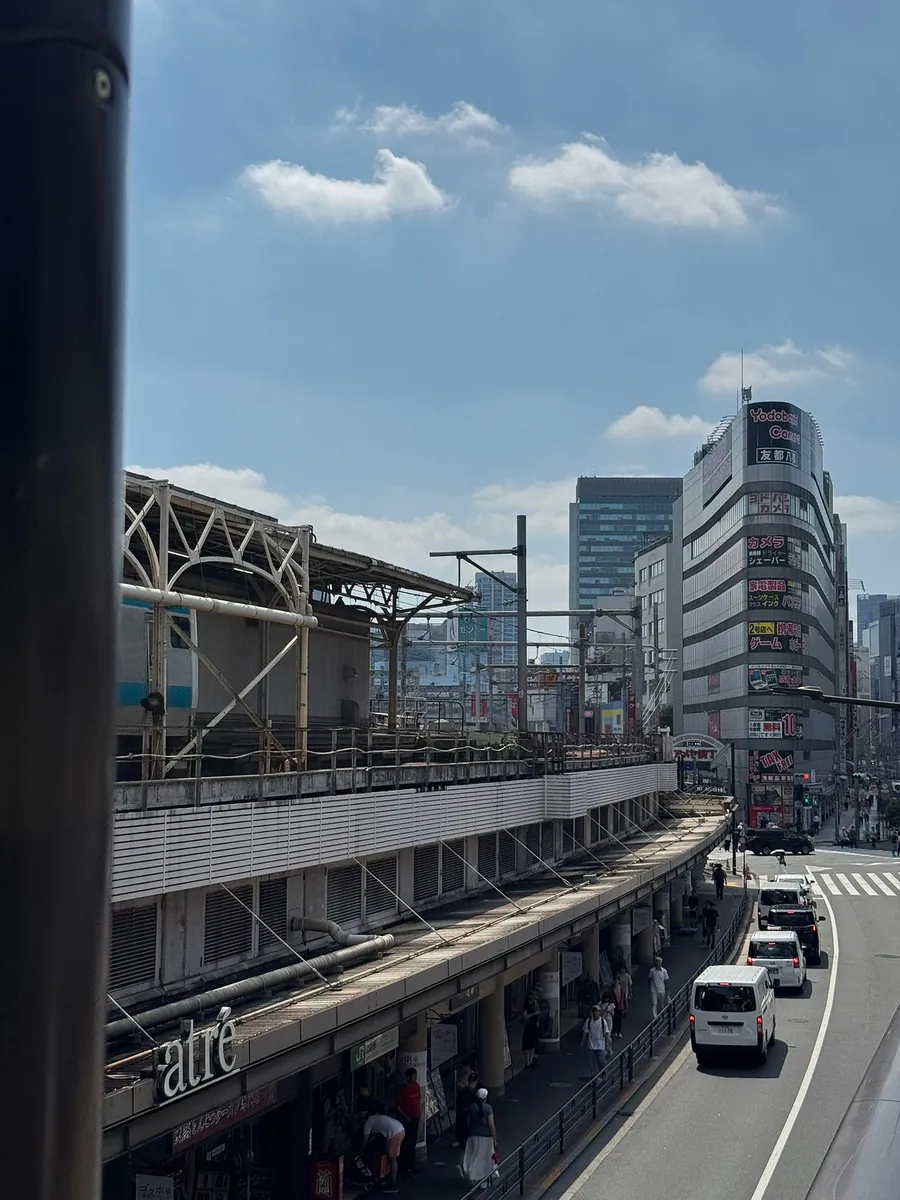
16:23 Arrive at Keisei Ueno Station
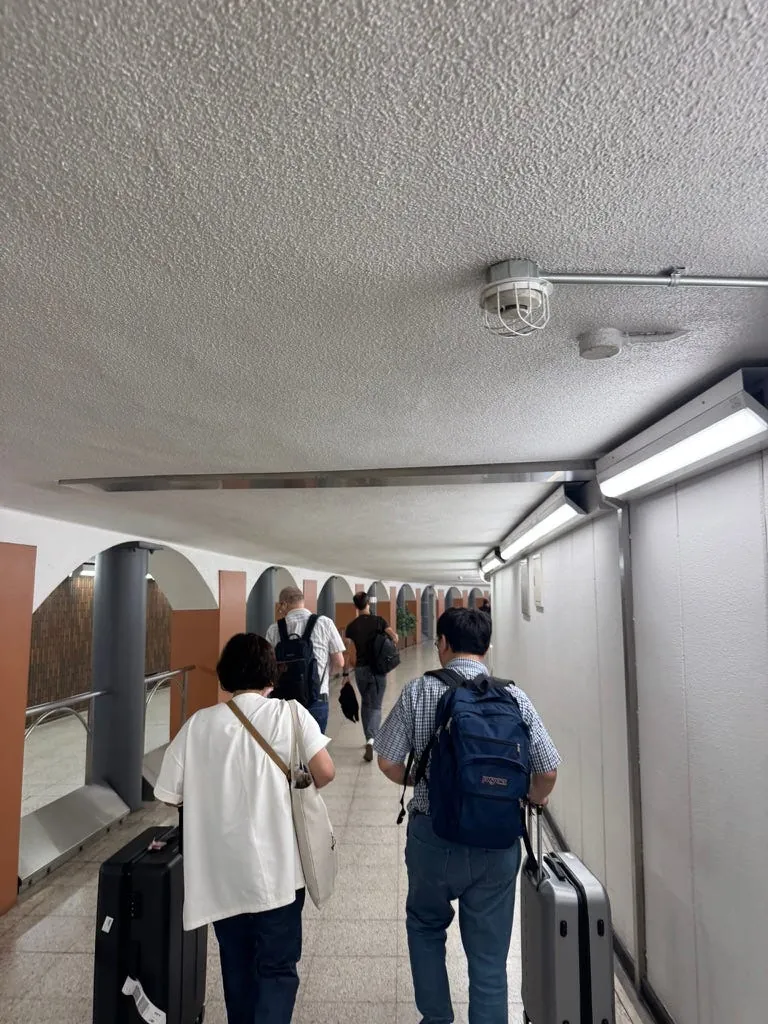
After getting off, follow the signs to the underground passage to take the G Ginza Line toward Shibuya, from Ueno-hirokoji to Shimbashi Station.
16:50 Arrive at Tokyo Shimbashi Daiwa ROYNET Hotel
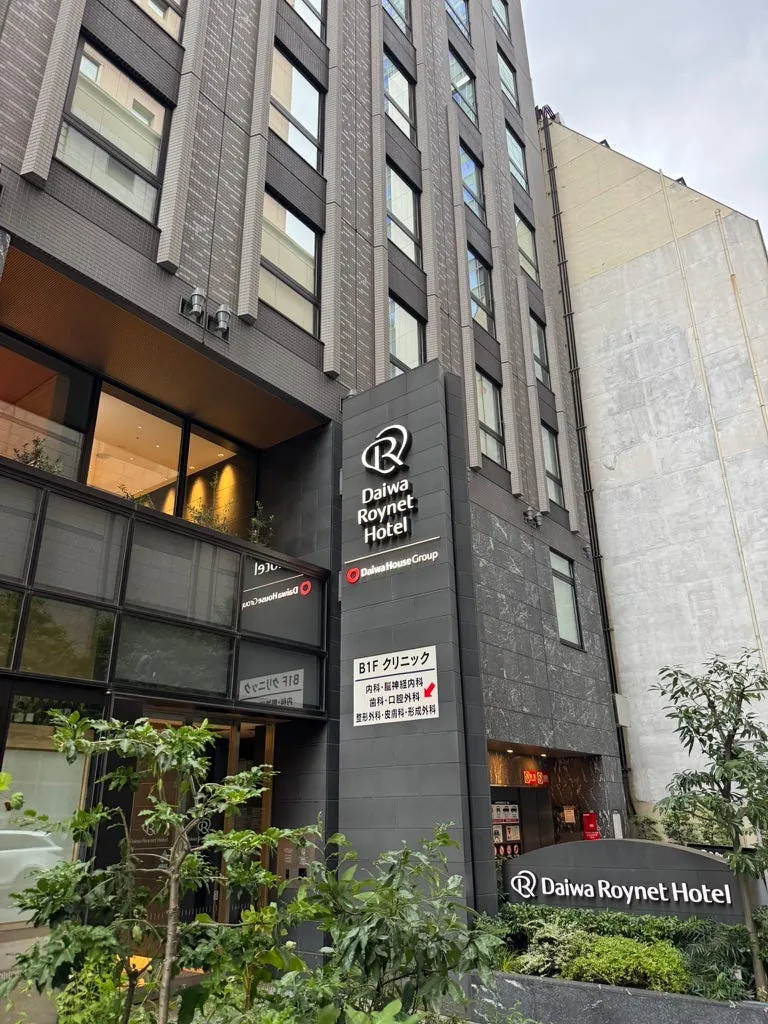
It’s just a short walk from Shimbashi Station, very convenient!
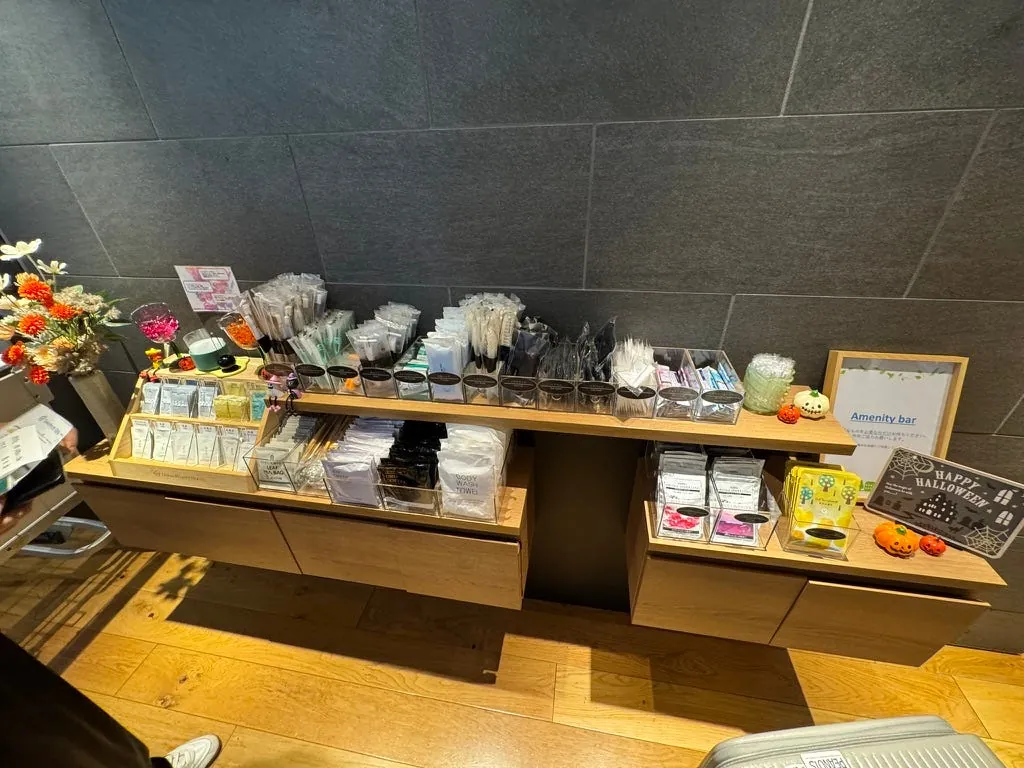
The hotel provides a wide range of free amenities, including face masks, bath additives, earplugs, portable mouthwash, and more.
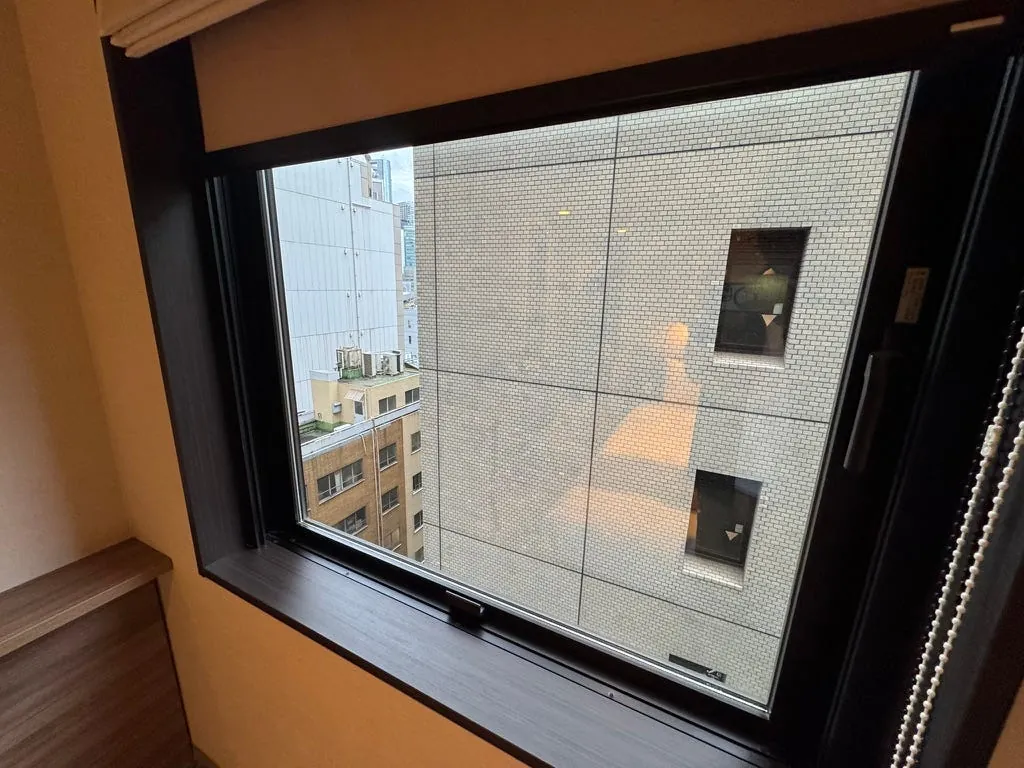
It’s somewhat like the trip to Hiroshima and Okayama two years ago where we stayed at the “Rifumax Okayama Kurashiki Ekimae Hotel.” The room was very small, feeling like a single room but with a double bed.
The drawbacks, besides being small, include the room fridge lacking a freezer function.
After putting our things down, we set off for Shibuya.
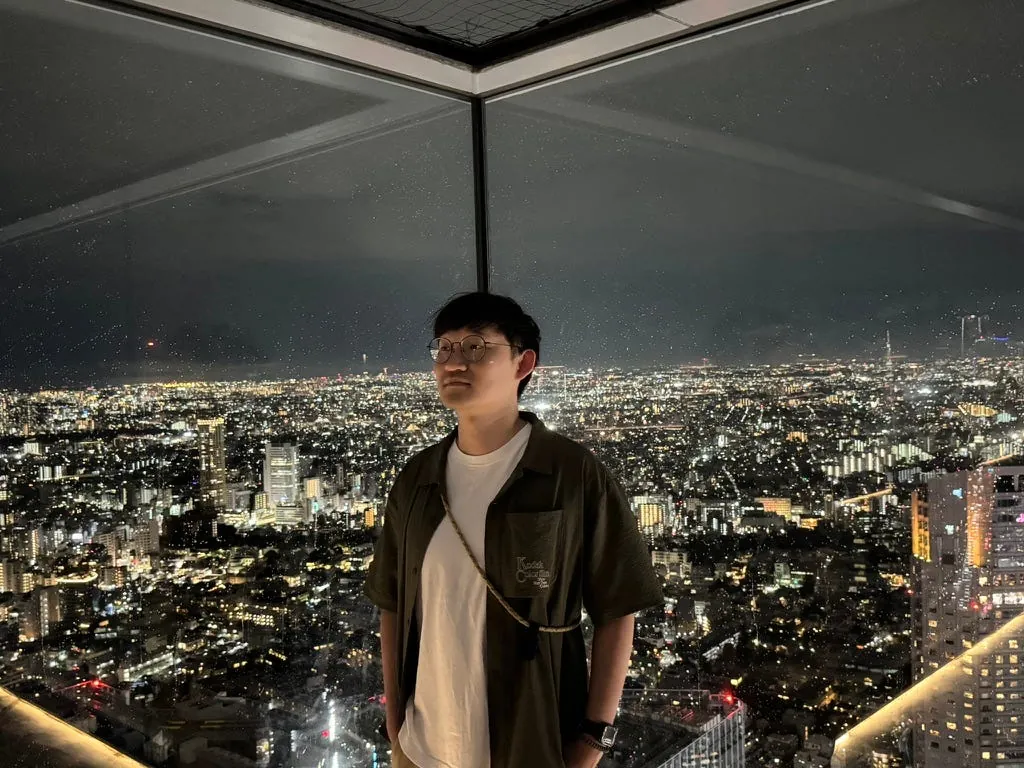
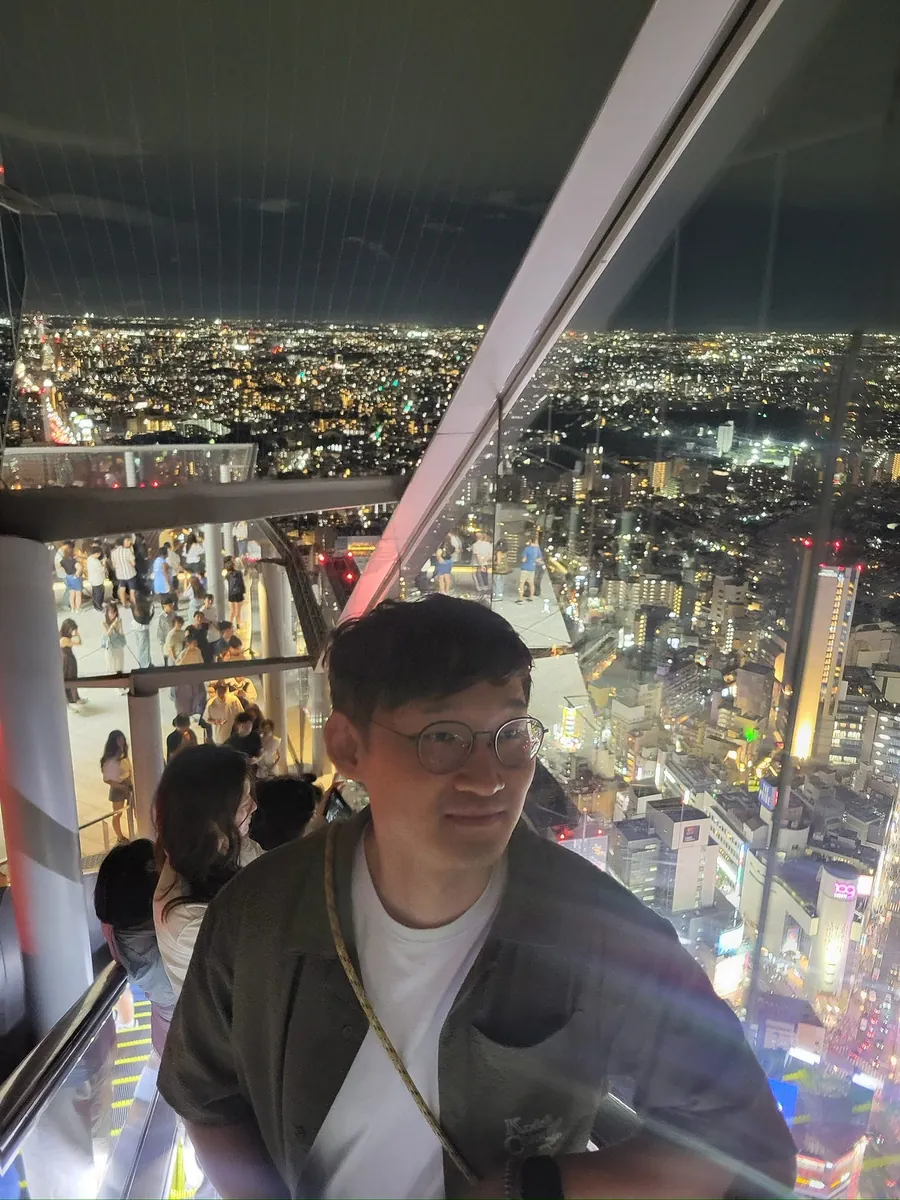
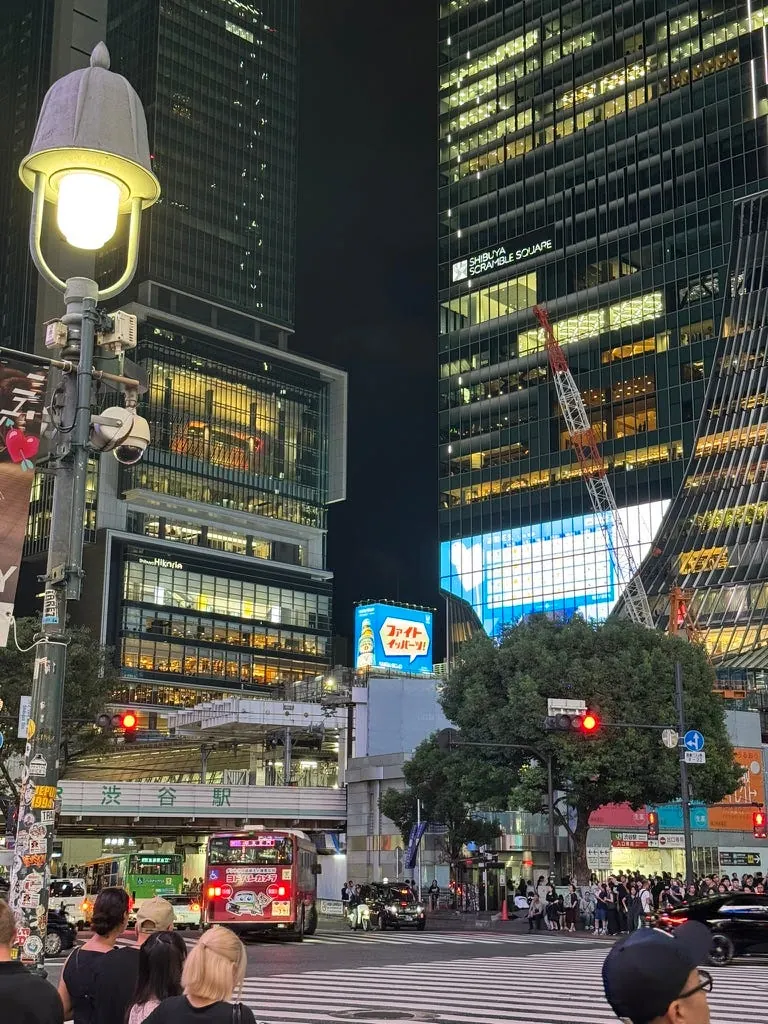
18:30 Queue to Enter Shibuya SKY
On the first floor of Shibuya Scramble Square, find the elevator to go up to the “Shibuya SKY” observation deck. After lining up for the elevator, show your QR code to the ticket inspector to queue for entry. (Ticket will be scanned upon entry)
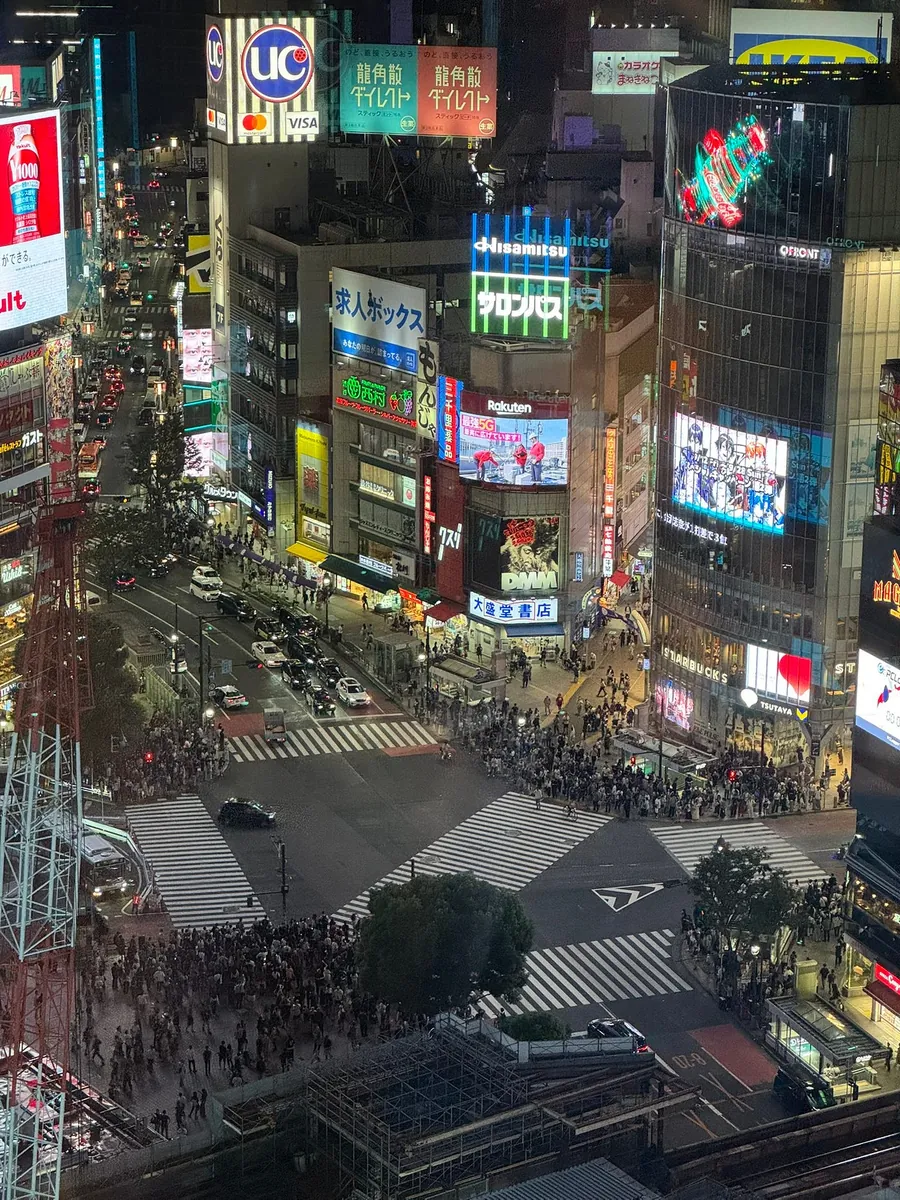
You can see the Shibuya Crossing from here.
After arrival, first use the free lockers to store your belongings. Selfie sticks and similar items are prohibited.
Revisiting Old Places , gained quite a bit of weight compared to two years ago.
The escalator has two sides, one going up and the other going down, both are great for photos.
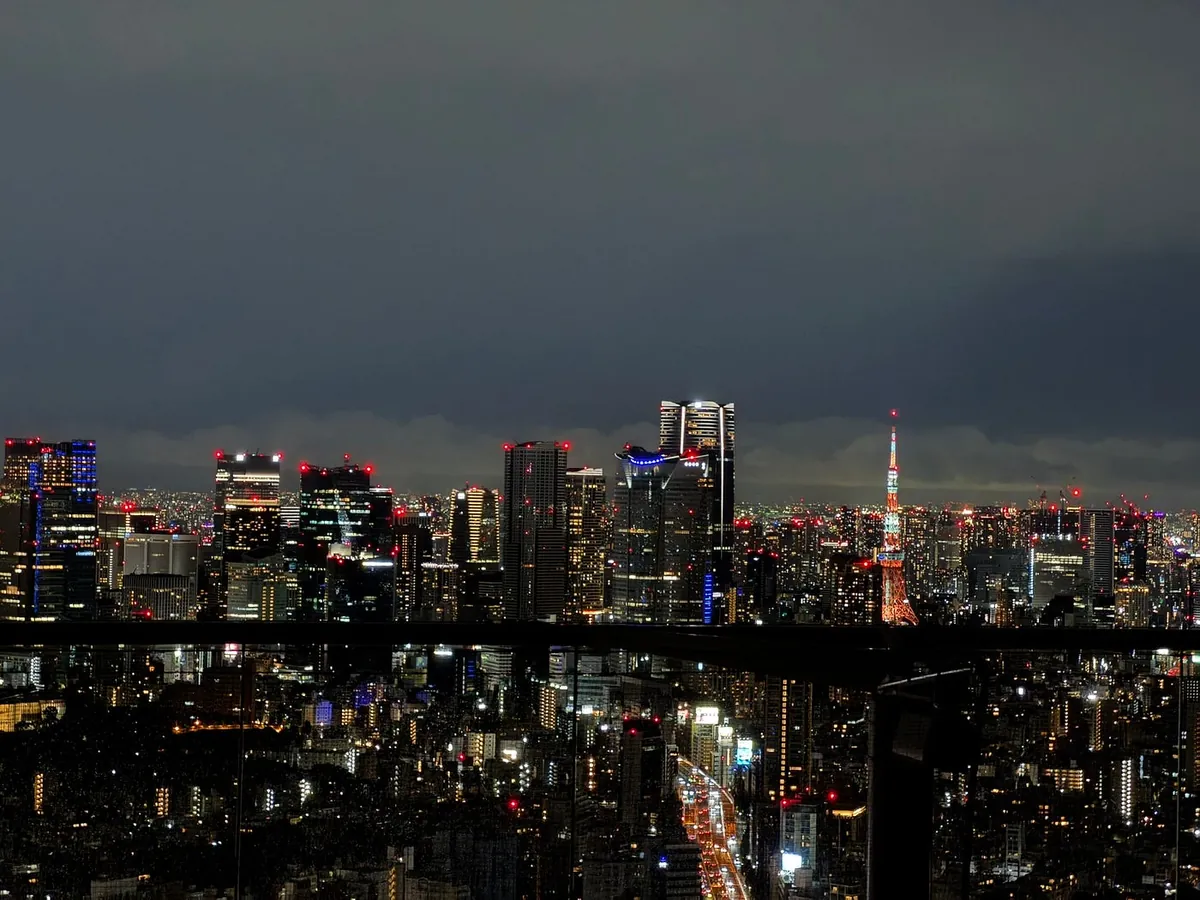
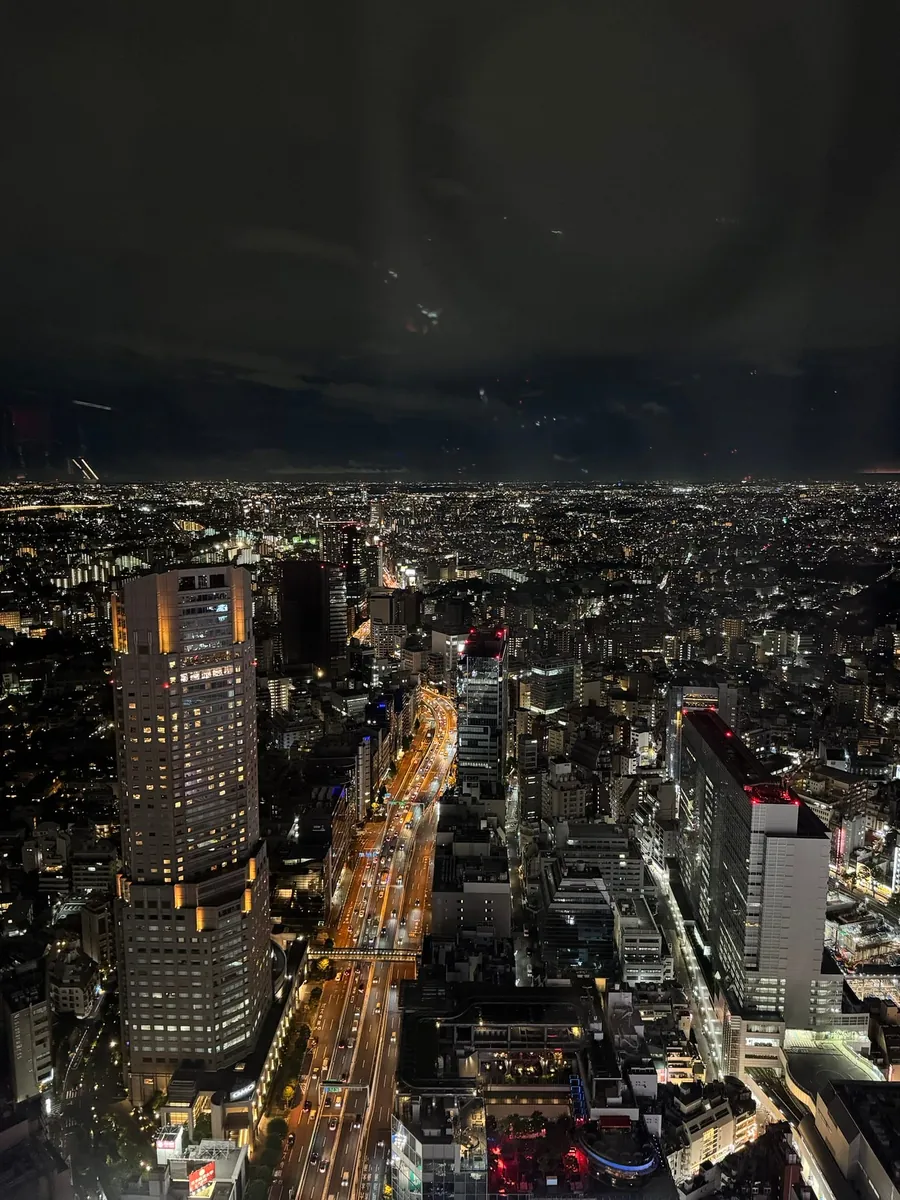
Rooftop night view, but compared to last time, the weather was worse this time—foggy with a light drizzle.
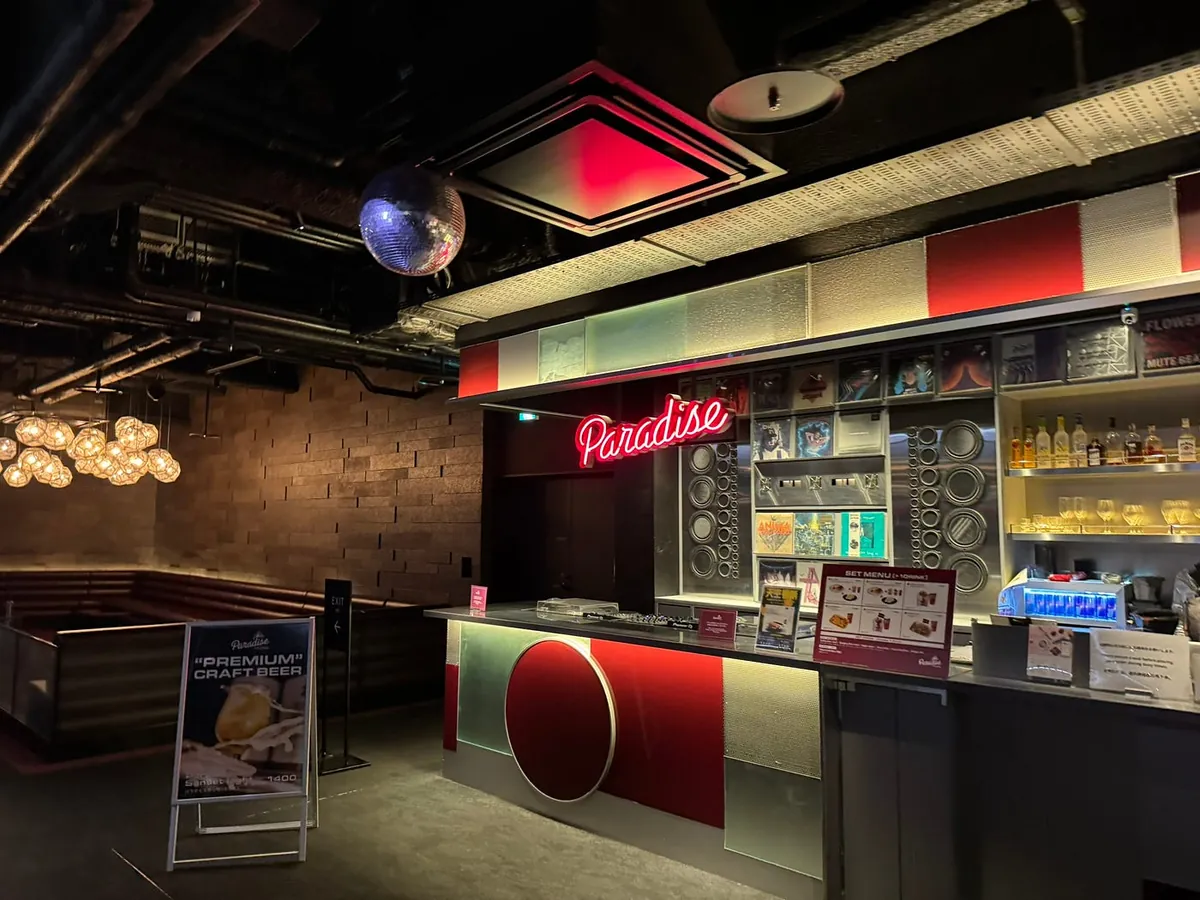

After walking all the way down, passing by the bar, the view here is also nice:
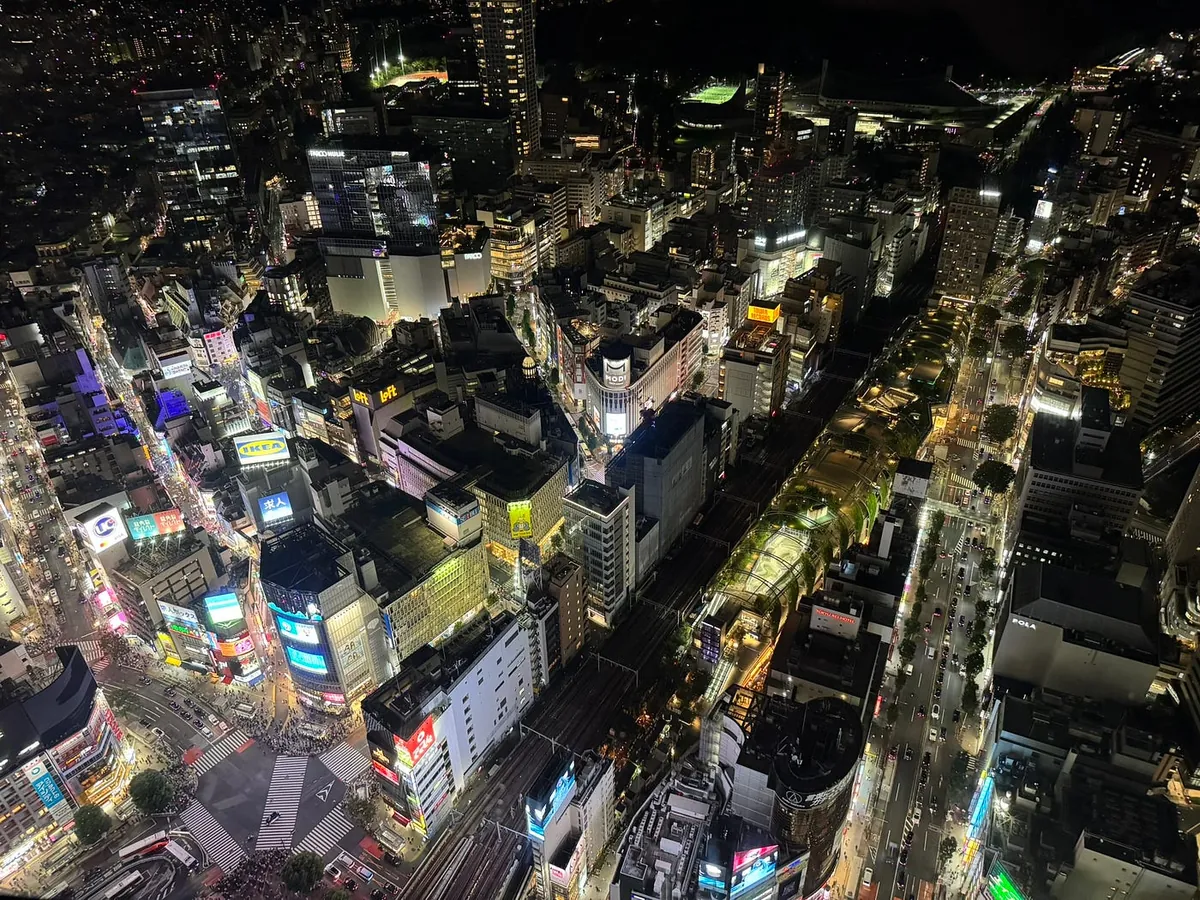
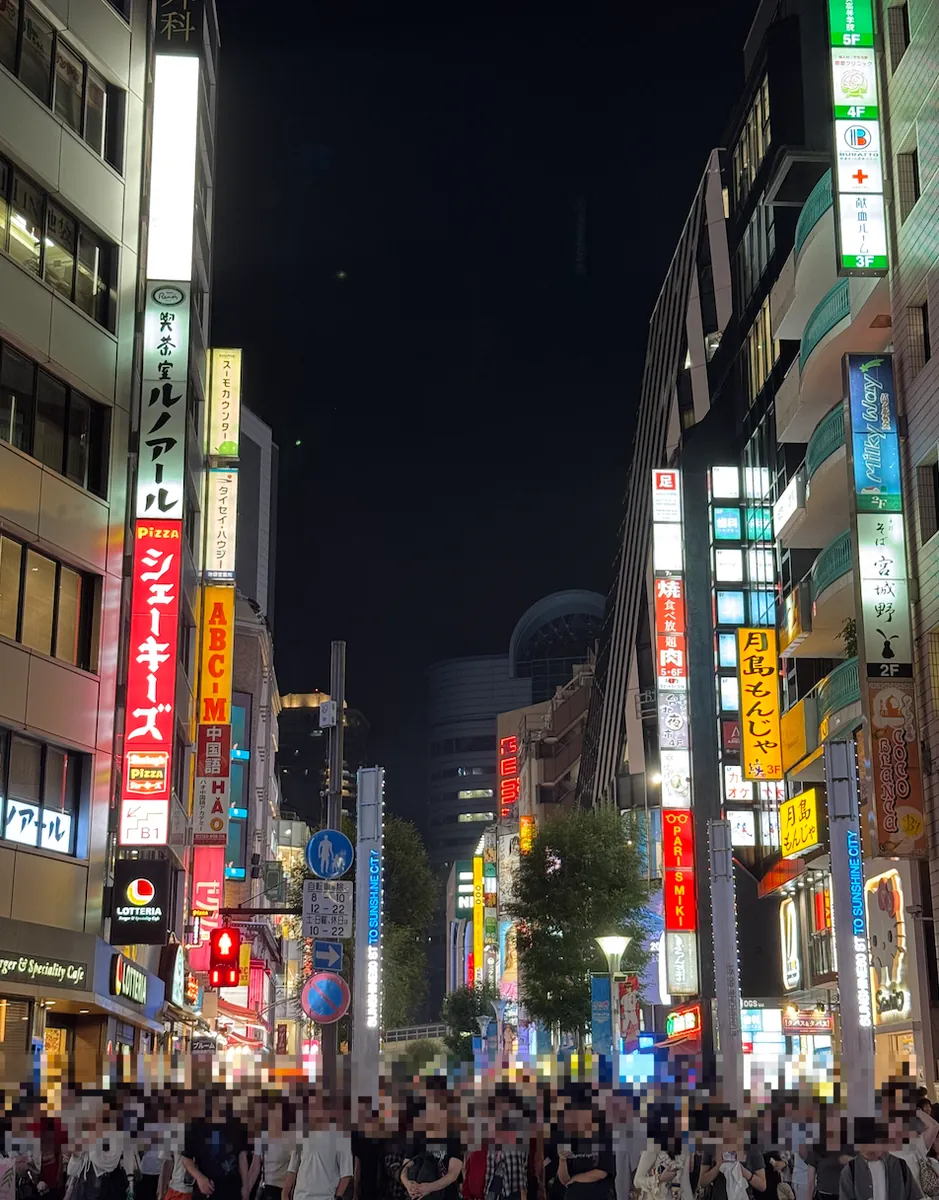
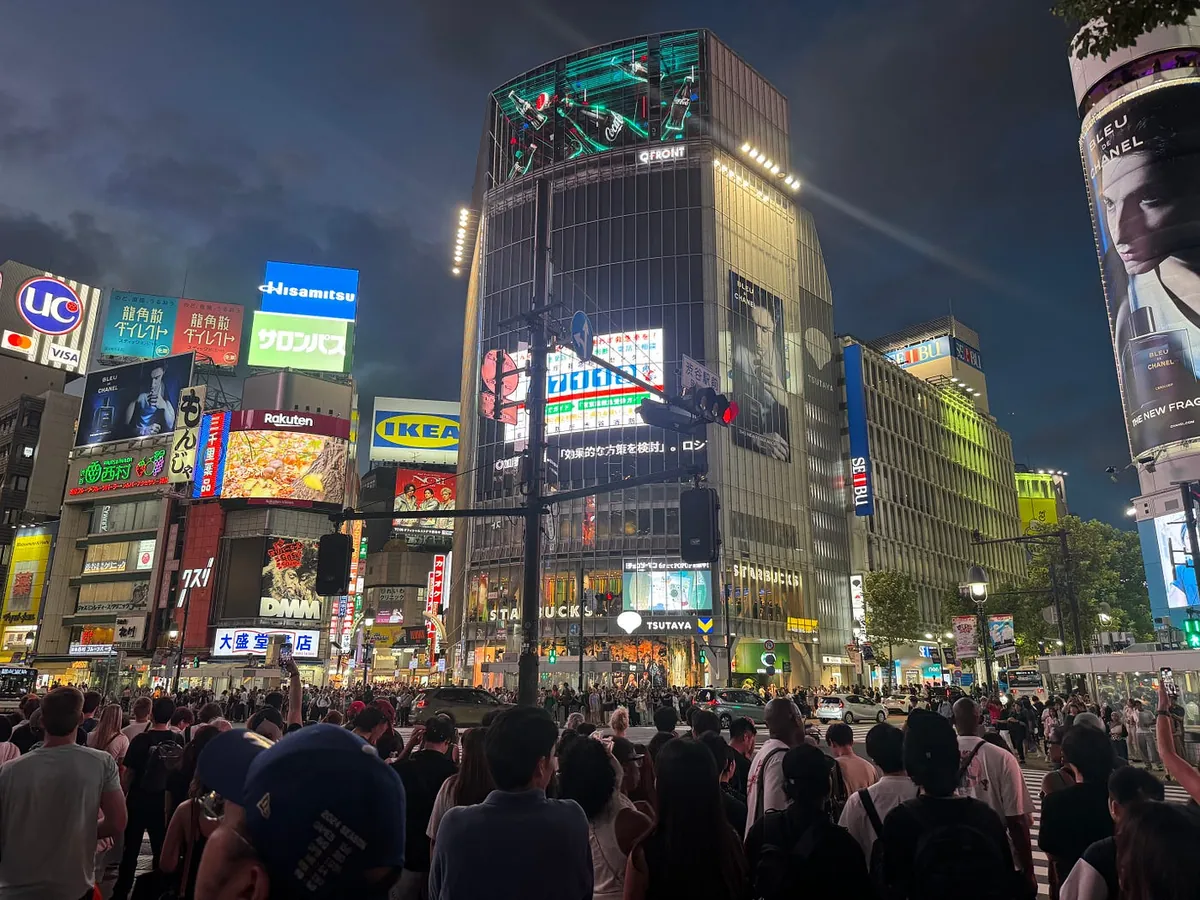
19:45 Return to Shibuya Crossing
The third season of “Alice in Borderland” is about to premiere, so let’s revisit the scenes; it feels like there are even more people than before.
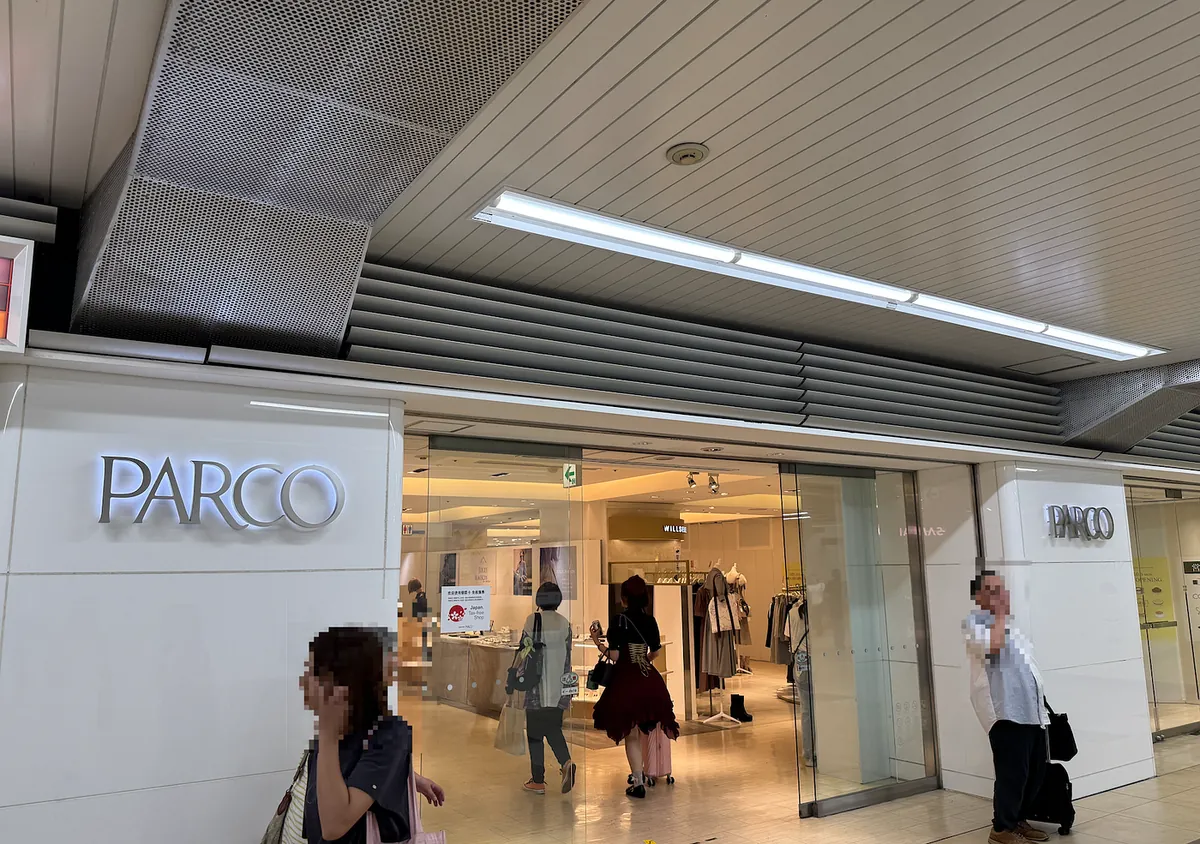
Cross the street and walk straight to Shibuya Parco to eat at 極味屋.
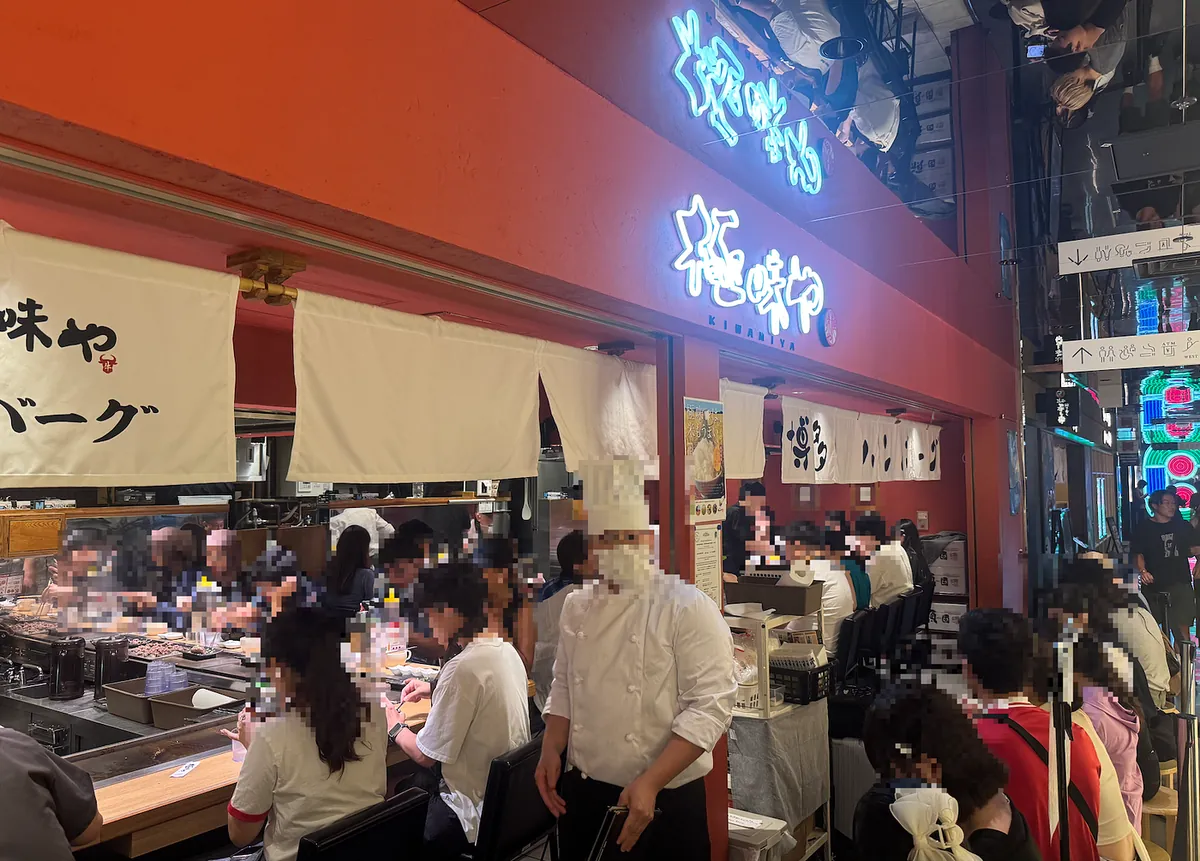
20:00 Arrive at Shibuya Parco
Unfortunately, Gokumiya was sold out (will come back in a few days), so I tried another kushikatsu shop in the same food street.
20:15 Kushikatsu Arata Shibuya Parco
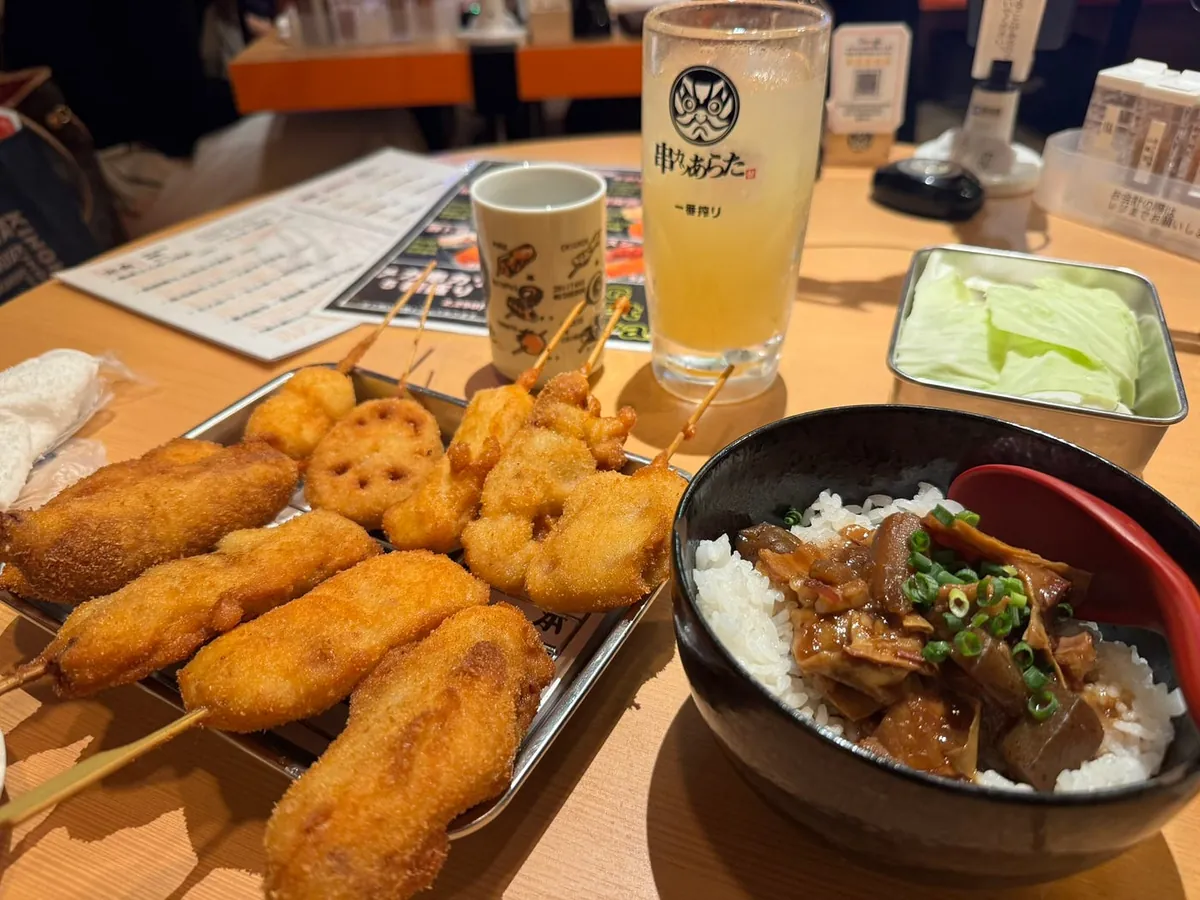
Ordered several signature fried skewers, double meat skewers, a bowl of beef brisket rice, and two drinks, totaling ¥6,340 JPY.
The Japanese-style crispy fried skewers are delicious and not greasy, and the beef brisket rice is flavorful and filling.
Note that fried skewer shops often charge an additional basic cabbage fee (お通し) , I forgot the exact amount, but it should be around ¥ 300 per person.
21:30 C-pla Shibuya
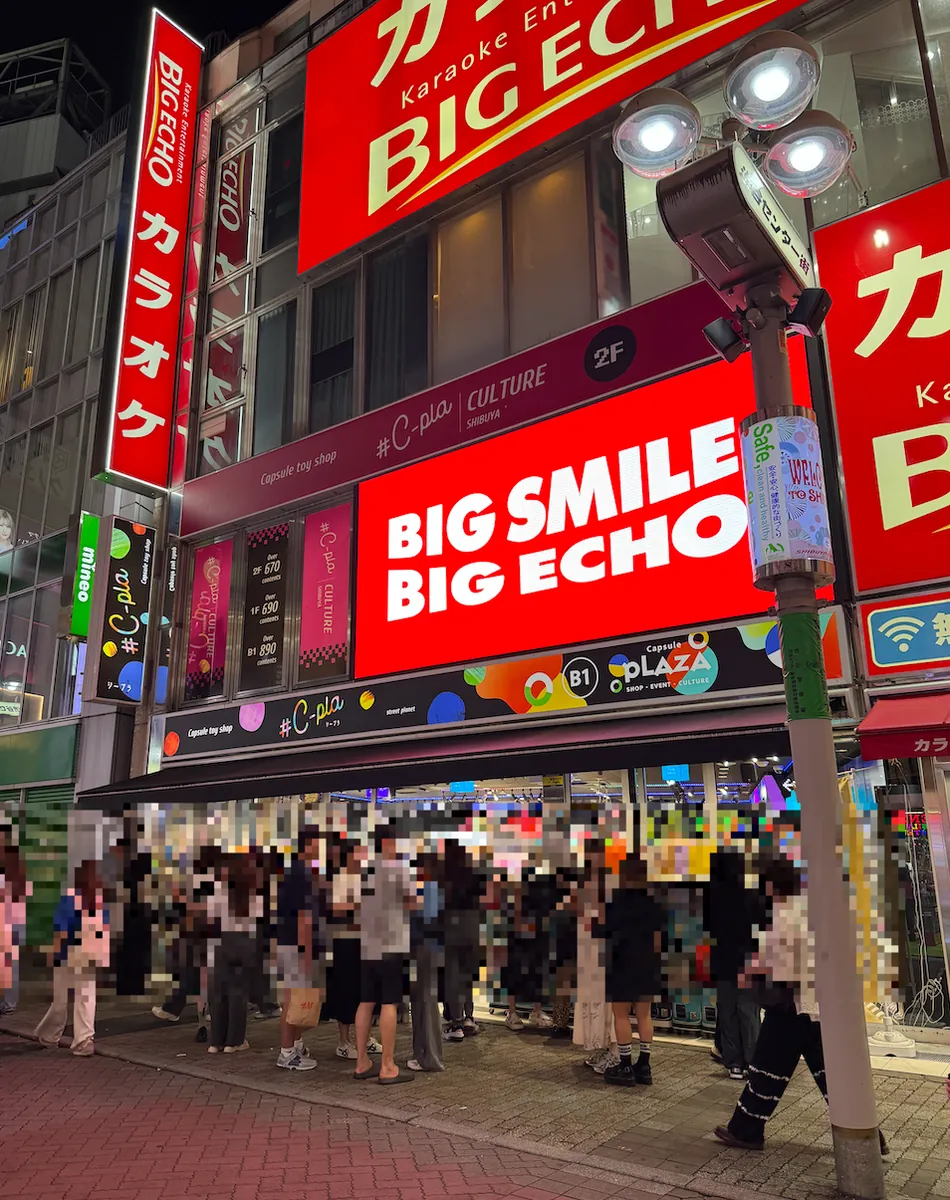
On the way back to the station after eating, I passed by a large C-pla capsule toy store and went in to explore.
Didn’t find what I wanted to twist, retreat!
Good night! Tokyo
Bought a late-night snack and returned to the hotel to rest.
Day 2 (09/14) — Kawagoe Day Trip, Shopping in Ikebukuro
09:30 Head out and have McDonald’s breakfast first — McDonald’s 新橋日比谷口店
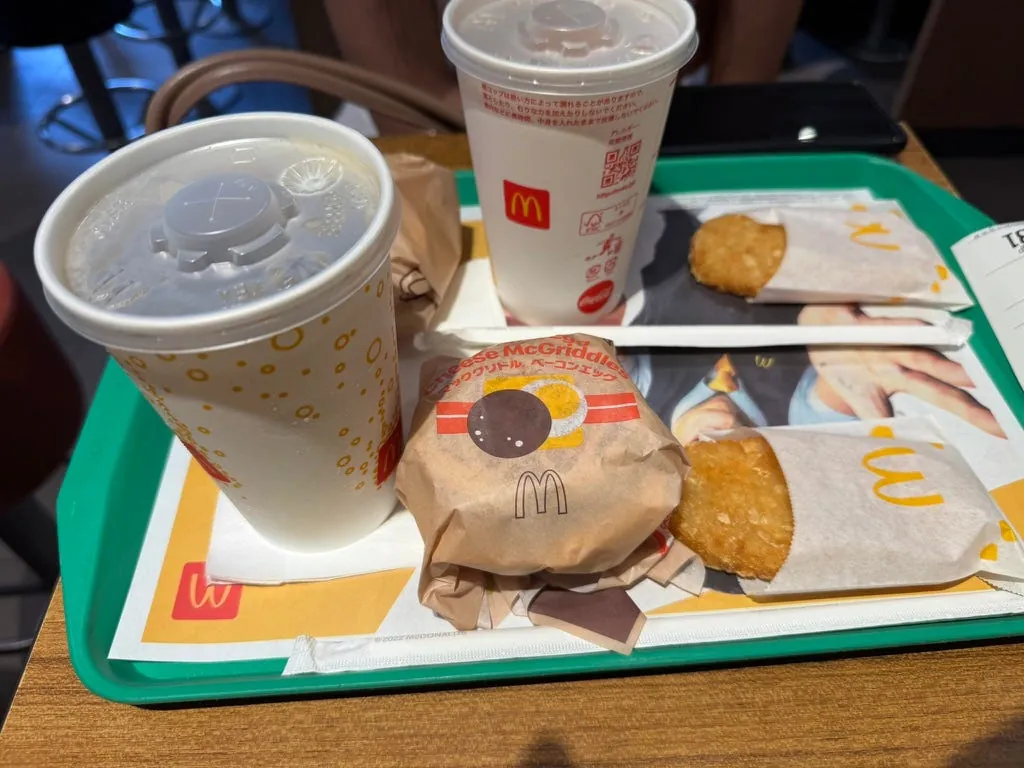
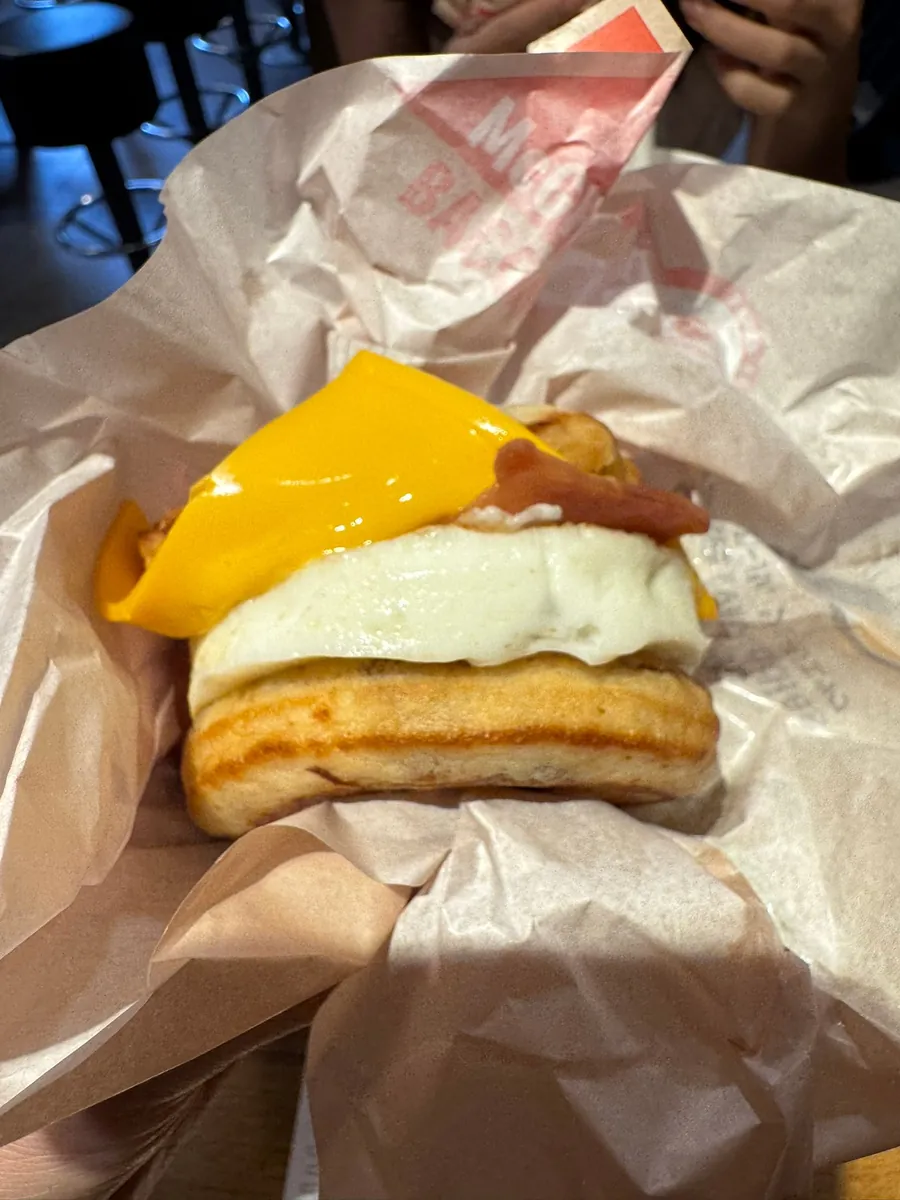
The same pancake ham, cheese, and egg burger!
I visited this McDonald’s last time as well. The drawbacks are that it is quite old, not very clean, and lacks self-order kiosks.
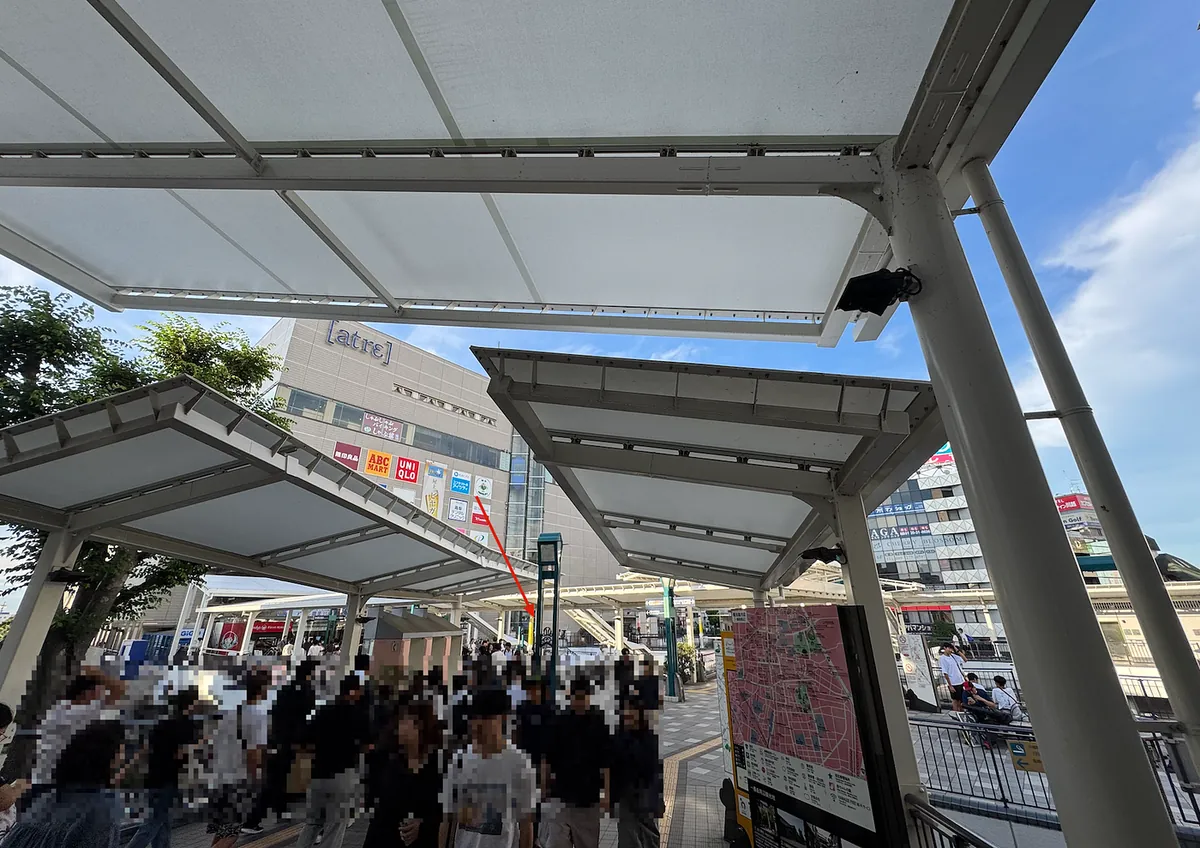
10:50 Arrive at Ikebukuro Station (Take Yamanote Line)
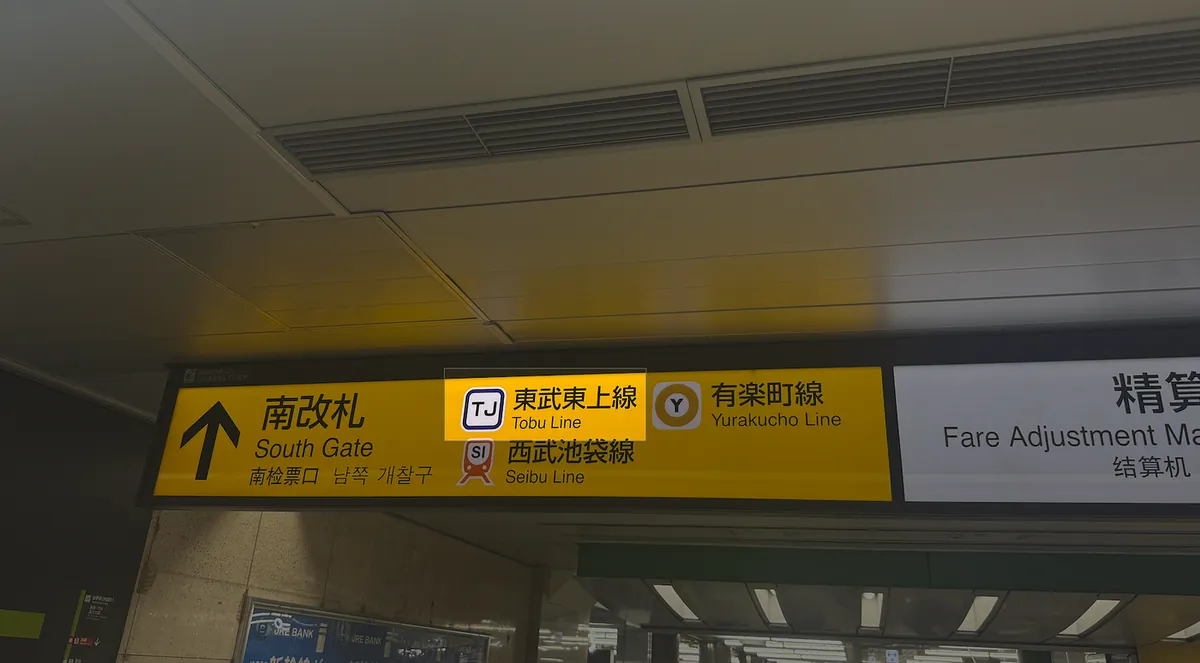
Transfer to Tobu Tojo Line to Kawagoe.
We purchased the Kawagoe Pass (Train + Bus) online in advance and activated it online to start the timer:
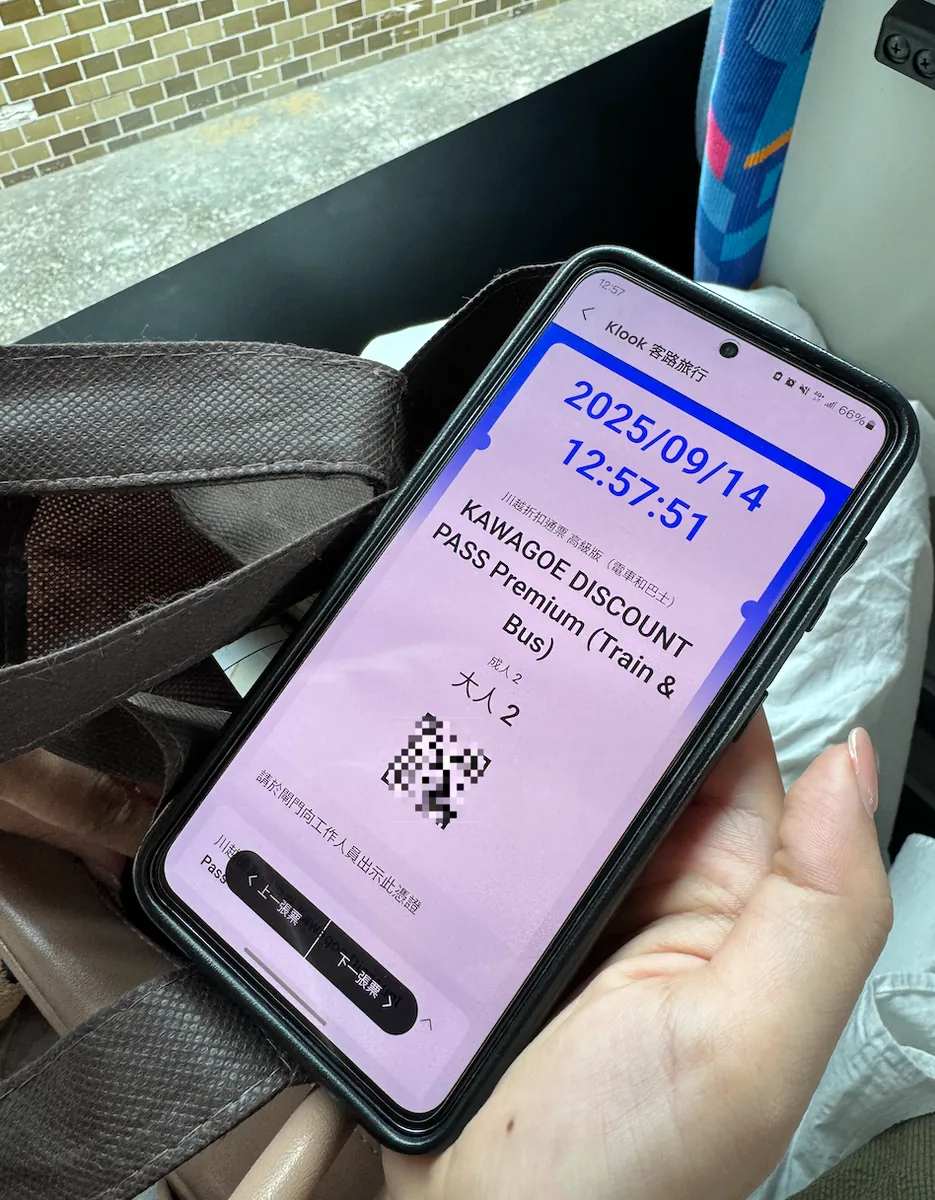
Go directly to the station office at the side and show the QR code to the staff to enter and exit the station. (No seat reservation needed)
11:00 Take Tobu Tojo Line Kawagoe Limited Express — to Ogawamachi (Saitama Prefecture) — via Kawagoe
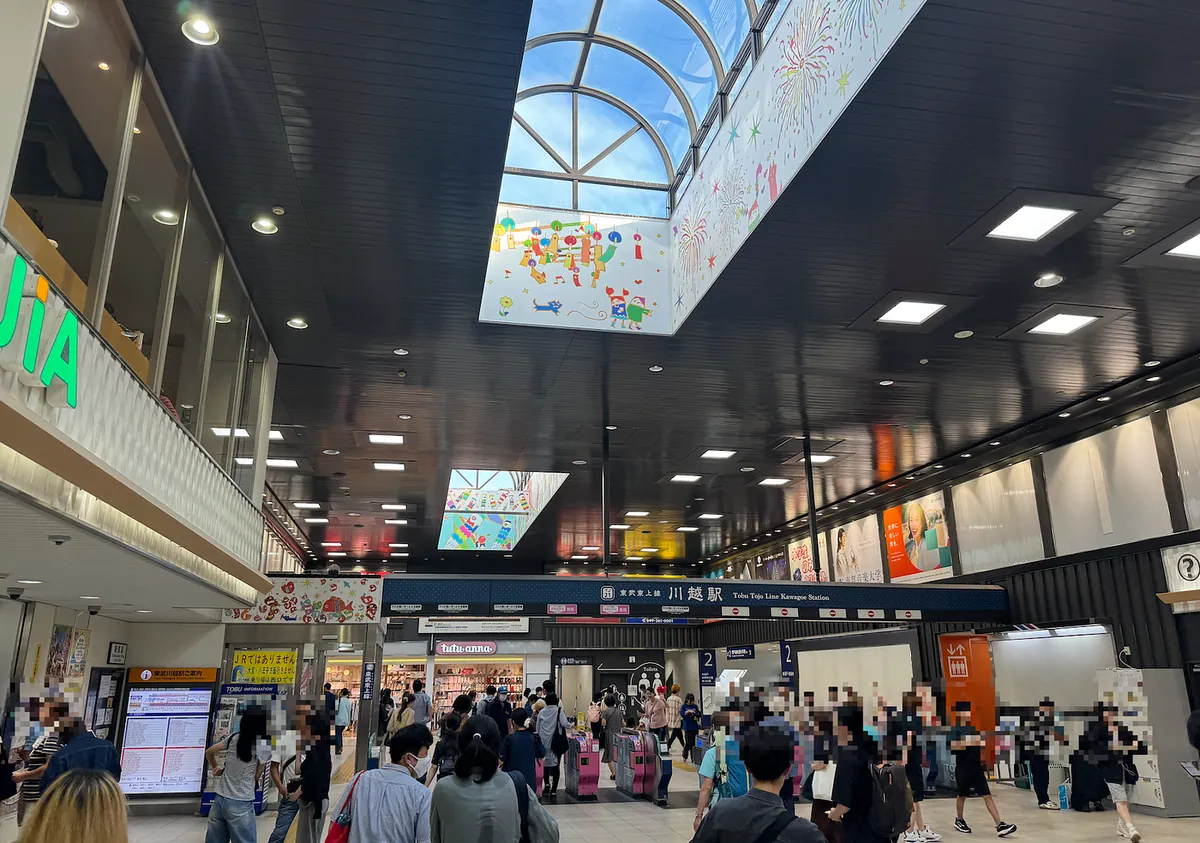
11:26 Arrive at Kawagoe Station
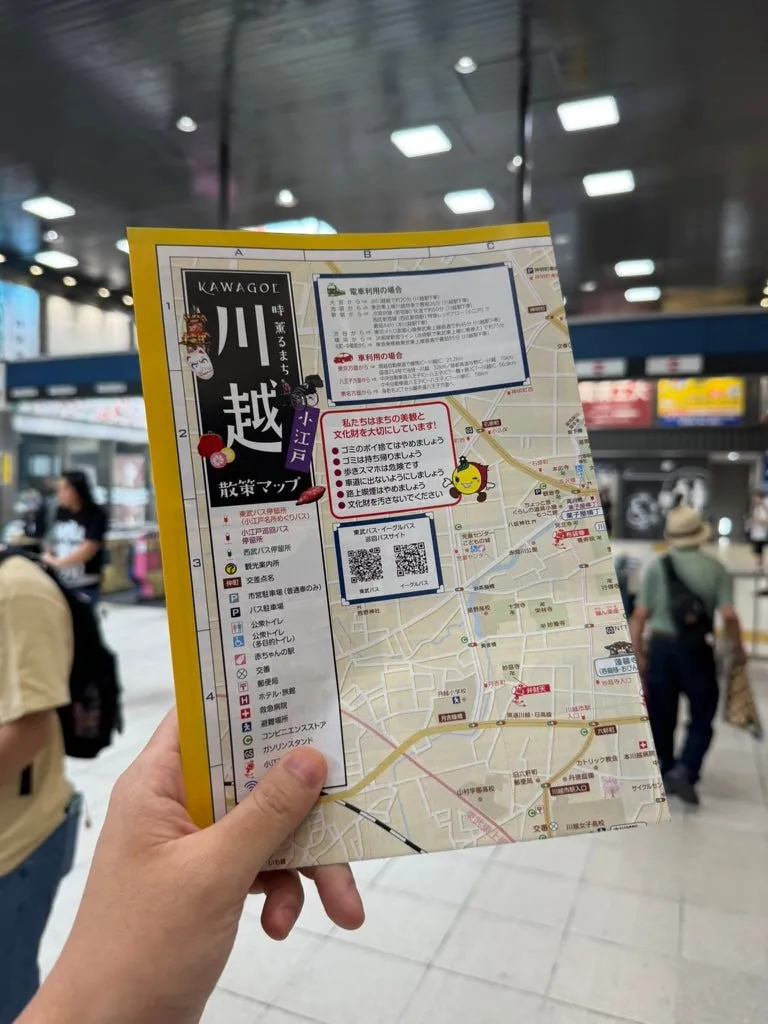
After exiting from the station office at the far side, I first picked up a tourist brochure and decided to take the bus to the farthest spot, Hikawa Shrine, then walk back while sightseeing.
Exit from the second-floor skybridge and go downstairs to the bus boarding area.
11:35 Waiting for the bus at Kawagoe Bus Station
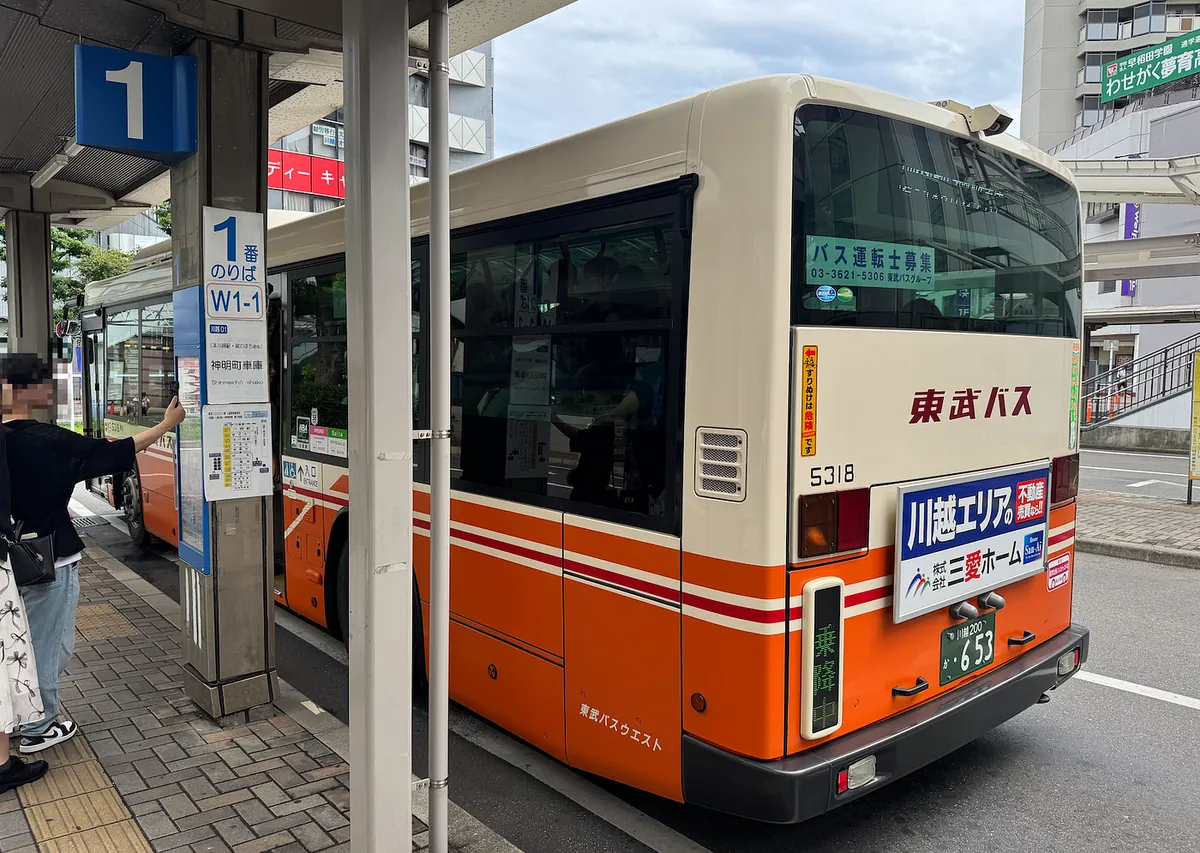
Both Platform 1 and Platform 3 have many trains going to Hikawa Shrine. In the end, I took the Me 01 from Platform 3.
As long as you recognize “東武 バス ”, use the Kawagoe Pass (Train + Bus) without any special exchange; just show the QR code to the driver when getting off.
Do not tap your Suica card when boarding if you are using the tour pass.
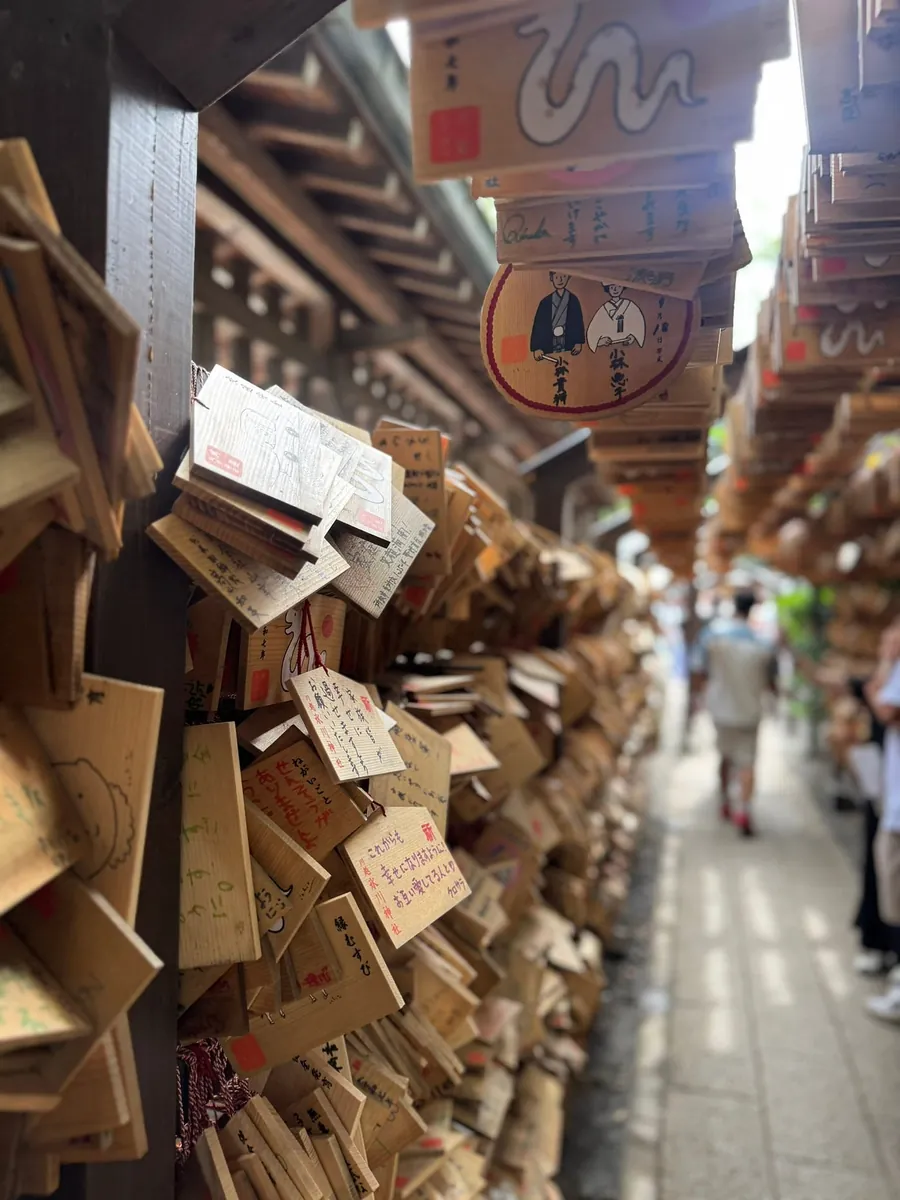
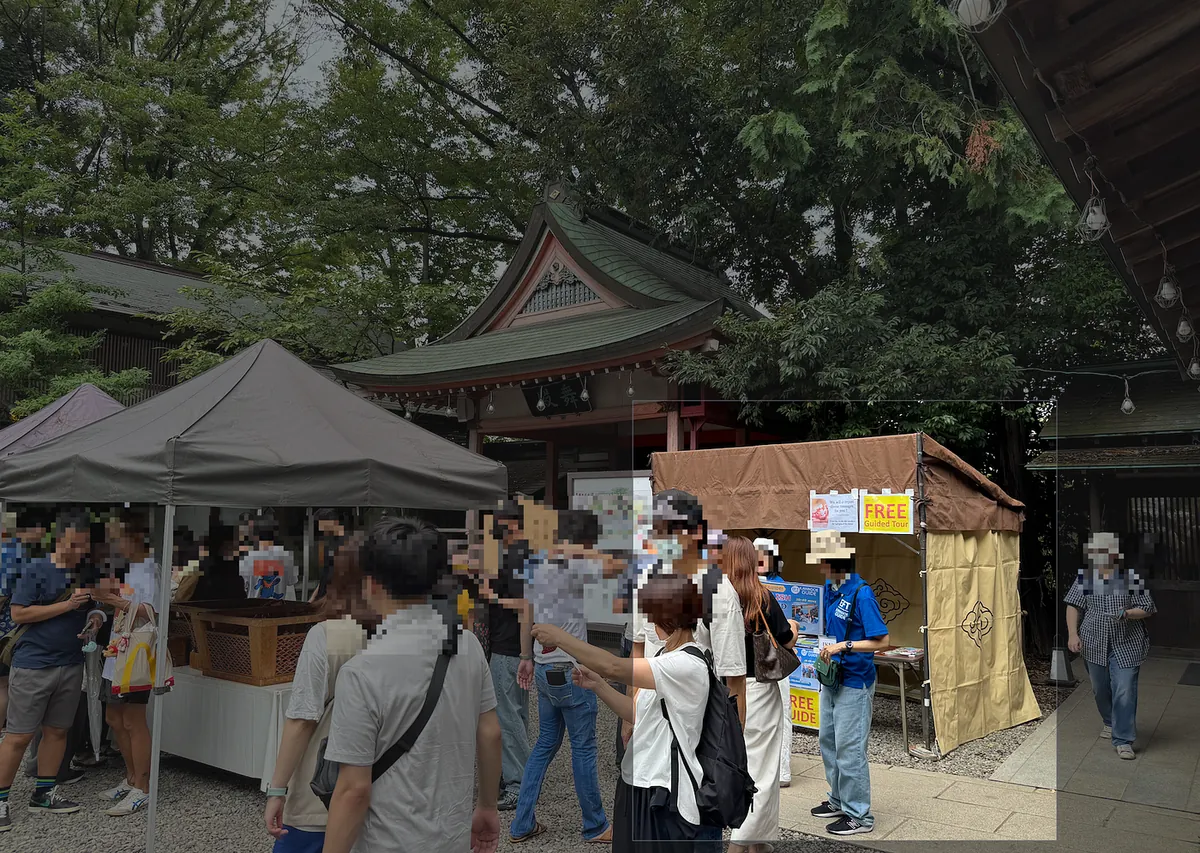
11:55 Arrive at Hikawa Shrine
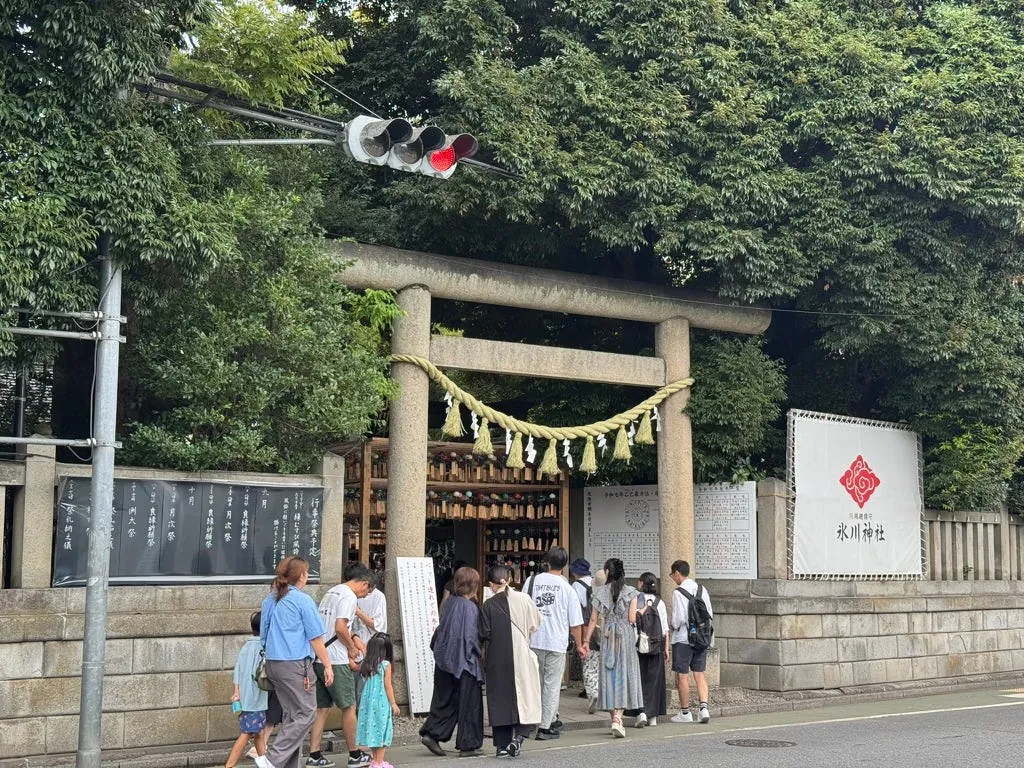
Hikawa Shrine
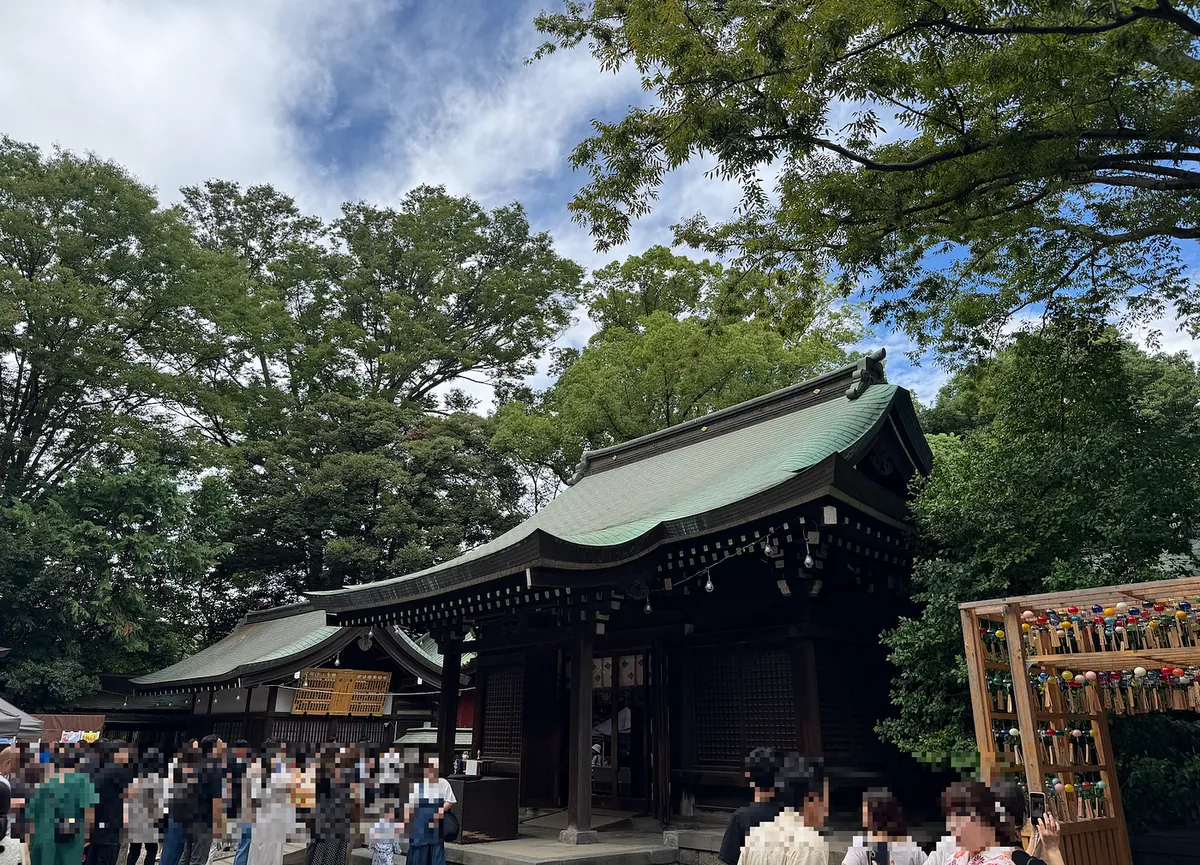
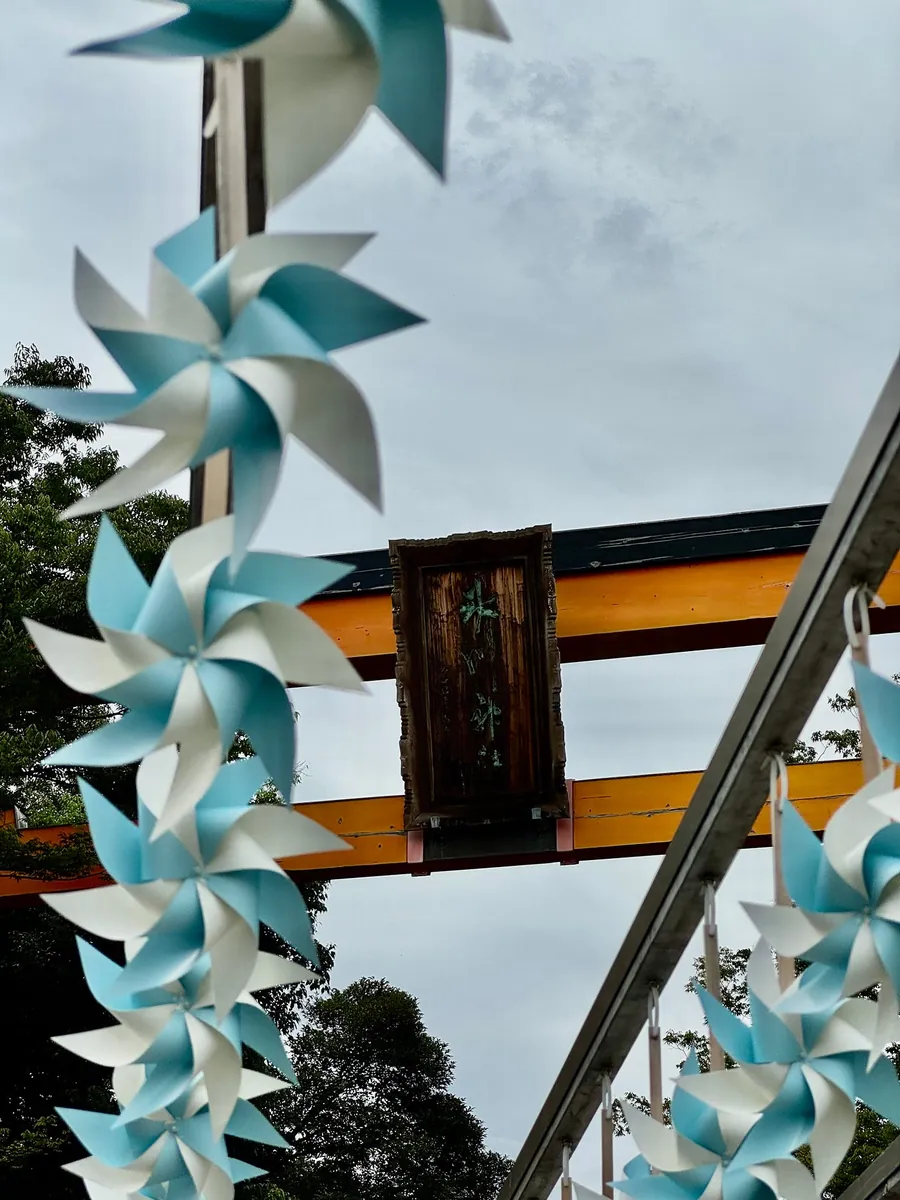
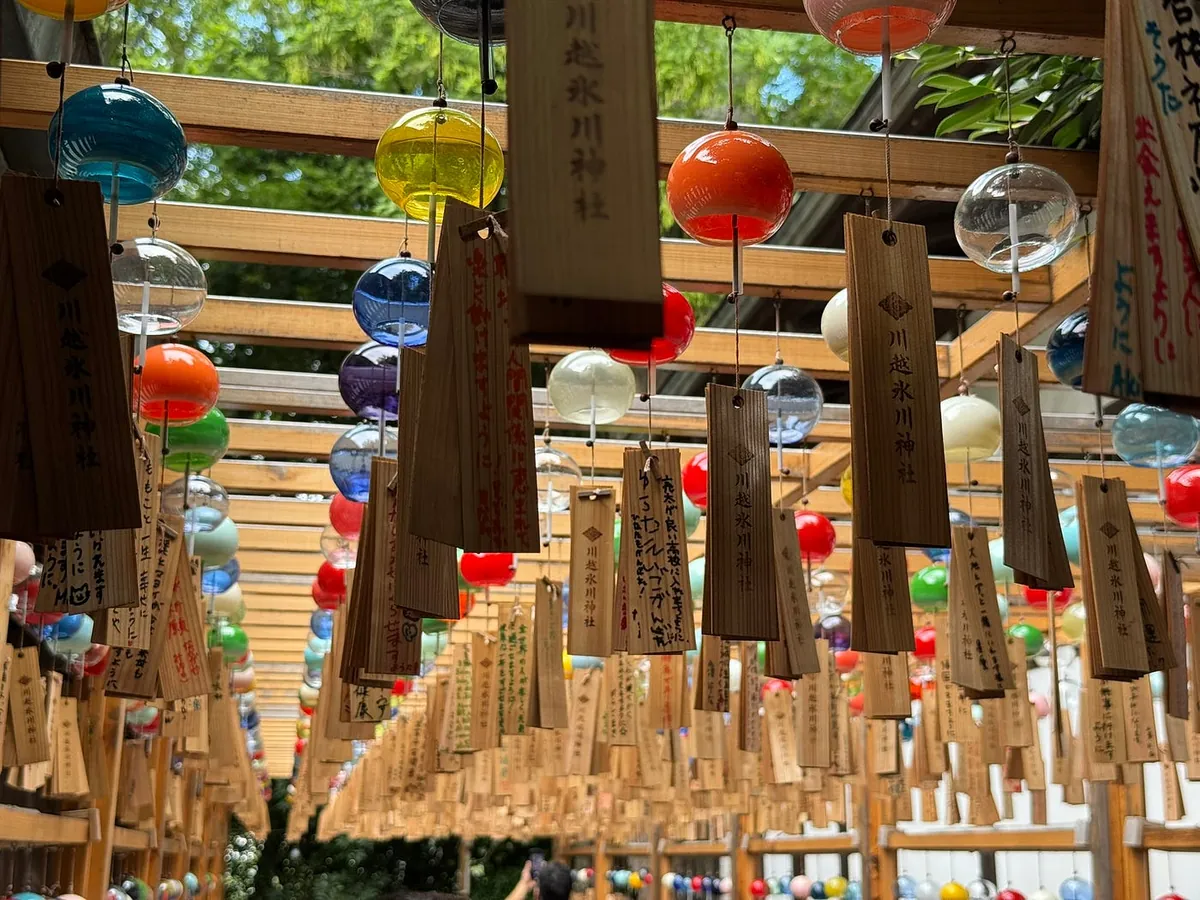
The shrine is small and has many pinwheels and wind chimes.
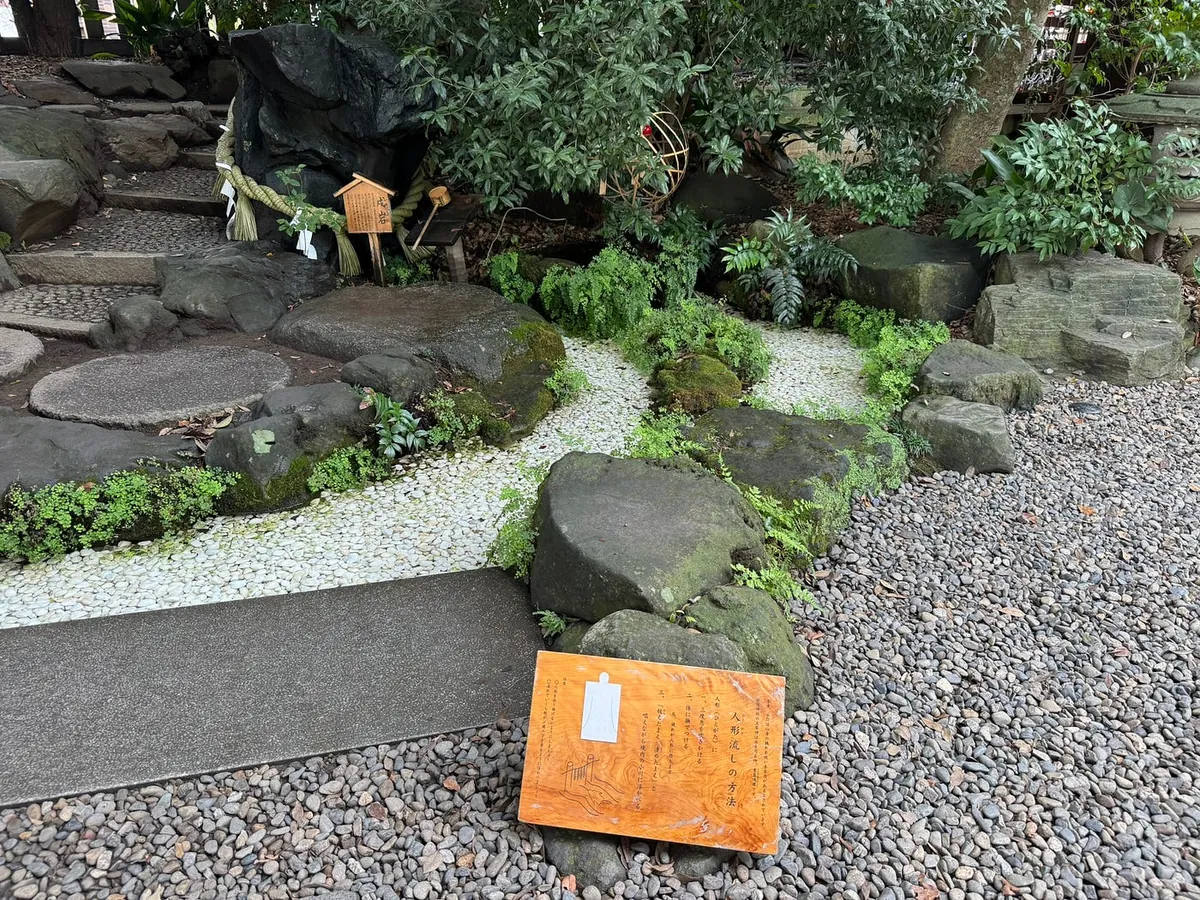
Human Figure Style for Removing Negative Energy:
Wind Chime Blessing and Ema Area
Sea Bream Omikuji
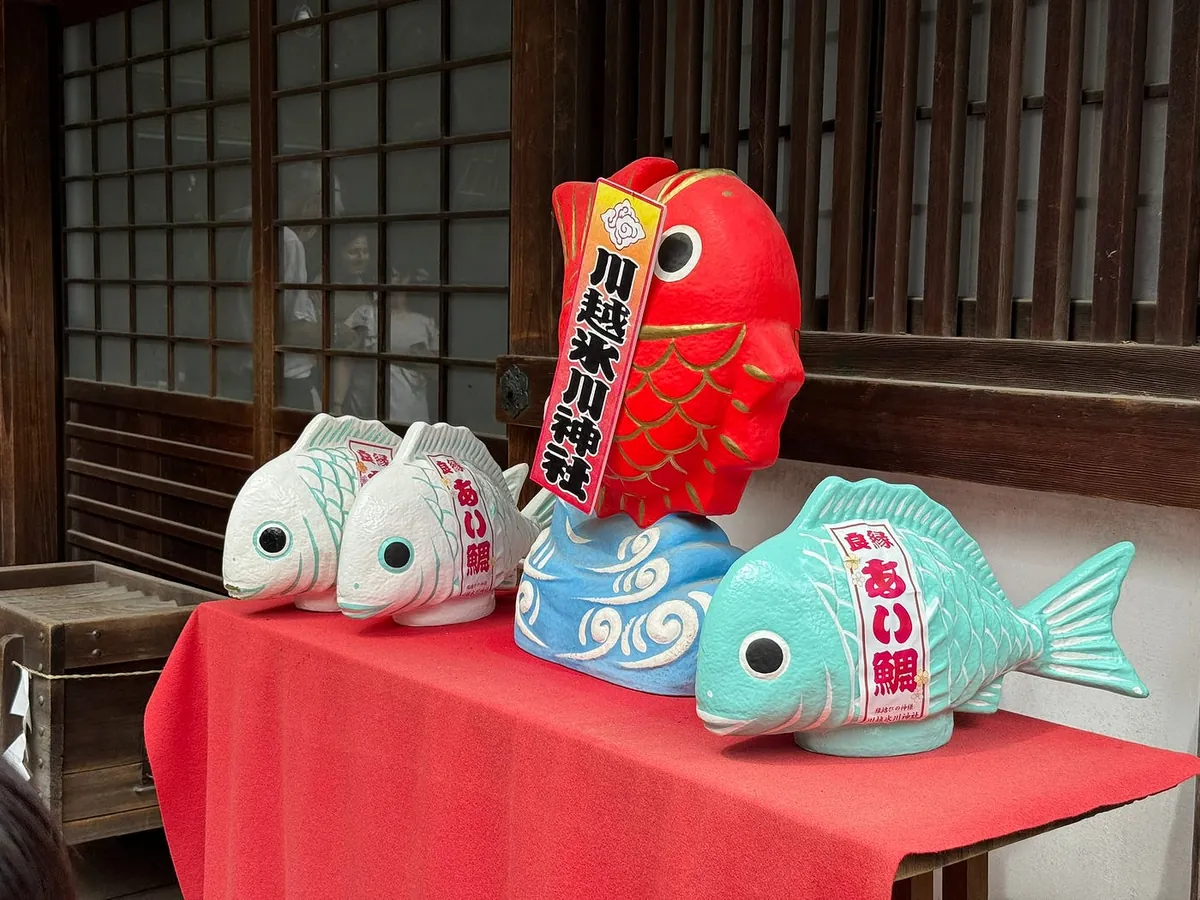
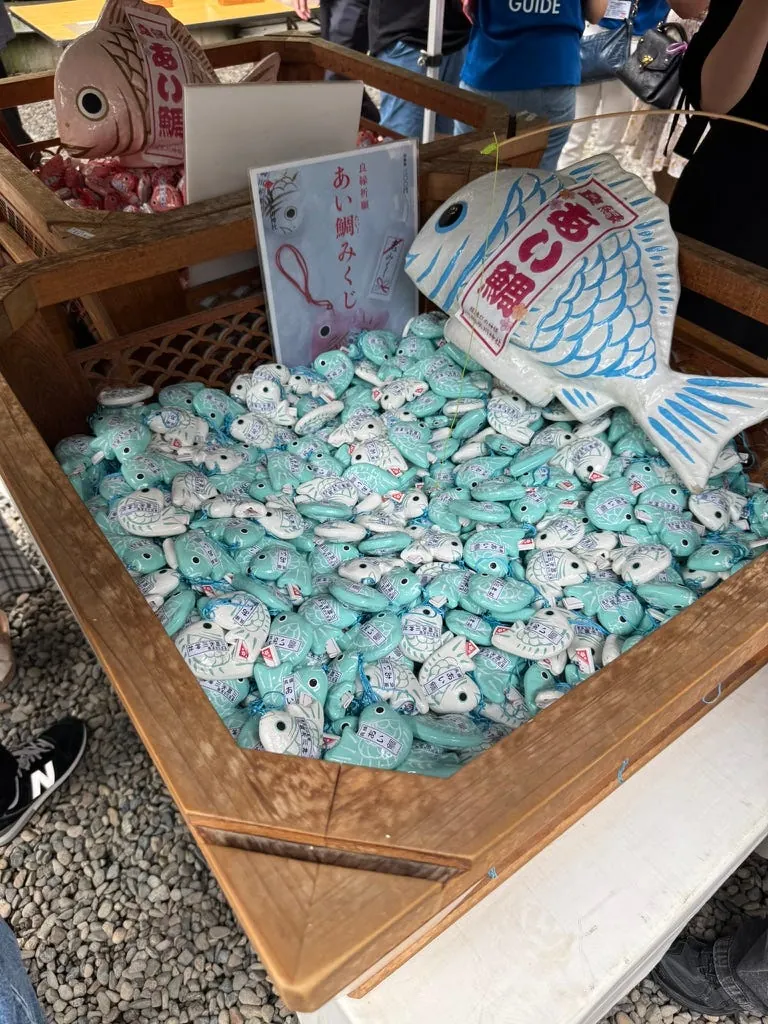
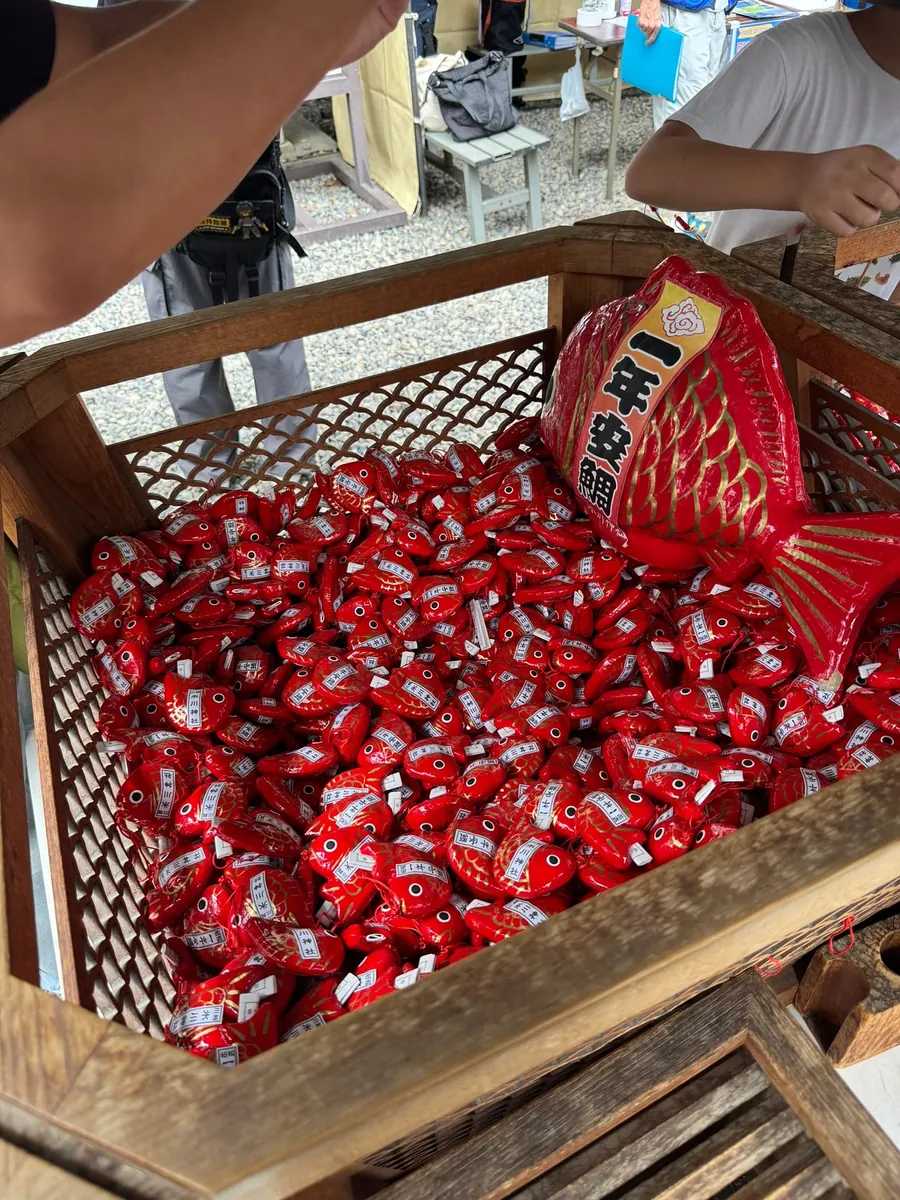
There are several fish ponds where you can catch sea bream for omikuji XD I caught a red one for a year of good luck.
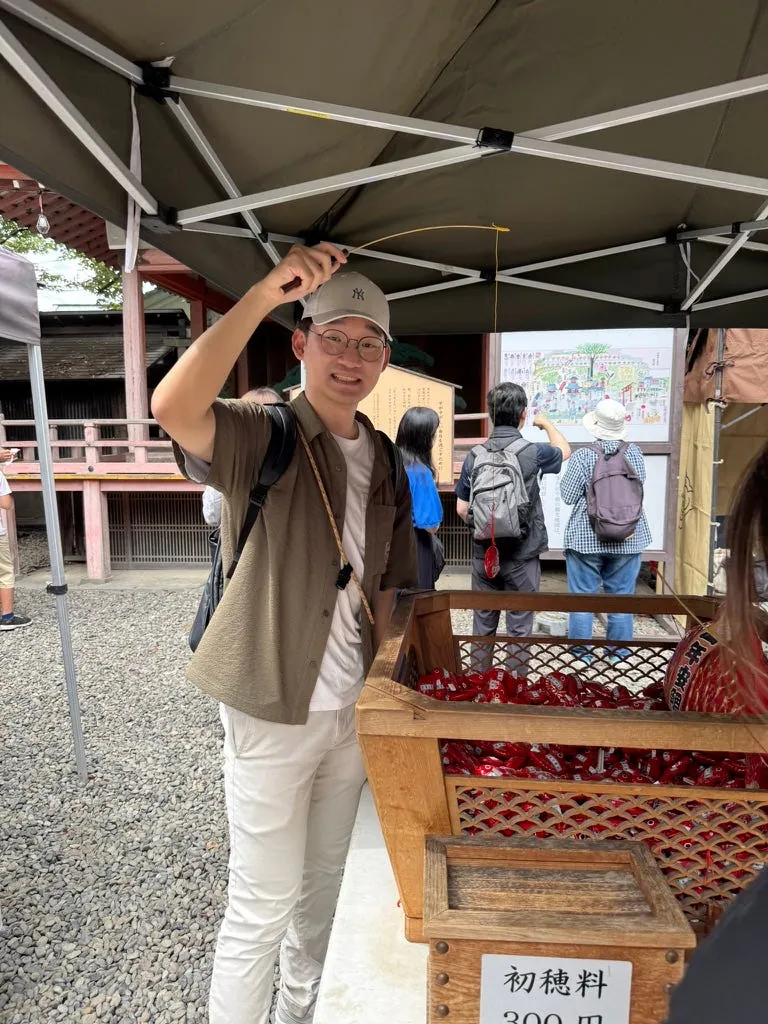
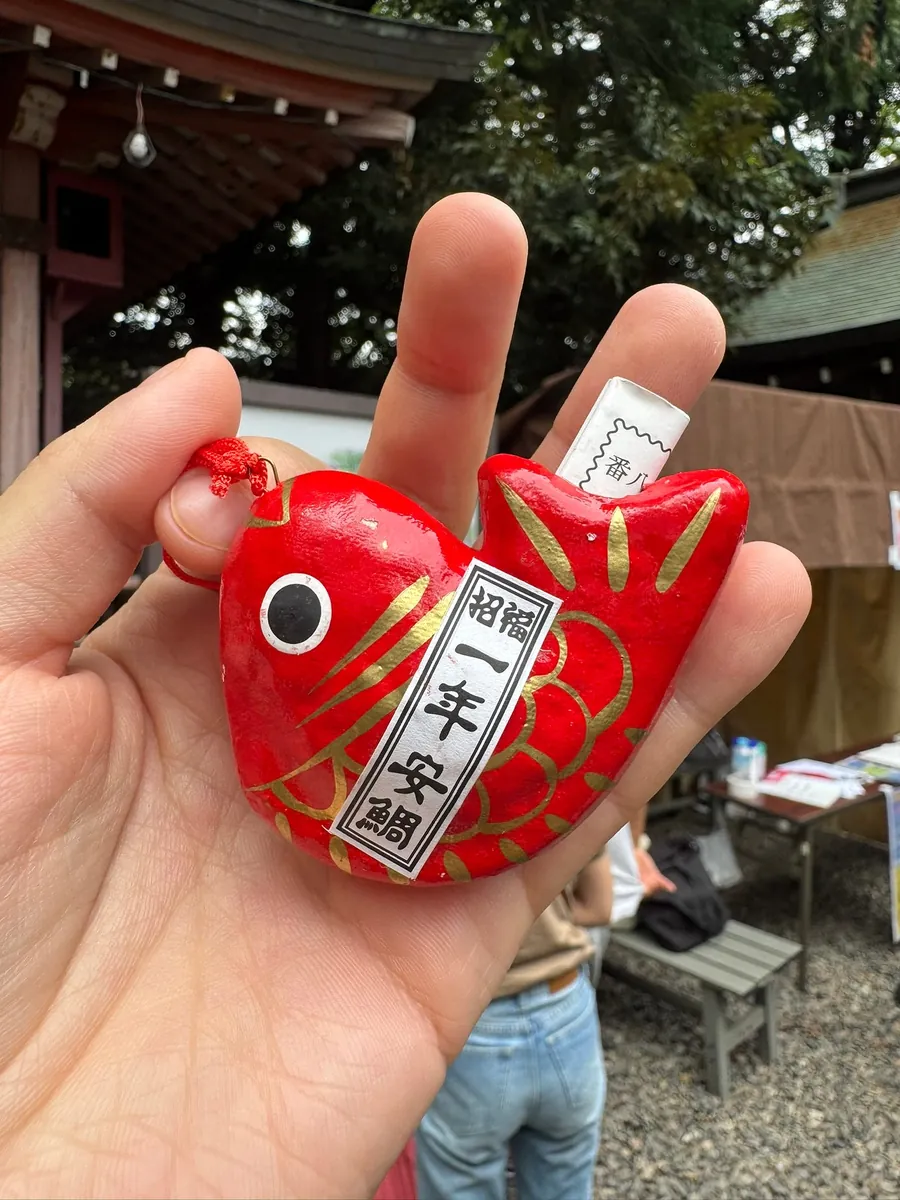

Great luck!
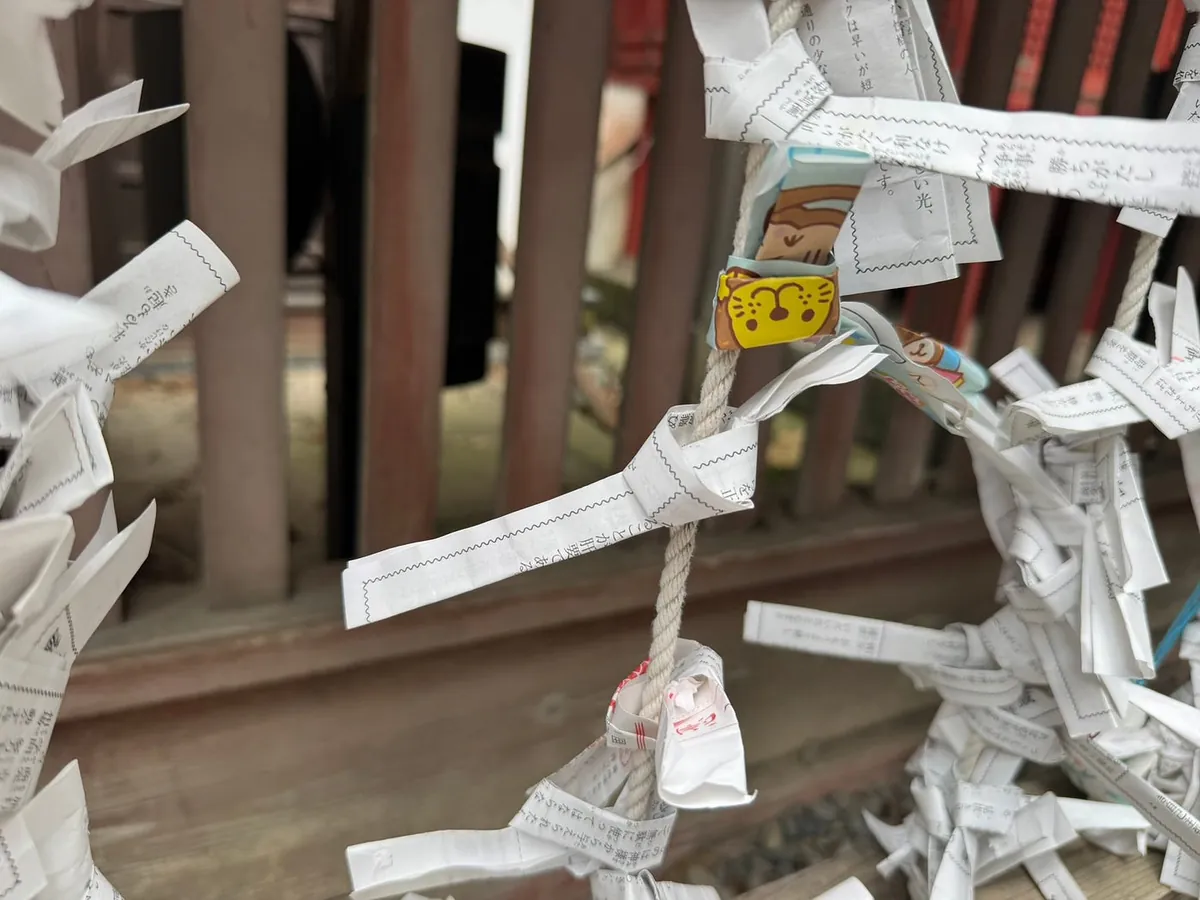
If you don’t have enough coins, you can exchange money with the shrine staff. Volunteers nearby can help translate the fortune slips into English for free. If you get a bad fortune, just tie it to the shrine to ward off bad luck.
12:45 Leave Hikawa Shrine
After taking some photos and walking around, we left Hikawa Shrine at about 12:45, ready to take a bus to Koedo Street and Jiikawa MOGUMOGU Honpo Kawagoe store.
Seibu — Koedo Loop Bus

While waiting for the bus, I saw a cool sightseeing bus with music — it was the Seibu Transport Koedo Loop Bus; Tobu passes cannot be used. You can pay with a transit card or buy the “ Ryde Pass” issued by Seibu Railway.
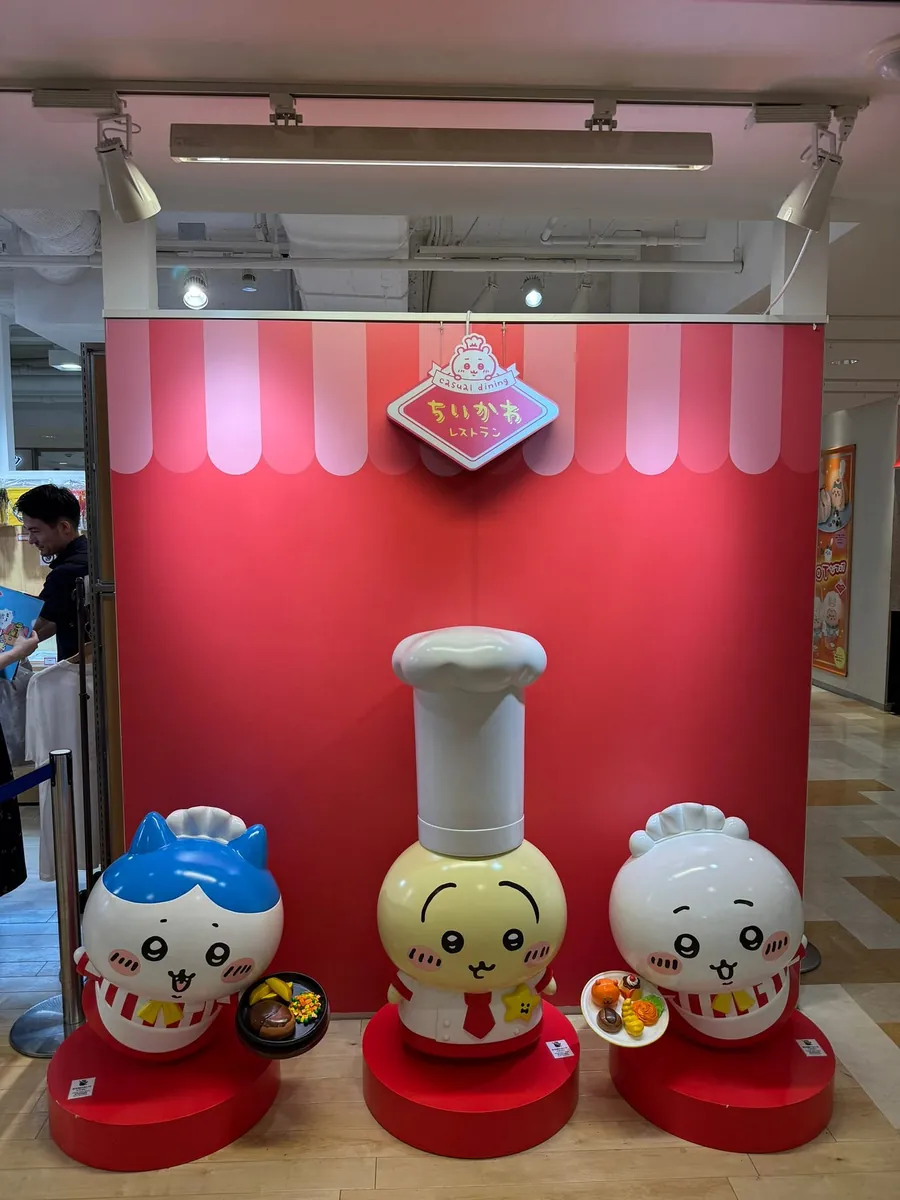
13:20 Chiikawa Mogumogu Hompo Kawagoe 吉伊卡哇 MOGUMOGU 本舗 川越店
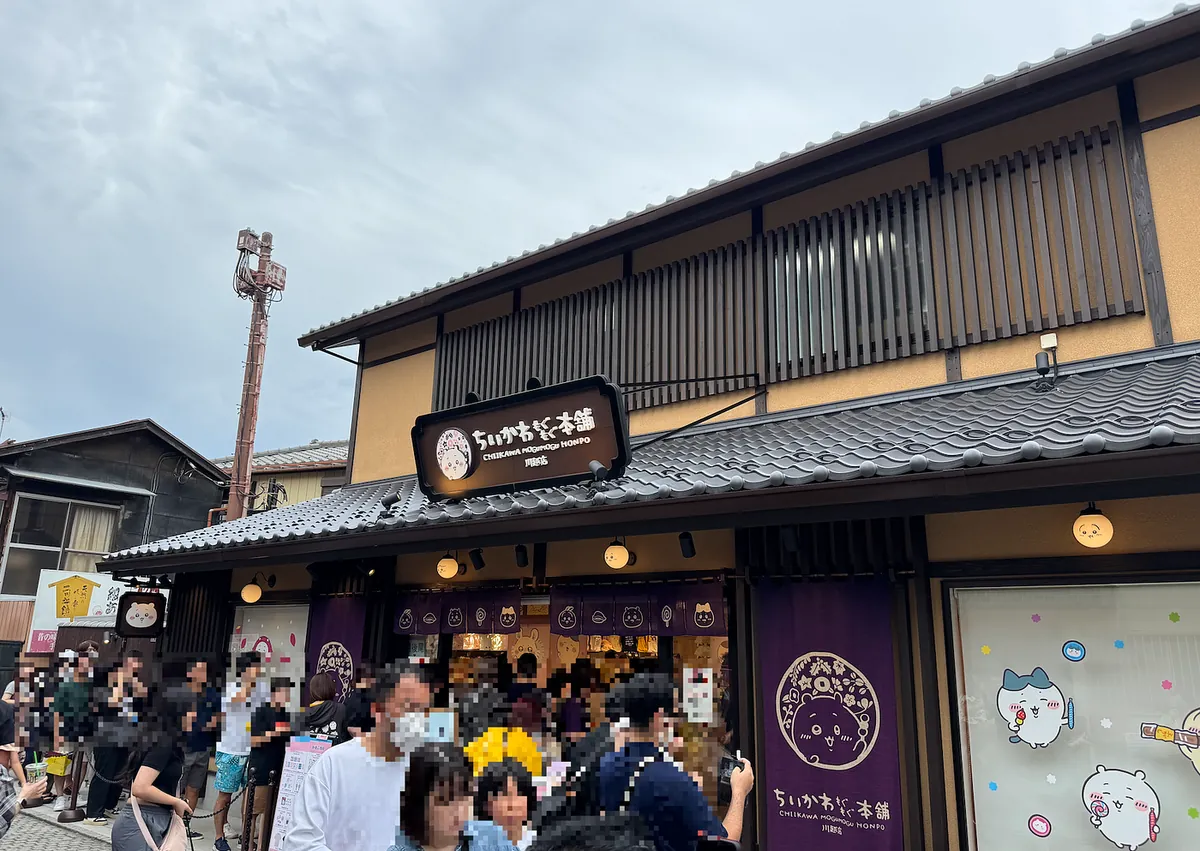
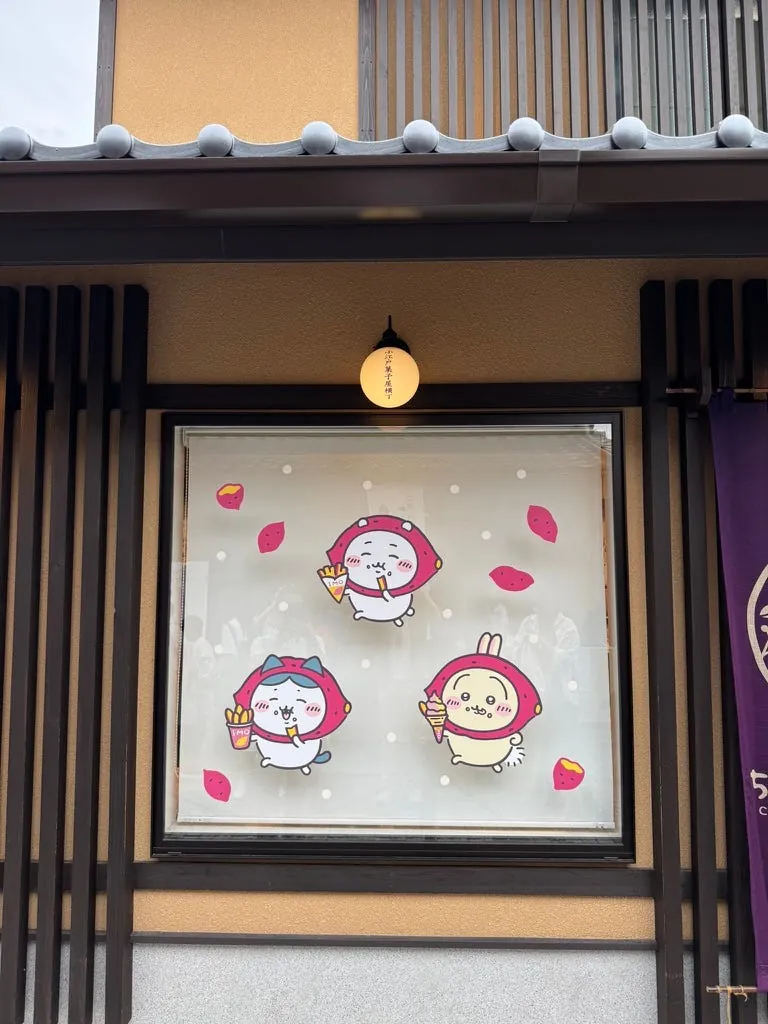
At the entrance, there are many cute babies and a sweet potato series exclusive to Kawagoe.
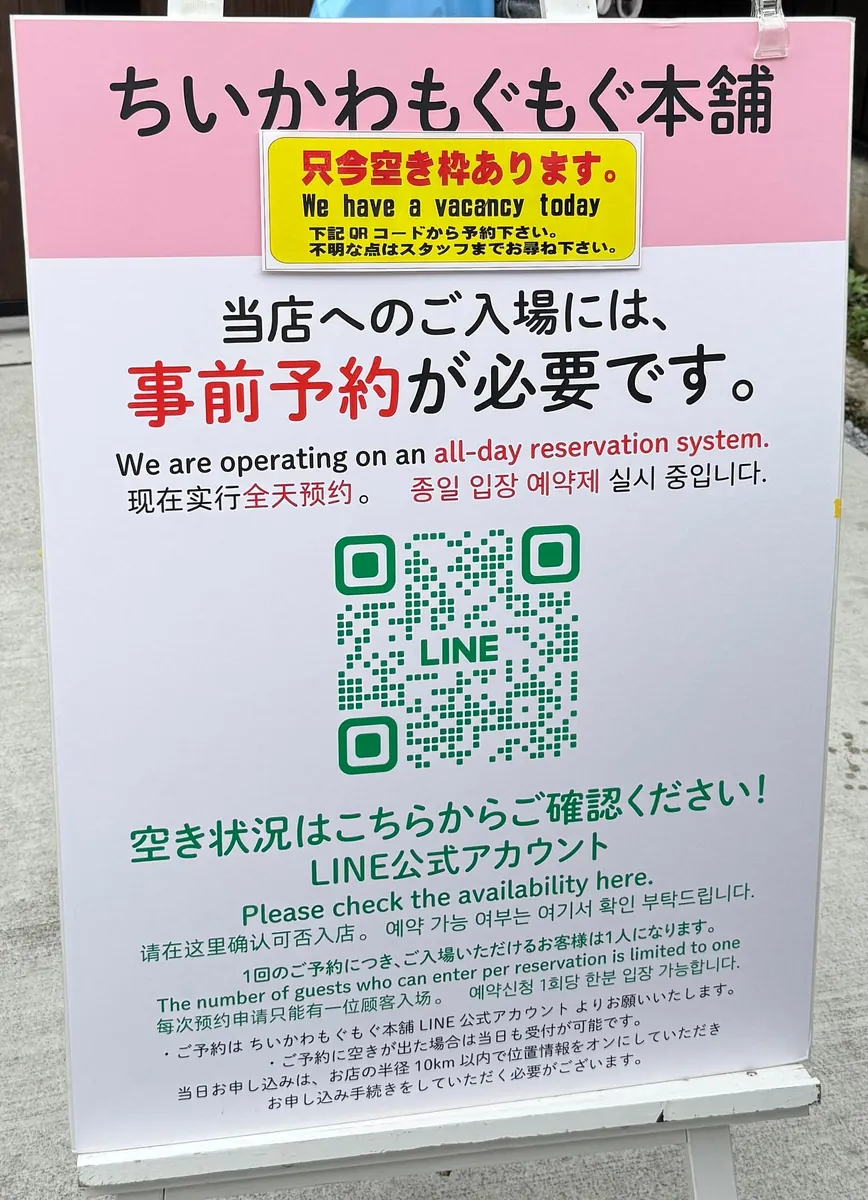
Although there is still full-day capacity control, the crowds are not as large as when it first opened. We arrived on-site and scanned the QR code to book the next available time slot at 13:40 (there were still spots). If you want to avoid missing out, you can book online in advance.
GIICAWA MOGUMOGU Honpo Kawagoe Store reservation and advance ticket lottery Ticket URL (Click Here).
Please note: One phone and one account equals one person. You can only make one reservation per day and per time slot.
13:40 Arrive at the store entrance on time to line up for entry
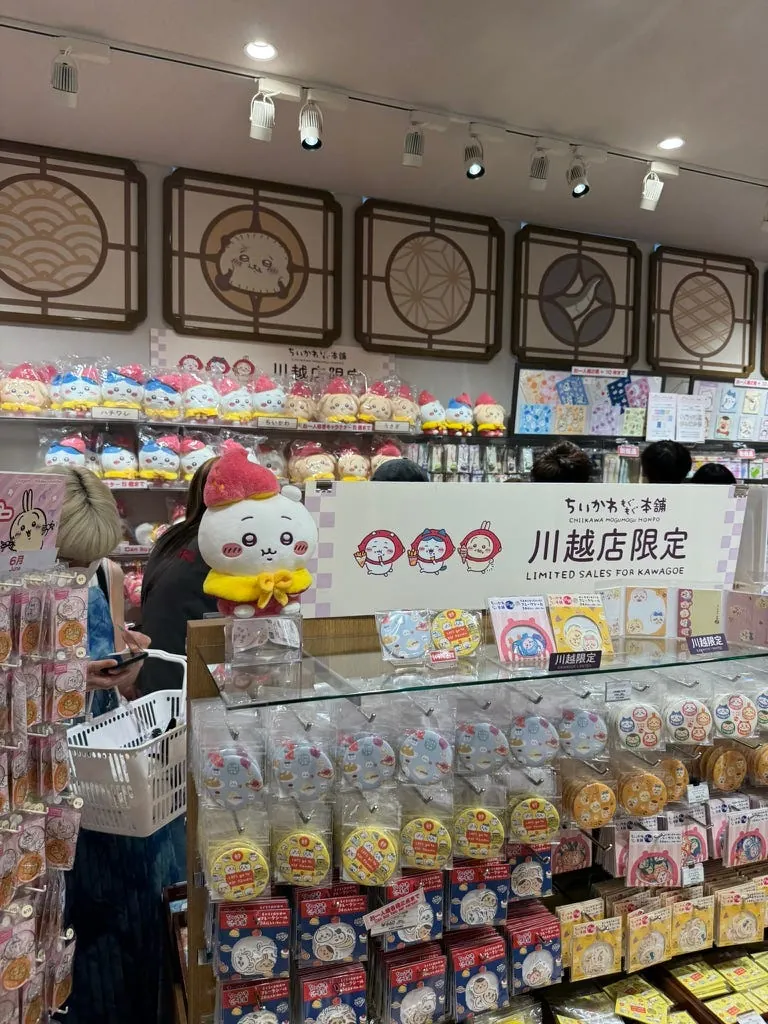
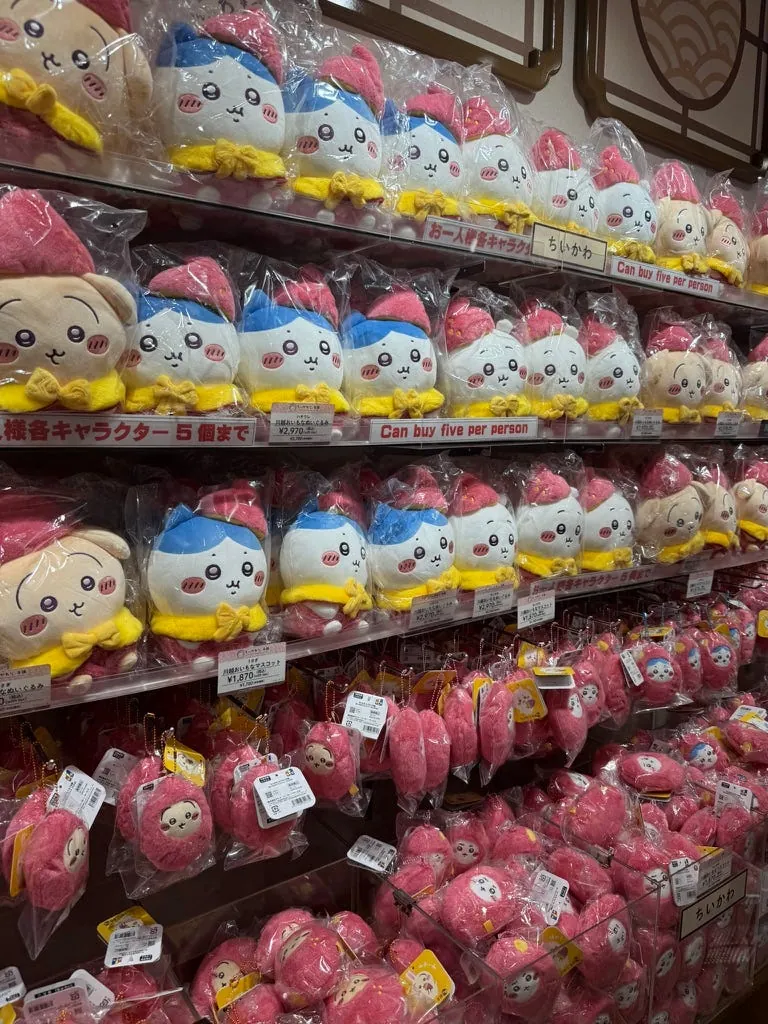
The stock of products is abundant, but some items have a purchase limit per person. You can pay extra to get a capsule toy.
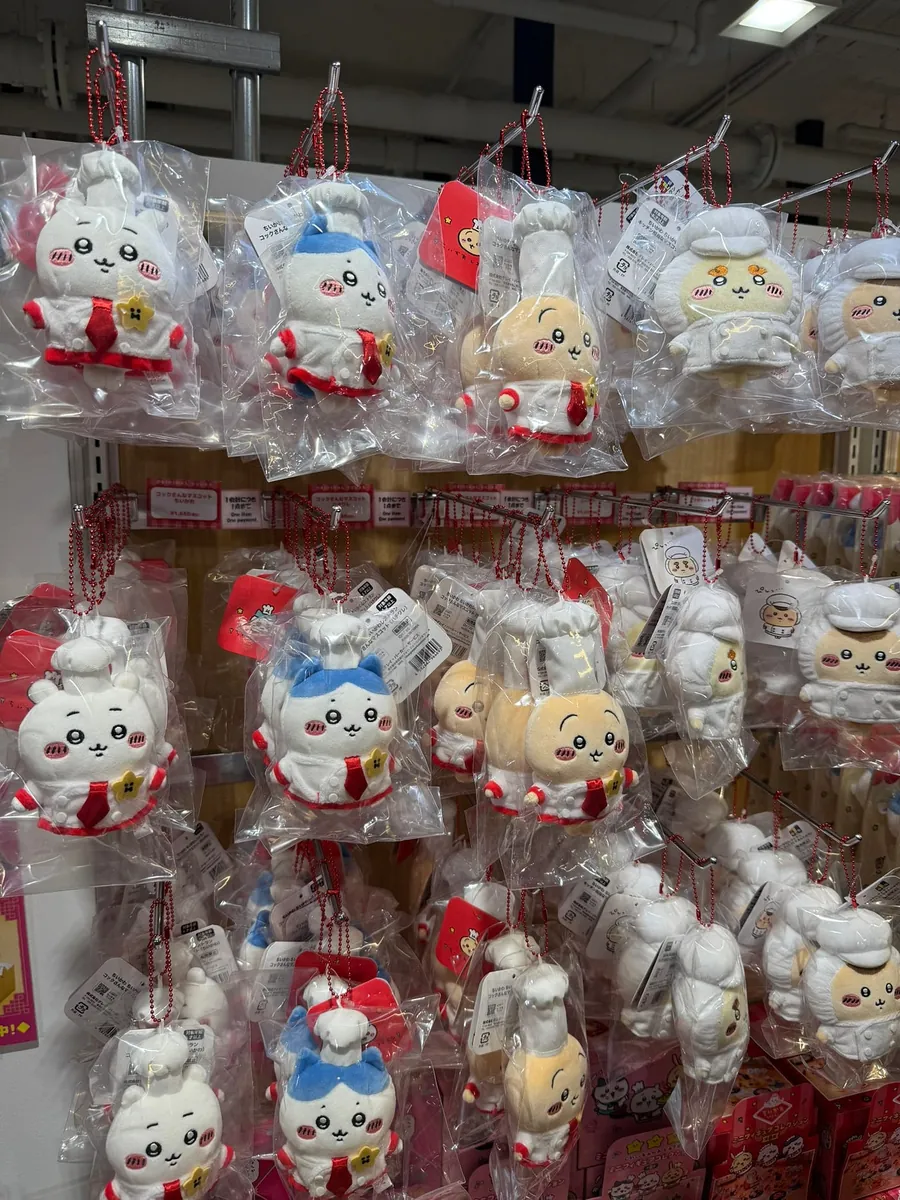
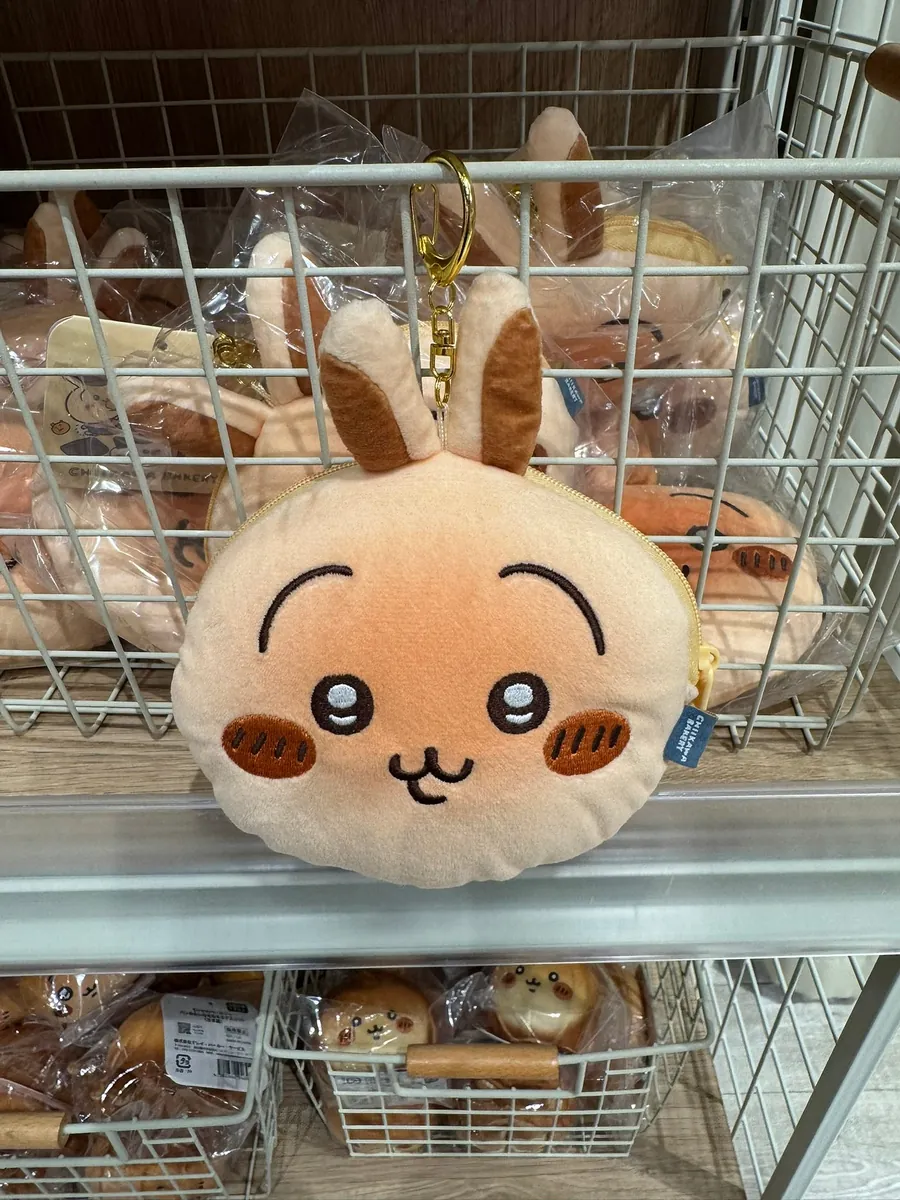
My Souvenirs:
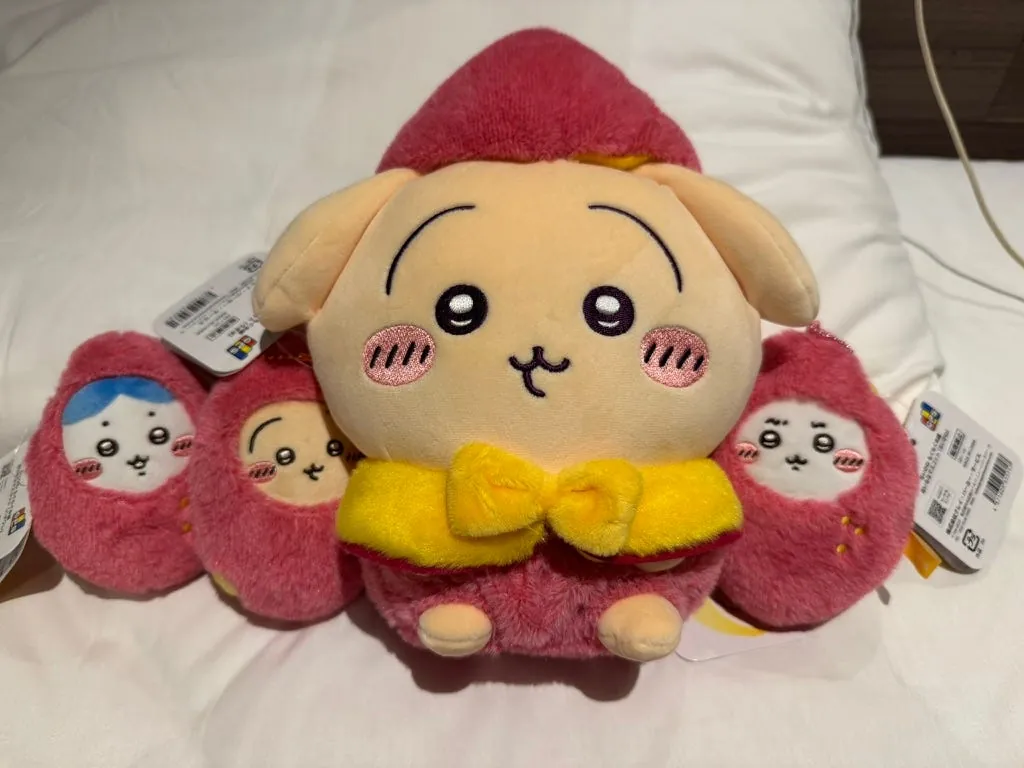
Sweet Potato Bunny has floppy ears and is super cute!
Product list and prices can be found on the official website.
Big Sweet Potato Bunny: ¥2,970 JPY / Small Sweet Potato Jiikawa: ¥1,870 JPY
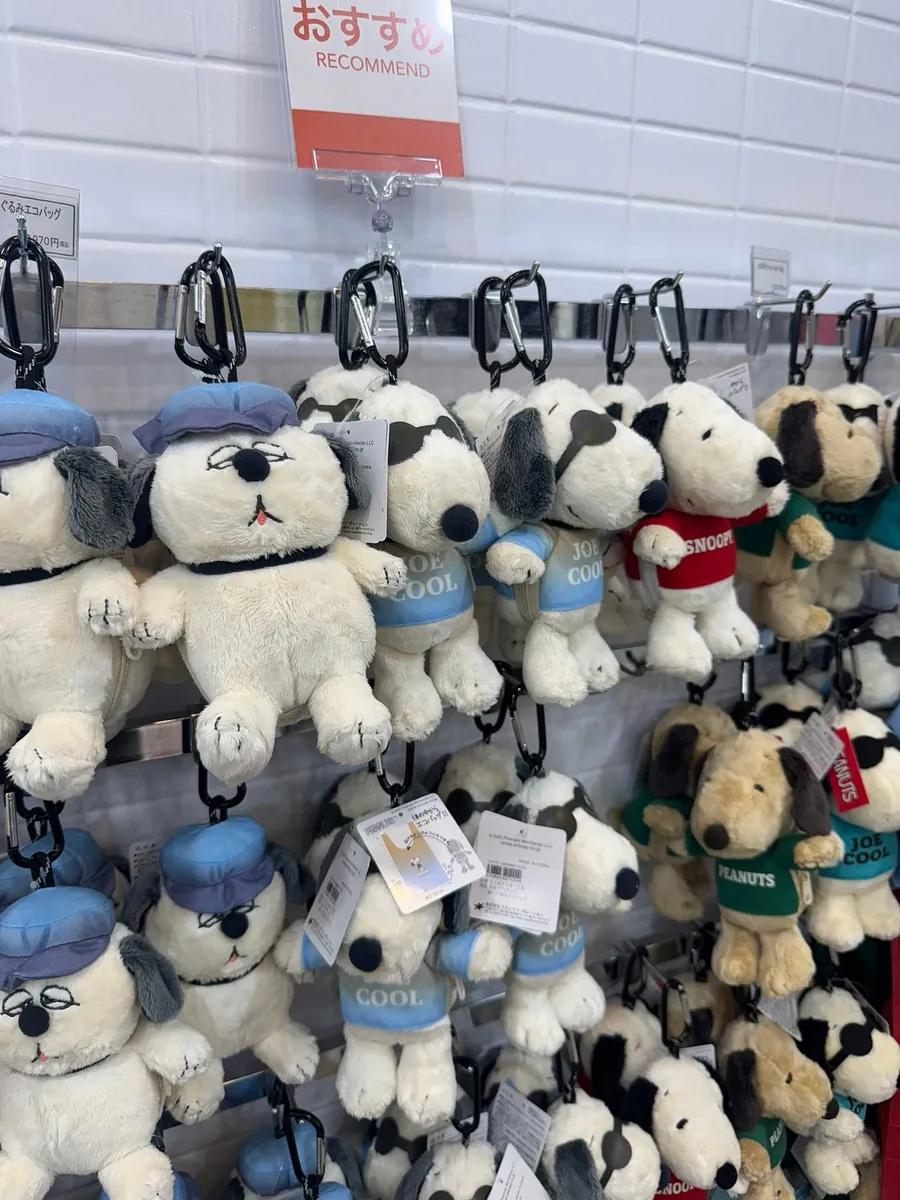
There are also Miffy and Snoopy specialty stores
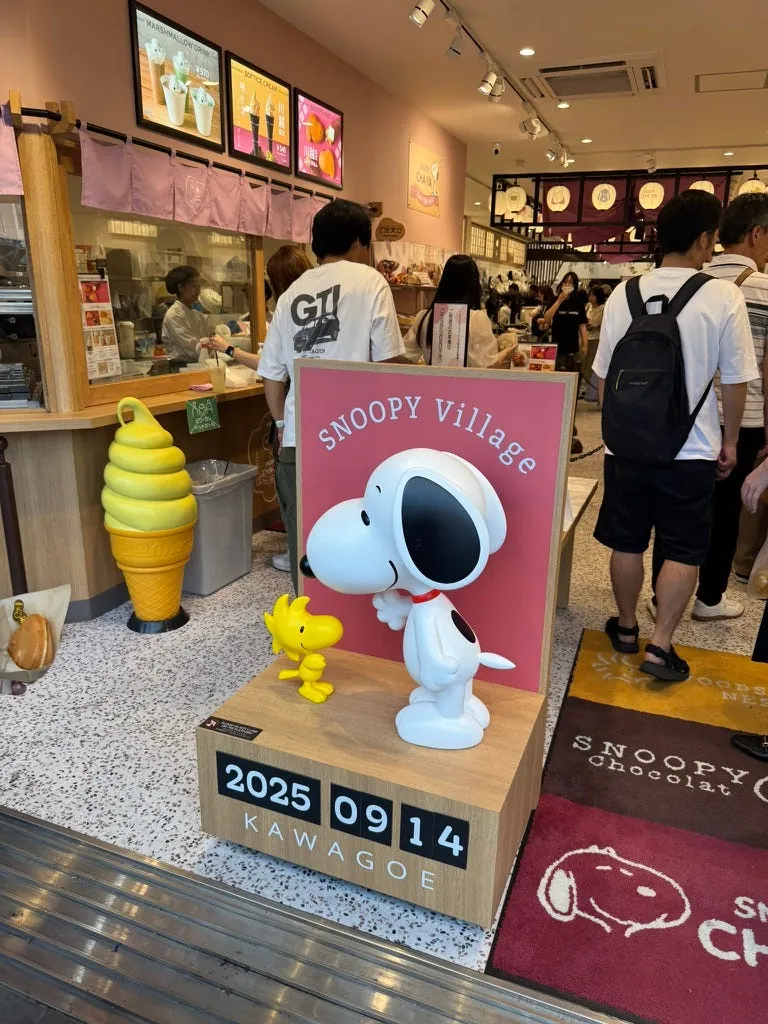
Bought Kawagoe rice crackers and brown sugar sweet potato sticks at the roadside souvenir shop
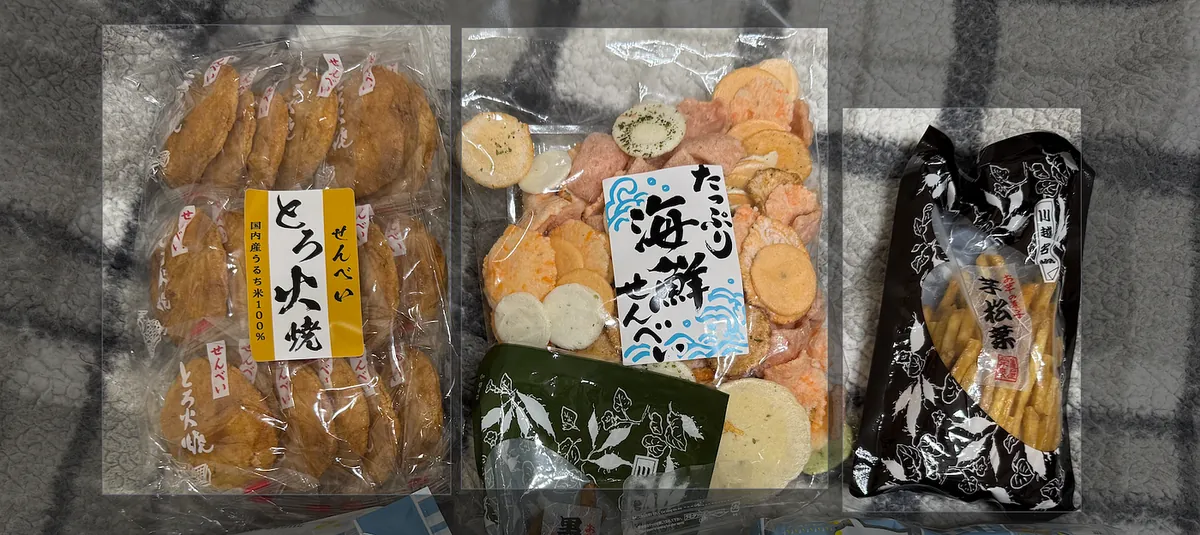
The seafood is delicious; the original flavor is quite firm. The brown sugar sweet potato sticks are like Taiwan’s brown sugar sweet potato chips but in stick form.
After shopping, it was almost 14:00, and I was really hungry and tired.
Former 85th Bank Main Building

Went to a second-floor café in a historic building to grab a quick bite before heading out.

If I weren’t so hungry and it wasn’t so late, I would have wanted to queue for soba noodles.
After eating, walk out to the terrace to take photos:
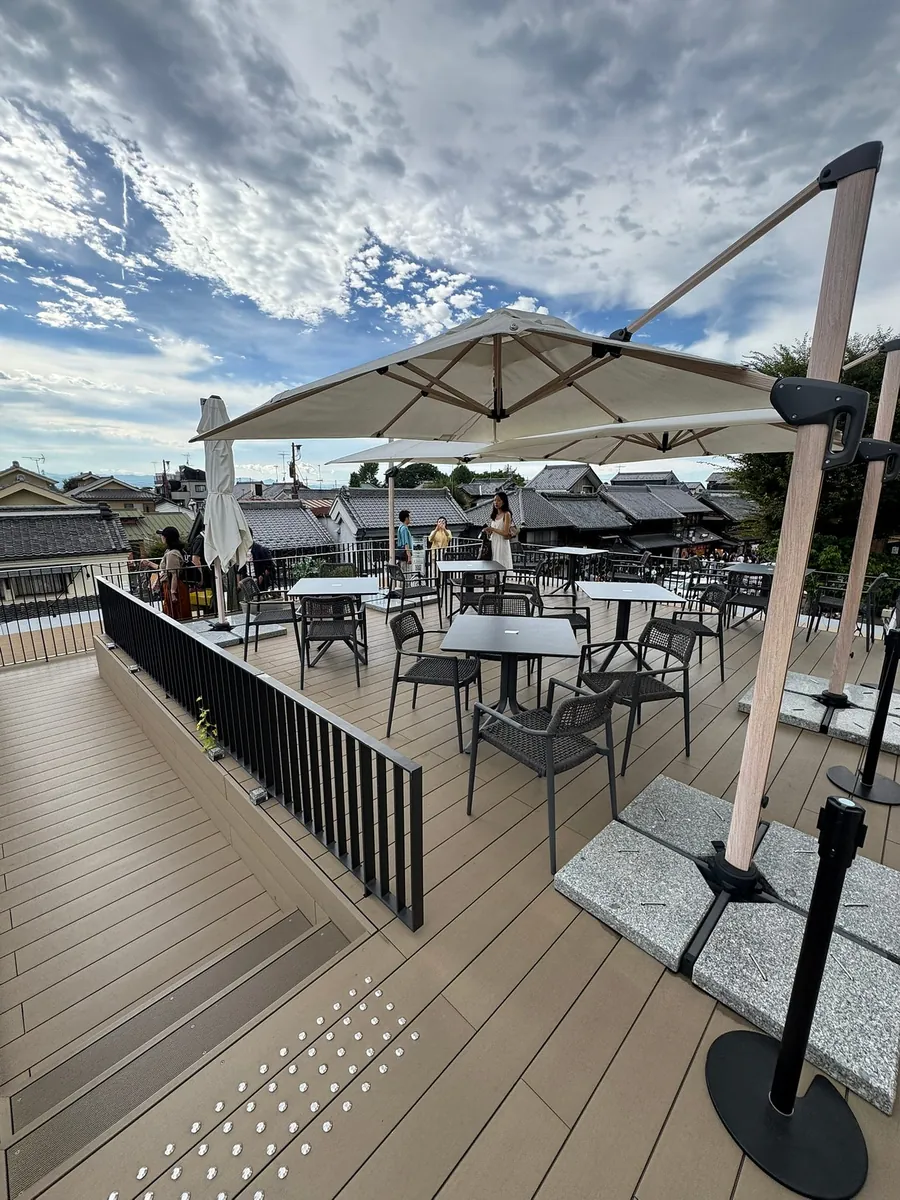
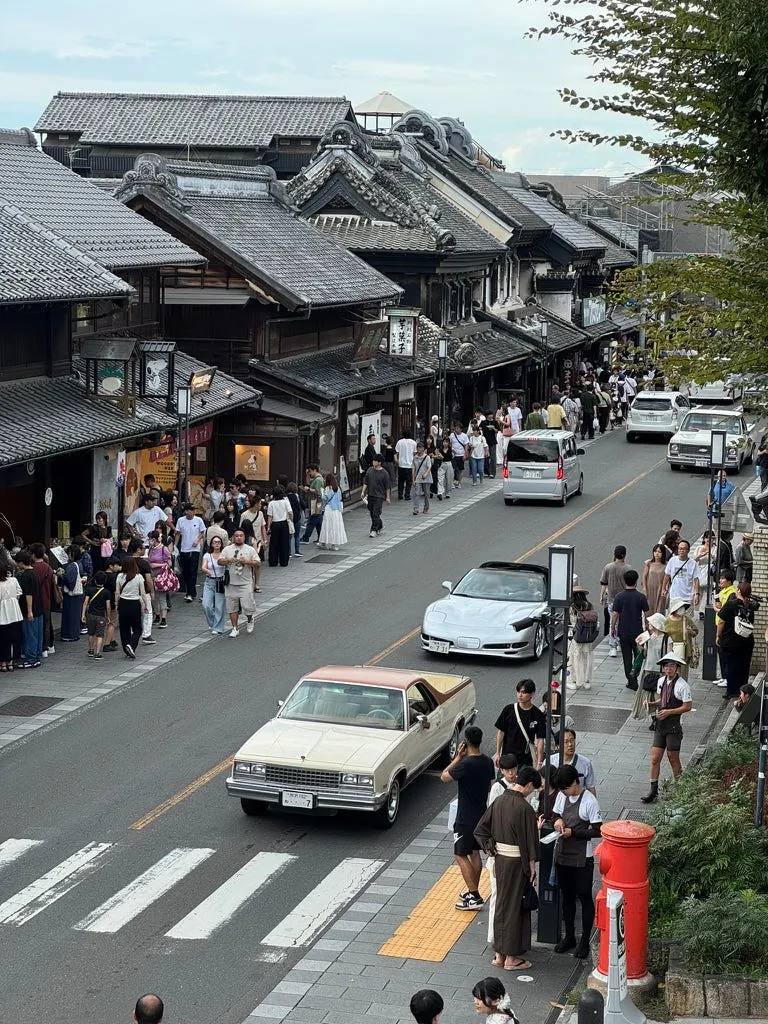
Here you can get a bird’s-eye view of Ichibangai shopping street, very beautiful:
The terrace is a public area and can be accessed without any purchase.
15:30 Toki no Kane (Time Bell Tower)
Continue strolling along the Koedo shopping street to Toki no Kane (Time Bell Tower).
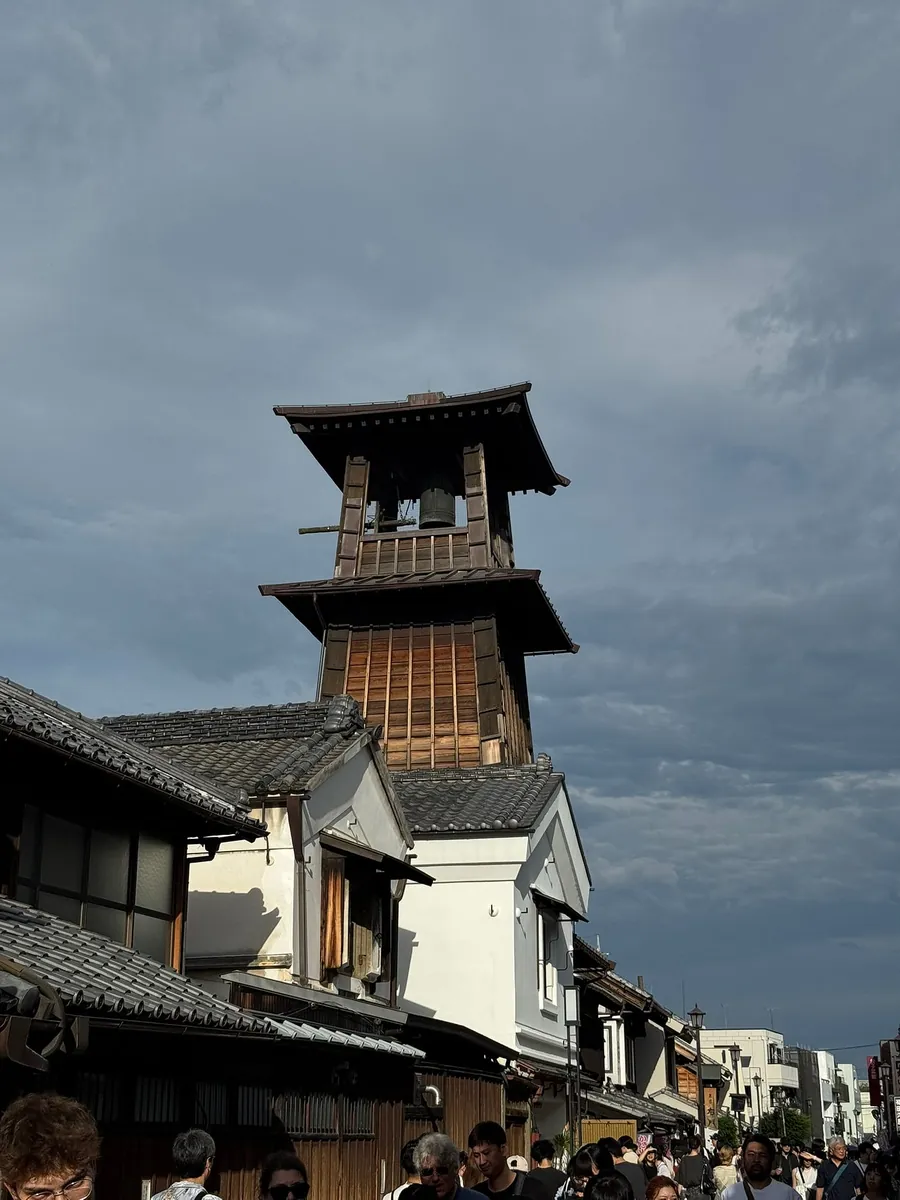
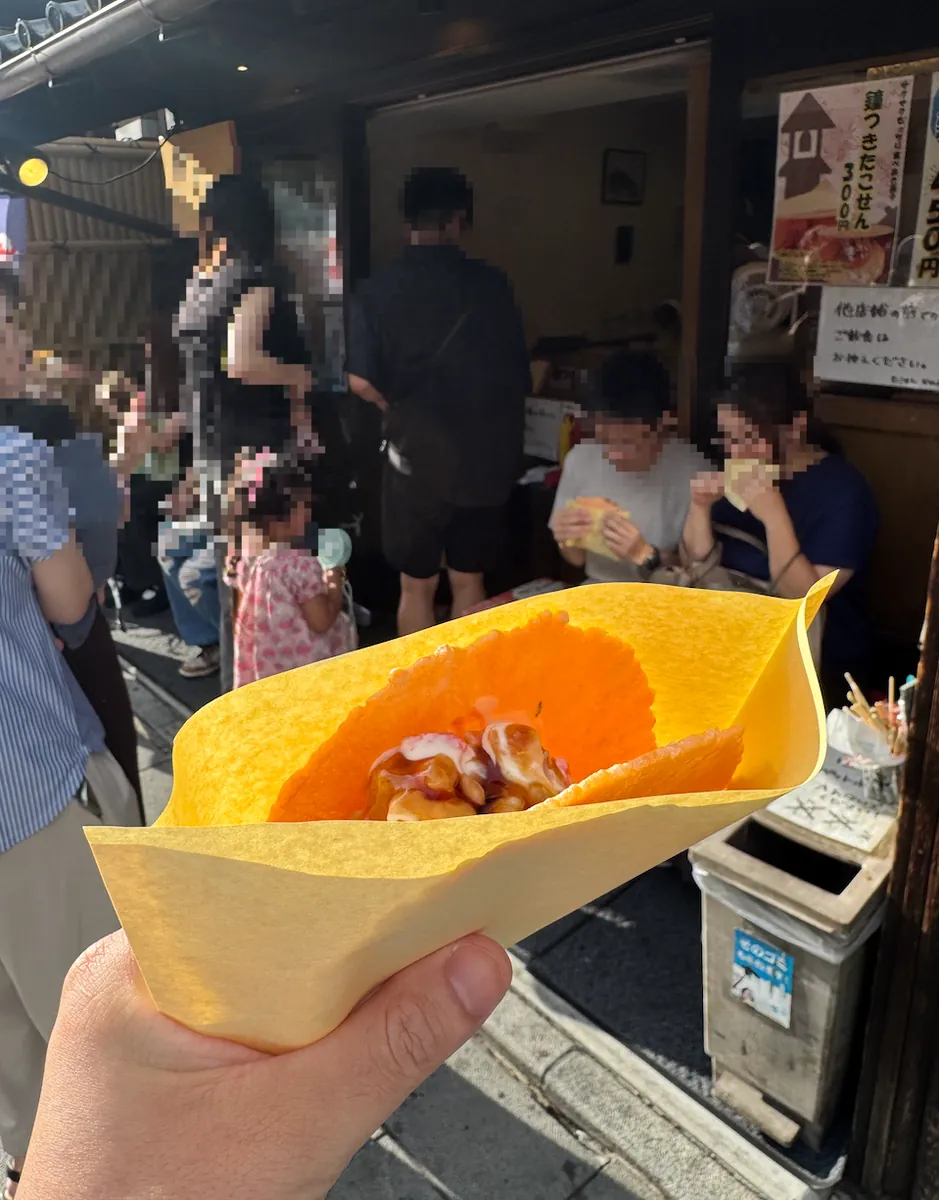
Bought takoyaki rice crackers from a nearby stall as a snack.
Taisho Romantic Dream Street (Shopping Street)
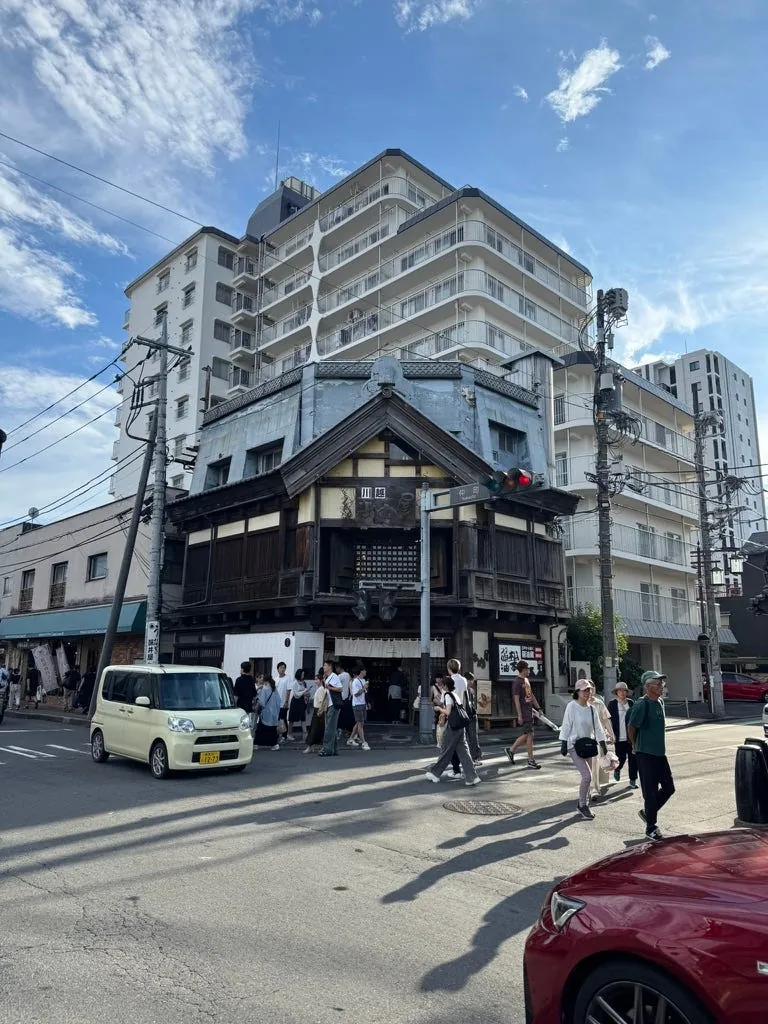
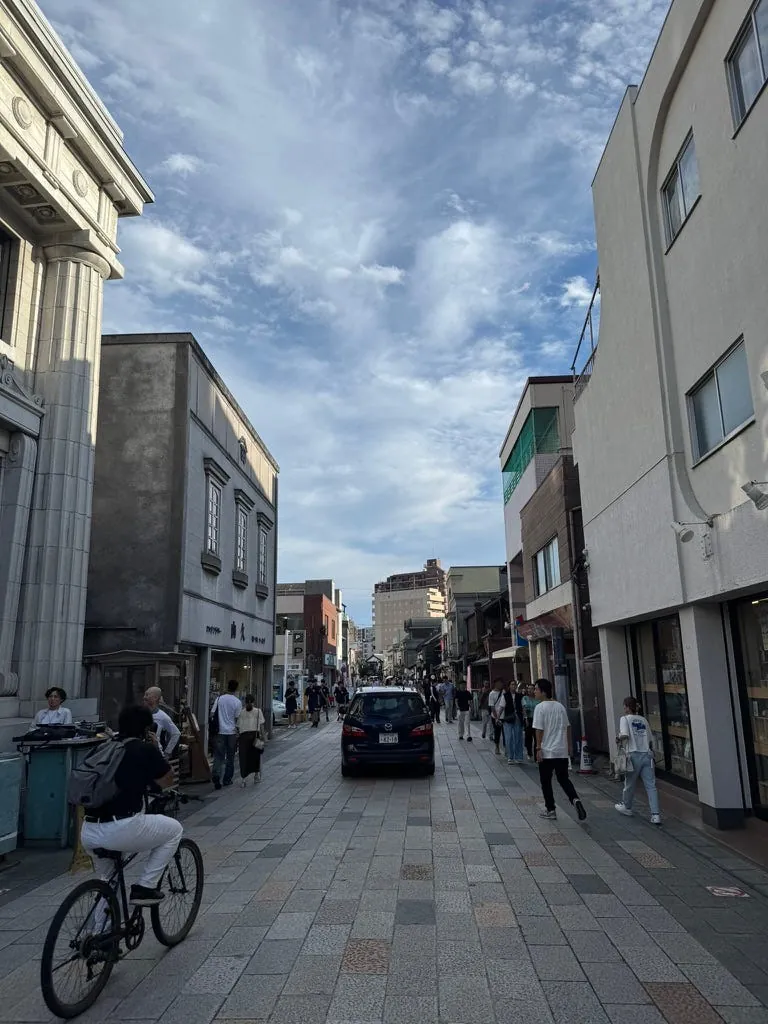
Finally, we passed through Taisho Romantic Street and took a bus back to Kawagoe Station, preparing to return to Ikebukuro.
16:25 Return to Kawagoe Station, take the Tobu Tojo Line back to Ikebukuro
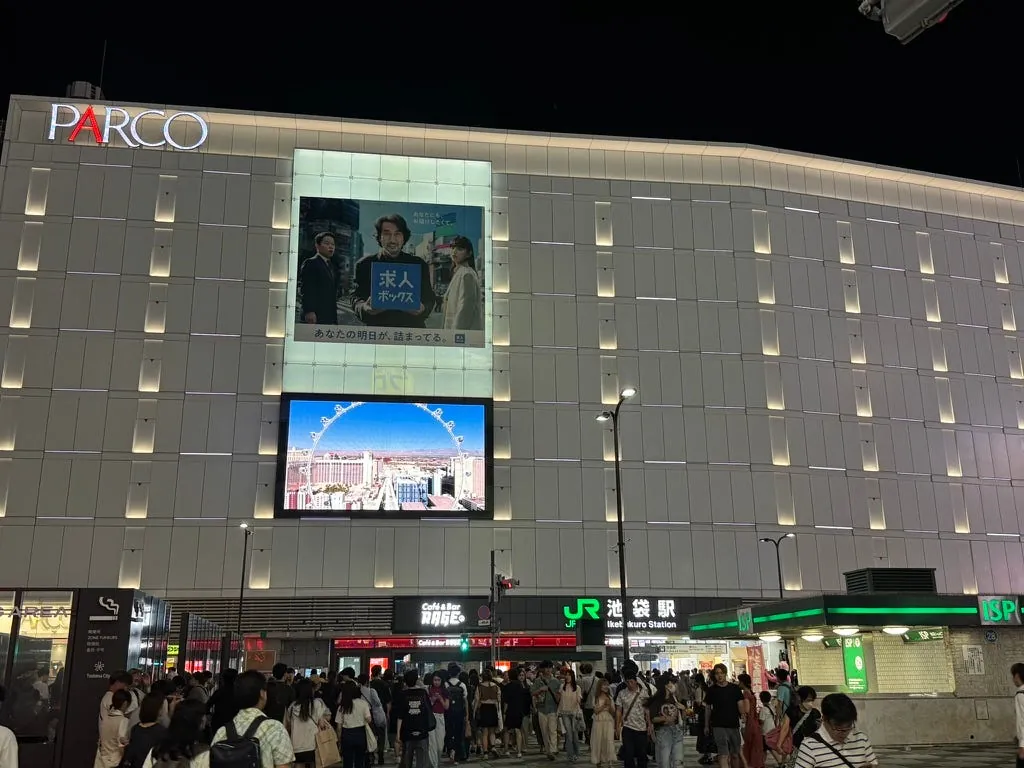
17:10 Ikebukuro Station Parco
After returning to Ikebukuro, first browse the department stores at Ikebukuro Station. There are Parco and Tobu Department Store, with many things to explore.
THE GUEST cafe & diner Ikebukuro 、 Chikawa Ramen Pork
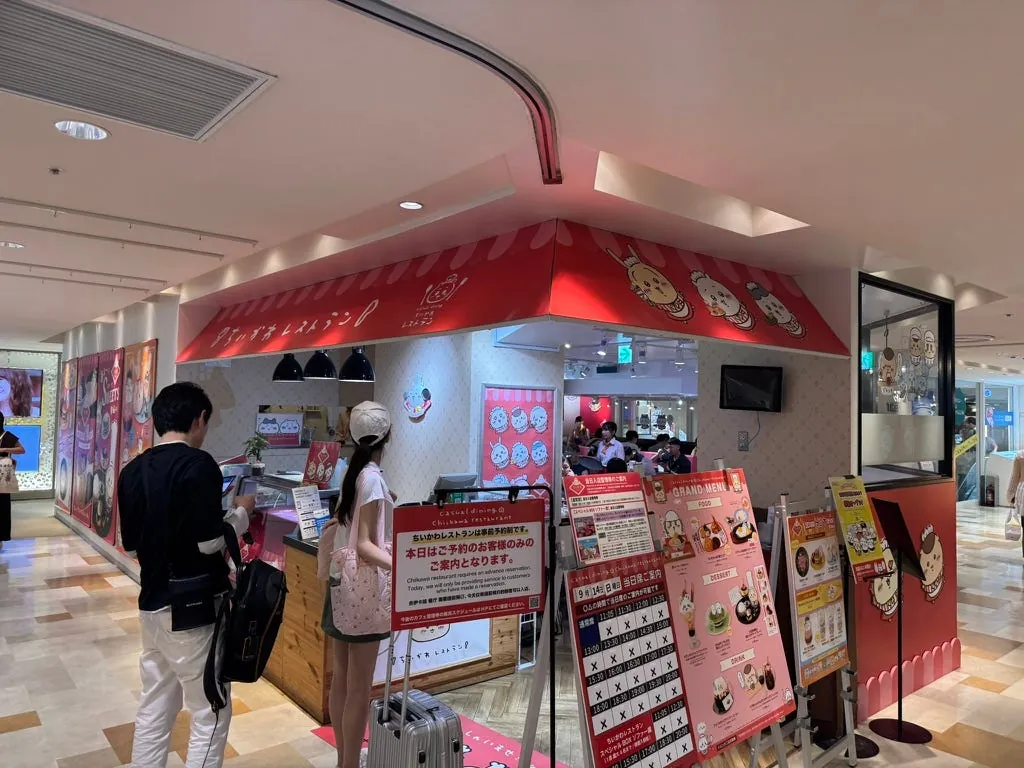
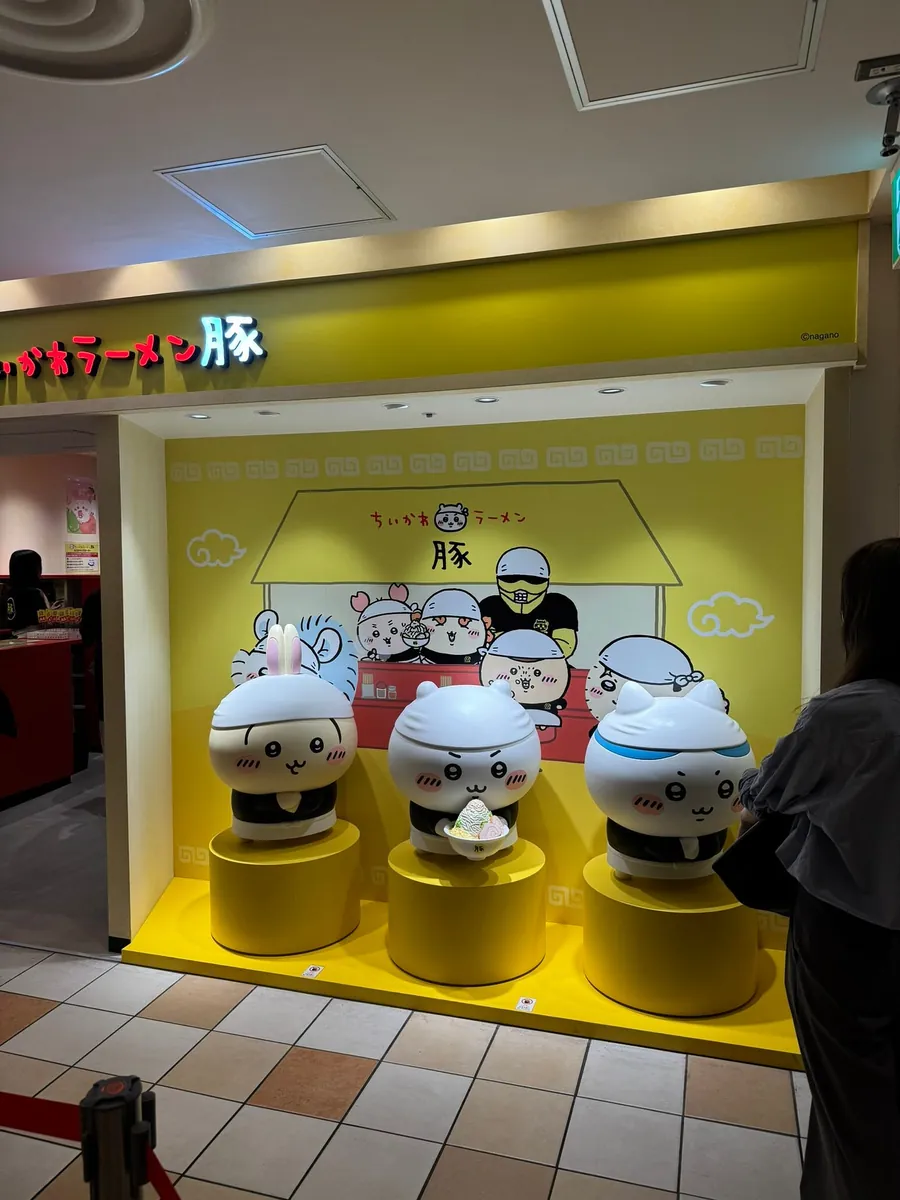
Upstairs, there are two Jiikawa restaurants. The café was fully booked when we passed by, but the ramen shop allowed entry with on-site queueing.
Next to it is a resale shop where you can buy restaurant series Gii Kawa:
17:45 Gyutan Yaki Sendai Henmi Ikebukuro PARCO
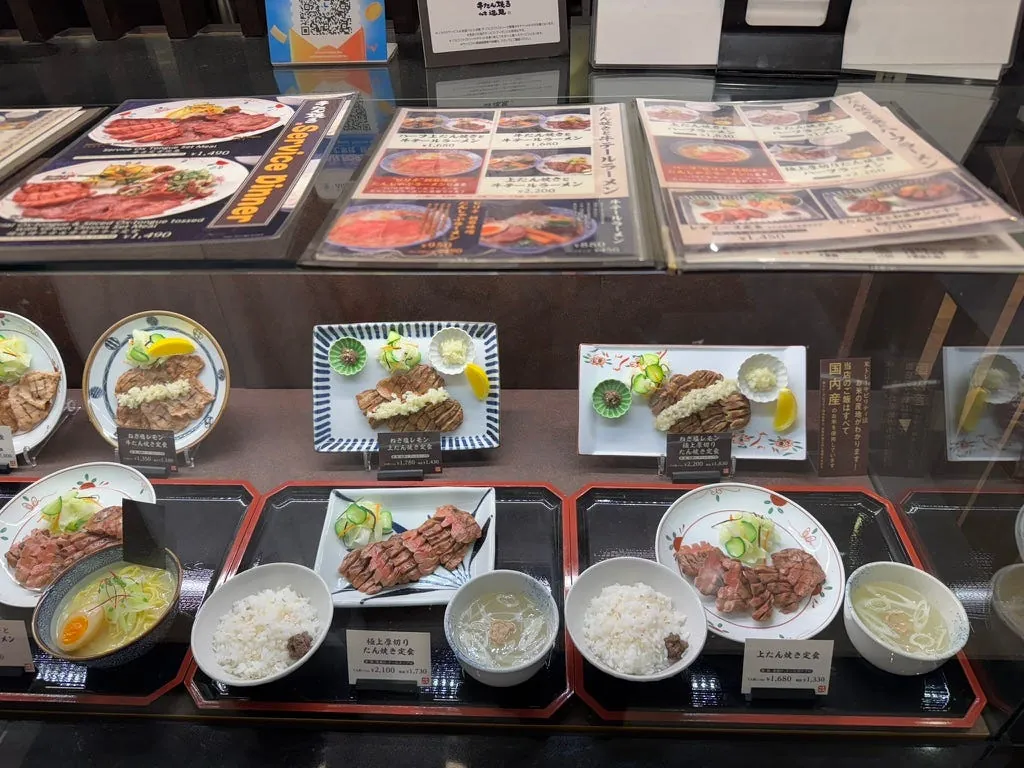
As dinner time approached, I decided to eat at the department store first and ended up choosing beef tongue at Parco.
18:00 Draw lots for the next day’s Chiikawa TOKYO Station tickets (want to see the baby series)
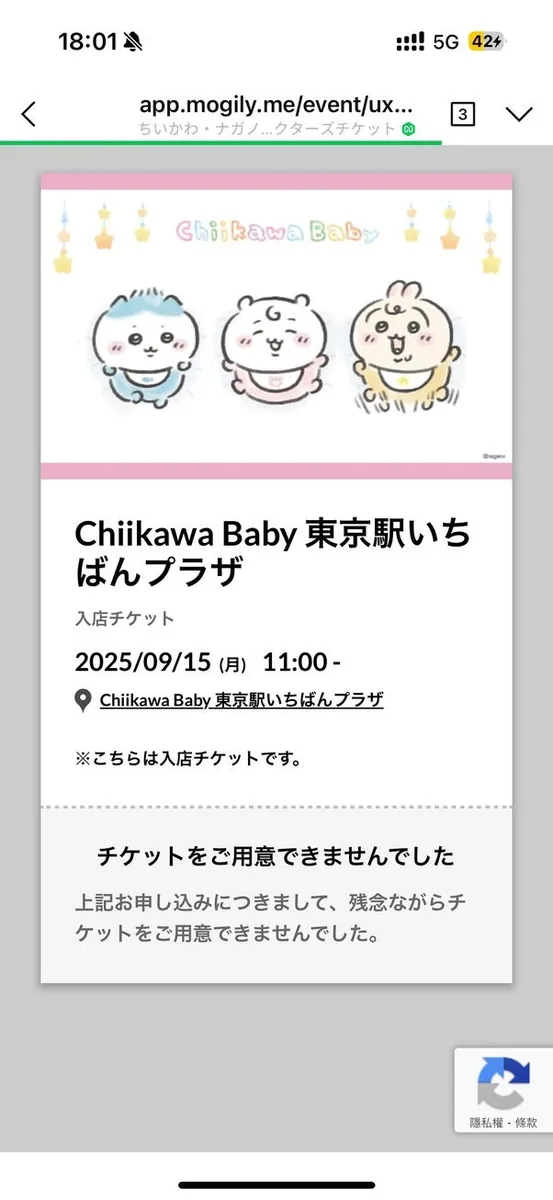
Loading converted… Didn’t get it QQ, very popular.
Start eating after drawing:
I think I have taken out and eaten at this place before before. The beef tongue has great texture and flavor, and the soup tastes like rich beef broth and is very delicious!
19:00 Shopping in Ikebukuro
After eating, continue shopping.
Ikebukuro is also very lively, with many people and numerous shops.
Chiikawa Park
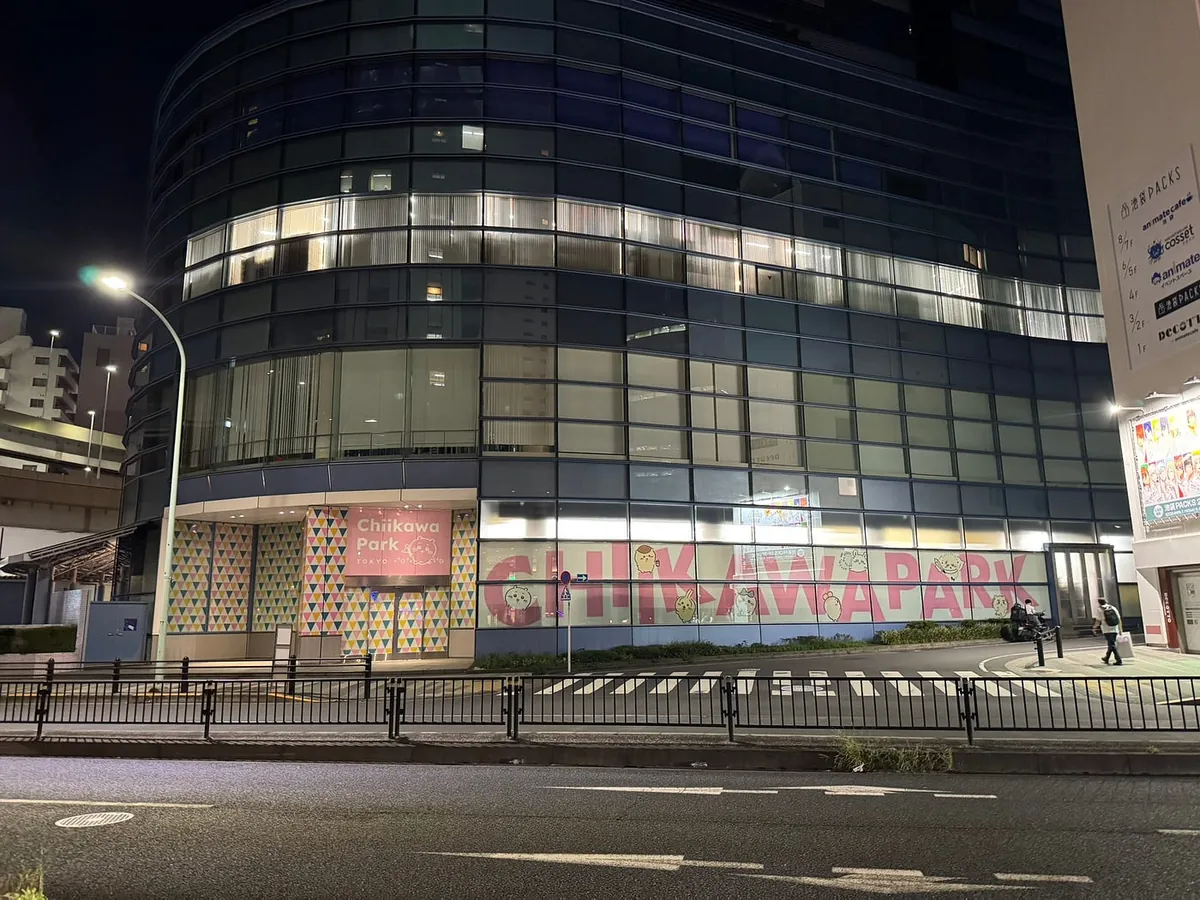
Chiikawa Park is also here, but it was closed since it was late.
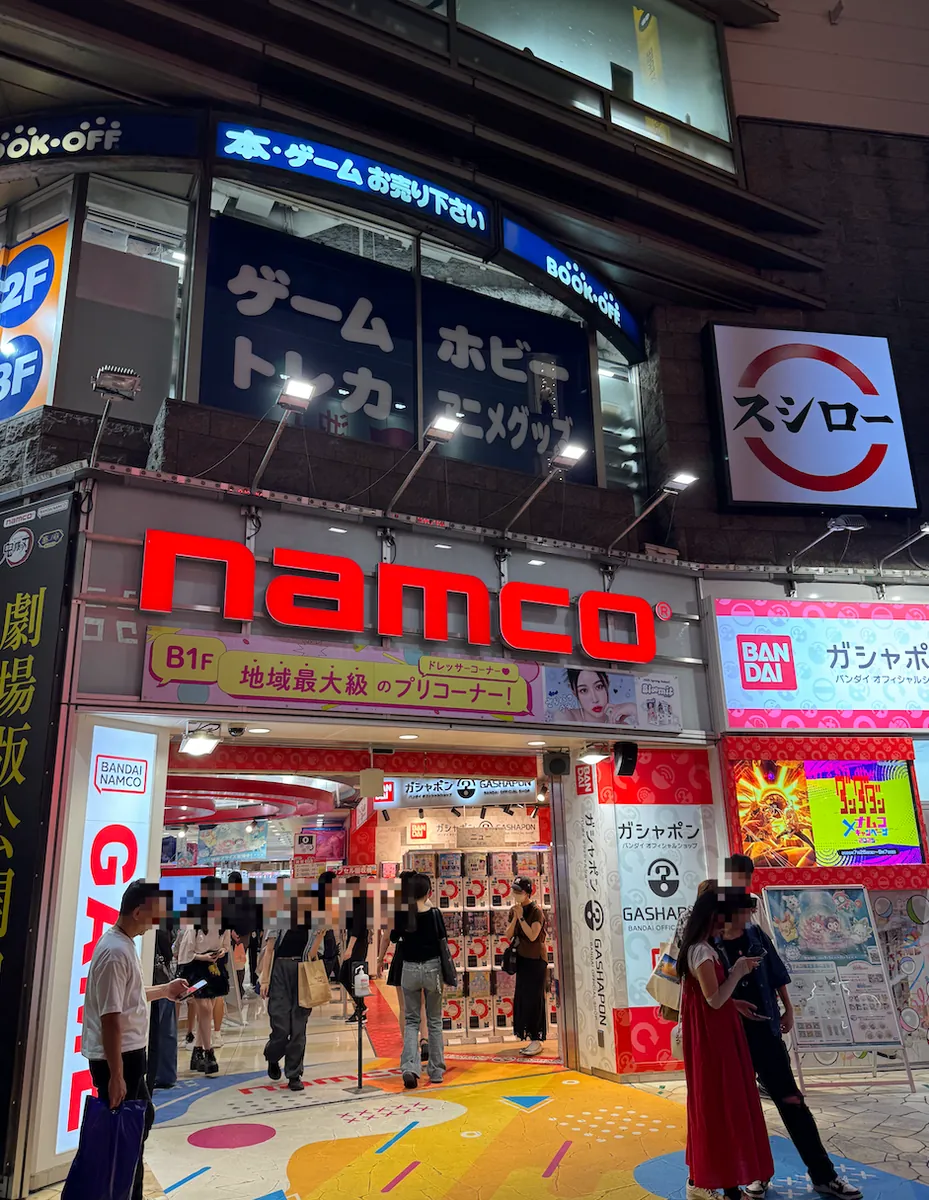
19:15 Sunshine City — Gashapon Ikebukuro Main Store — The World’s Largest Gashapon Shop (3000+ machines)
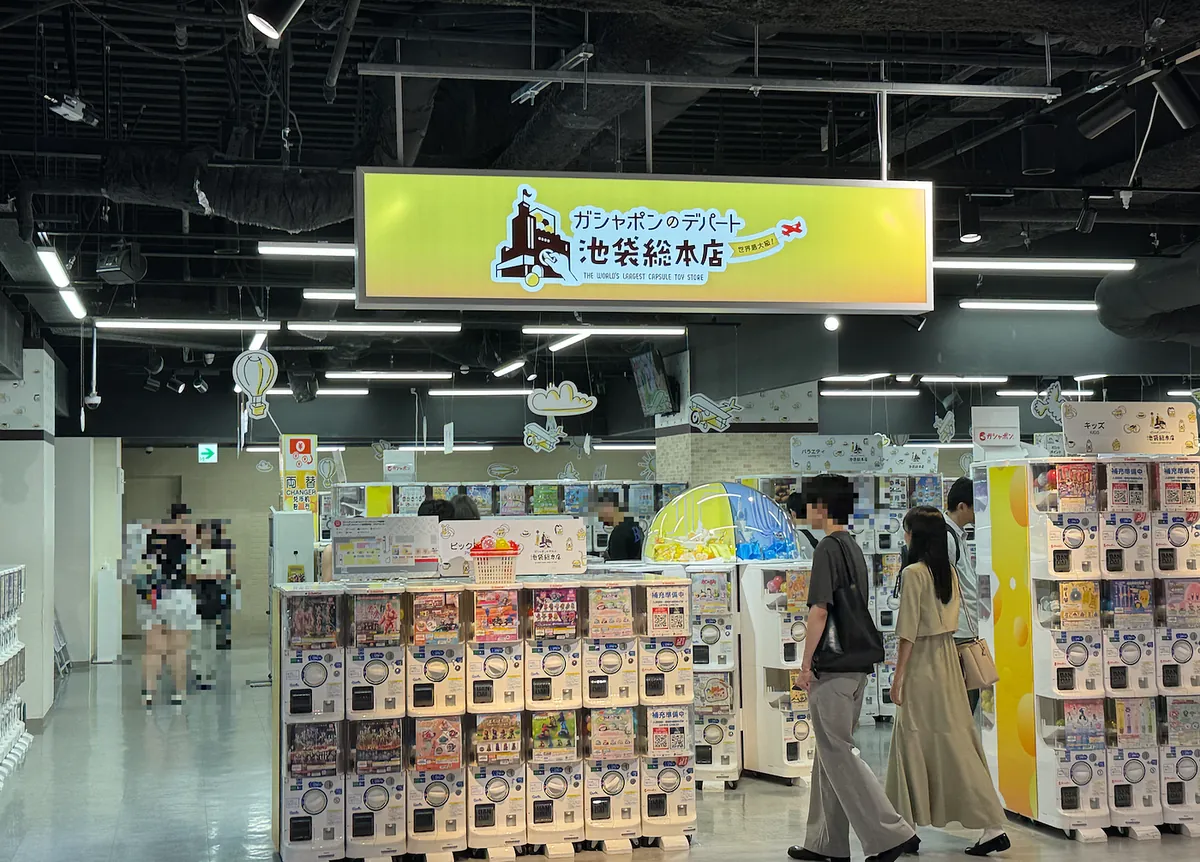
Walked all the way to the world’s largest capsule toy store to hunt for treasures.
In the end, I didn’t play much. Although there were many machines here, nothing special caught my eye, and the categories were quite messy, making it overwhelming to browse.
20:10 Return to Ikebukuro Station — Return to hotel to rest
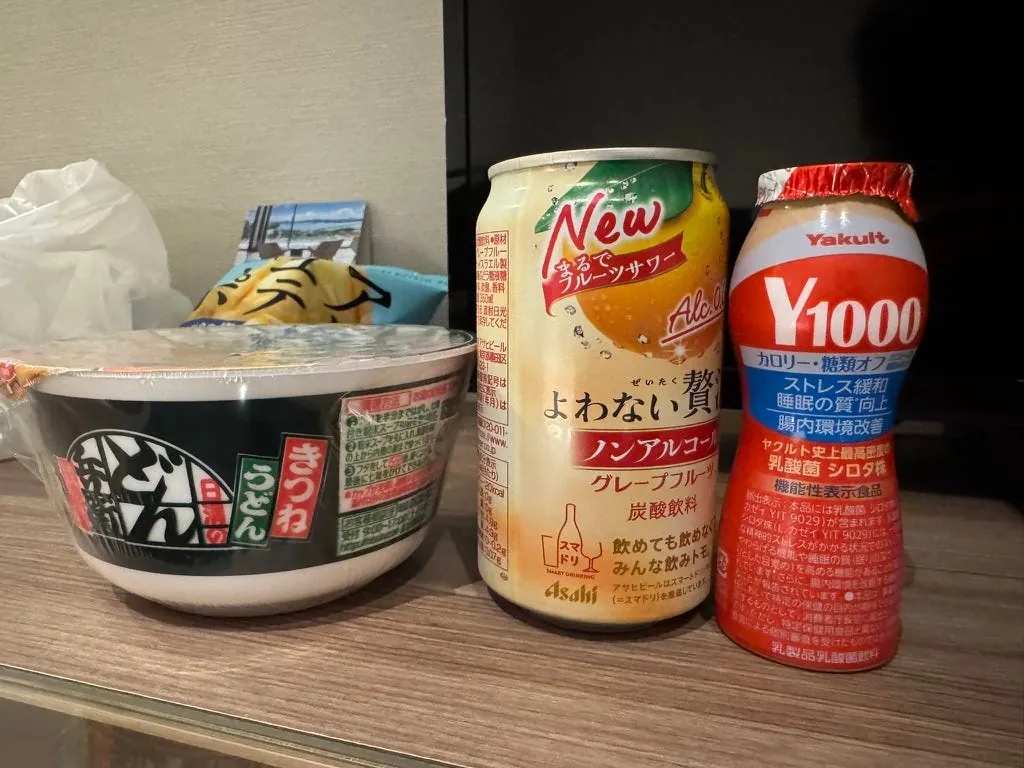
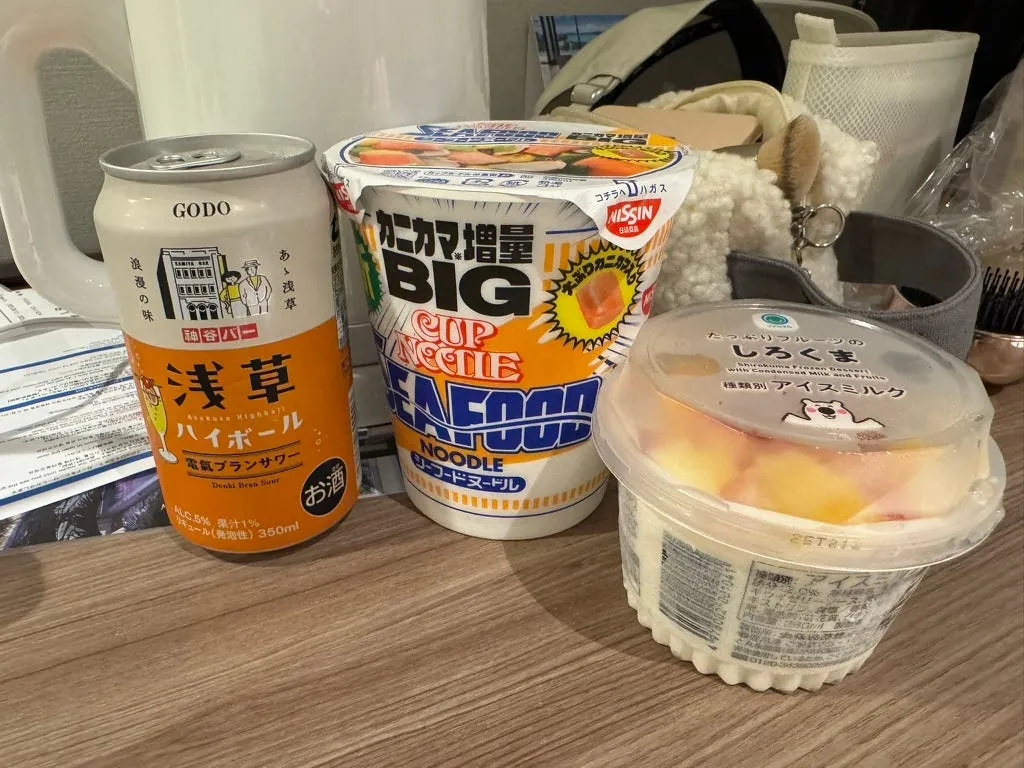
Tonight’s Late-Night Snack:
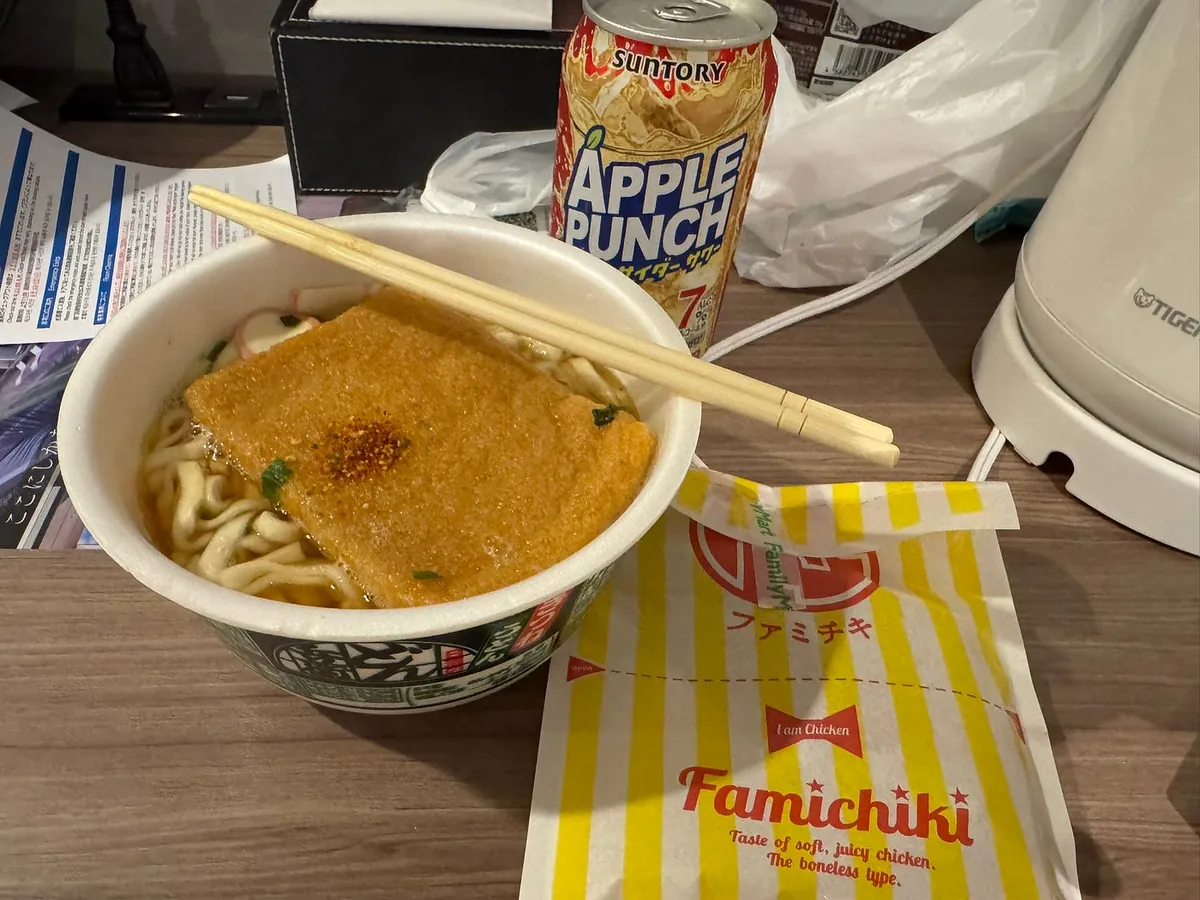
Classic tofu skin instant noodles + convenience store fried chicken + alcohol.
Day 3 (09/15 Mon) — Tokyo Station Ichibangai, Atami Fireworks Festival
Planning to take the 14:57 Shinkansen to Atami.
Highlight of this day — Atami Fireworks Festival; slept in and headed out late in the morning.
11:10 Tokyo Station
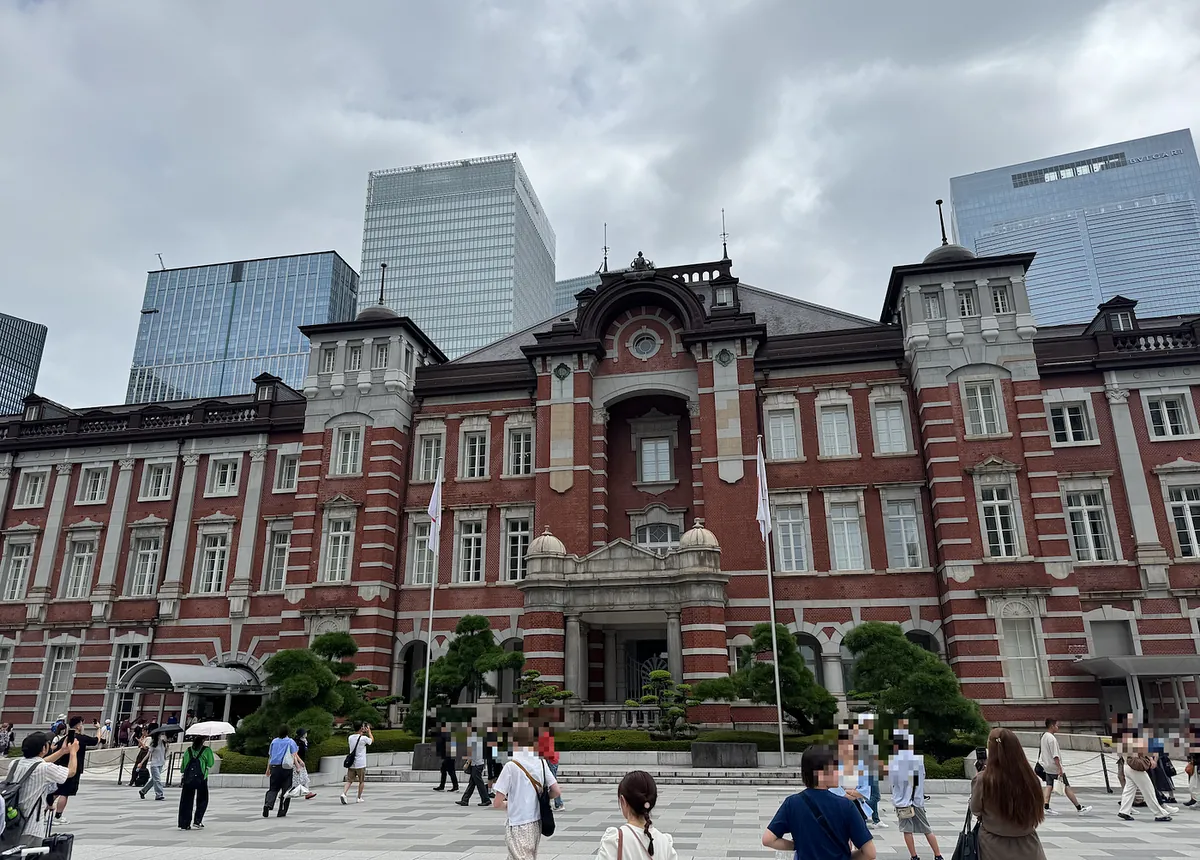
Approaching noon, we first looked for food inside the station.
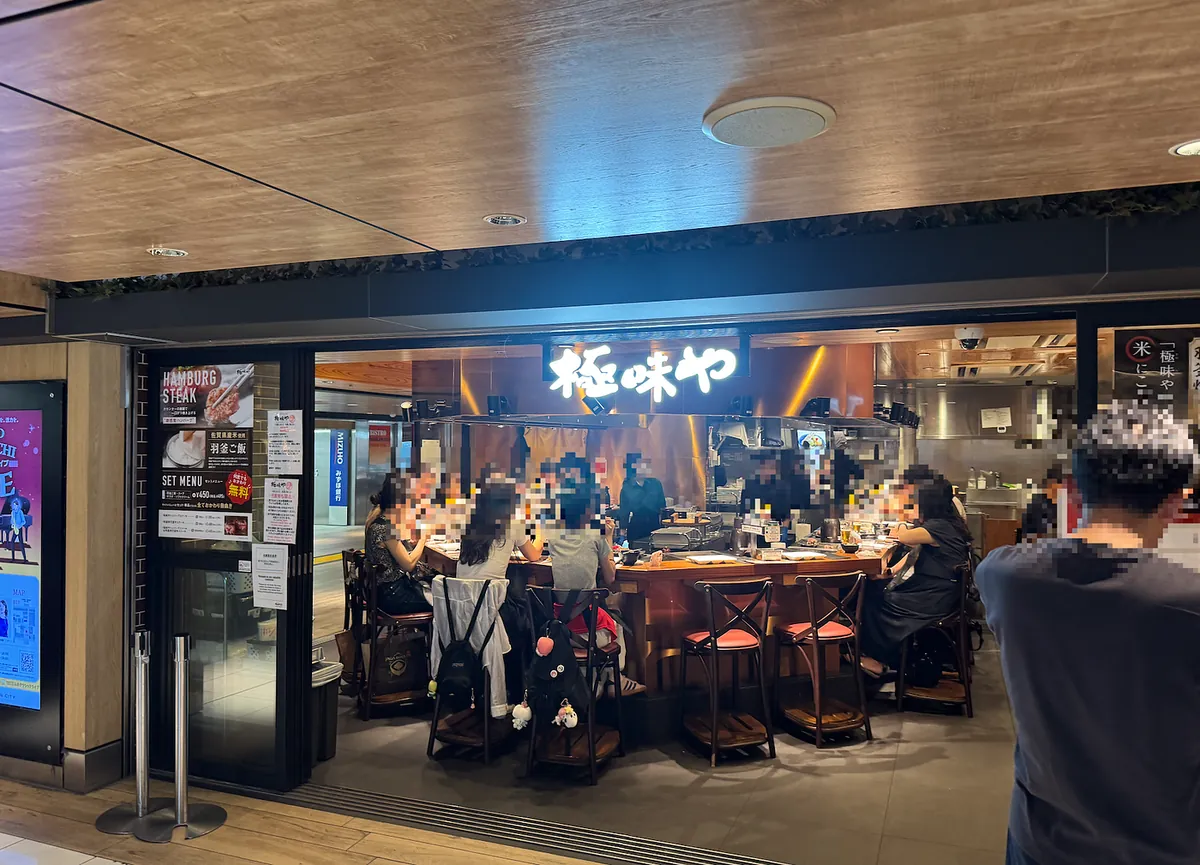
There is also a Gokumiya at Tokyo Station, but it gets very crowded. It opens at 11:00, and many people are already lining up. The wait seems to be about an hour.
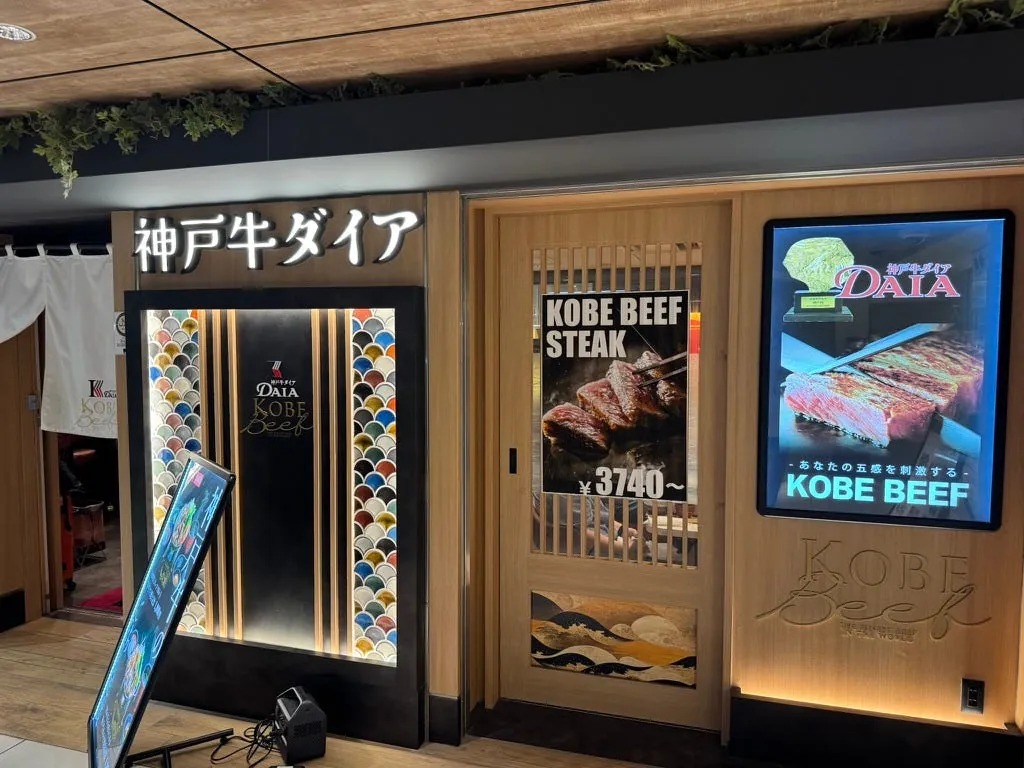
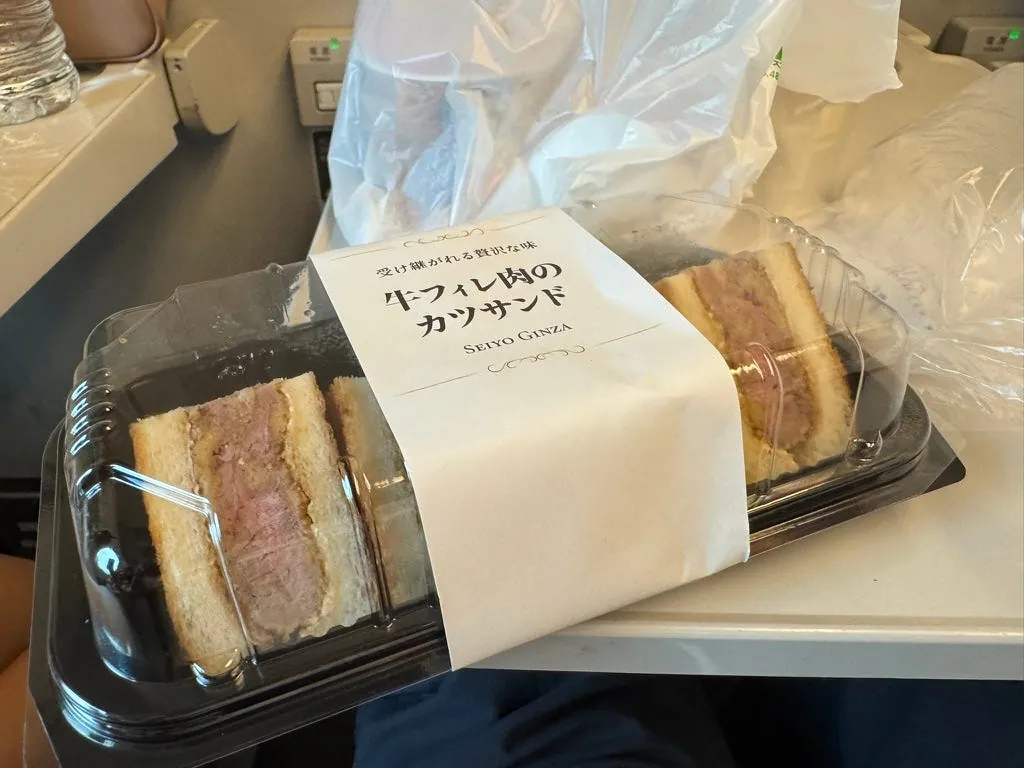
Turn around and go eat Kobe beef across the street.
Kobebeef Daia Tokyo Station Store — 神戸牛ダイア 東京駅店
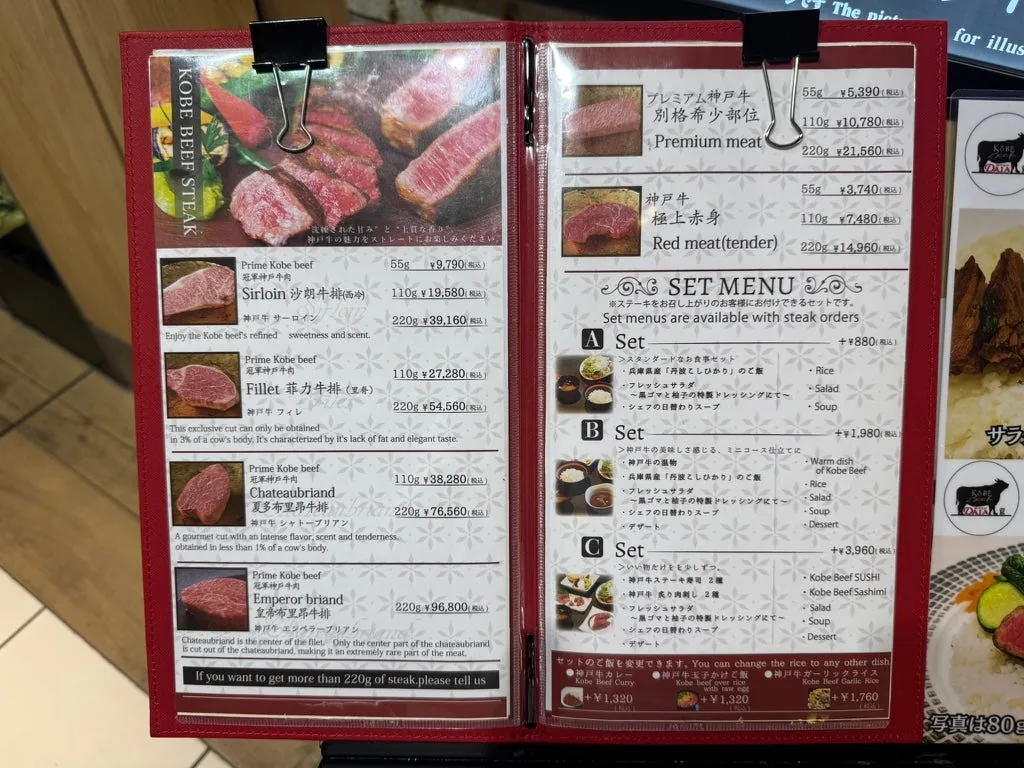
A nostalgic great taste, last time in Kobe I specially went to eat Kobe beef (Kissho Kichi), the price in Tokyo is about ¥8,000 more expensive than in Kobe (Prime Kobe beef sirloin 220g Tokyo ¥39,160 / Kobe ¥31,600).
Just like the taste I remembered, the meat is tender with no off-flavors, only the natural aroma of beef; before I knew it, it was all gone!
12:20 Start exploring Tokyo Station Underground First Avenue
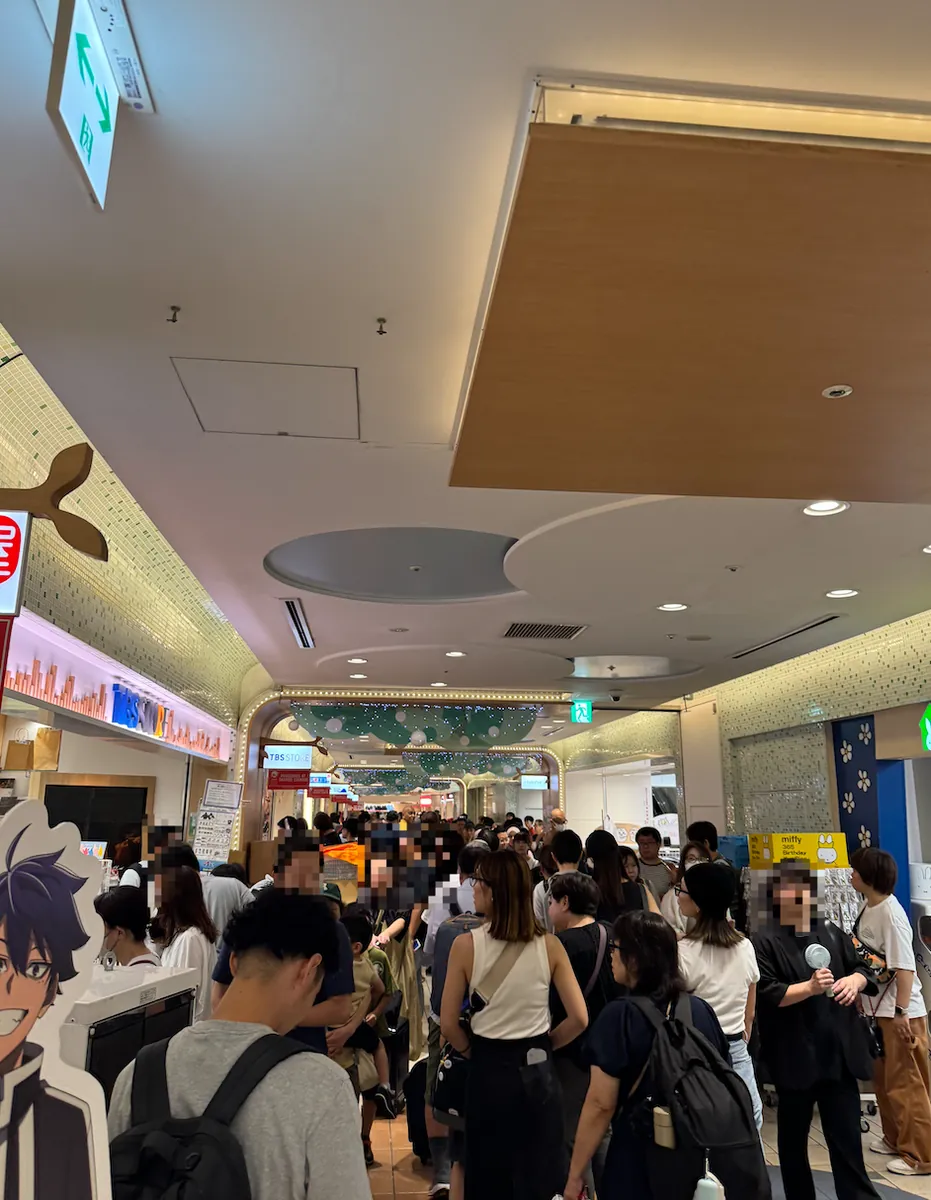
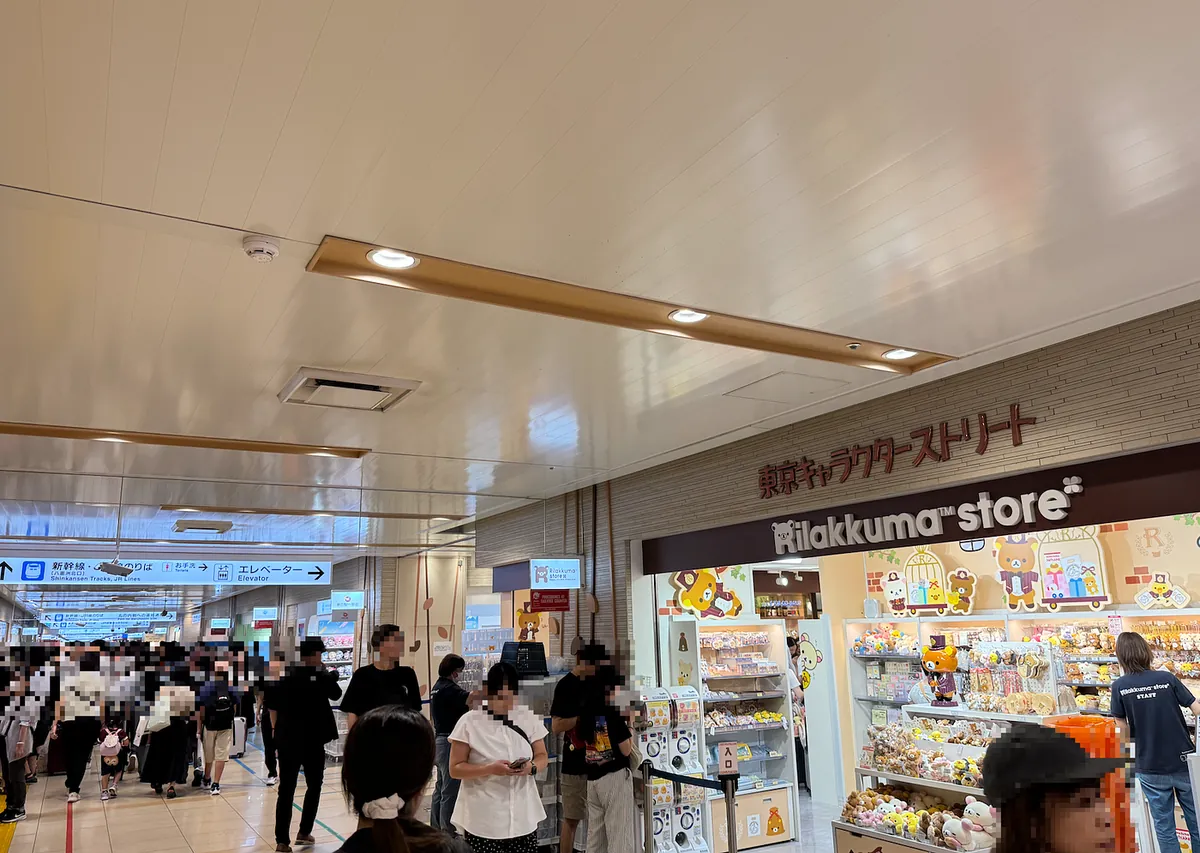
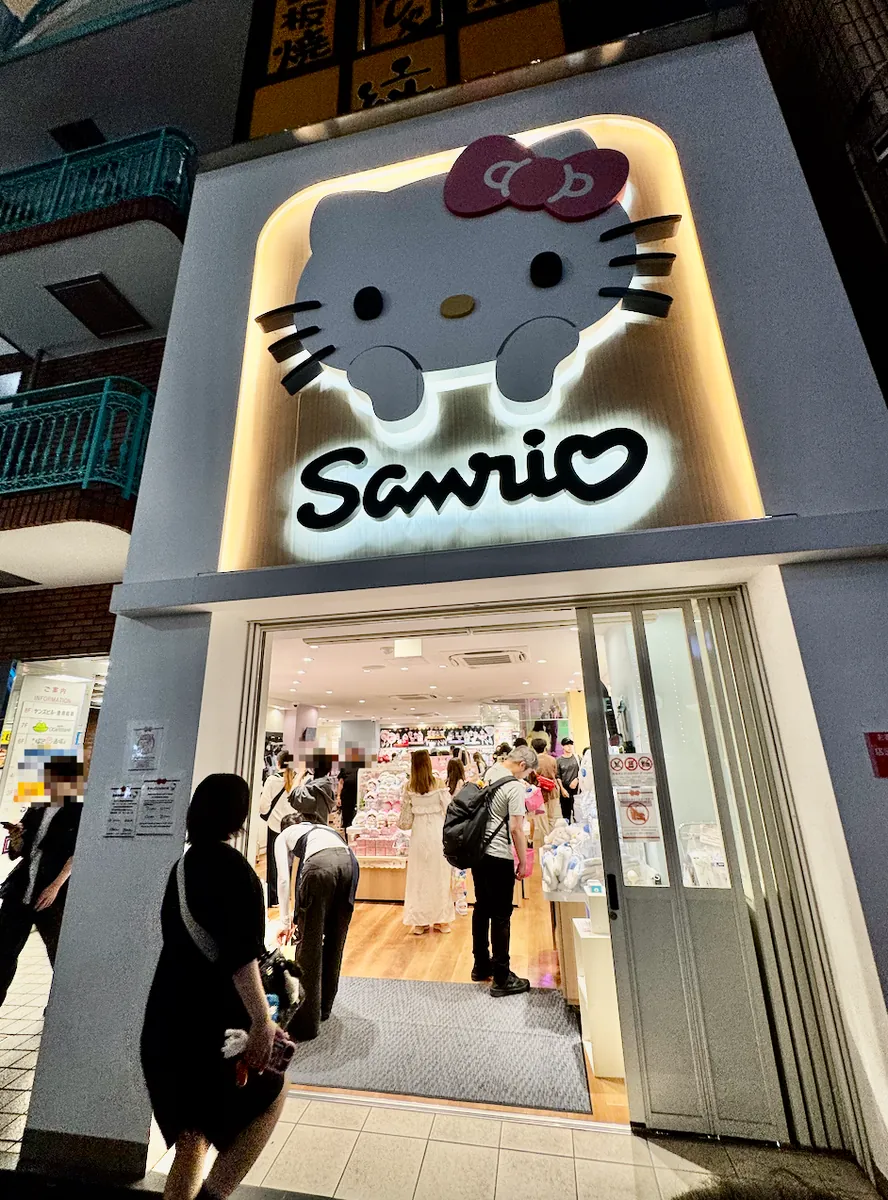
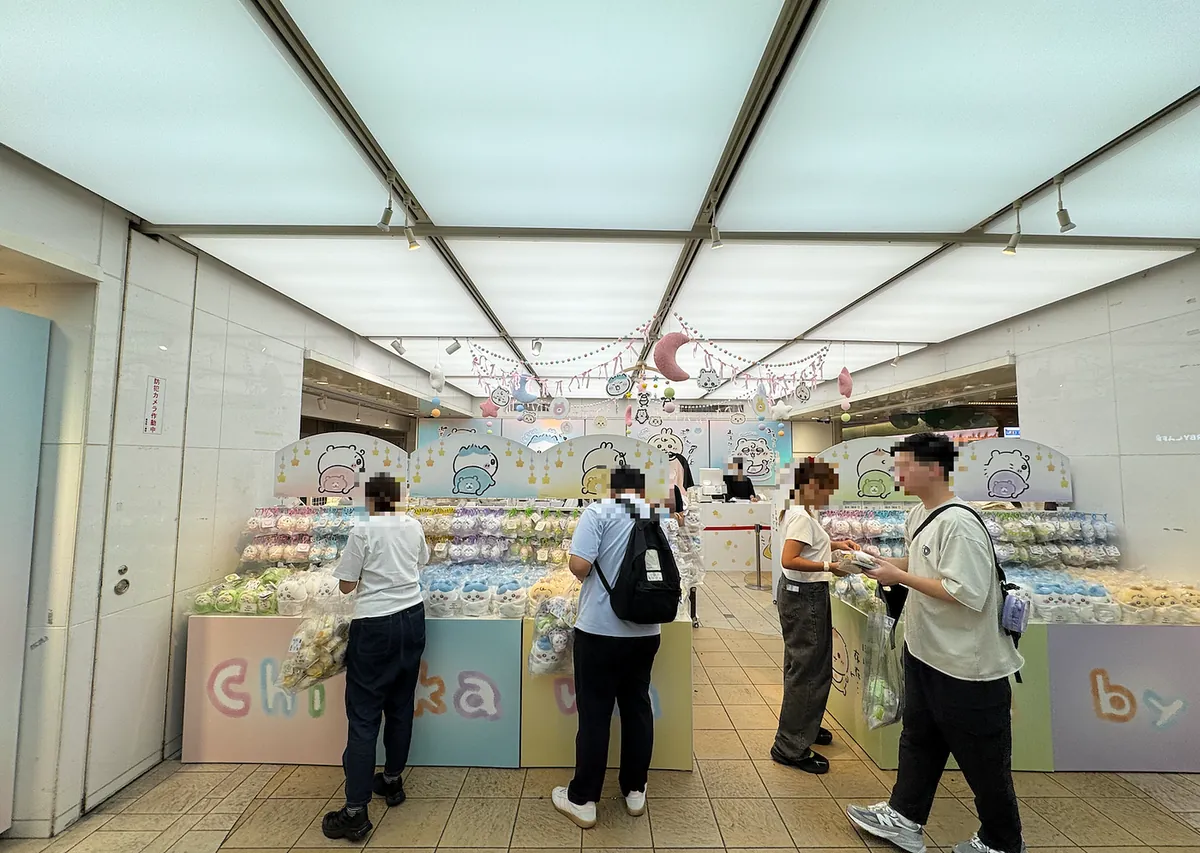
The underground mall is crowded, featuring almost every IP you can think of: Sanrio, One Piece, Jump Store, Rilakkuma, Acorn Republic, Snoopy, Chiikawa, and more.
Chiikawa baby Tokyo station
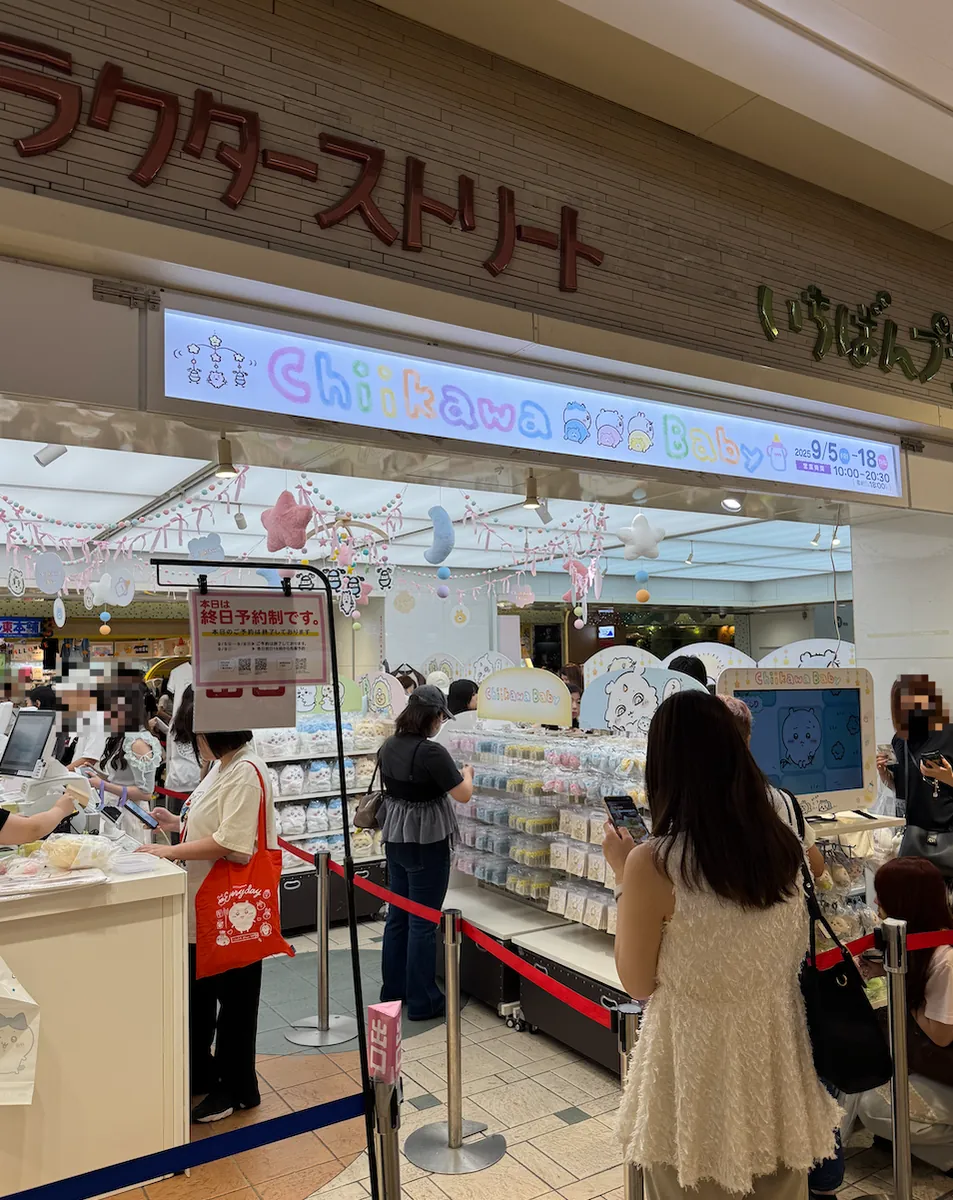
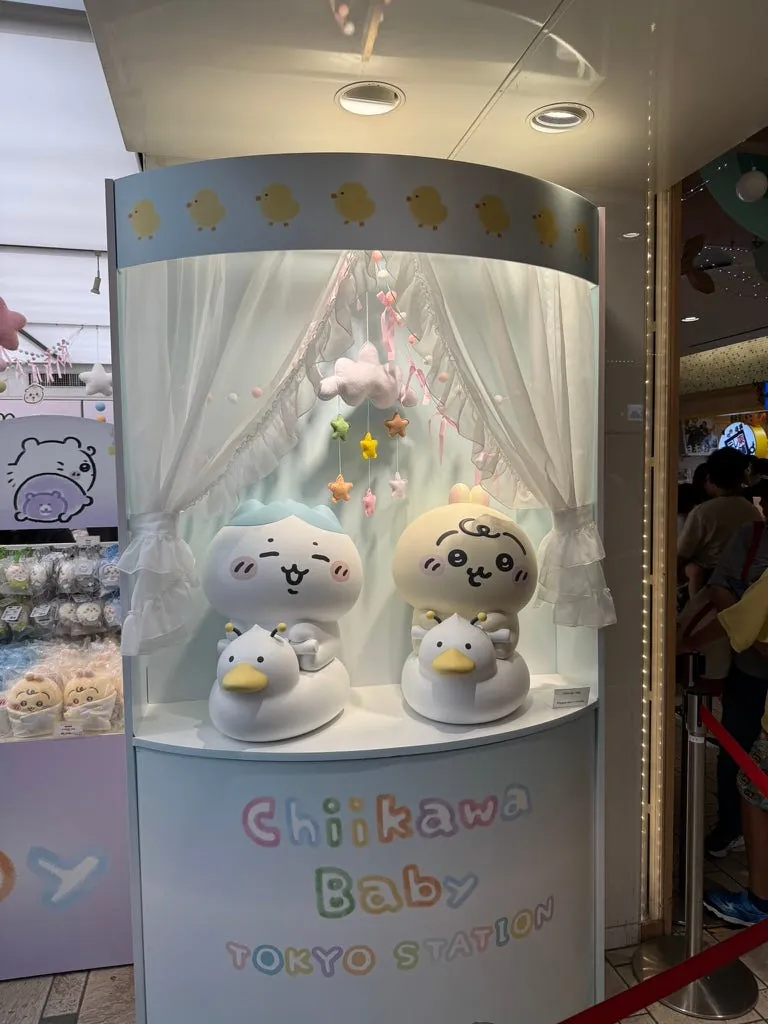
Didn’t get a ticket, so I just passed by to take some photos. The stock looked ample and there were few people (feels like they didn’t control the crowd enough?).
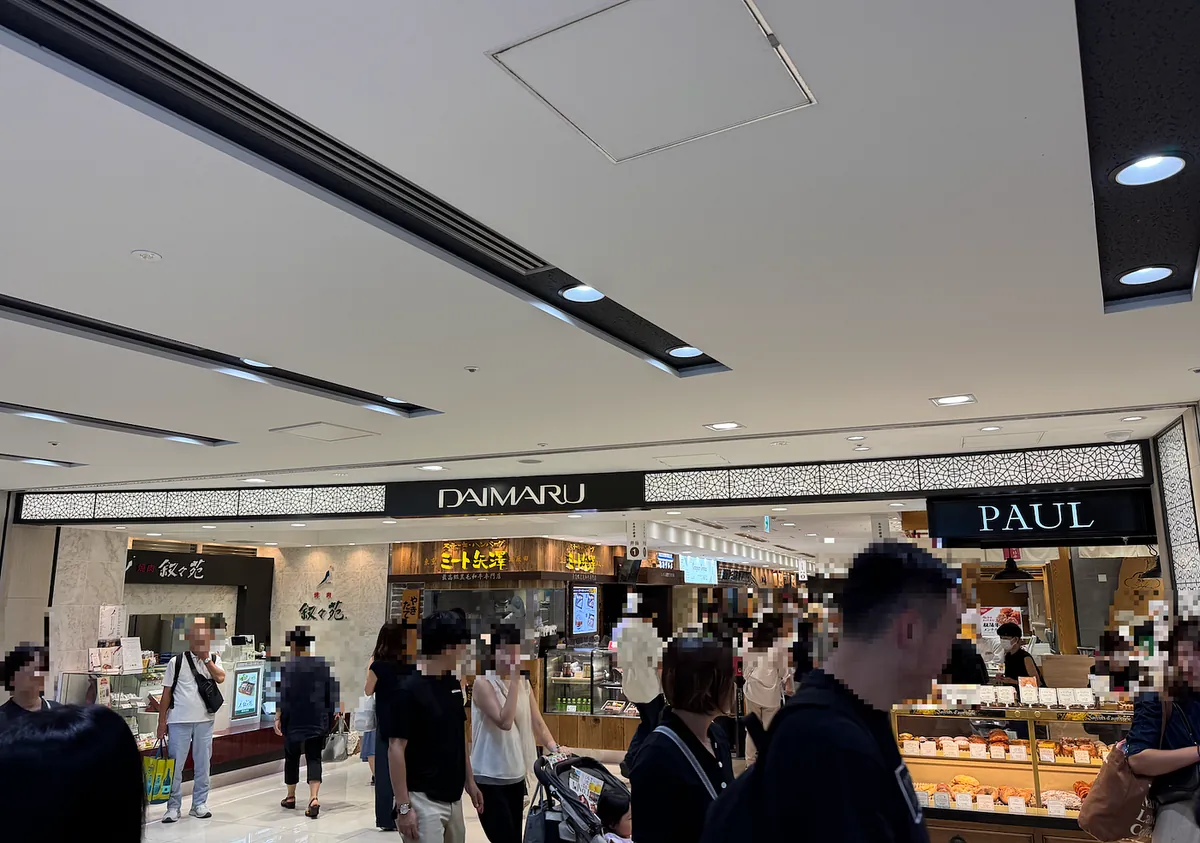
If you haven’t had enough shopping, you can also visit the adjacent Daimaru Department Store or continue walking to other nearby underground shopping streets.
14:00 Tax refund and luggage storage at Tokyo Station
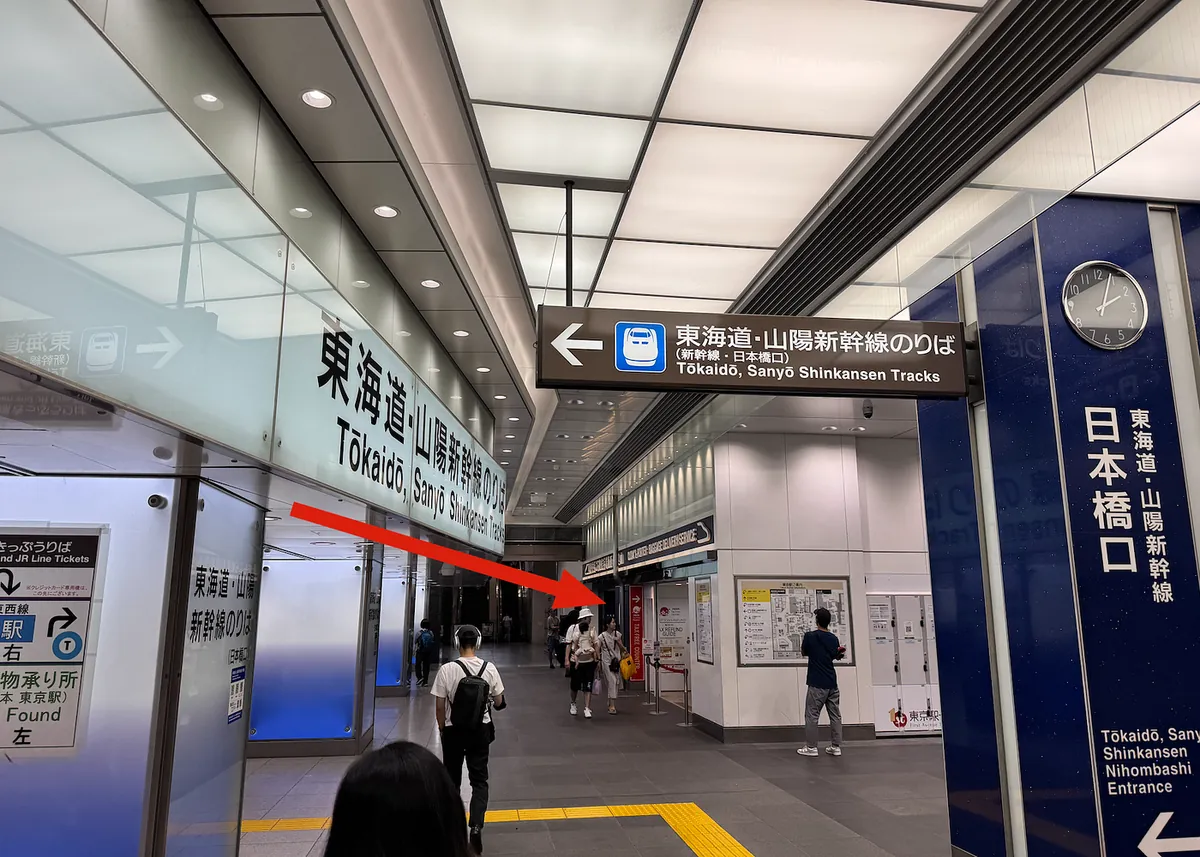
For tax refunds on shopping at Tokyo Station, you can go directly back to the first floor and find the tax refund counter opposite the Tokaido Sanyo Shinkansen Nihonbashi Exit.
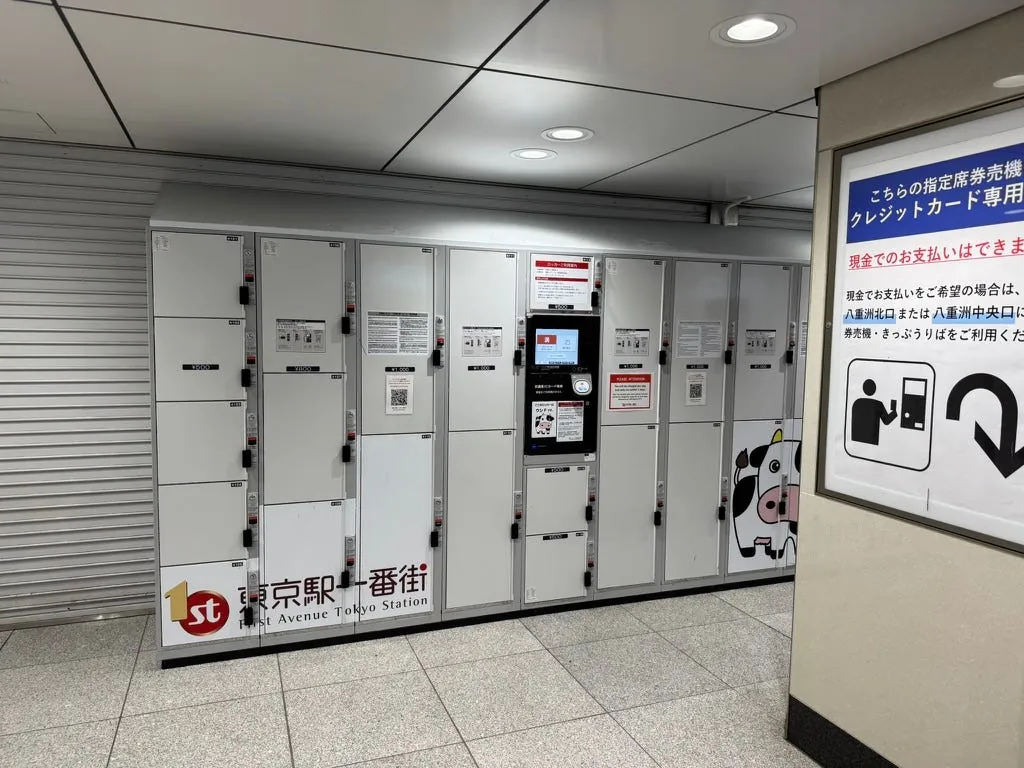
Bought some items. Since the locker counter closes at 8:00 PM, I looked for lockers to store my belongings. There are many lockers available here.
After storing our luggage, we went to the food court to buy some snacks to eat on the way.
14:30 Prepare to take the train to Atami
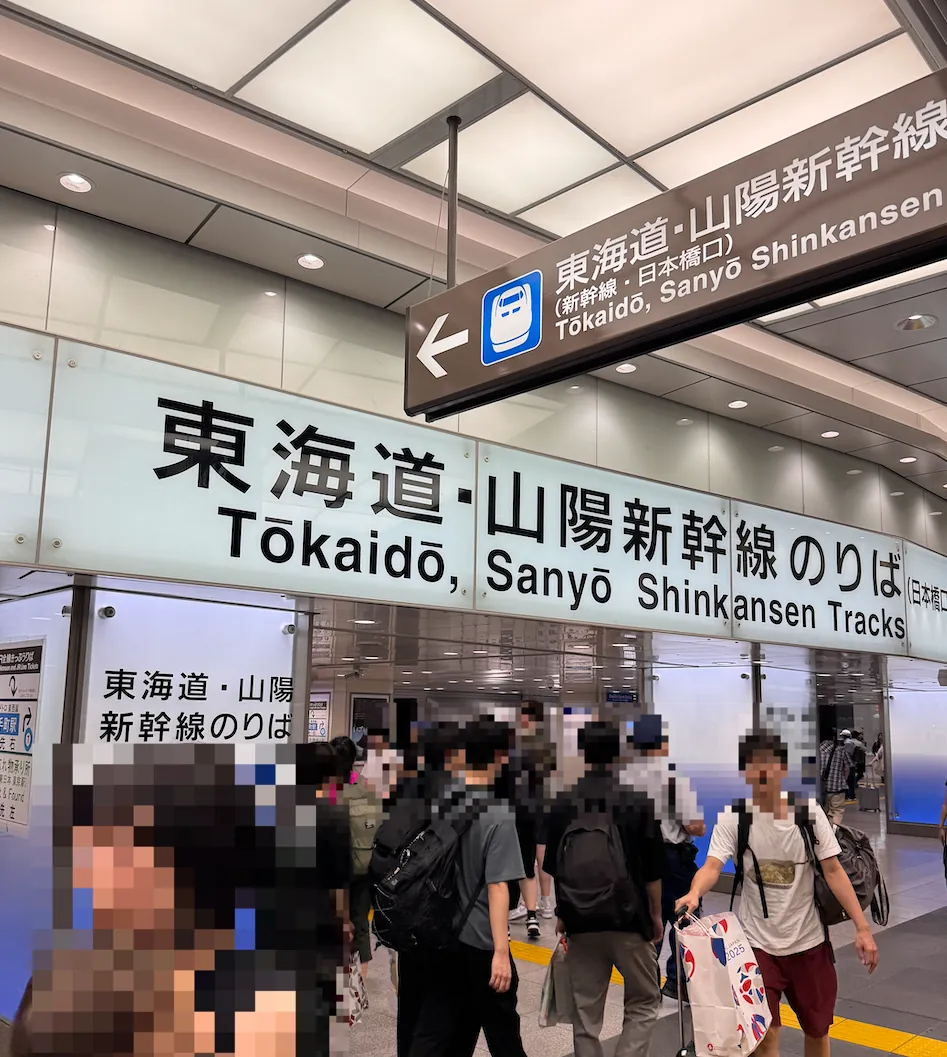
Also entering through the Nihonbashi Entrance of the Tokaido Sanyo Shinkansen.
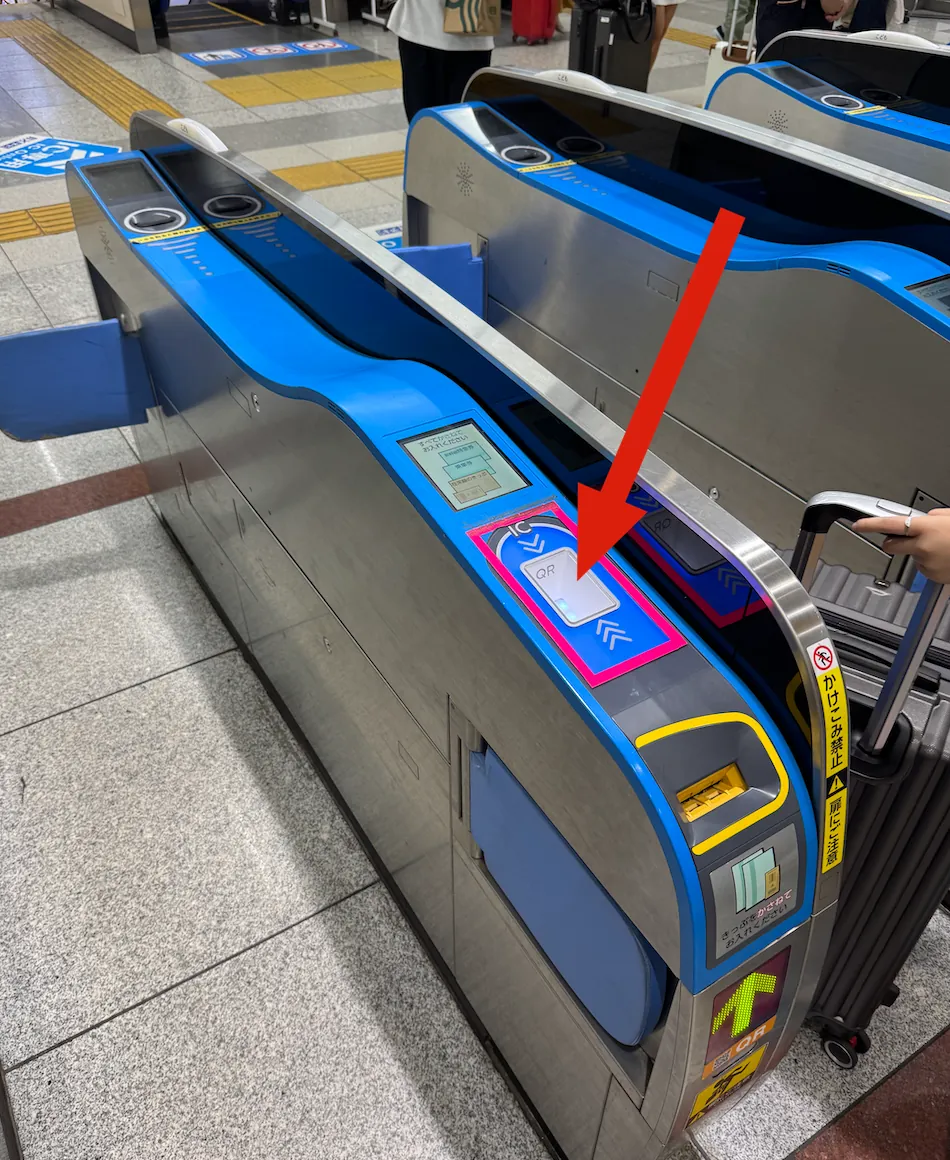
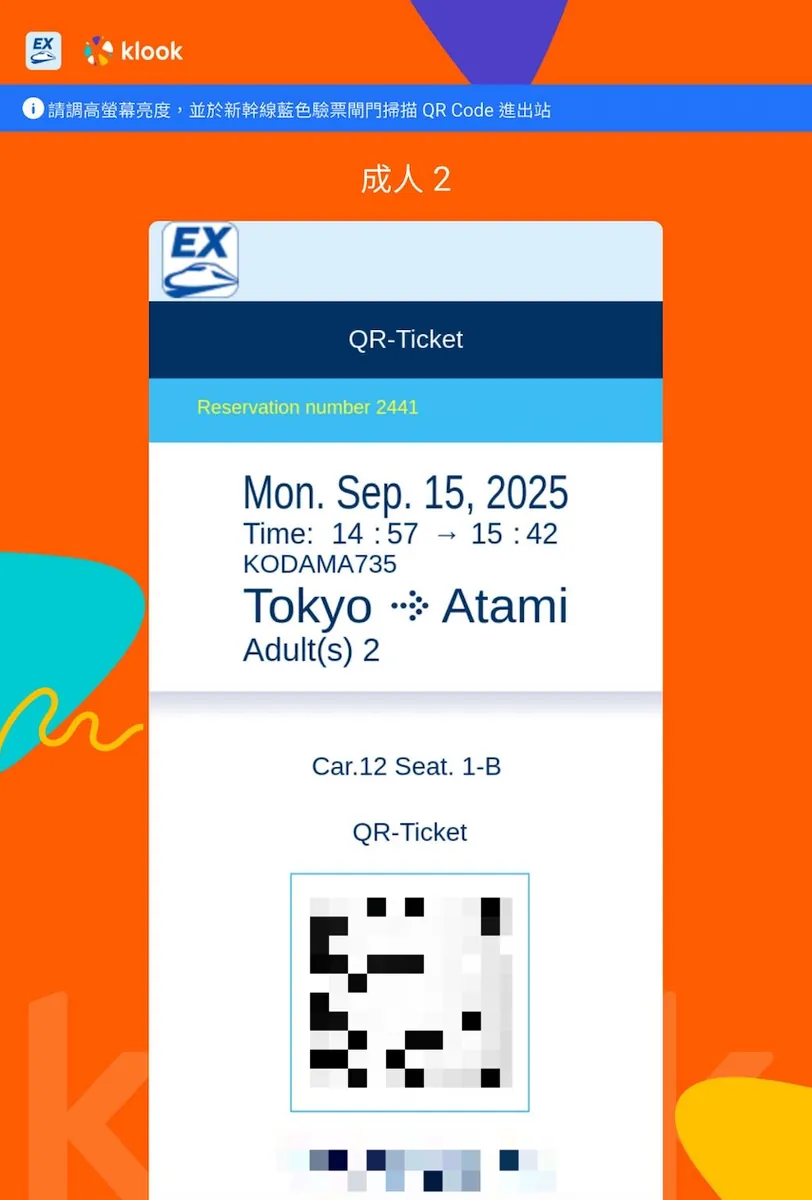
For e-tickets purchased in advance on KKday / Klook, there is no need to exchange tickets. Just use the blue gate and hold your phone’s QR code close to the sensor to enter.
Entering the station successfully will print out a ticket (for easy information viewing or ticket inspection on the train), but you still need to use the mobile QR code for entry and exit.
14:57 Depart Tokyo for Atami
A quick snack break.
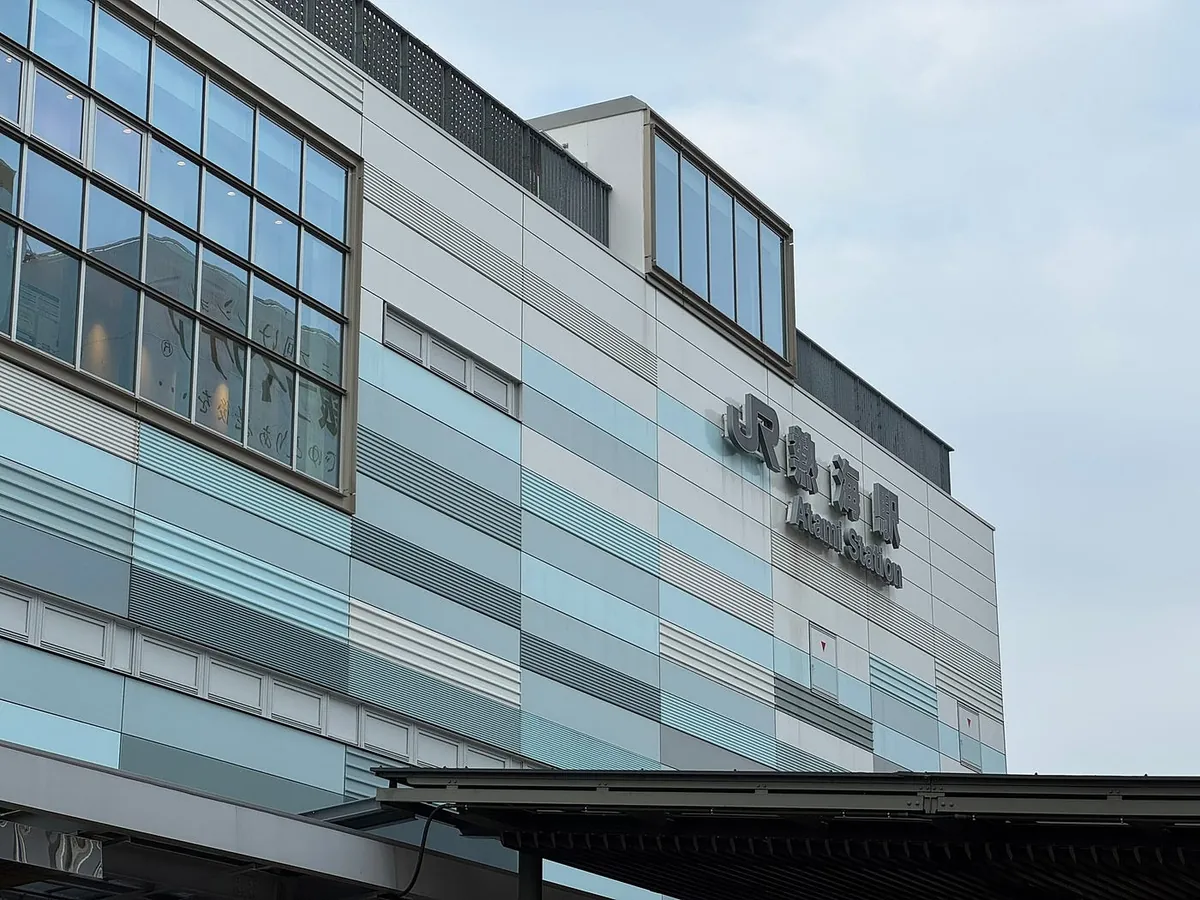
15:42 Arrive at Atami
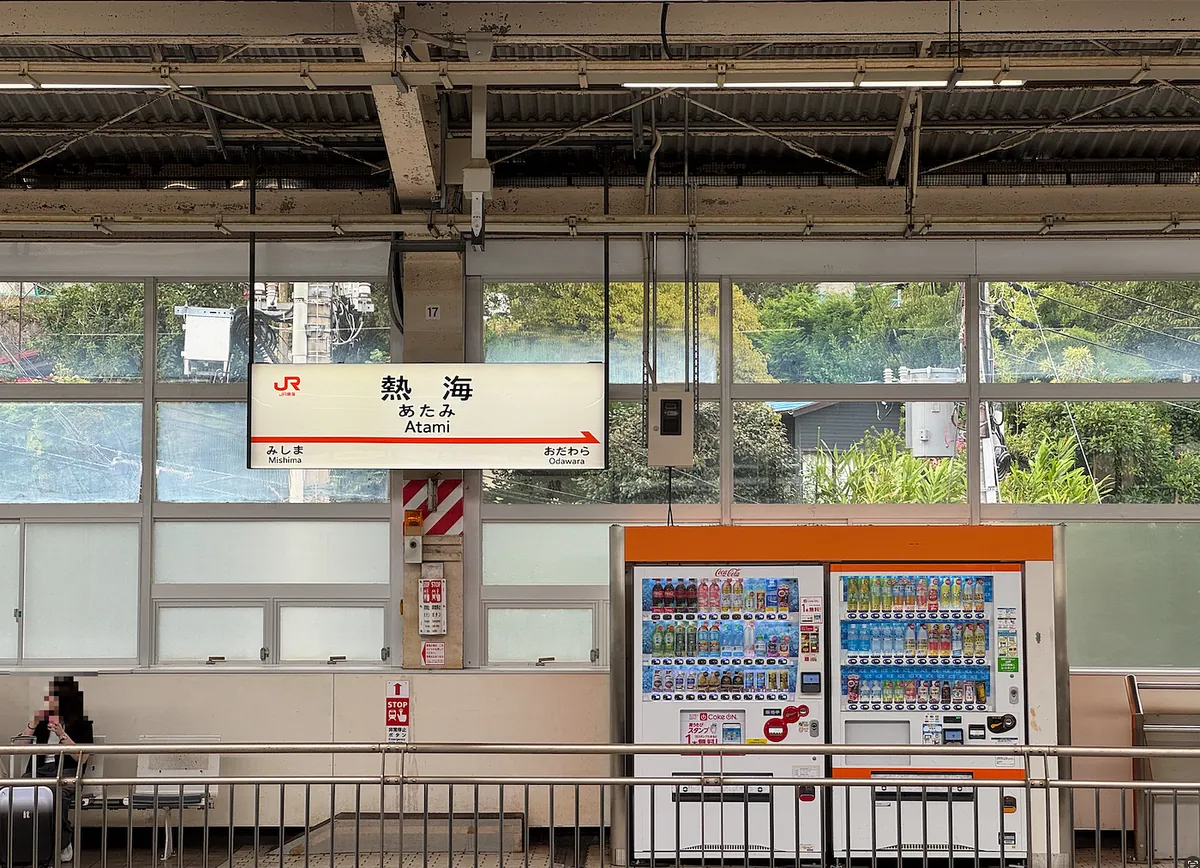
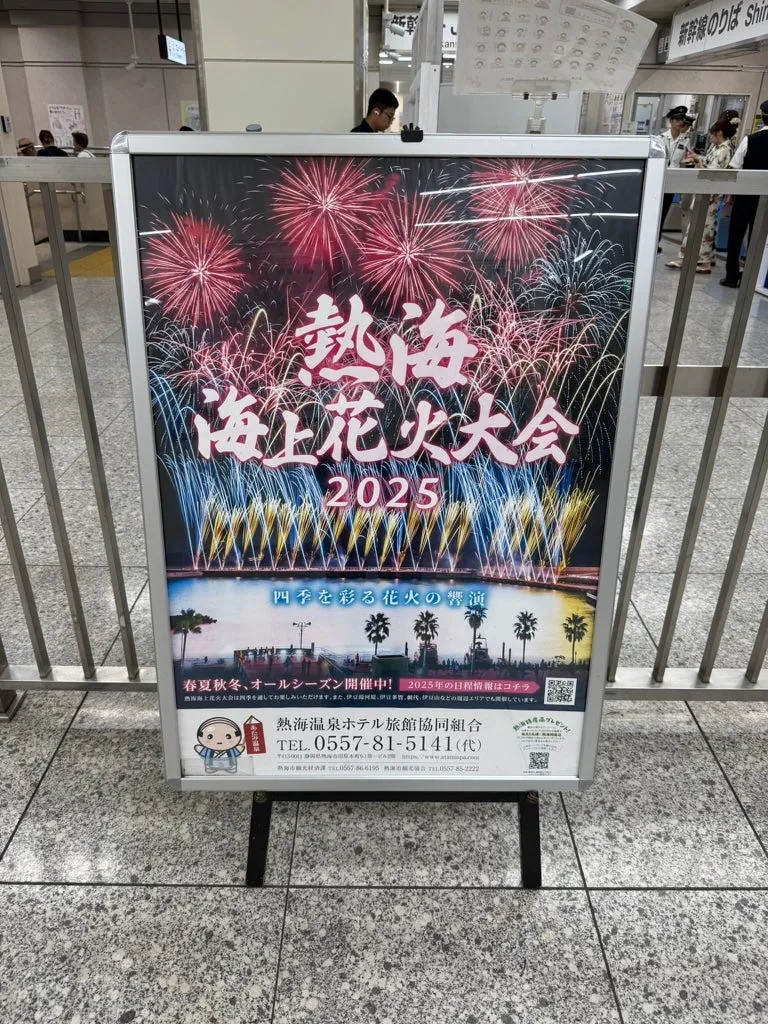
Welcome to the 2025 Atami Sea Fireworks Festival!
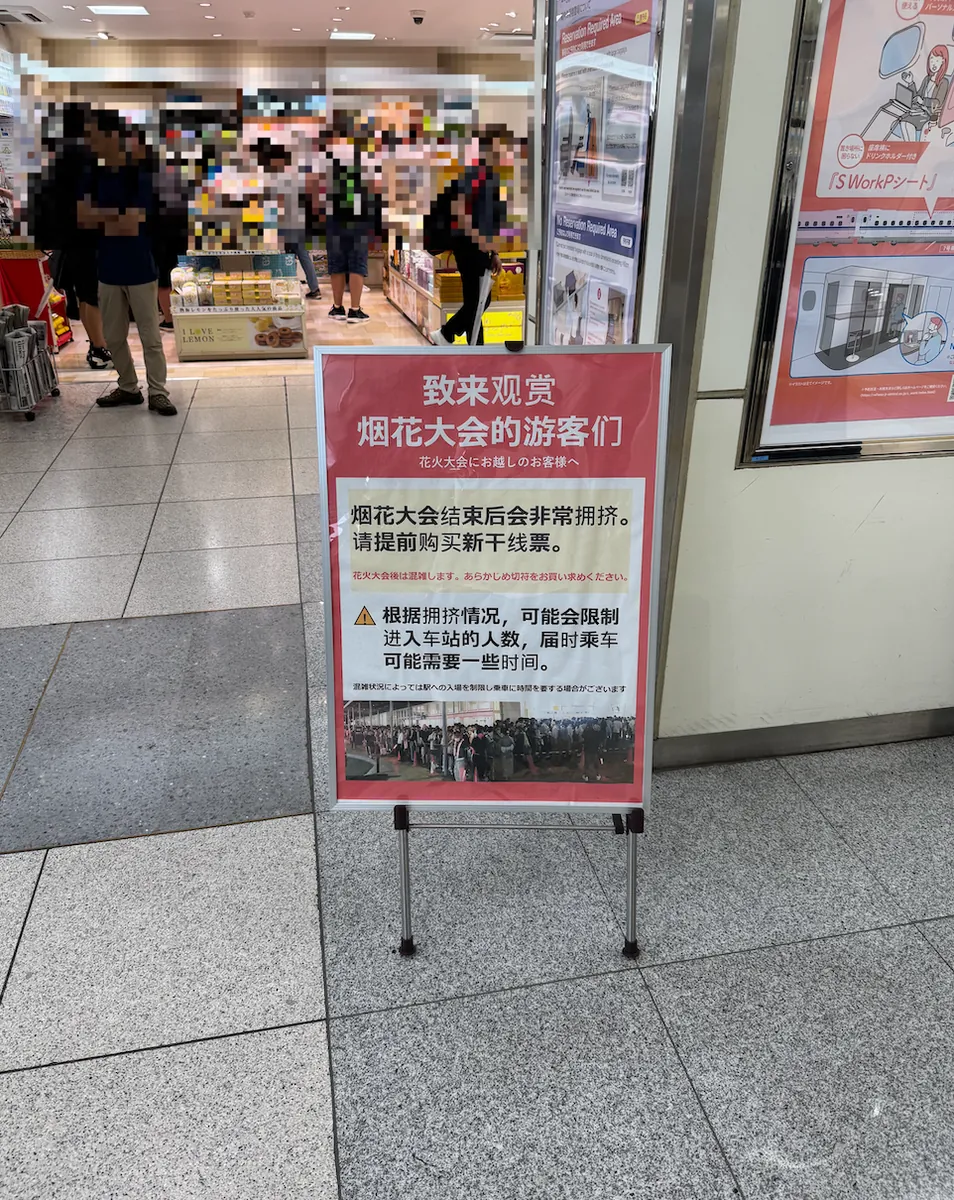
Official reminder: The fireworks festival will end with large crowds, so please purchase your Shinkansen tickets in advance.
After exiting the Shinkansen, you still need to pass through the conventional line ticket gate (just show the staff your ticket QR code to exit).
The weather was overcast, but the advantage was that it wasn’t too sunny!
The Glorious Yakiniku Journey
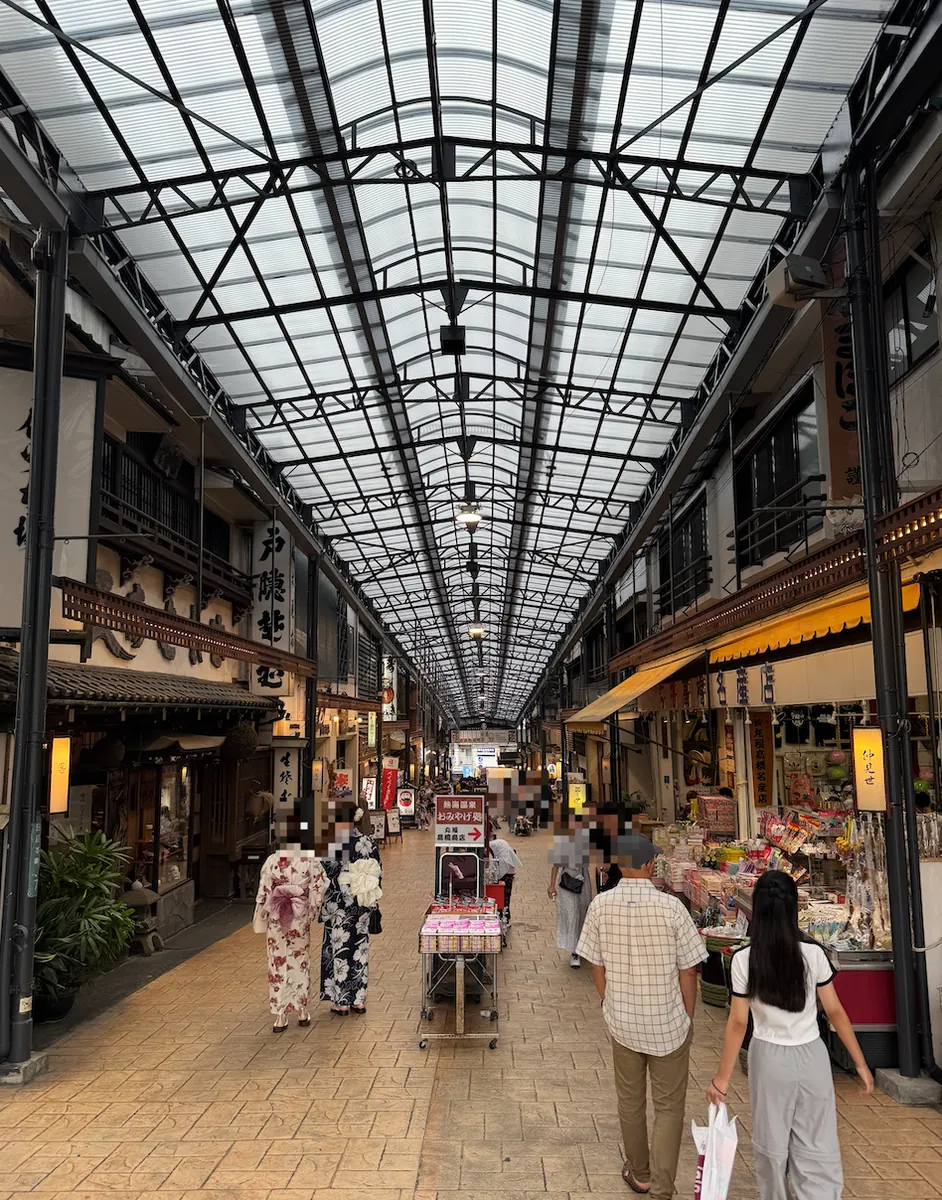

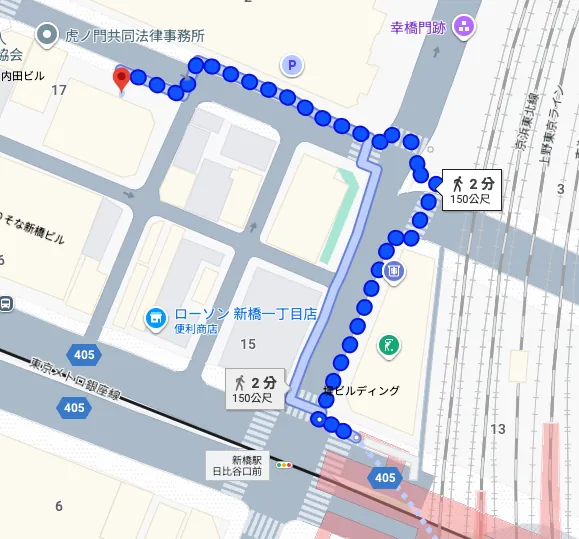
Walk straight down after passing through the shopping street, and you will reach the beach.
The route is shown in the above image. First, head to Lawson to buy some food and drinks, then go to the beach for a picnic and wait for the fireworks.
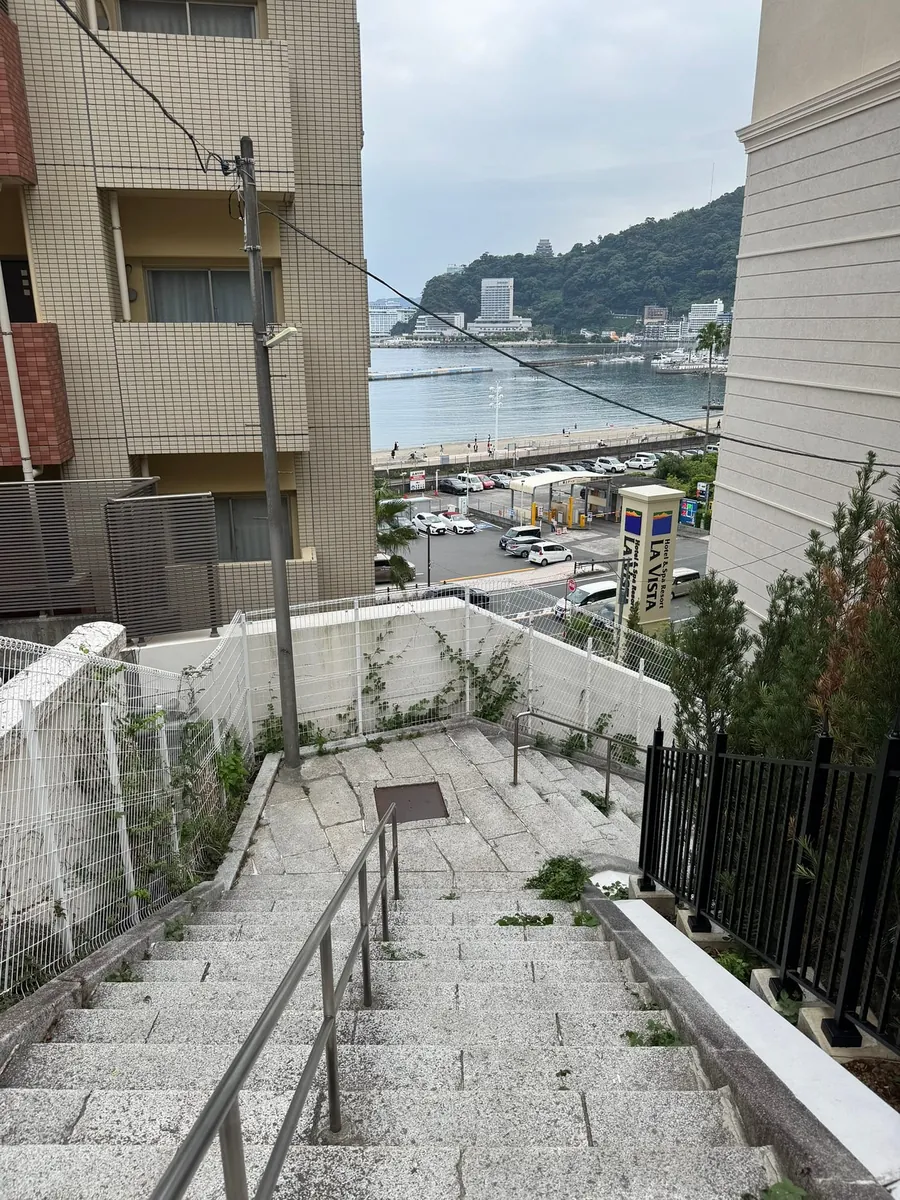
The fireworks are launched roughly at the location shown in the picture above. You can walk to Higashikaigancho and wait on the beach further back. Here, you can also go into the water, and there are shared restrooms and showers nearby for changing. (However, it’s recommended to check in advance, as some facilities may be old and poorly maintained.)
You can also see Atami Castle from Atami Beach in the distance.
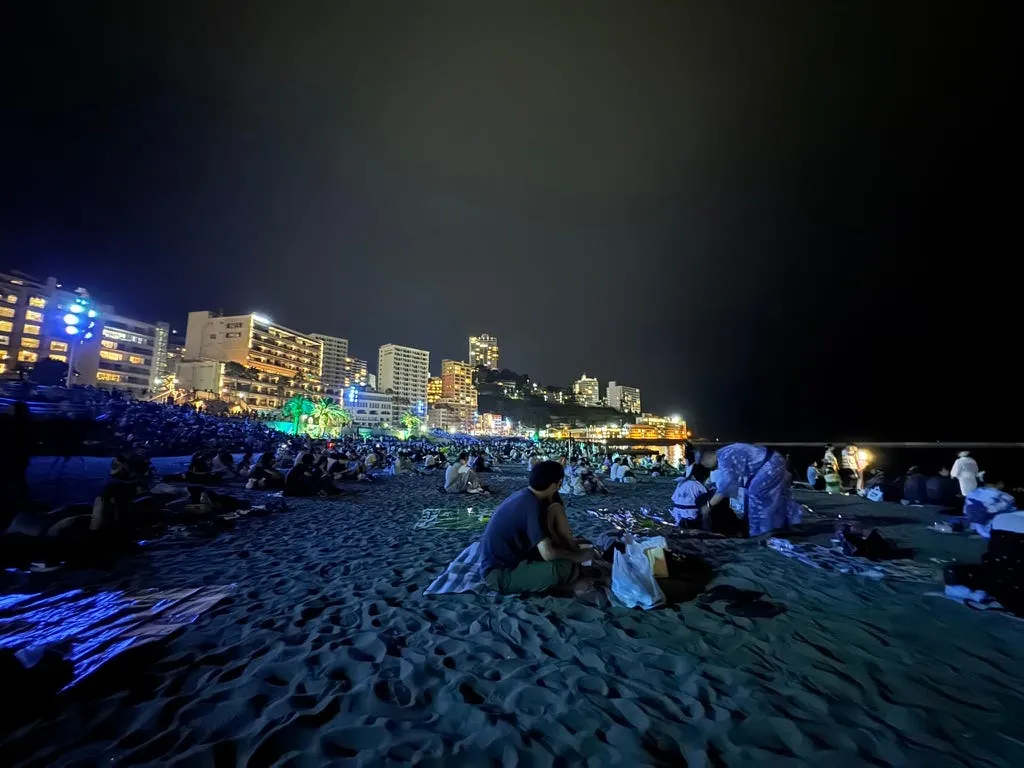
17:00 Atami Sunshine Beach
It doesn’t feel necessary to arrive in Atami so early; the crowd is not as large as expected. Before around 18:30, there are still spots available on the beach, and even by the 20:20 fireworks show, there are still places to watch.
18:00 Atami Fireworks Festival Beach Crowd
You can see that at 18:00 there are still many seats available, or many people come early to lay out picnic mats to reserve spots and then walk around nearby, returning just before the fireworks start.
A bit further ahead around the Sky Deck area, there is a small night market selling food (though the cost-performance ratio is not great):
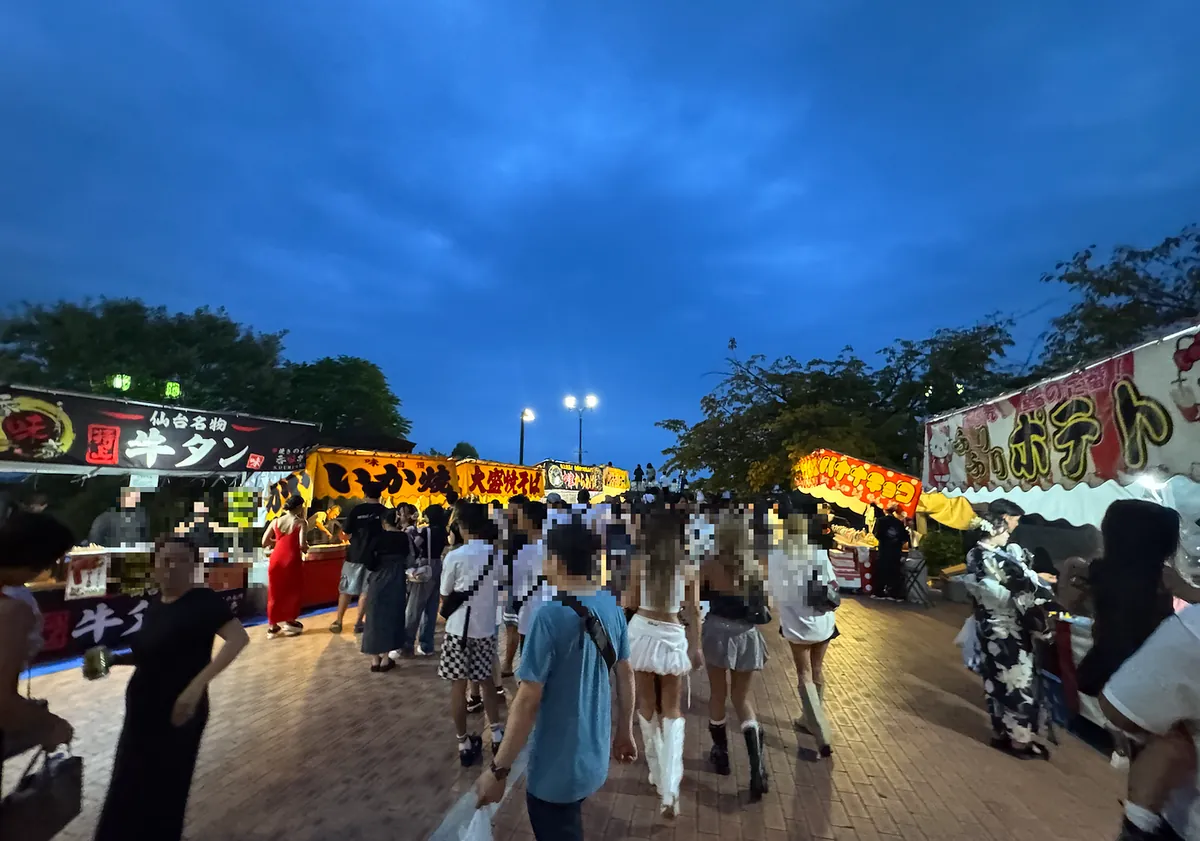
There are restrooms around the beach, so you don’t have to worry about not having access.
20:15 Crowd at the beach near the fireworks release time
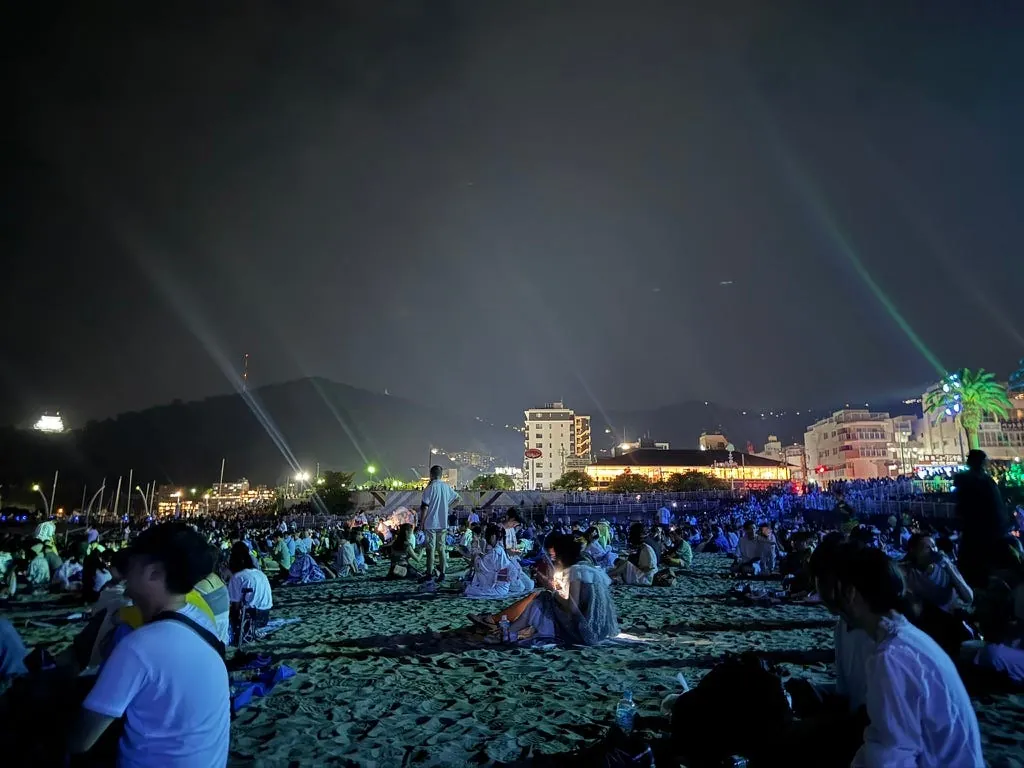
There are many people on the trail behind.
20:20 Fireworks Festival Begins
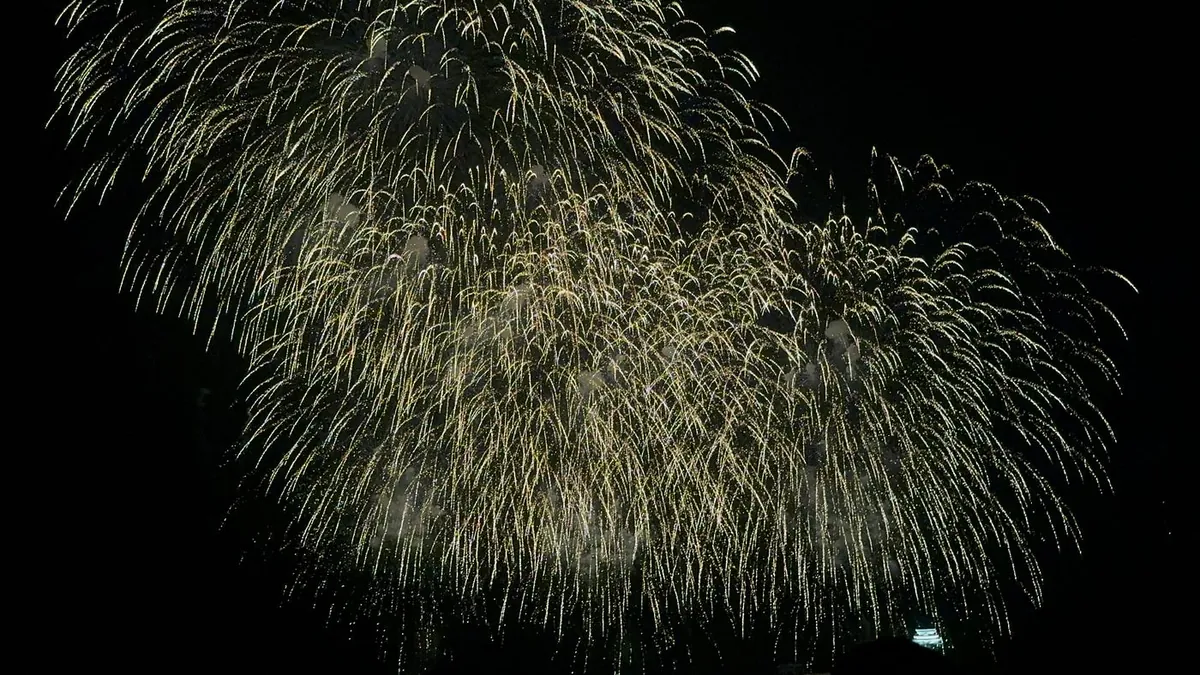
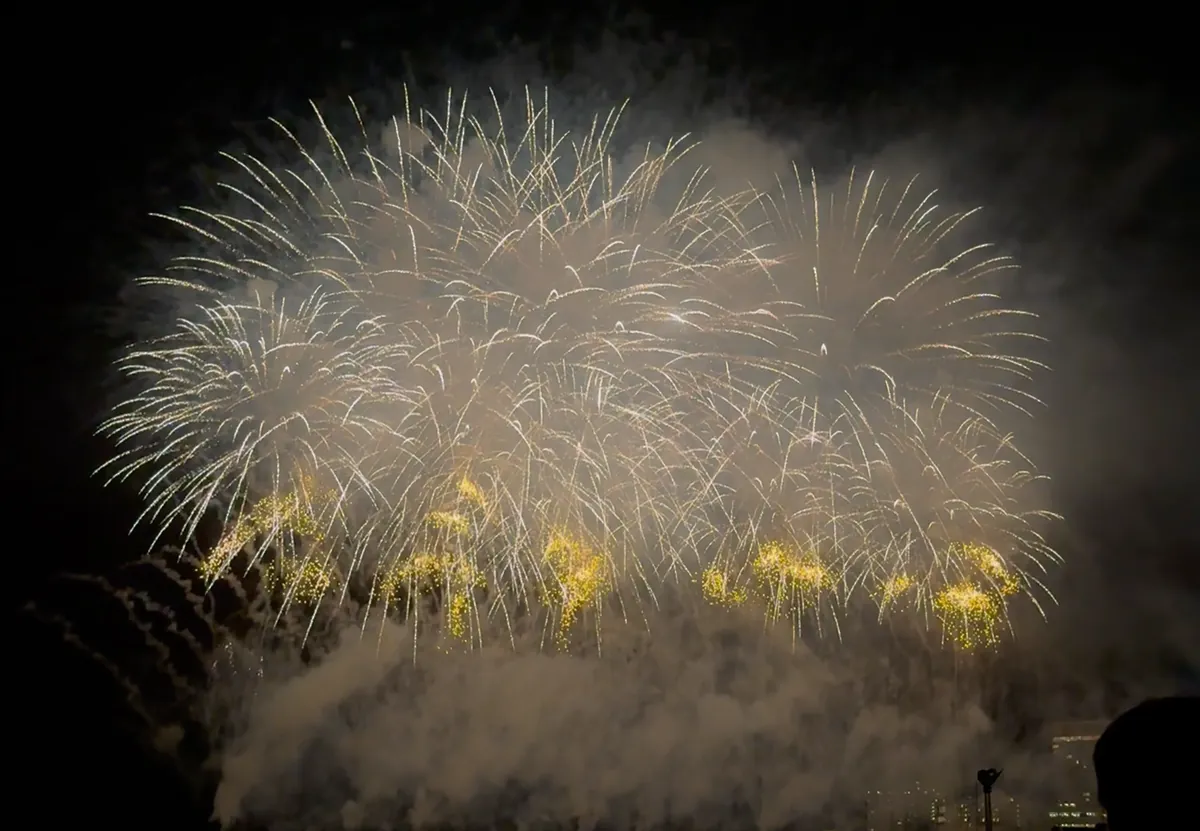
The fireworks had several parts and lasted until 20:40 (20 minutes). My favorite part was the magnificent full-screen fireworks. Unfortunately, the humidity was high today, so the smoke didn’t disperse well towards the end.
20:45 Start leaving the venue
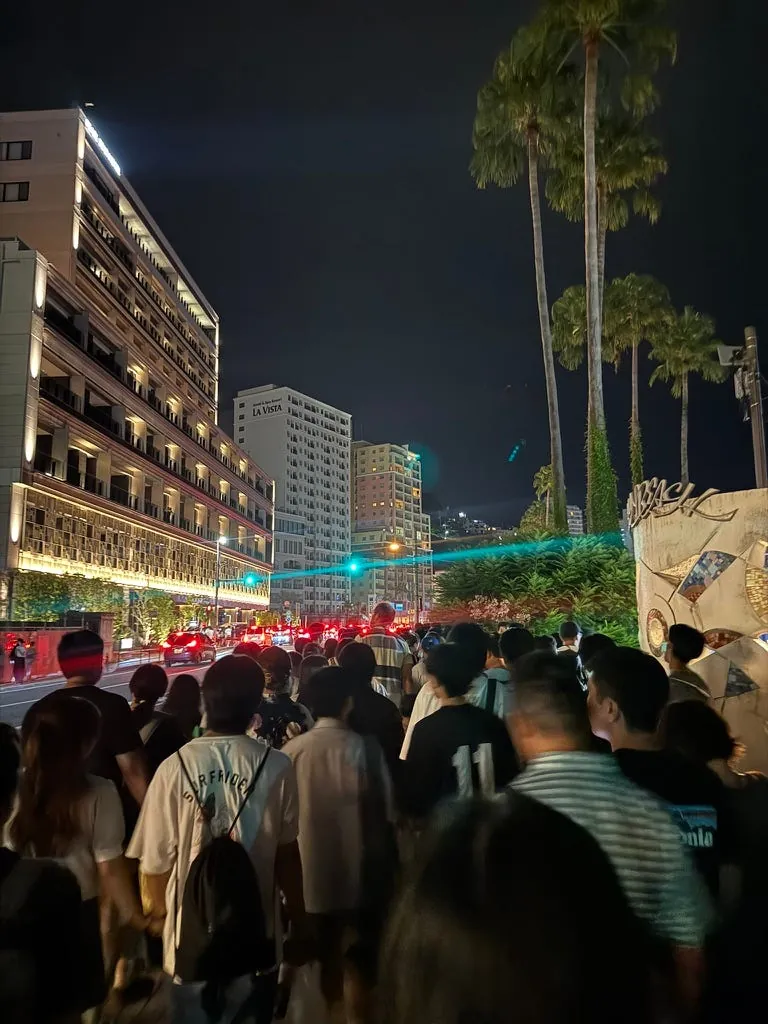
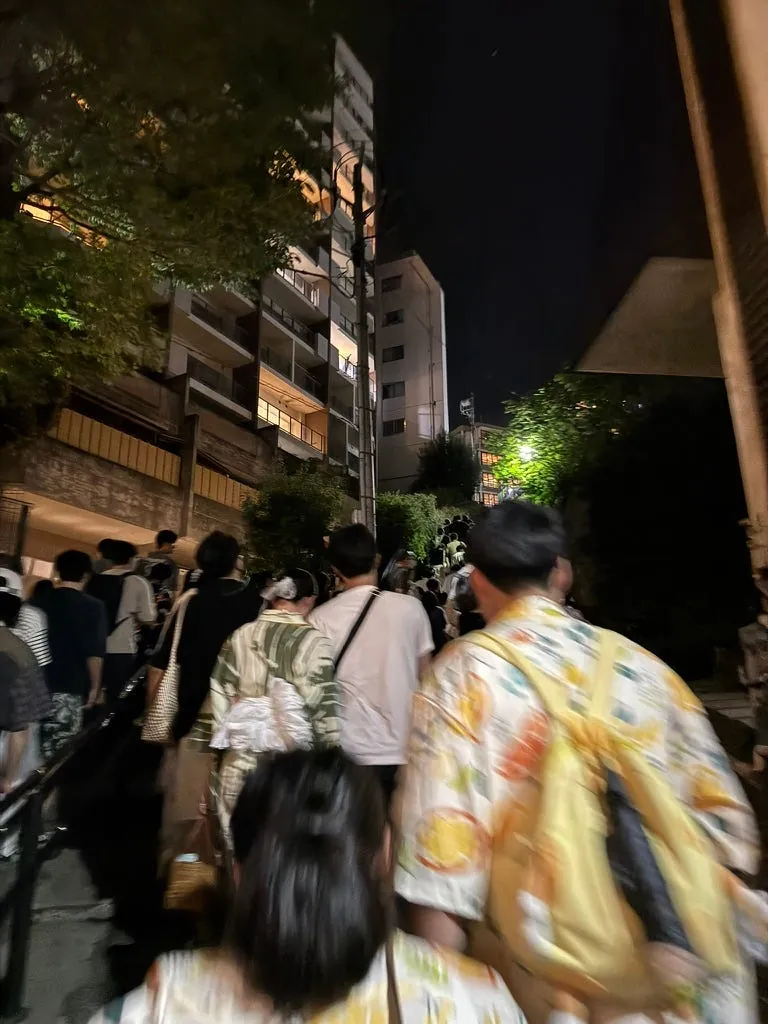
There were many people leaving, but everyone moved toward the station in an orderly manner; it was downhill coming in and uphill going back (tiring).
21:05 Return to Atami Station
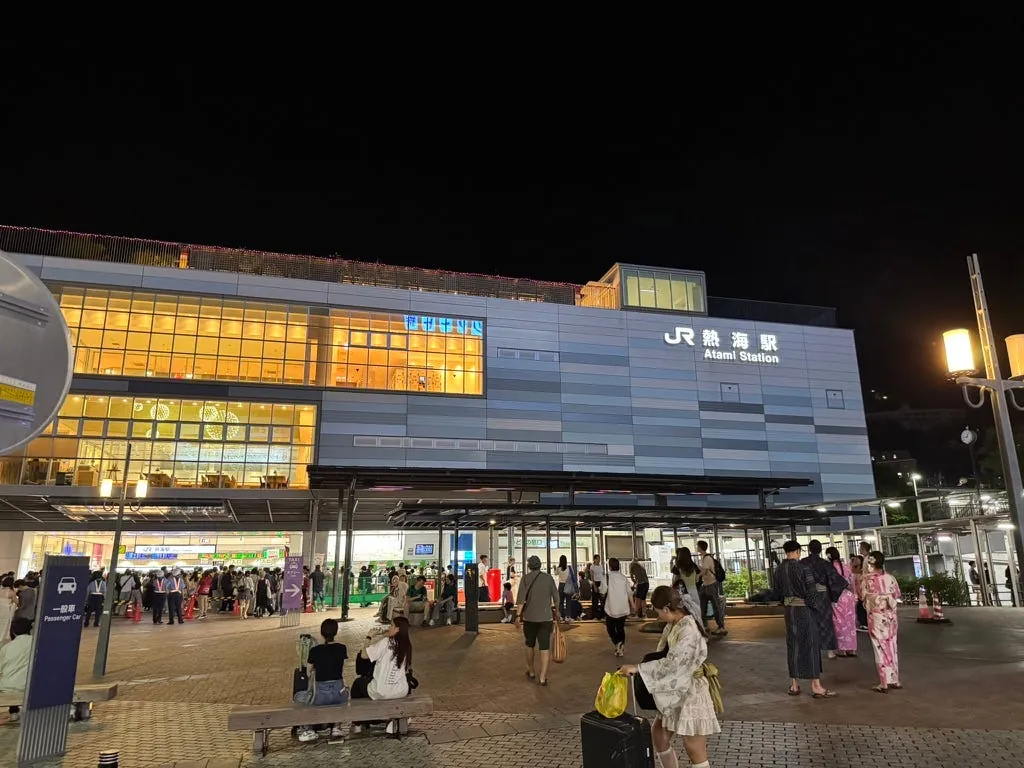
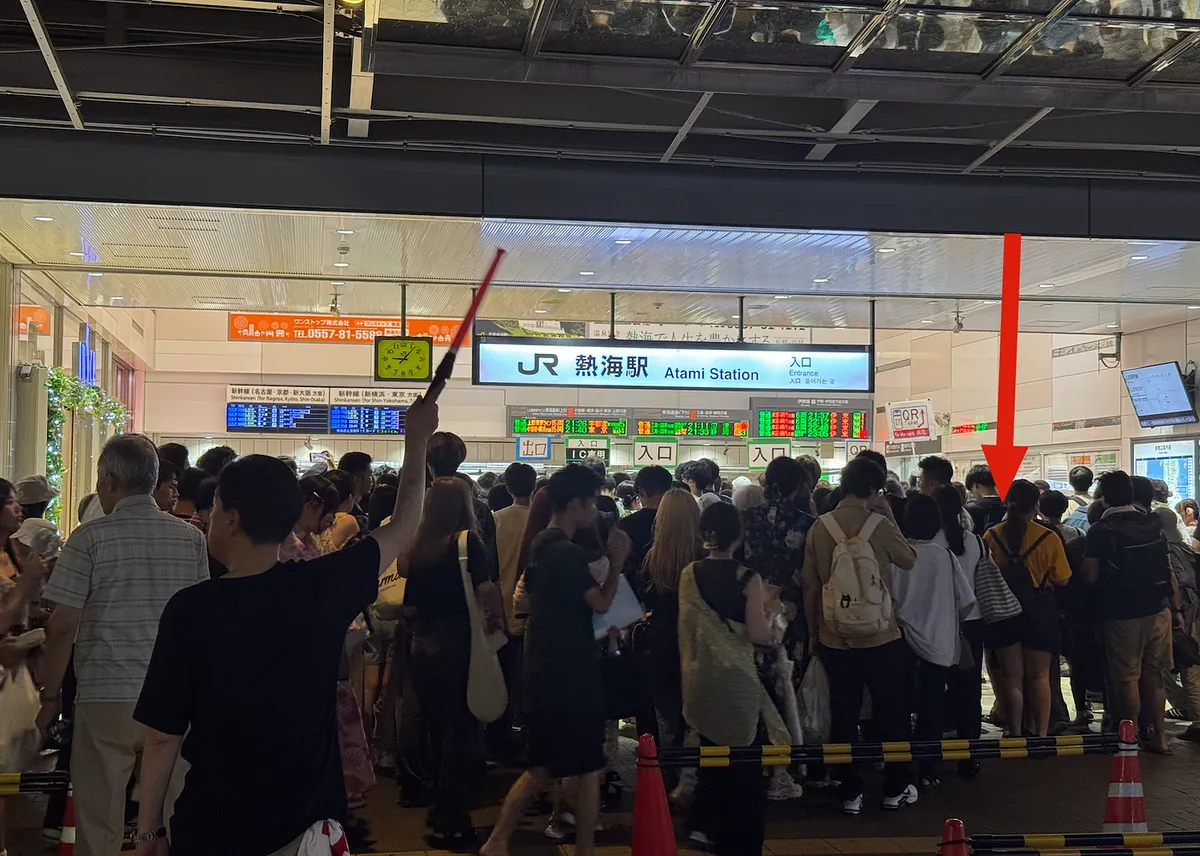
It takes about 20–25 minutes to walk back to Atami Station due to the large crowd, and there are many people entering the station. If you take the local train line, you need to queue slowly to enter. If you have already purchased your Shinkansen ticket, you can go directly through the manned gate on the right and then access the Shinkansen platform without going through the local line.
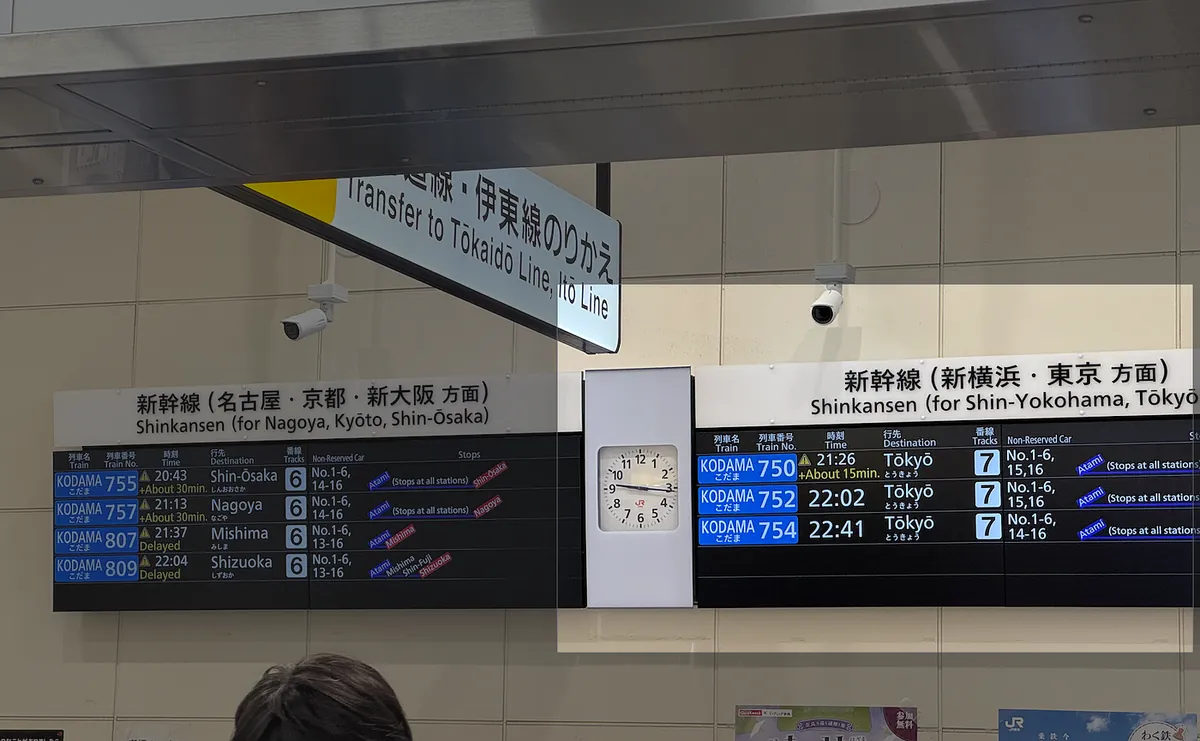
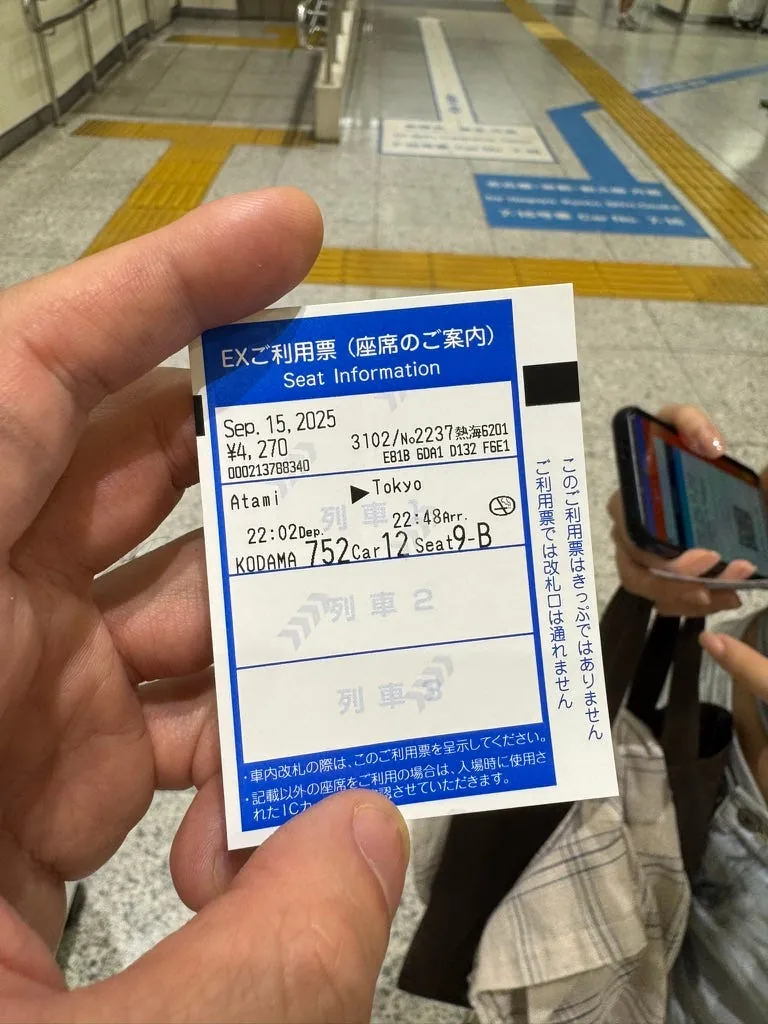
Originally worried about tight timing, I bought a 22:02 train ticket from Atami back to Tokyo; based on the situation on site, the earlier 21:26 train would have been more than enough.
21:20 Arrive at the station and wait for the train
The Shinkansen here is very spacious and the air conditioning is cool.
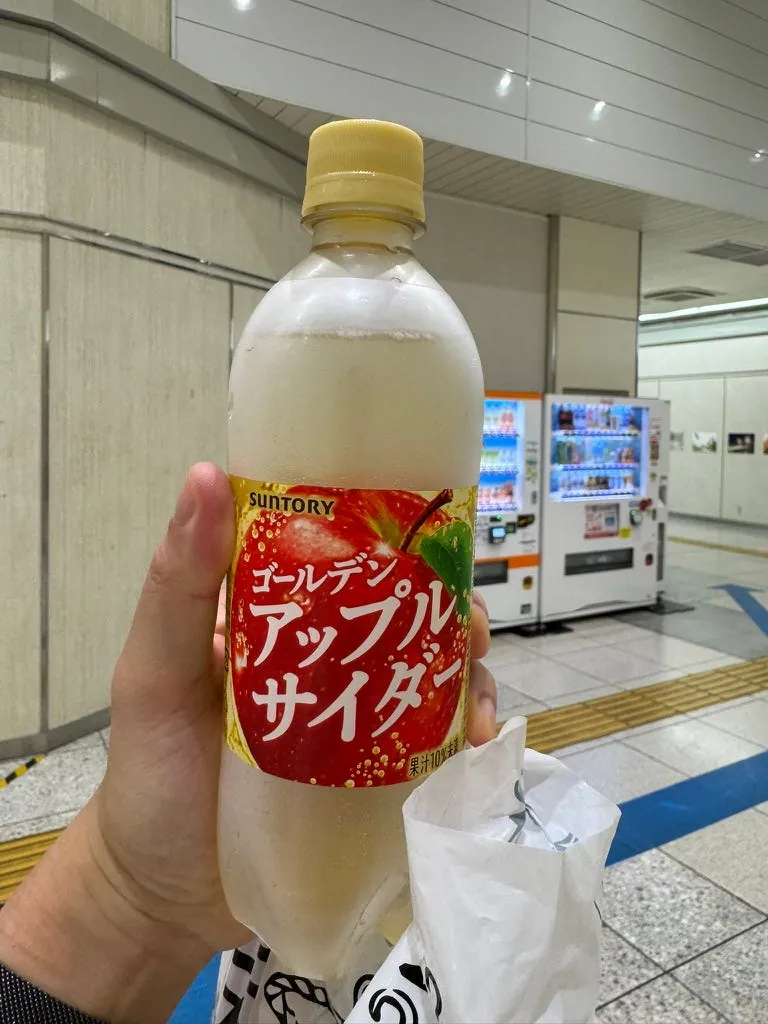
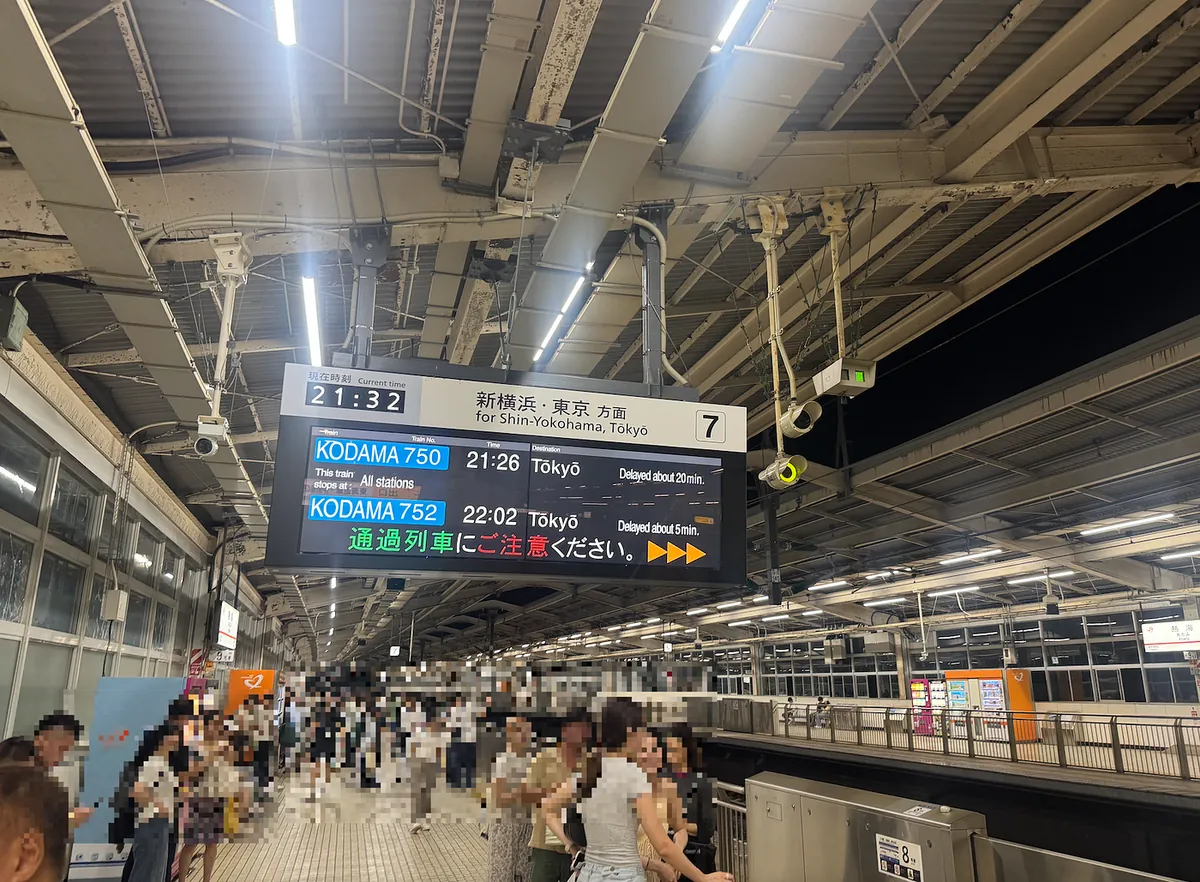
Bought a can of apple soda to recharge, but heavy rain in other areas caused all trains to be delayed.
~=22:25 Board the train (delayed by nearly 20 minutes)
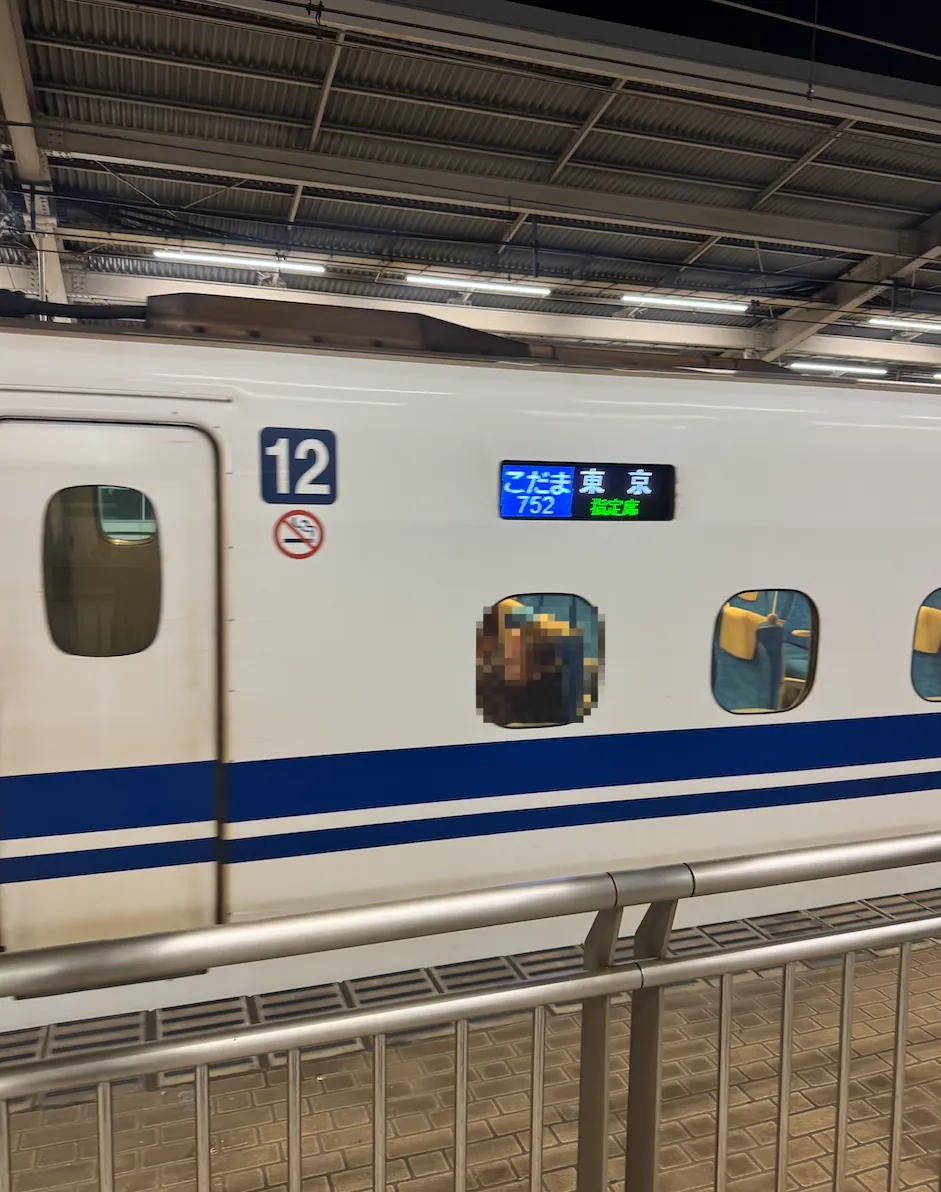
~= 23:10 Arrive in Tokyo
Transfer to the Yamanote Line back to Shimbashi.
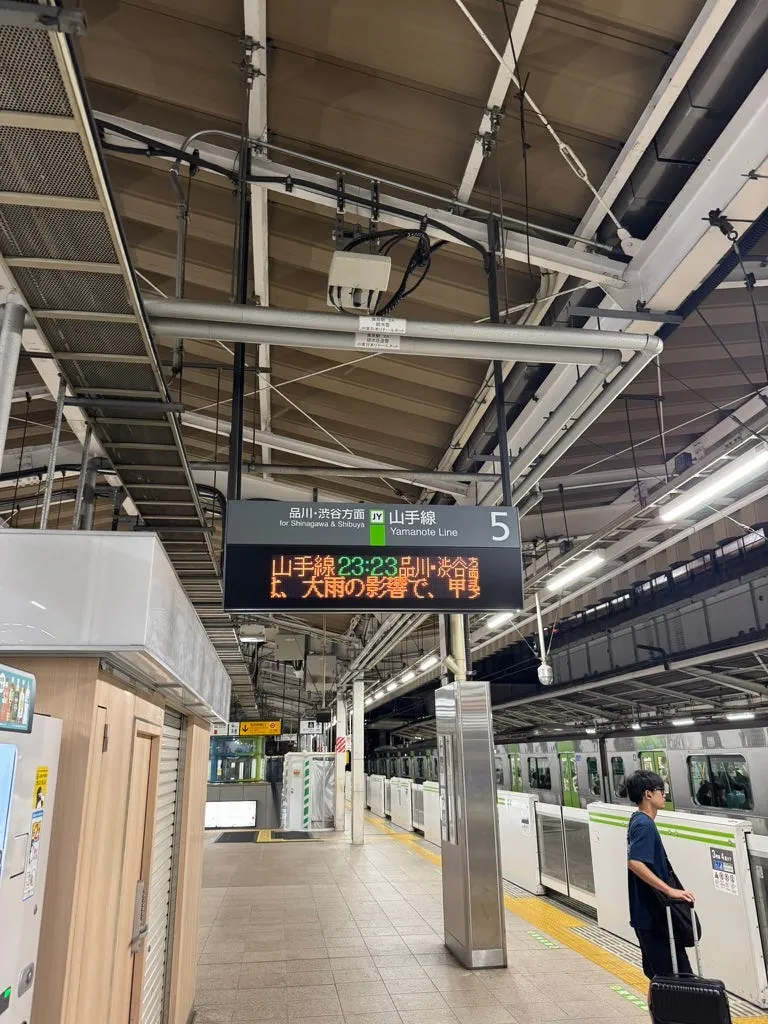
~= 23:40 Return to the hotel to rest
What a fulfilling day!
Day 4 (09/16 Tue) — Azabudai TeamLab, Harajuku Shopping, Otter Café
After a good sleep, take the bus out.
10:10 Arrive at Azabudai Hills
I thought Azabudai no Mori only had JP Tower, but it’s actually a whole cluster of fragmented buildings with many department store counters and dining options.
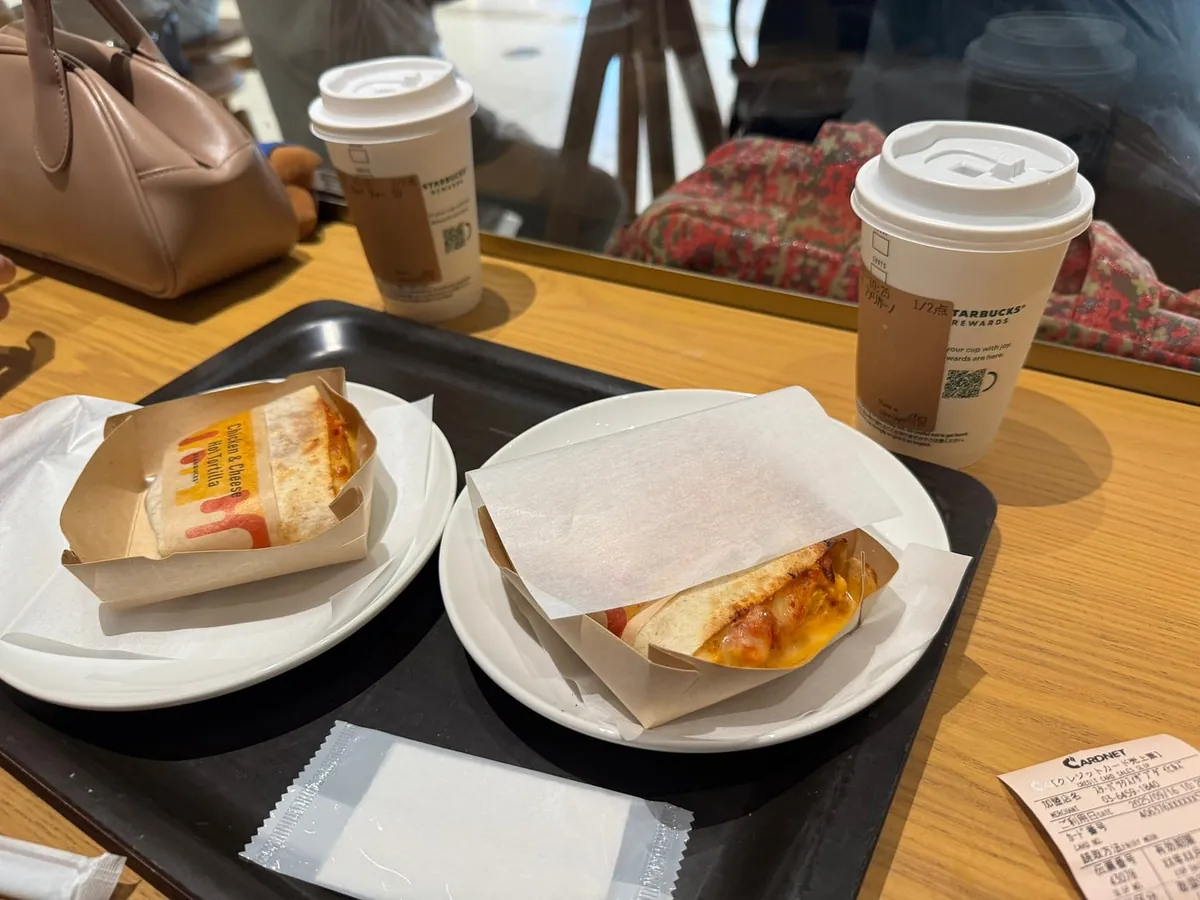
First, go to a café for breakfast and to wake up.
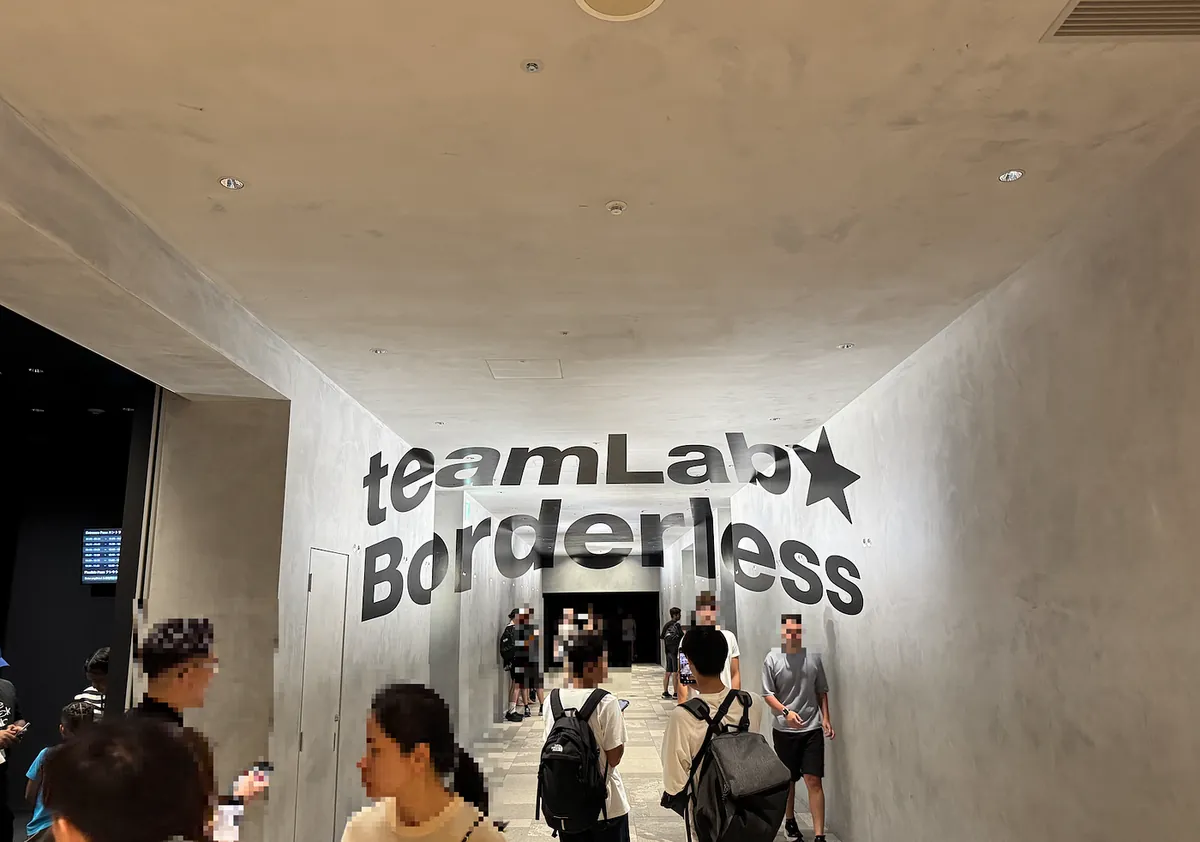
10:50 Head to teamLab Borderless: MORI Building DIGITAL ART MUSEUM (Azabudai Hills Garden Plaza B, B1)
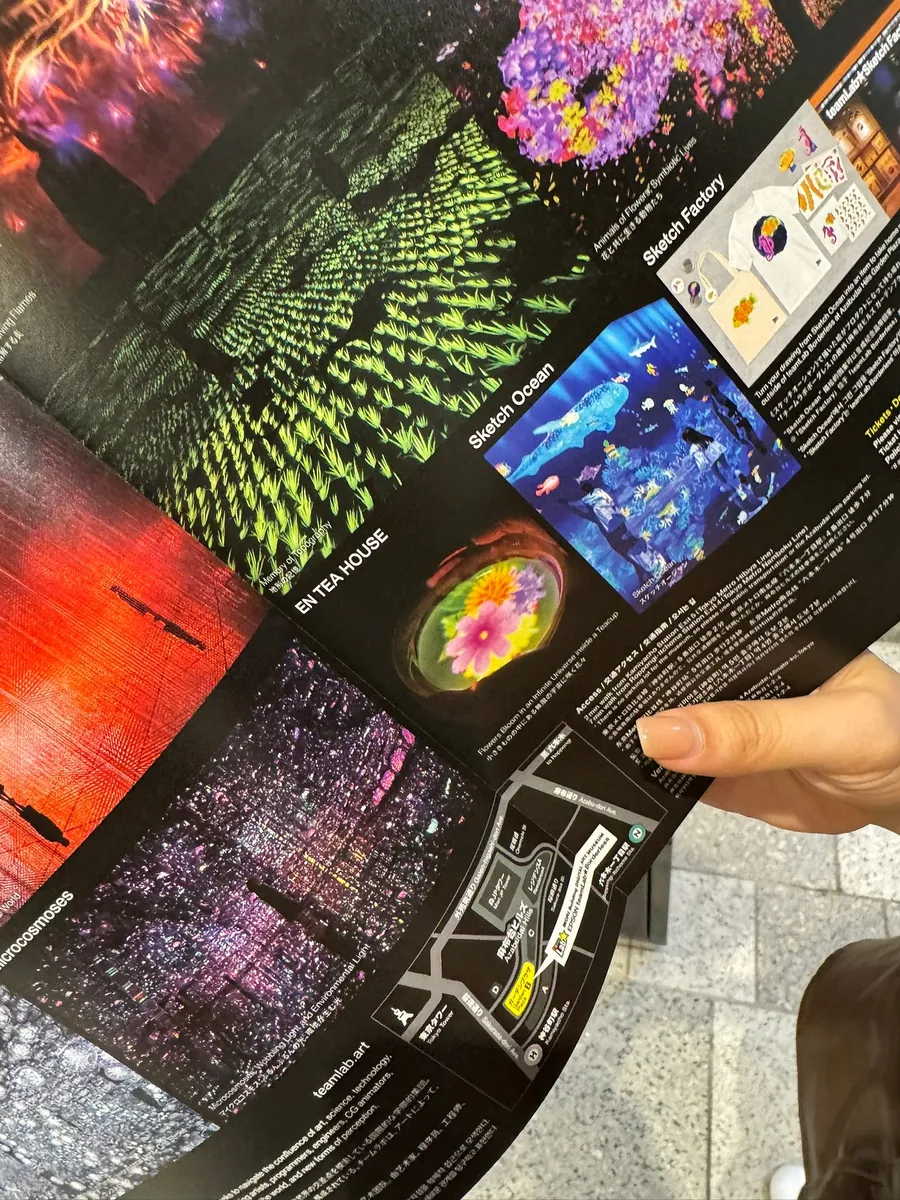
There is no map inside. If you want to explore everything, you can first get the official guidebook outside.
Turn right for a free storage area. After storing your items, show your ticket to the staff to enter.
11:00 teamLab Borderless
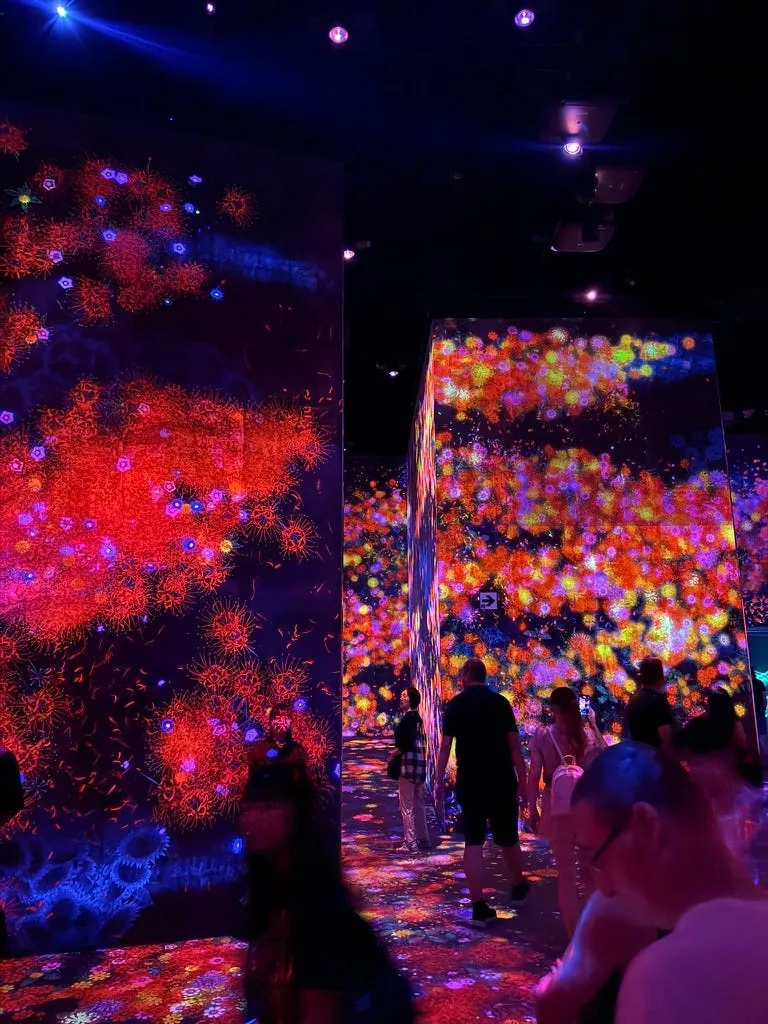
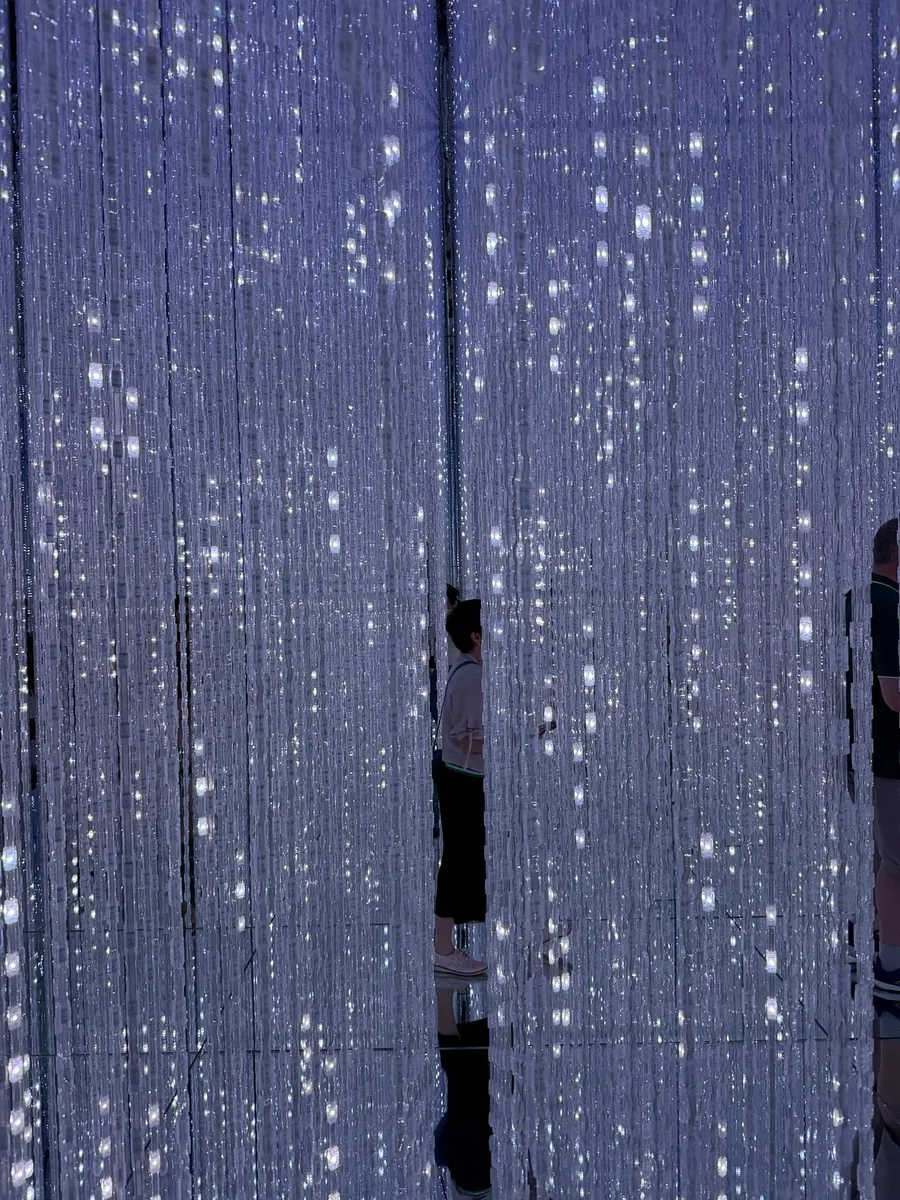
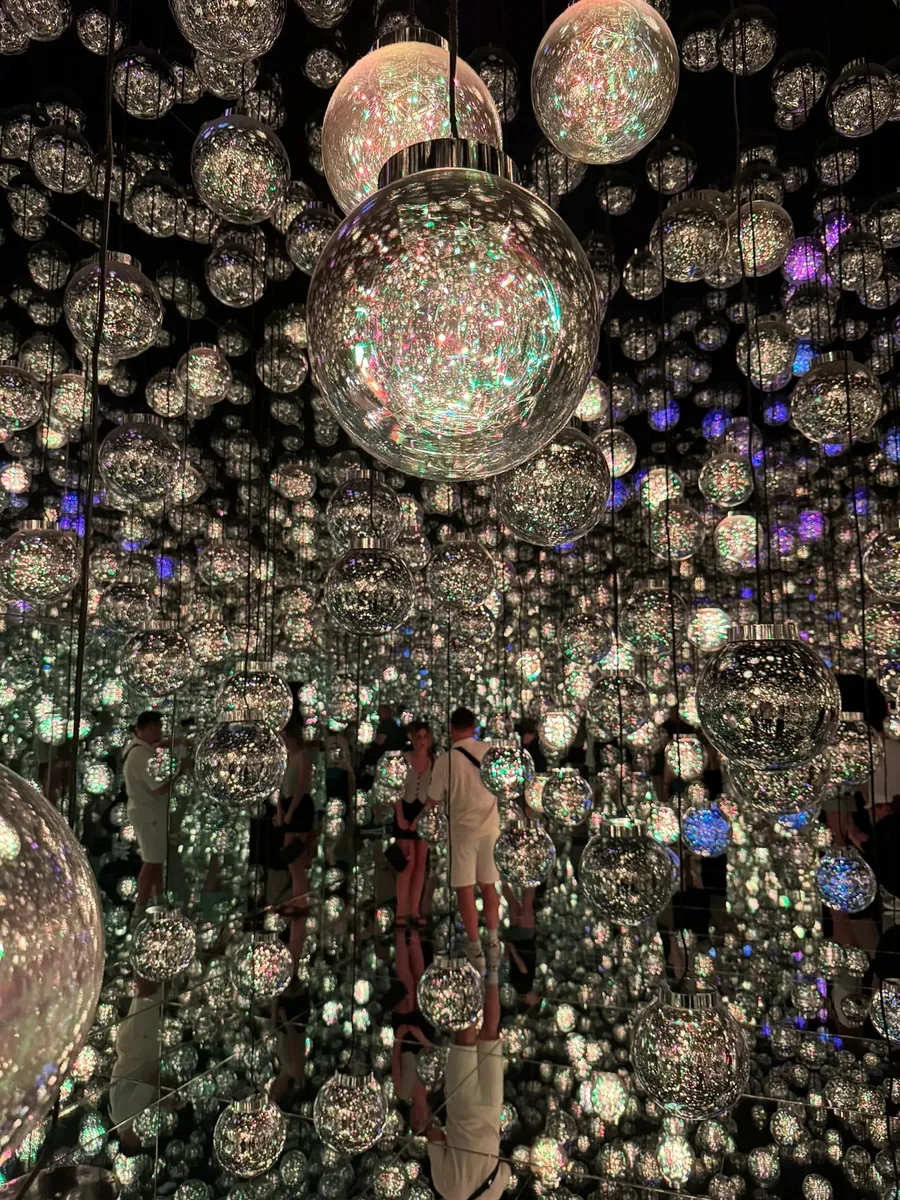
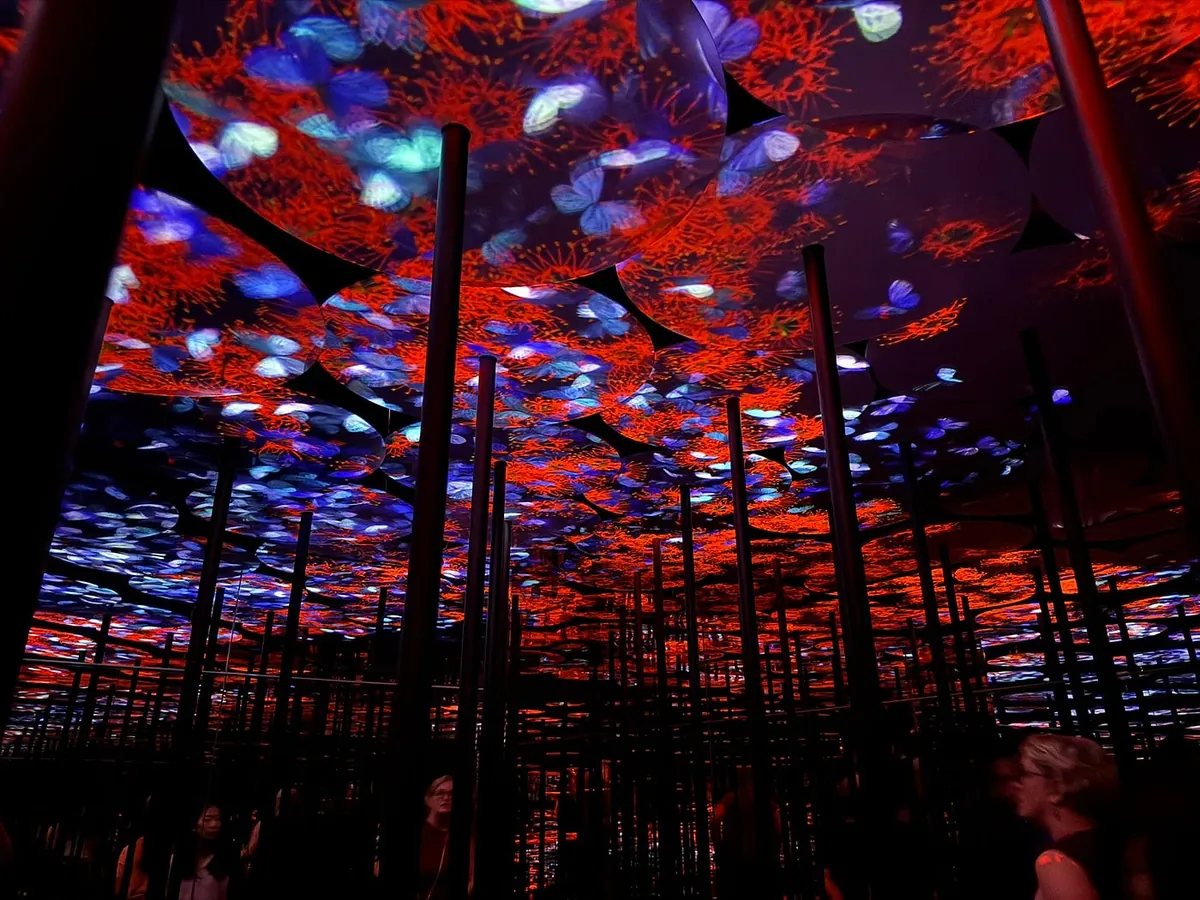
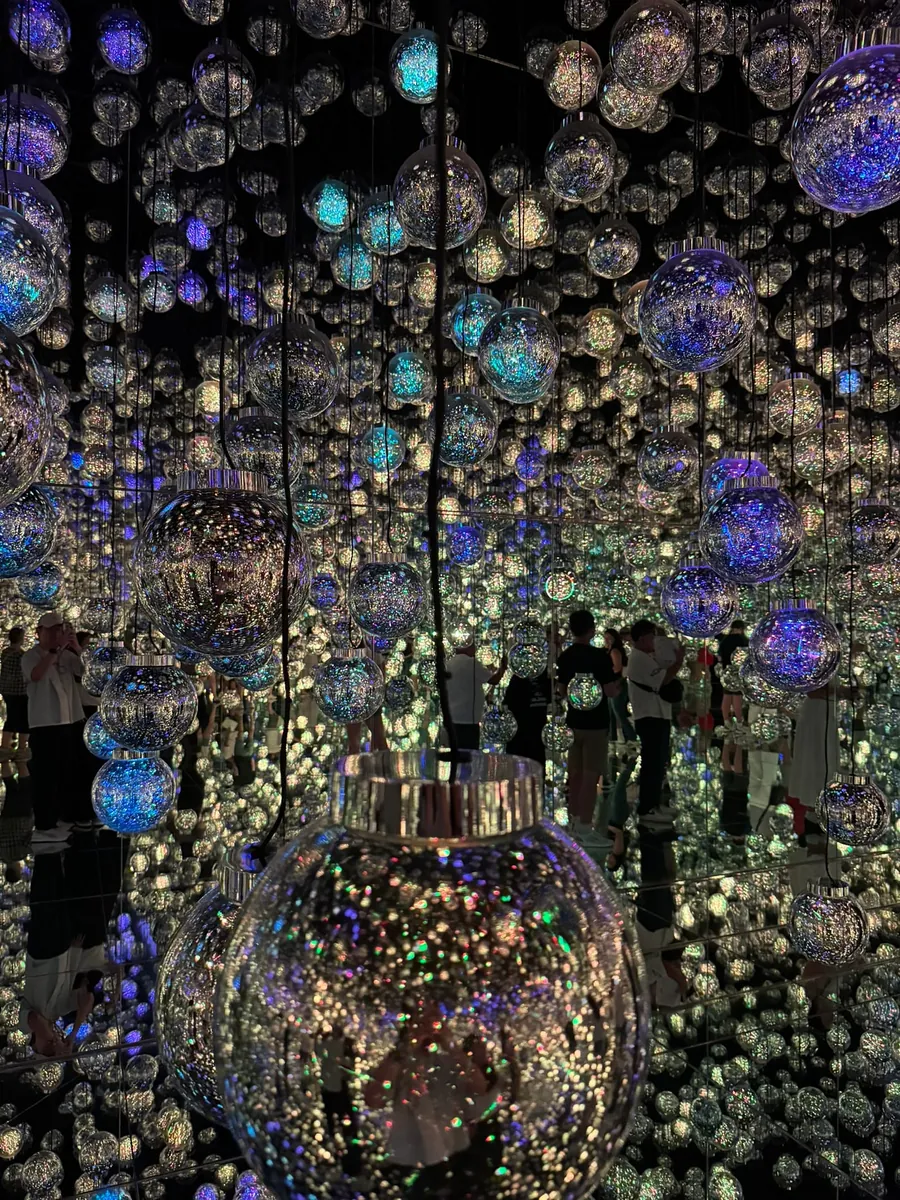
teamLab is truly amazing, featuring various magical and creative scenes that feel unreal. The interactions include light and shadow, mirrors, spheres, pillars, leaves, mist, and more. Almost all are 360-degree full scenes, providing a strong sense of immersion.
There is no map; you need to explore all the exhibition rooms on your own. Aprons are thoughtfully provided at the entrance for girls wearing skirts who are concerned about exposure.
Before entering each room, staff usually provide instructions, mostly asking visitors not to touch anything and to walk carefully.
There are restrooms inside, but you need to find the signs yourself or ask the staff.
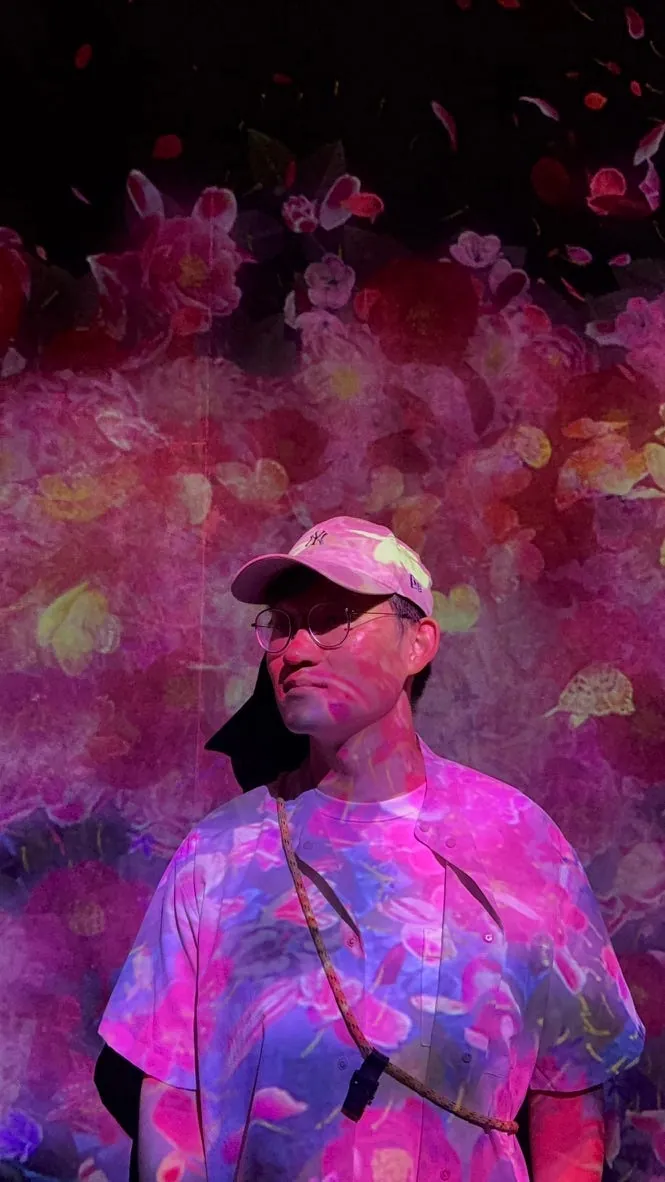
The photos also look very magical.
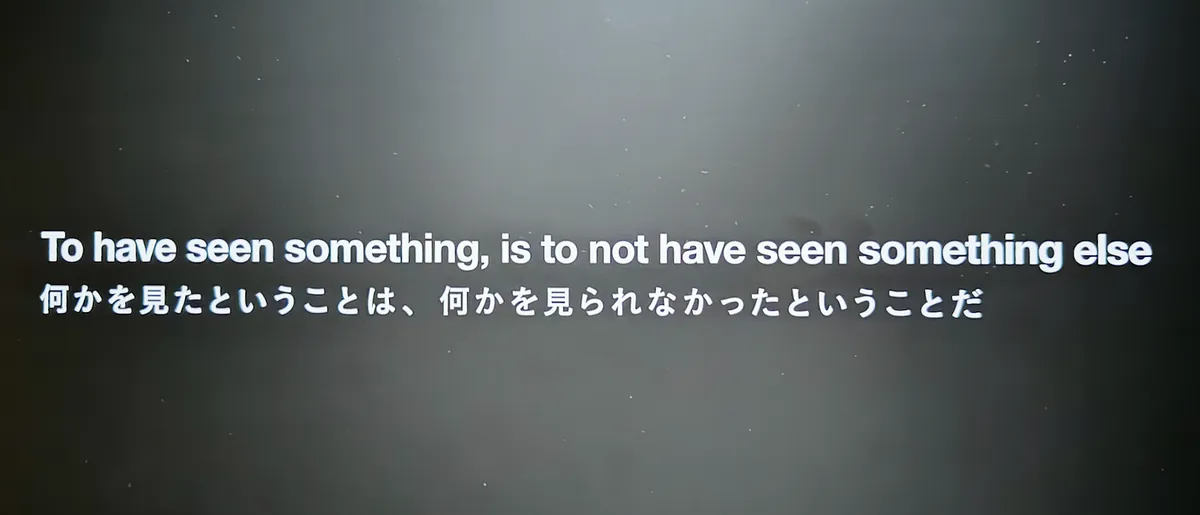
To have seen something is to have missed seeing something else
We left around 12:15, but we can’t guarantee we saw everything; if we weren’t hungry, spending two to three hours inside would probably not be a problem.
HARBS Azabudai Hill Store
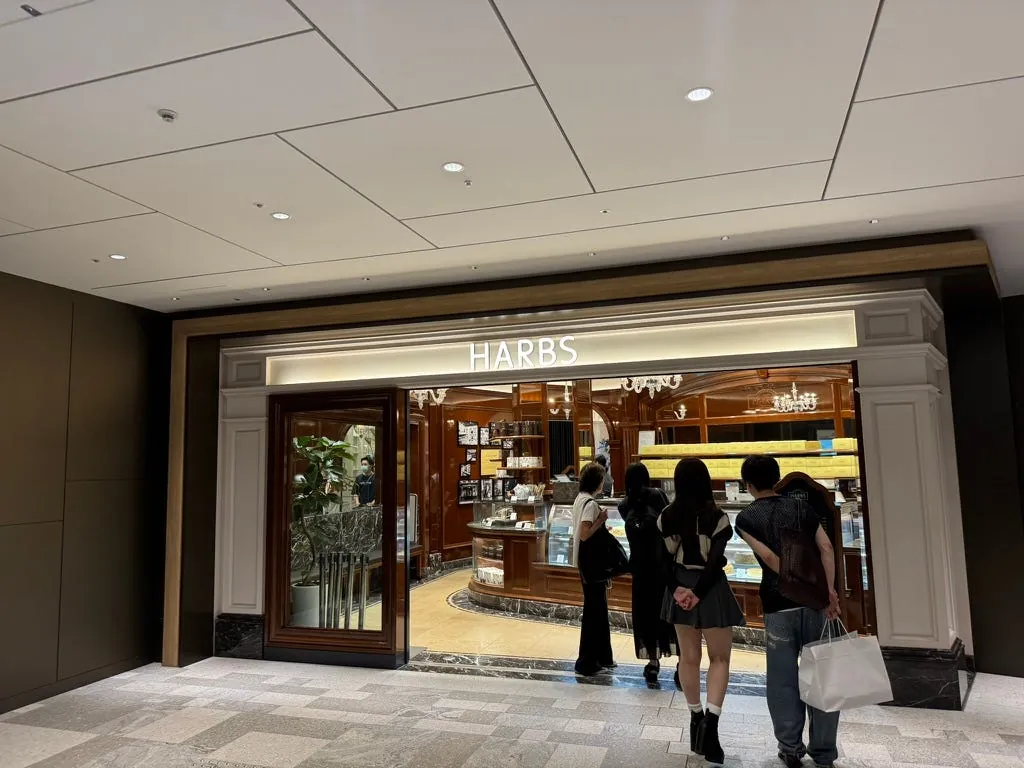
After visiting teamLab, there is a HARBS nearby. Let’s have a fruit mille crepe cake to settle our stomach first.
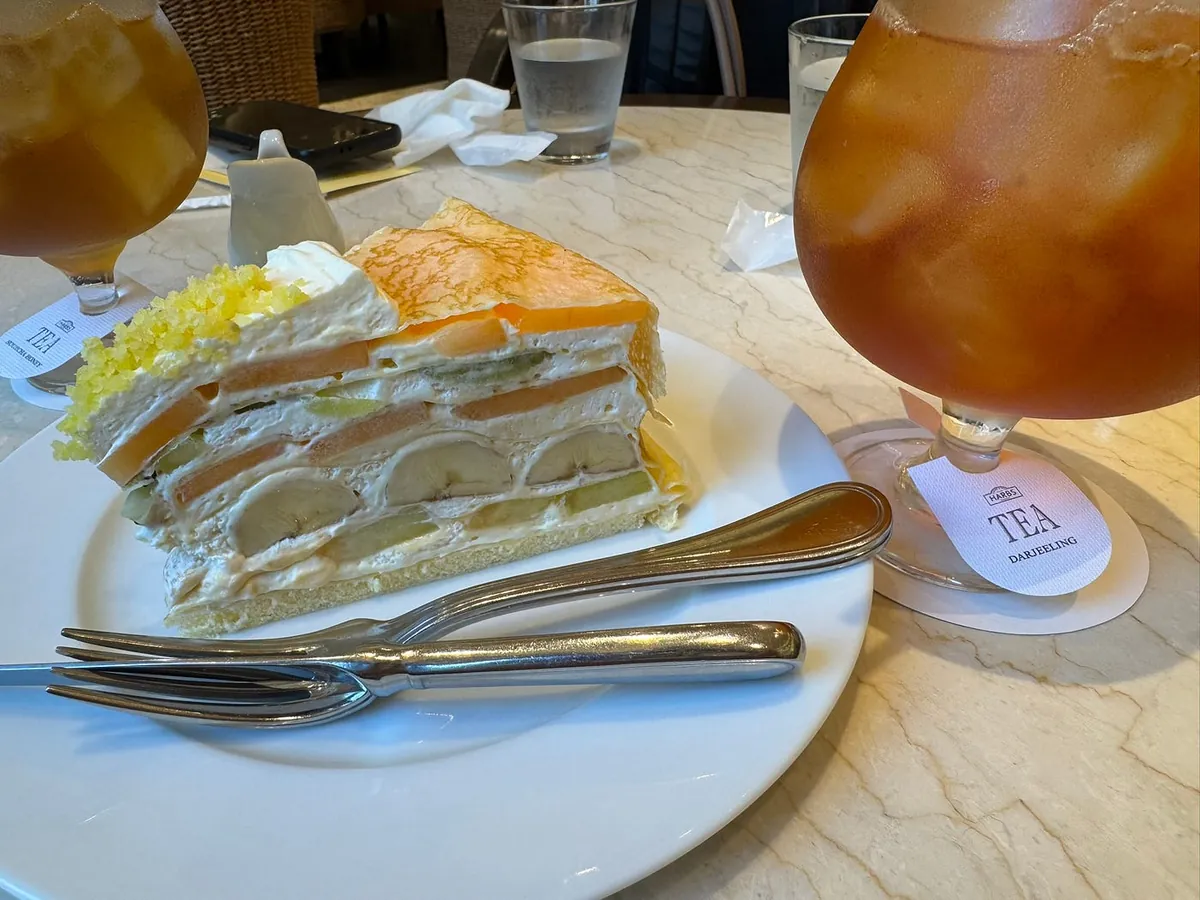
Signature Fruit Mille Crepes (Mille Crepes/ミルクレープ) 1 slice ¥1,050 + minimum order of one drink.
Inside there is cantaloupe (very sweet and delicious) + banana + kiwi.
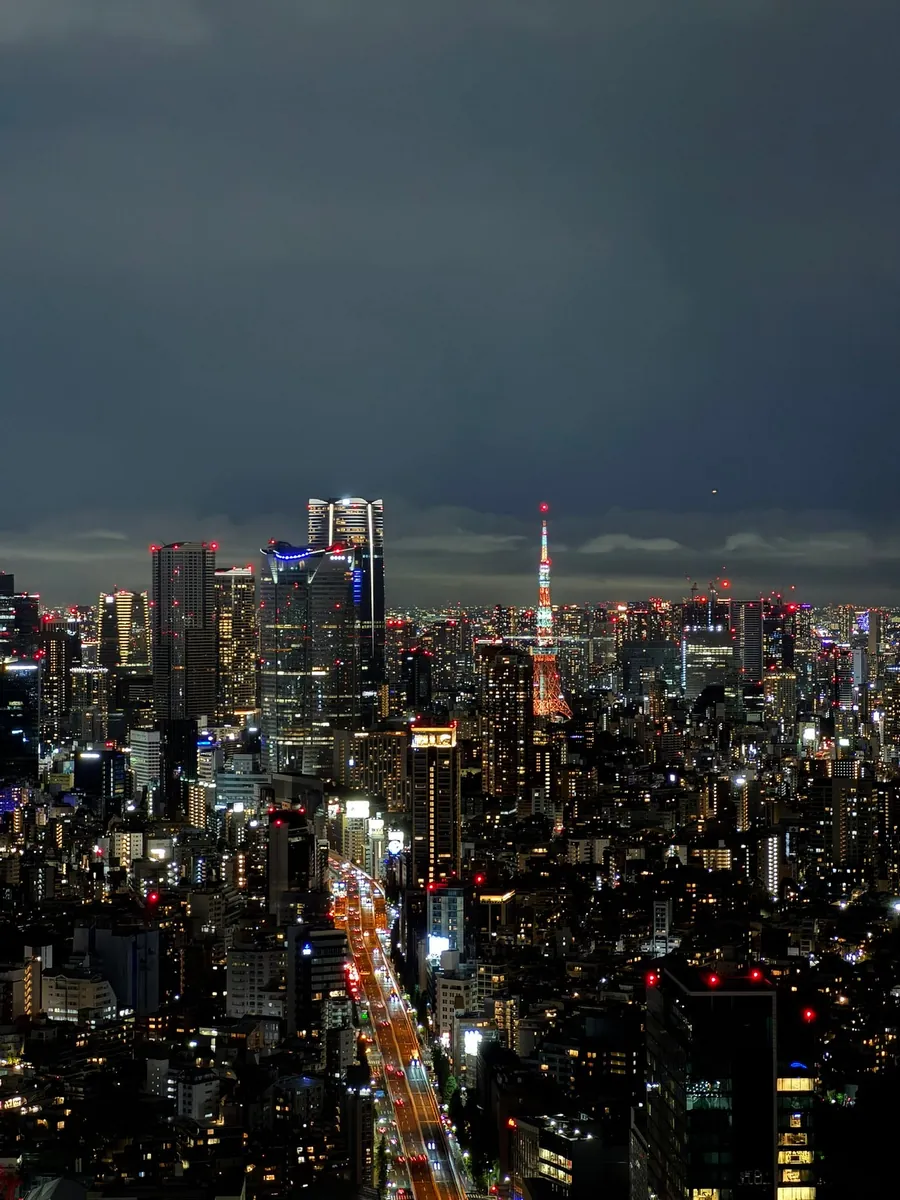
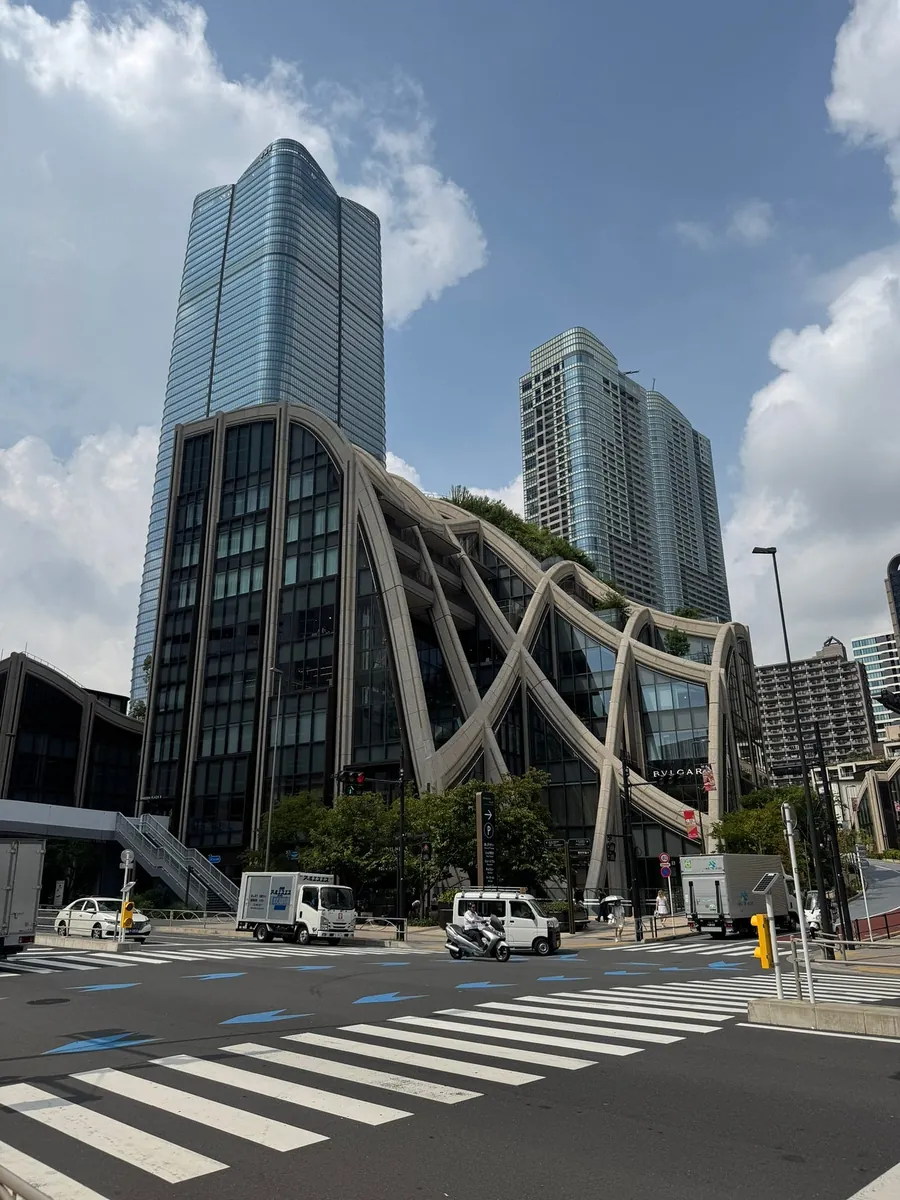
13:20 Tokyo Tower
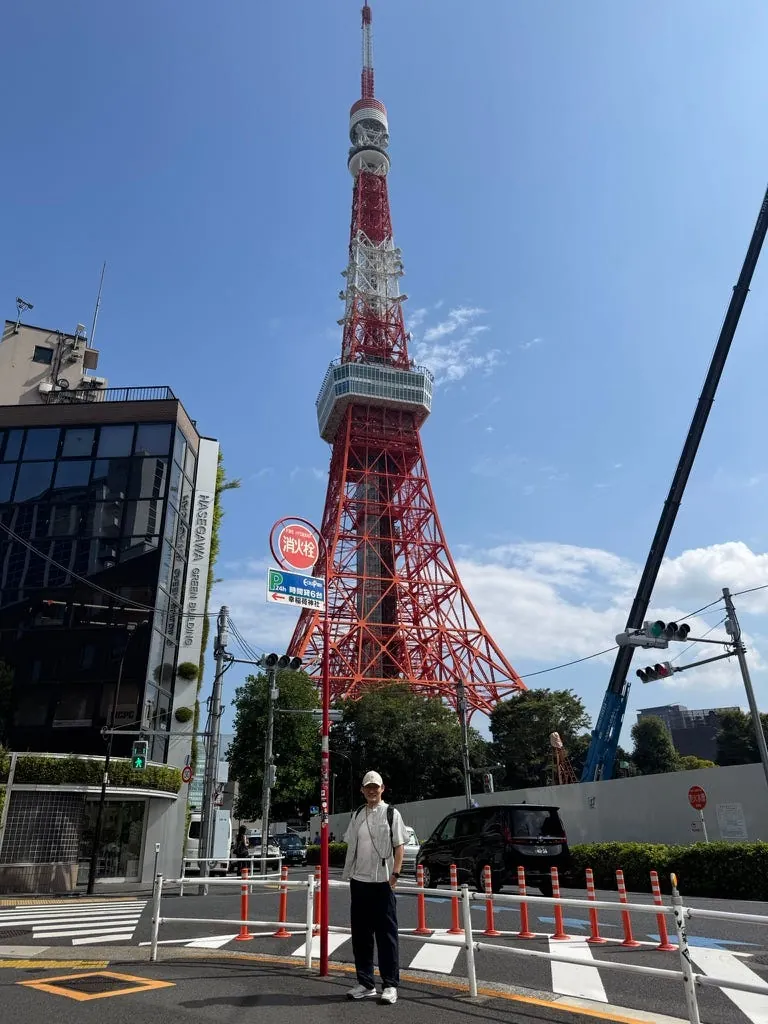
Visited last time and went up (please refer to the previous travelogue), this time just passed by to take some photos.
Take the train to Harajuku.
14:00 Harajuku
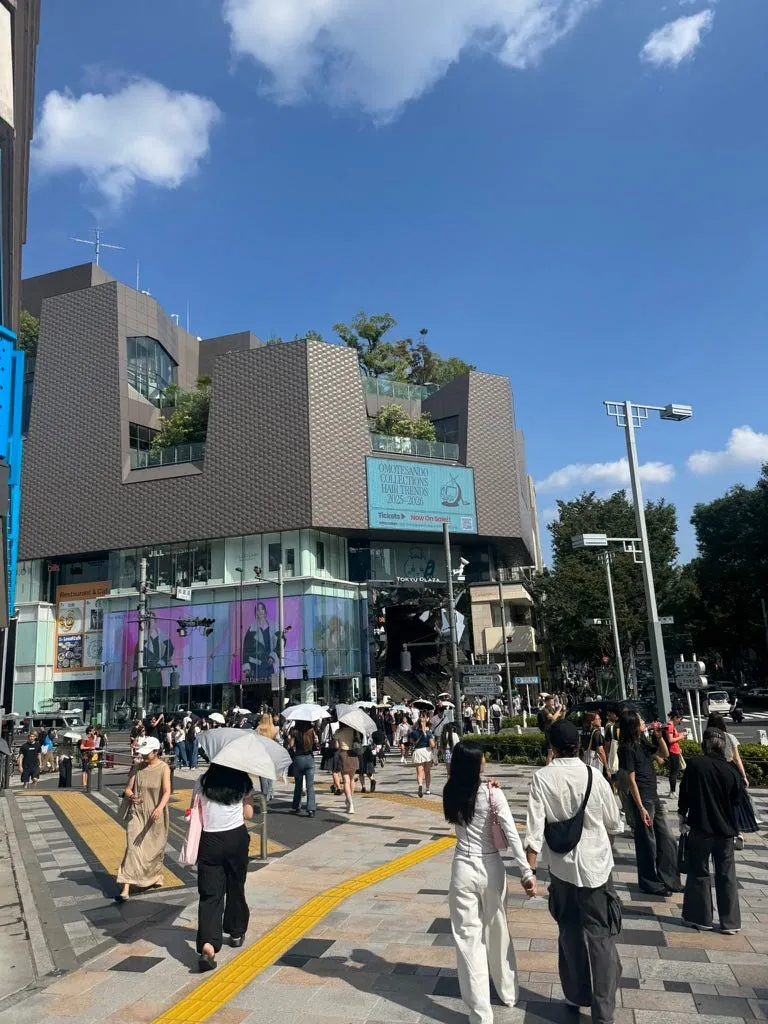
As soon as I came out, I saw Giikawa again and again. Upstairs at Tokyu Plaza Omotesando Harajuku is the Giikawa Bakery.
Chiikawa Bakery 伊卡哇麵包店
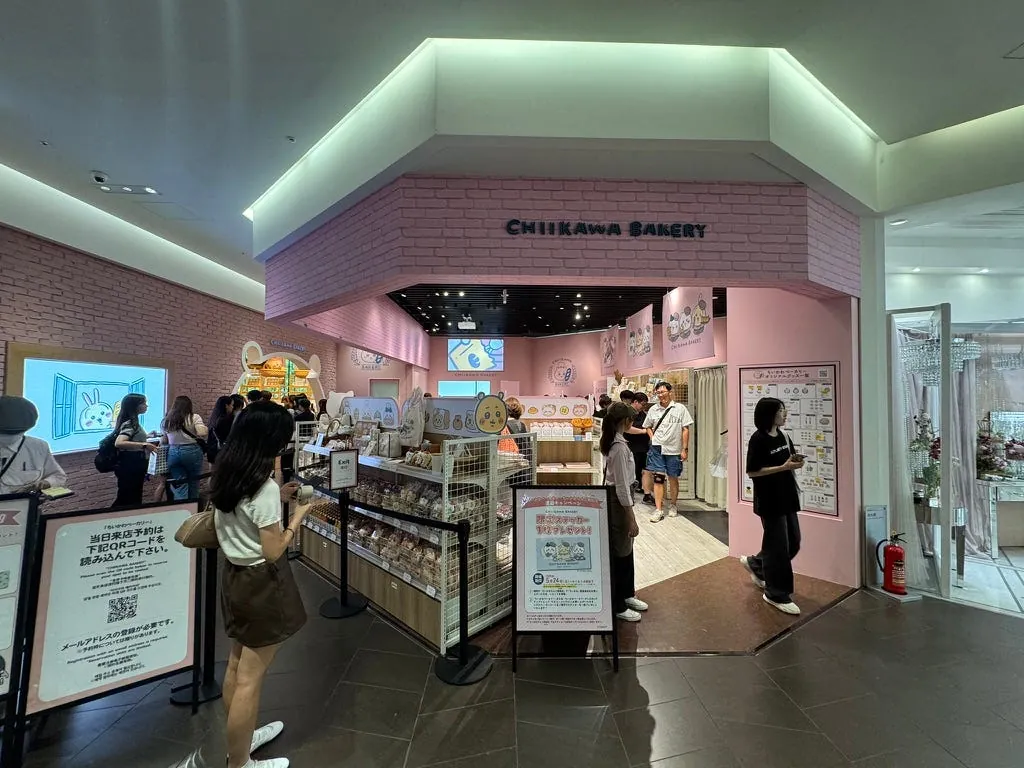
The bakery and jam shop on the left require a numbered ticket for entry; the doll shop on the right does not.
(Because I just happened to pass by, I didn’t go in.)
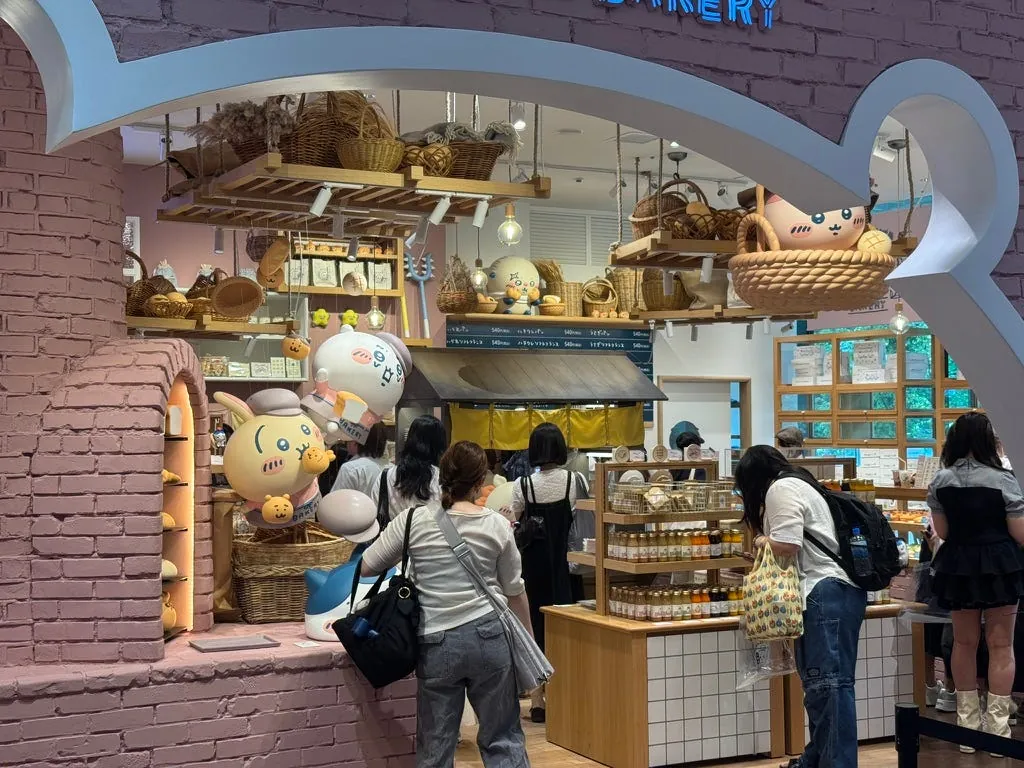
Food: Bakery Section.
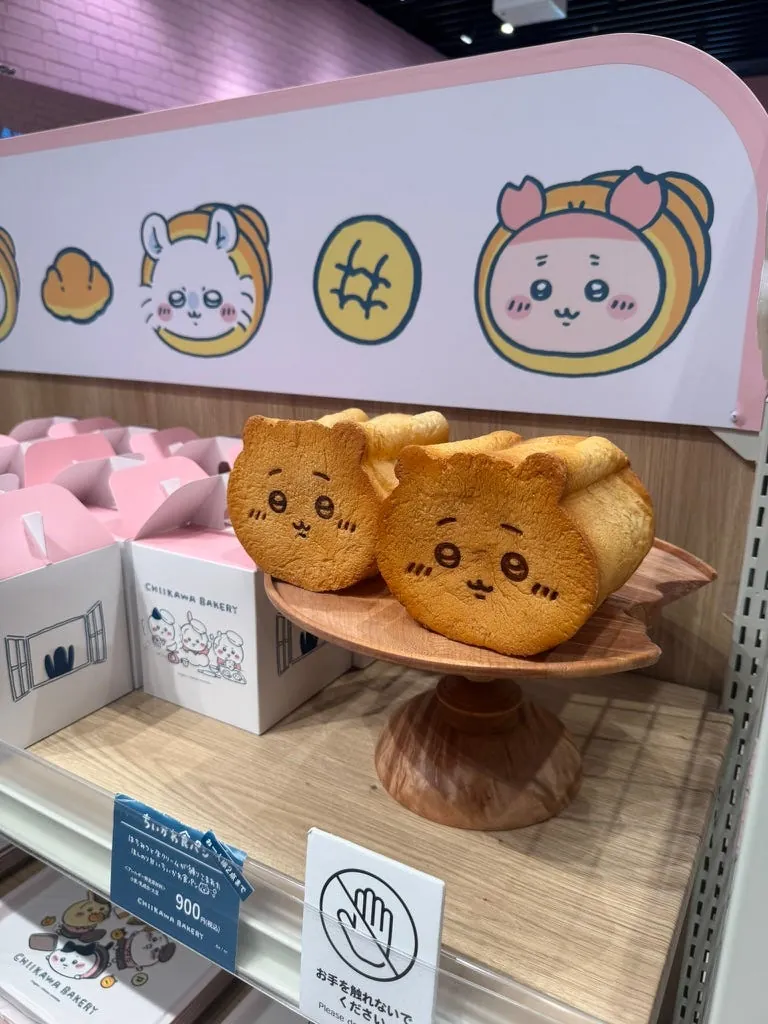
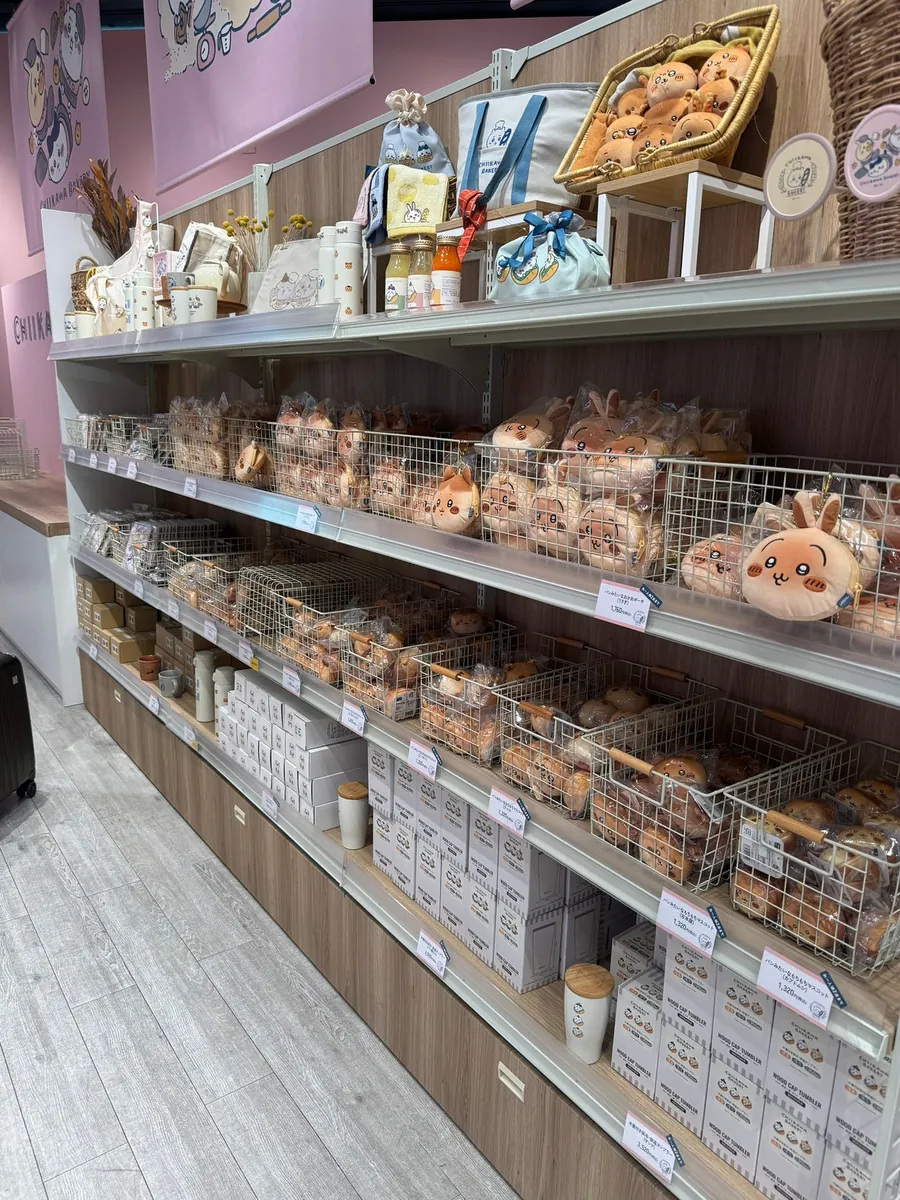
The nearby shops had plenty of stock, but since I already had sweet potatoes, I didn’t buy any and just looked around.
Kiddy Land キデイランド Harajuku Store
After leaving, we went to another nearby Kiddy Land to browse. (But this one doesn’t have Gii Kawa)
There are many IPs like Snoopy, Sanrio, Pokémon, Rilakkuma, and more.
By the time I finished walking around, it was nearly 3:00 PM. I had only eaten a piece of fruit mille-feuille for lunch and was a bit hungry, so I randomly picked a highly rated American burger joint I passed by to grab a bite.
14:50 The Great Burger
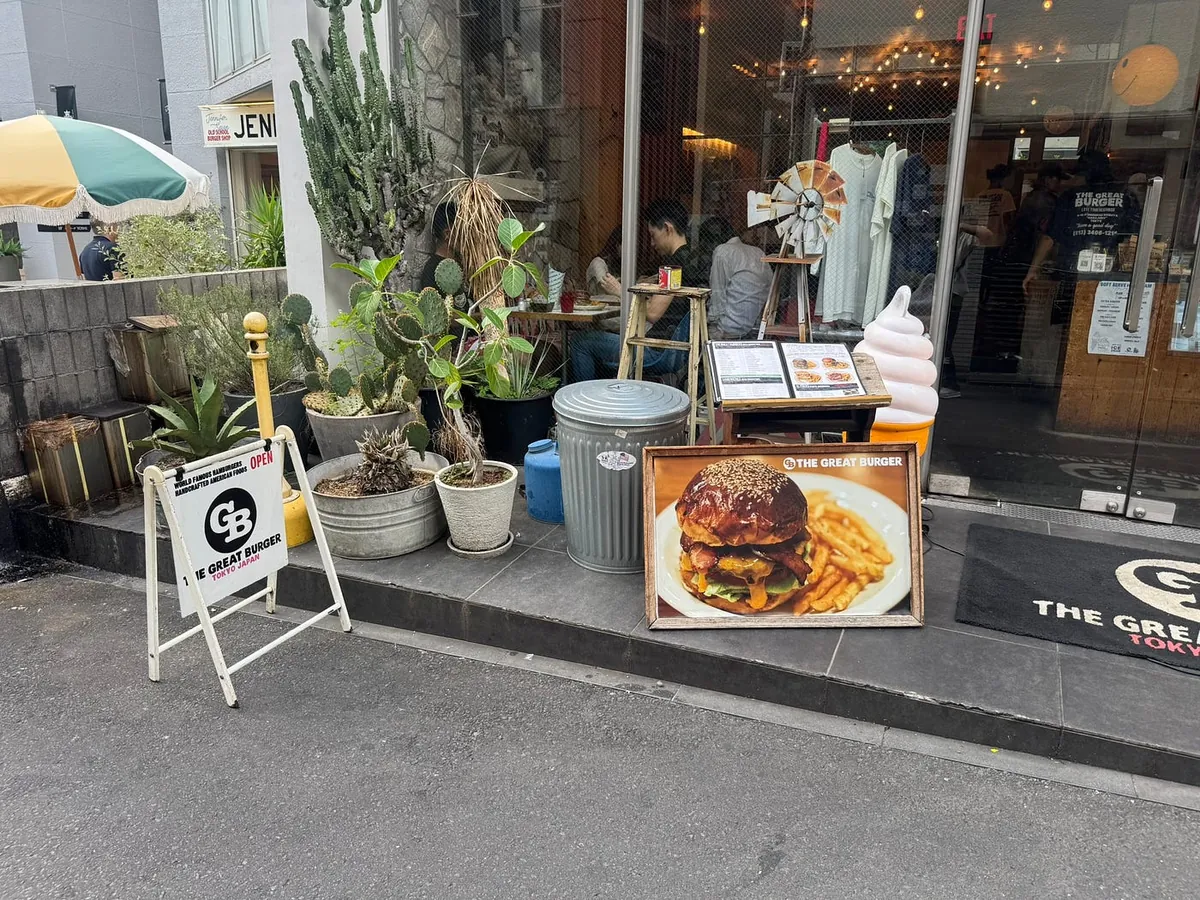
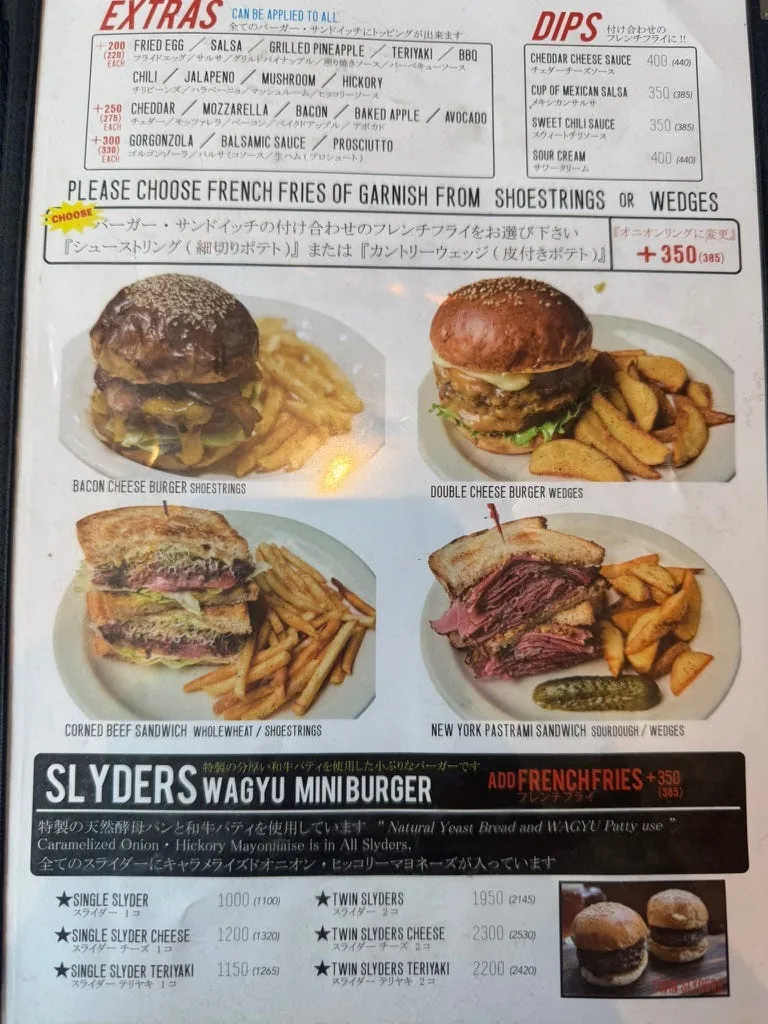
The specialty is Wagyu mini burgers.
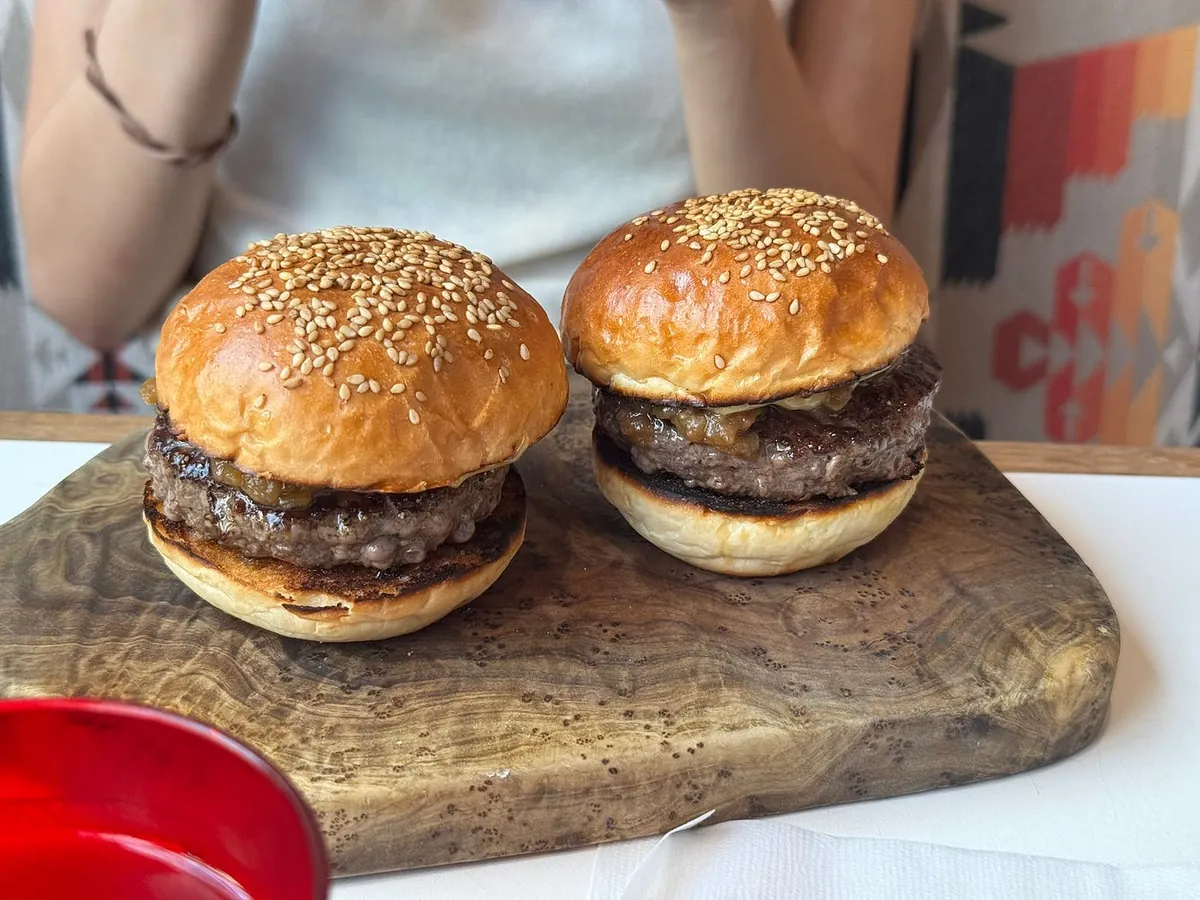
The taste is quite good, but eating too much can be overwhelming.
15:40 Shopping in Harajuku
After eating, continue exploring Harajuku until evening (16:30) to visit the reserved Otter Café.
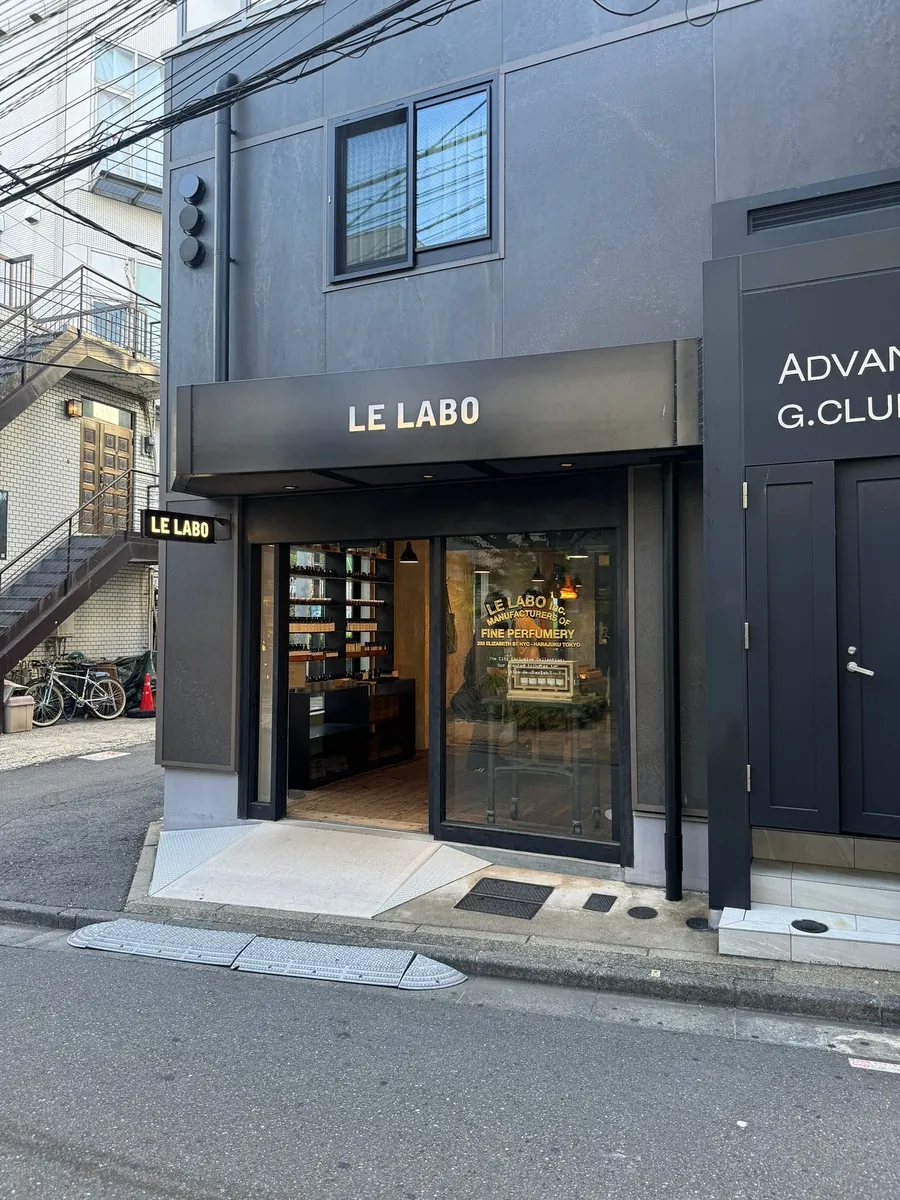
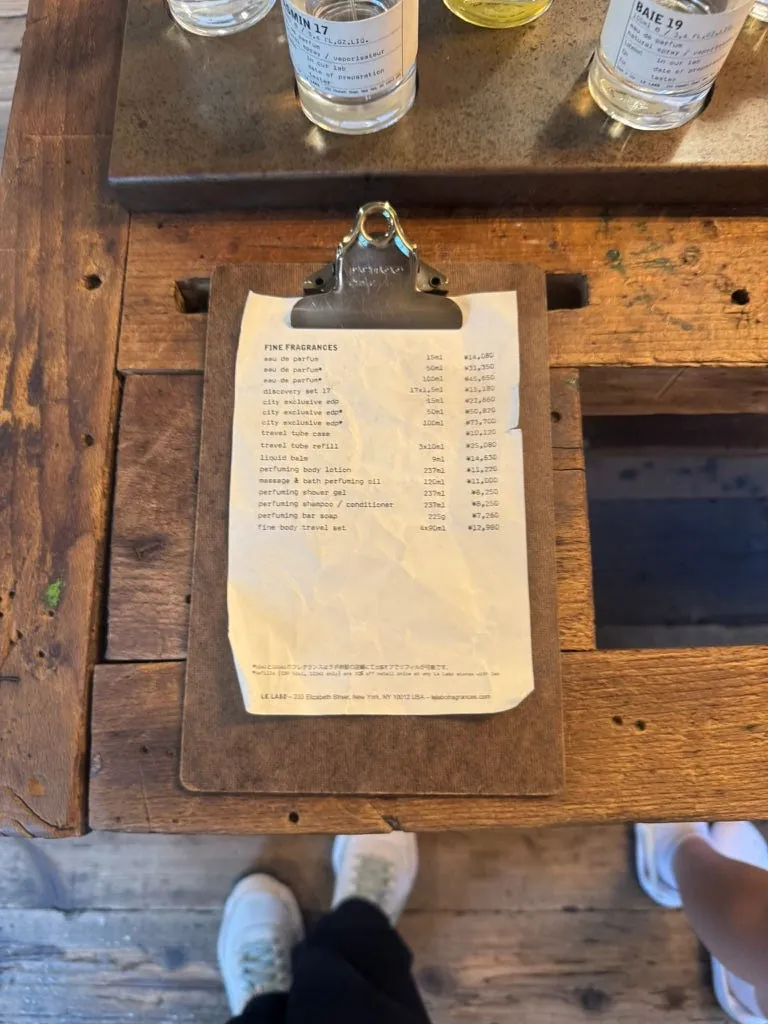
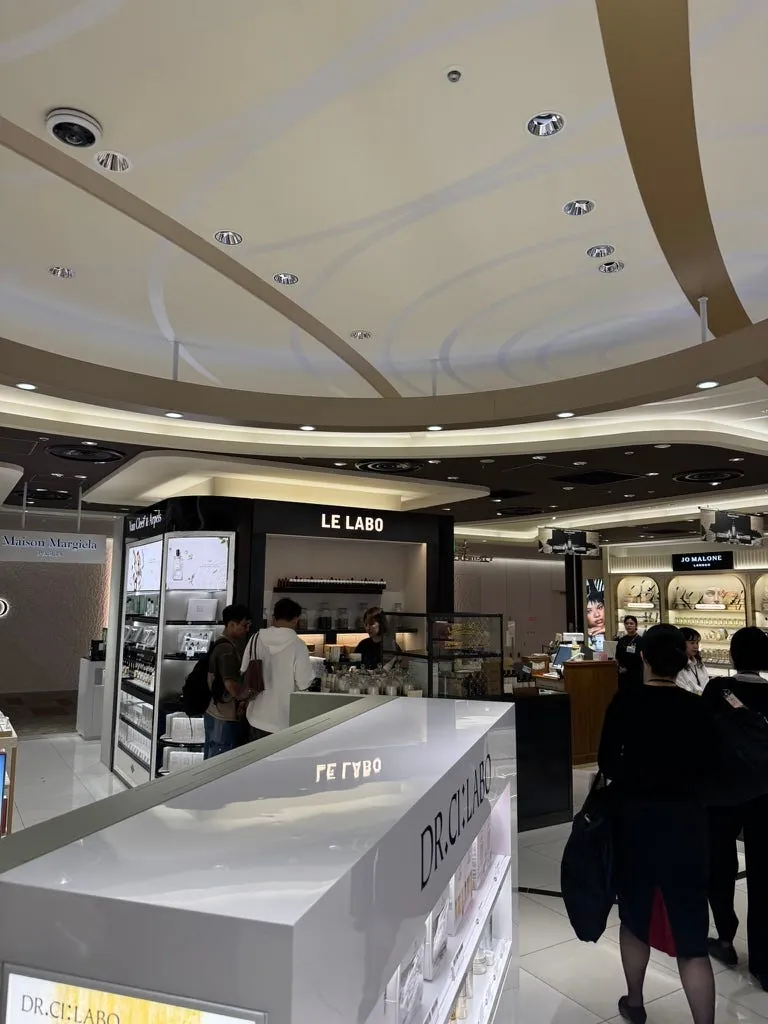
Just wandering around, I ended up at the same Le Labo store where I bought perfume last time. In 2025, the price for 50ml perfume in Japan is ¥31,350, and after tax refund, it’s about ¥28,500.
16:30 HARRY HARAJUKU terrace Otter Café
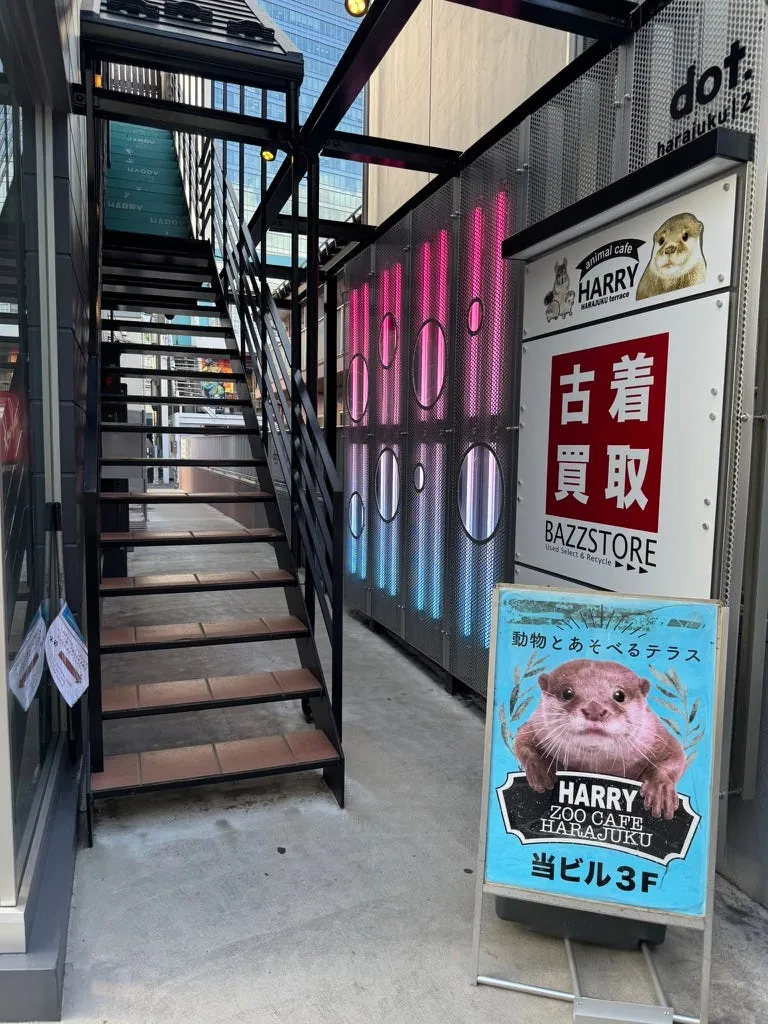
Go up the stairs beside it to the rooftop of this building.
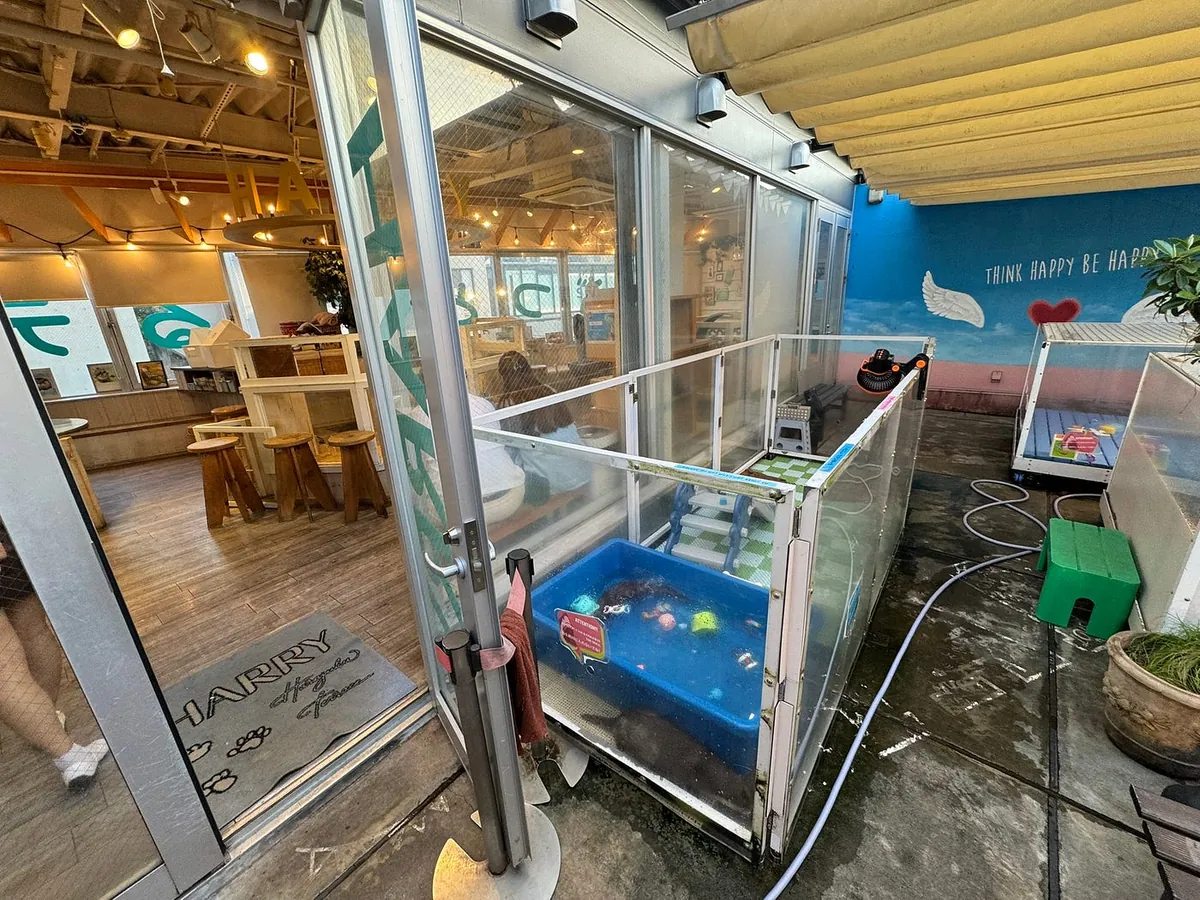
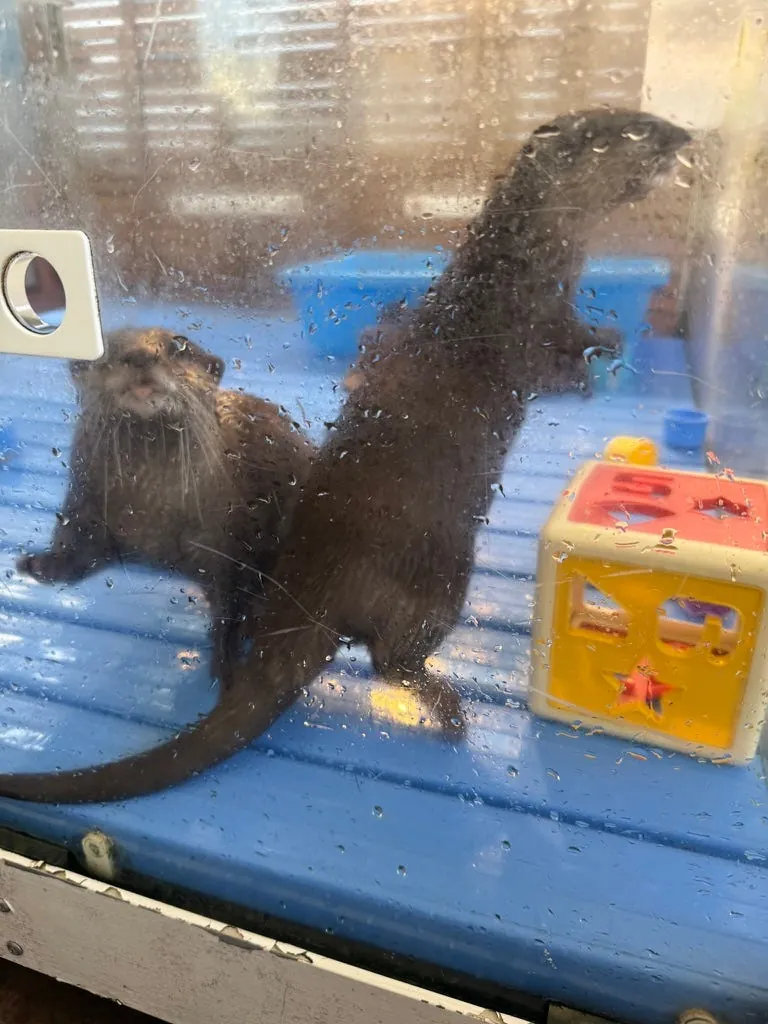
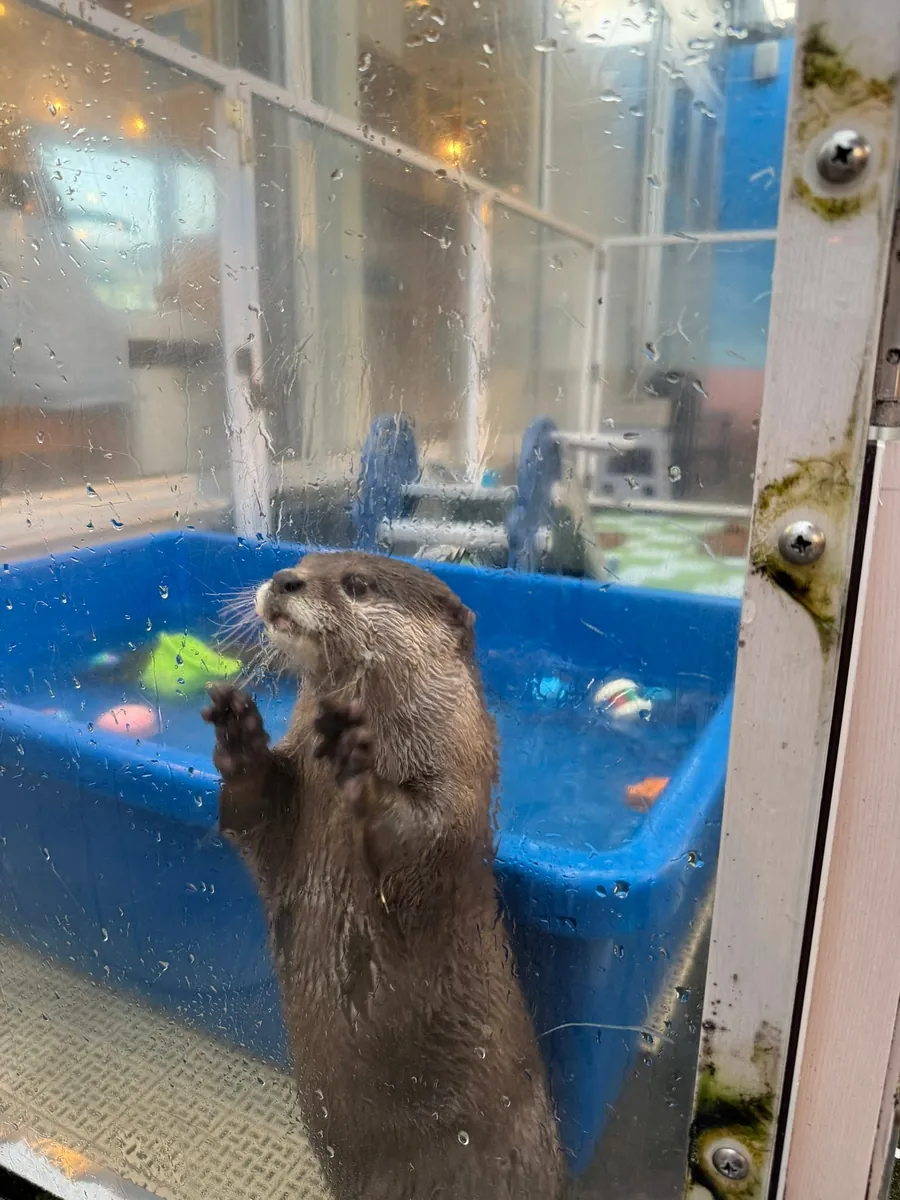
The venue is small, with three pools outside where three otters roam around. You can buy snacks to feed them (¥880). (They will reach out their paws)
The coffee is from the vending machine, self-served. (Buy 30 minutes and get 1 cup free)
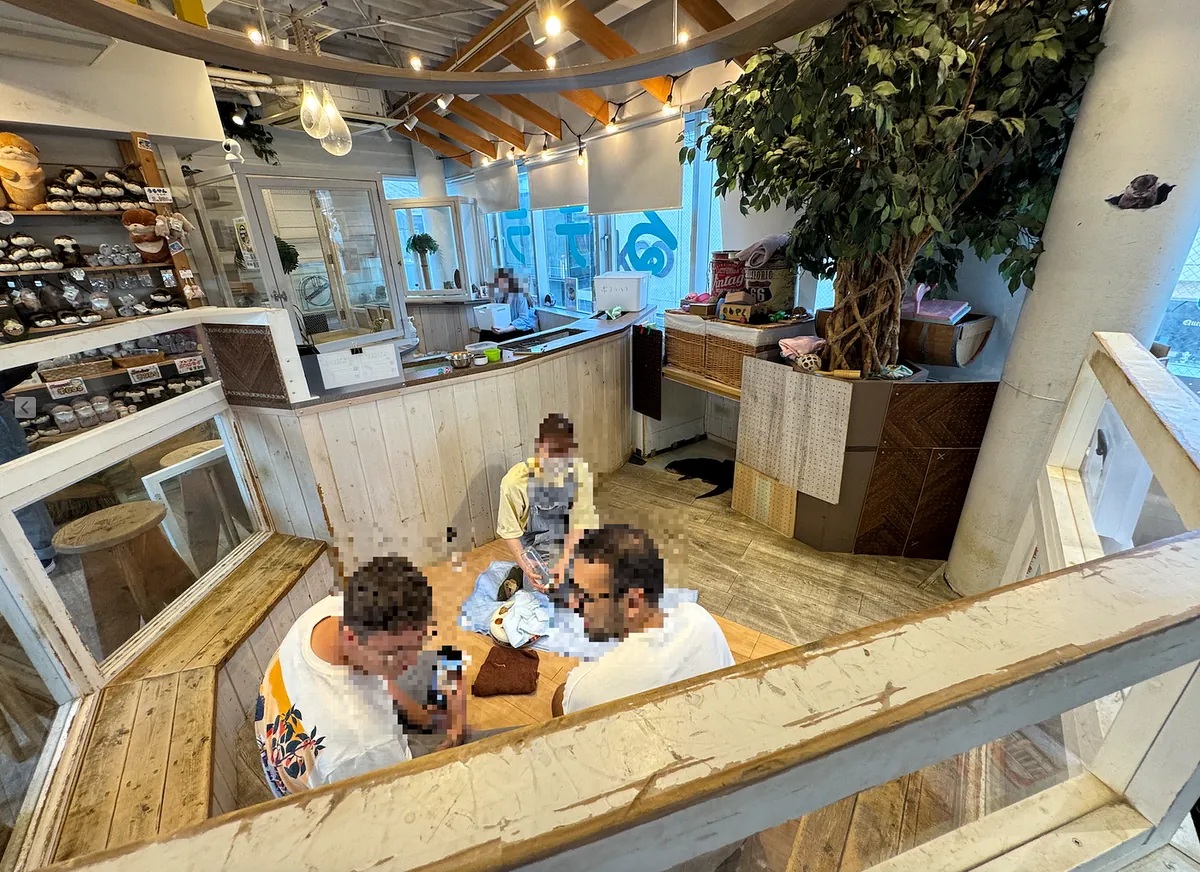
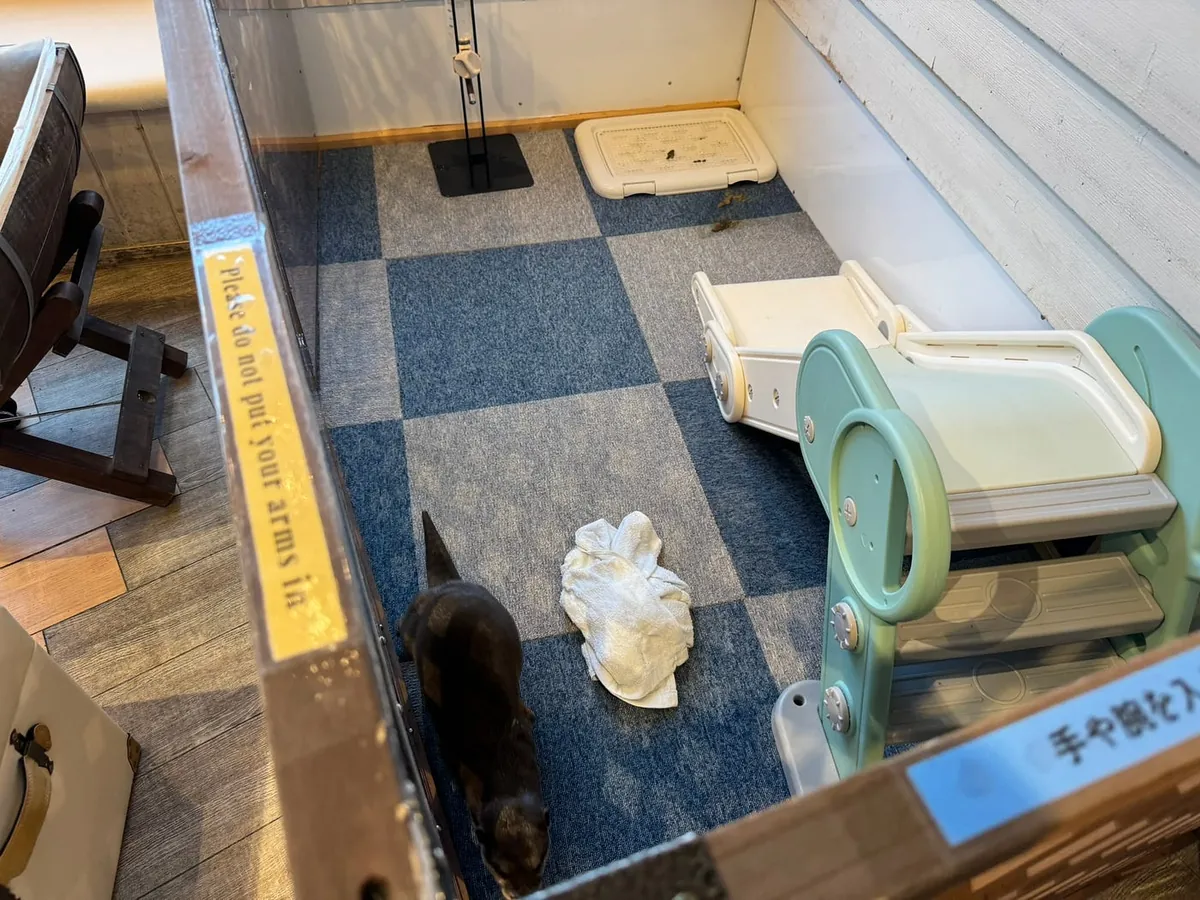
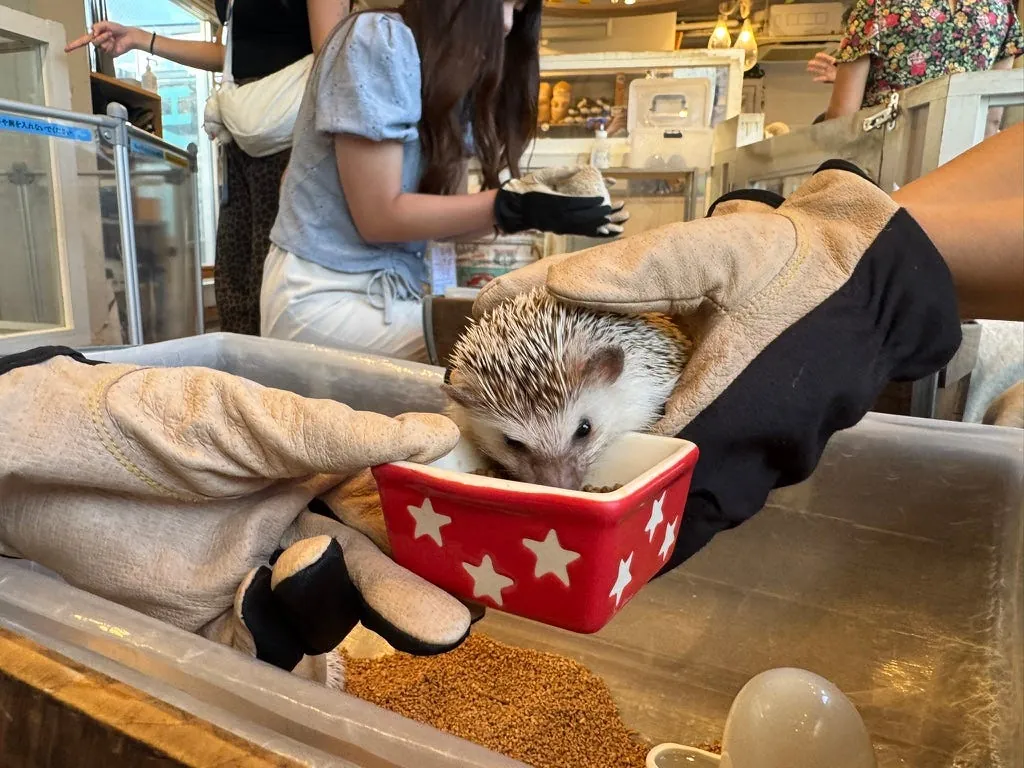
The venue itself is not very large. In the middle, there is a paid interactive otter area (additional fee required), next to it is a paid Totoro interactive area, and on the other side is a free hedgehog interactive area, along with a few otters inside a fenced enclosure.
We added ¥880 per person for a 5-minute close interaction with the otters; otherwise, you can’t actually touch them.
17:20 Pet the Otters
There were many visitors interacting with the otters, so our turn was not until 17:20. The staff monitored the time closely.
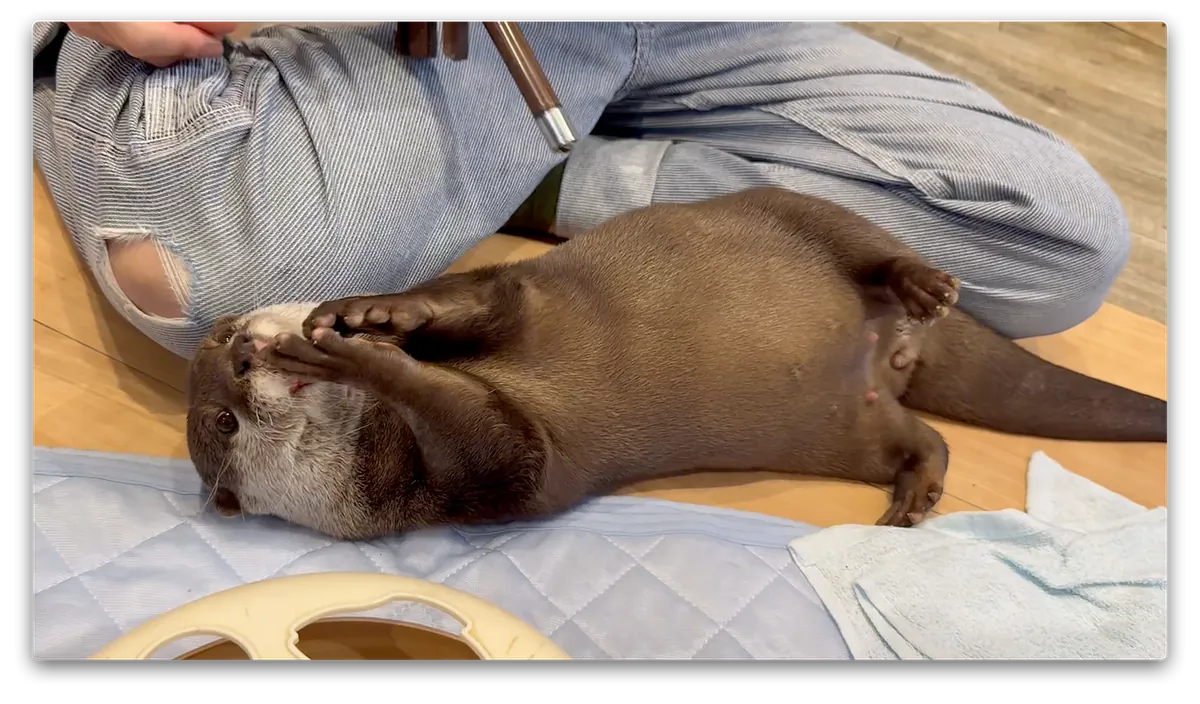
You can pet him while he’s eating and rolling over; his fur is very soft.
Overall: The rating might only be around 2.5–3 stars
The overall venue is quite small. The basic fee is ¥3,080 per person for one hour. Aside from the hedgehogs, there is no other interaction, and the coffee is only from vending machines. Although the staff are gentle with the animals, the other otters resting nearby and those in the outdoor pool have limited space to move, which feels a bit sad.
It seems different from a typical coffee shop in size, plus there are otters running around.
After further research, it seems another place, カワウソ_若林の家, is better with longer interaction time.
18:00 Head to Shibuya
18:20 Queue at Gokumiya
It’s still early, so I came back to Shibuya and started with a meal at Gokumiya.
At this time, there weren’t many people, so after a short wait, we got to eat.
18:55 Seating at Gokumiya
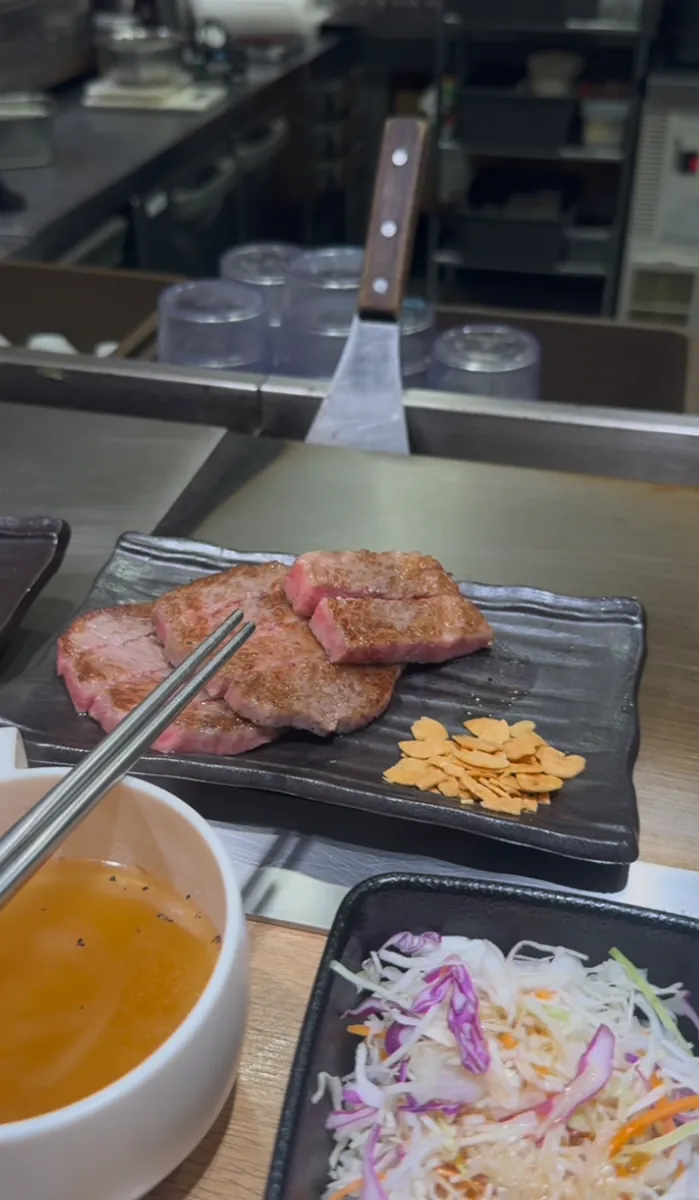
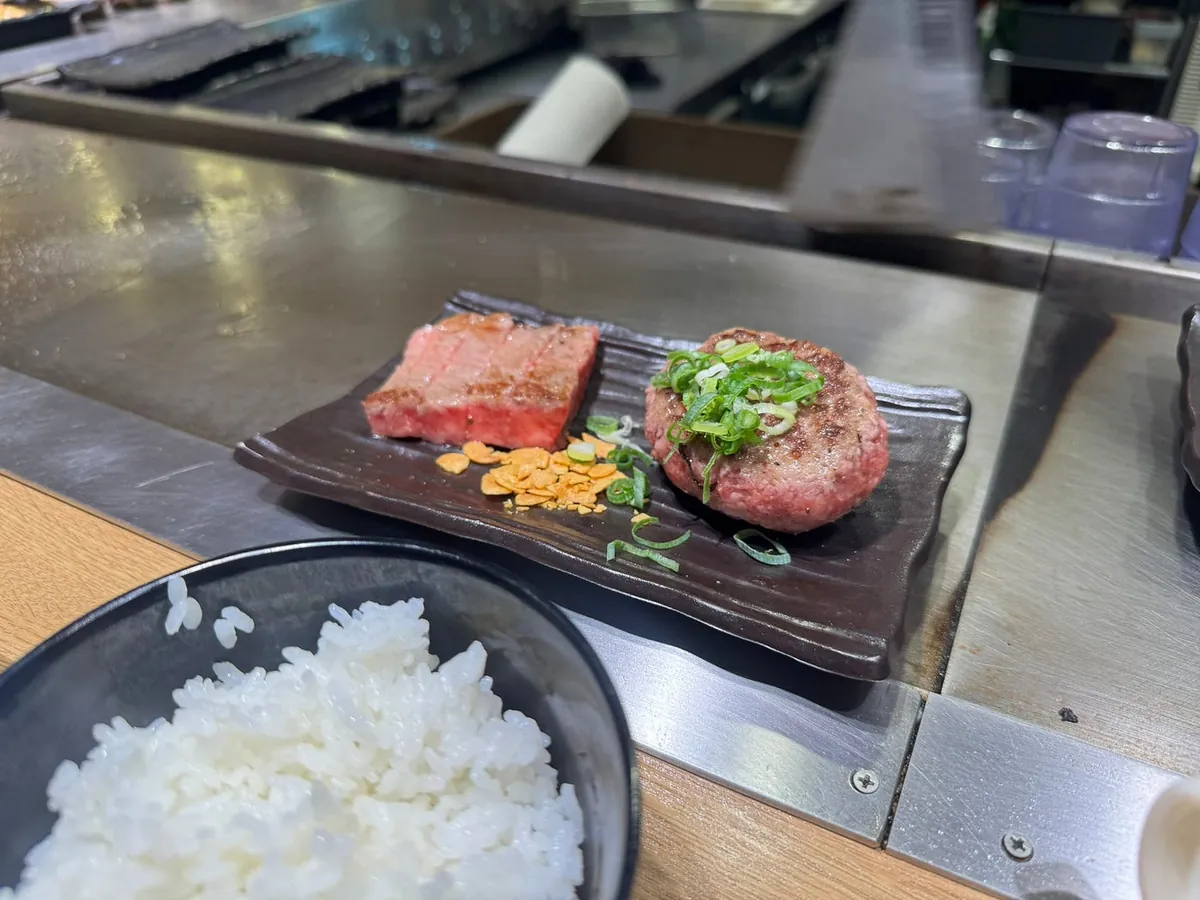
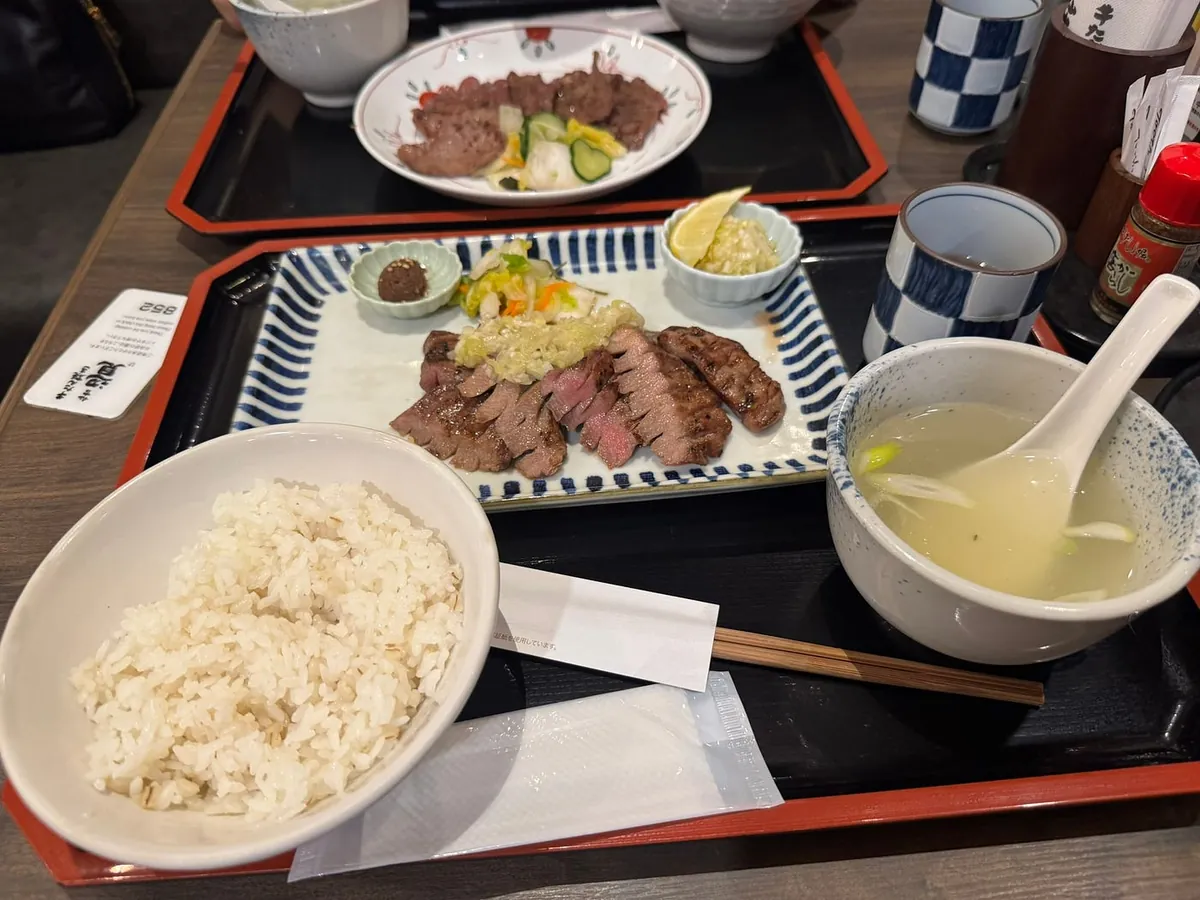
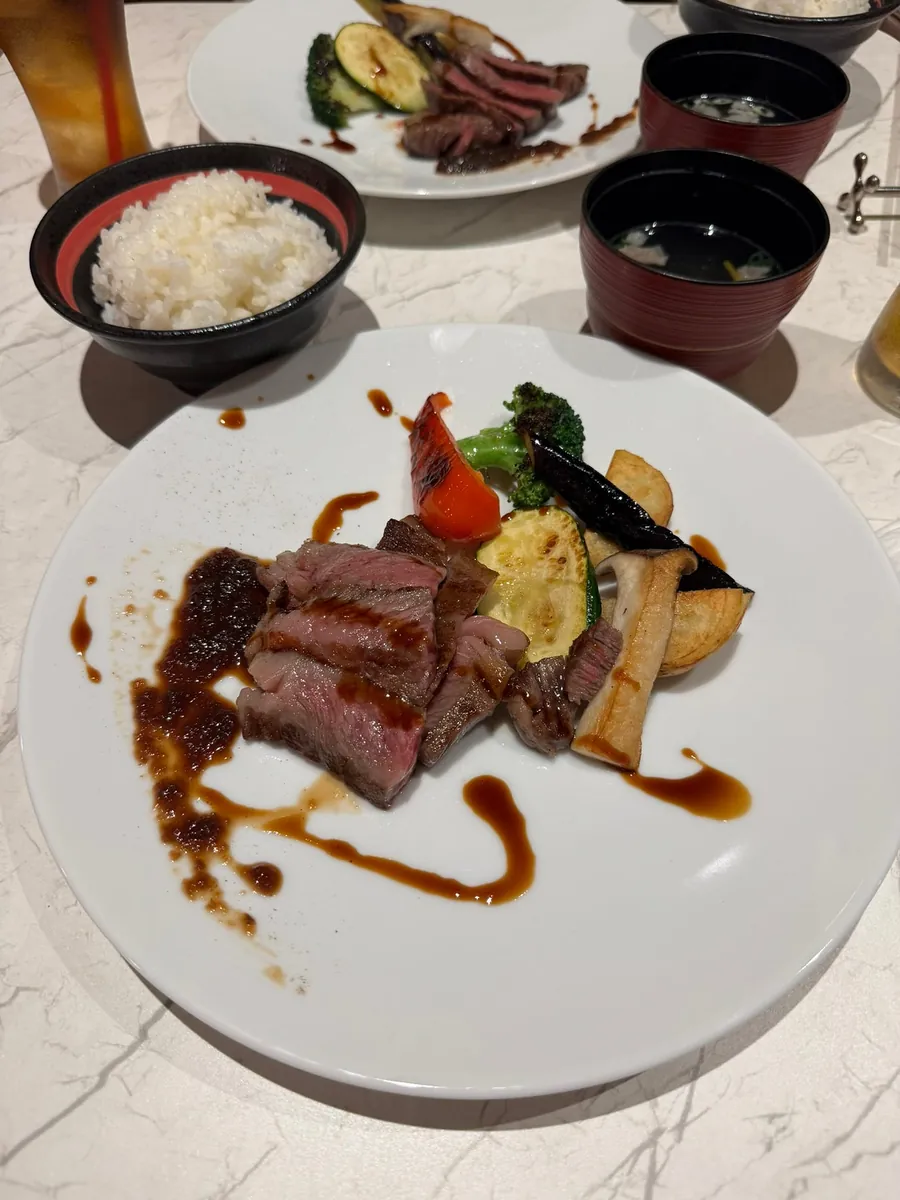
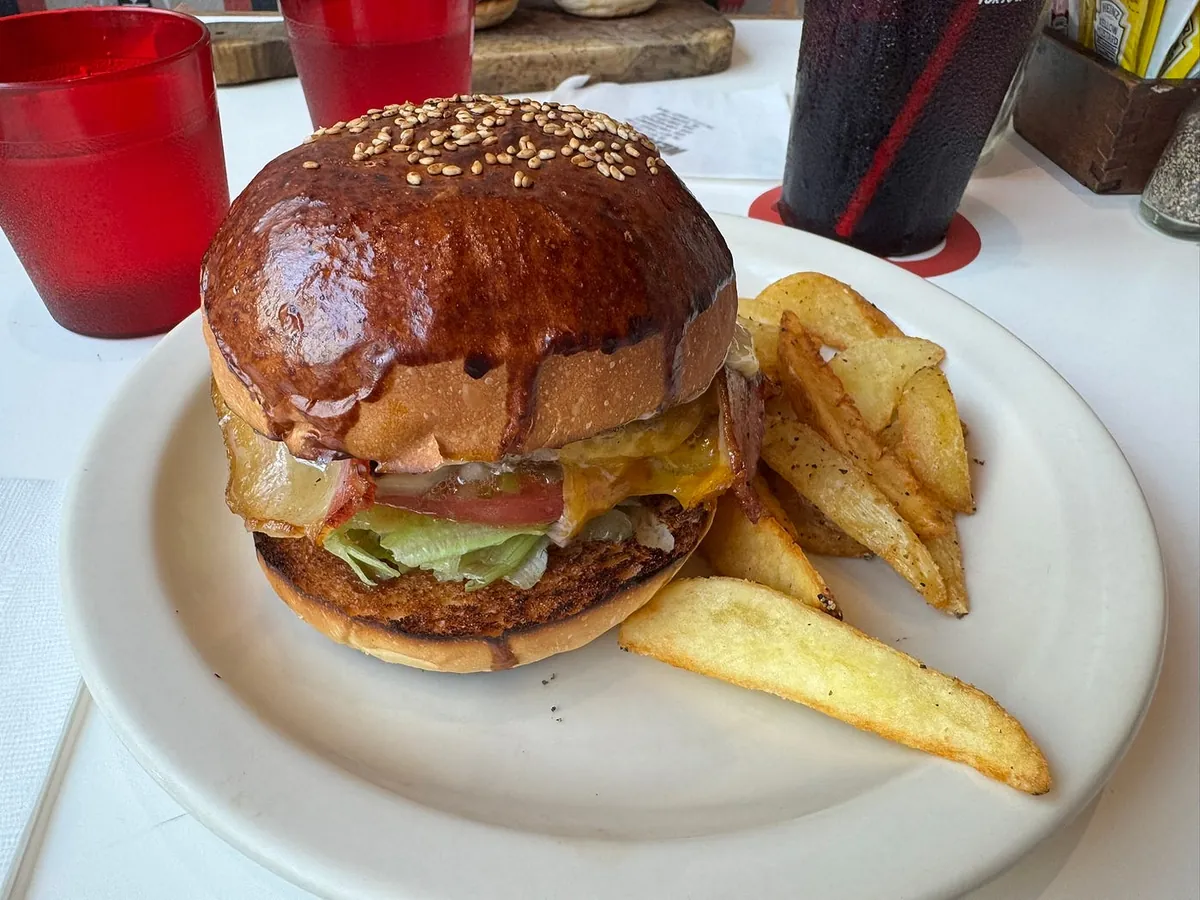
I ate too many hamburger steaks at lunch and felt a bit tired of them. I ordered the pure beef steak set on the left; the juice was delicious.
Last time I had the hamburger steak + beef steak set Just remember to bring two pairs of chopsticks: metal ones for grilling, wooden ones for eating.***
Signature — Imari Steak + Gokumiya Hamburger Beef Prices:
-
Small (120g): ¥2,480 JPY
-
Medium (160g): ¥2,850 JPY
-
Large (200g): ¥3,180 JPY
Price of Jun Imari Steak:
-
Medium (130g): ¥2,480 JPY
-
Large (180g): ¥3,280 JPY
Upgrade Package: ¥450 JPY
-
Multiple soups, salads, and ice cream
-
Personally, I think it’s just okay.
The price is very affordable.
Shopping and Buying Cosmetics

At the department store, I found some fragrances and bought two bottles along with a pillow spray to try at home.
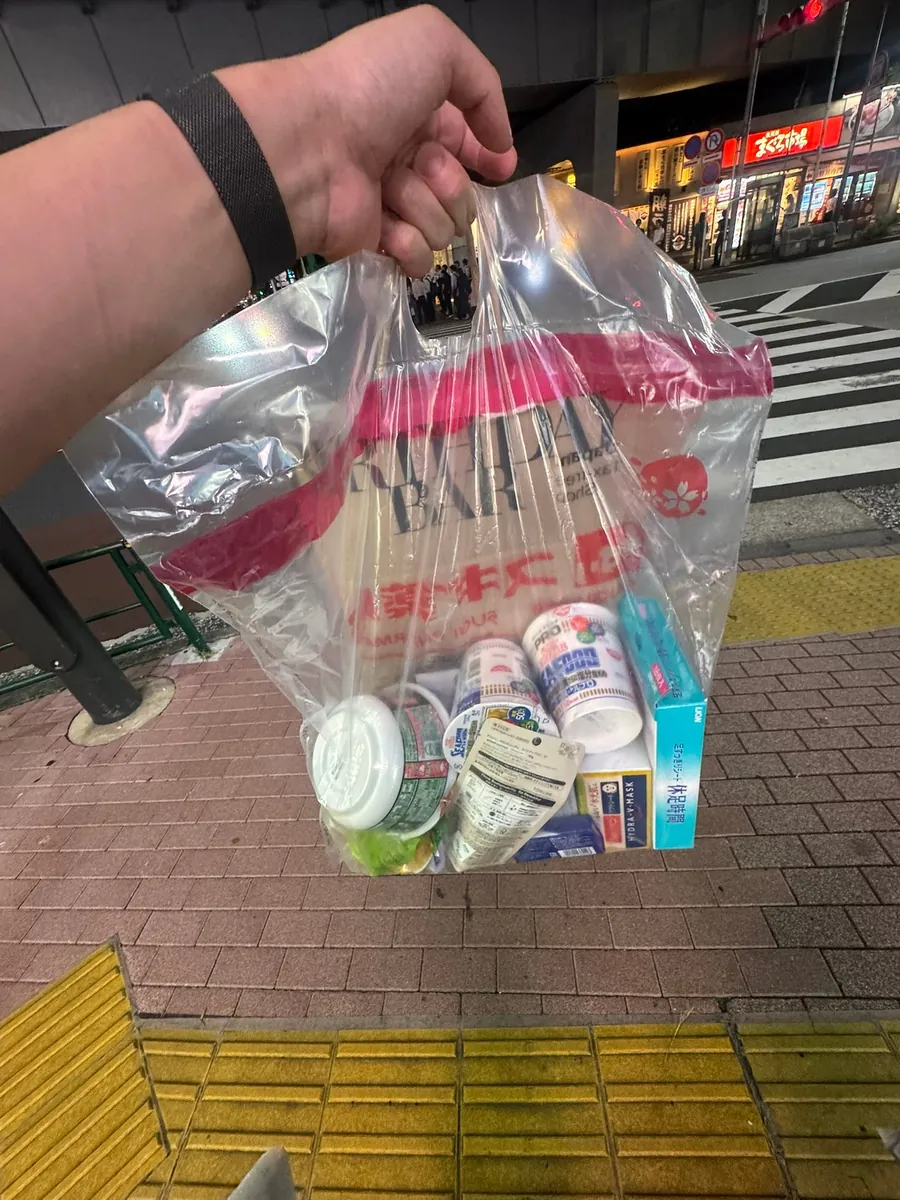
After eating, we strolled around Shibuya a bit more, then went back to the hotel to get some money and buy cosmetics at a drugstore. Returned to the hotel to rest, getting ready to say goodbye to Tokyo.
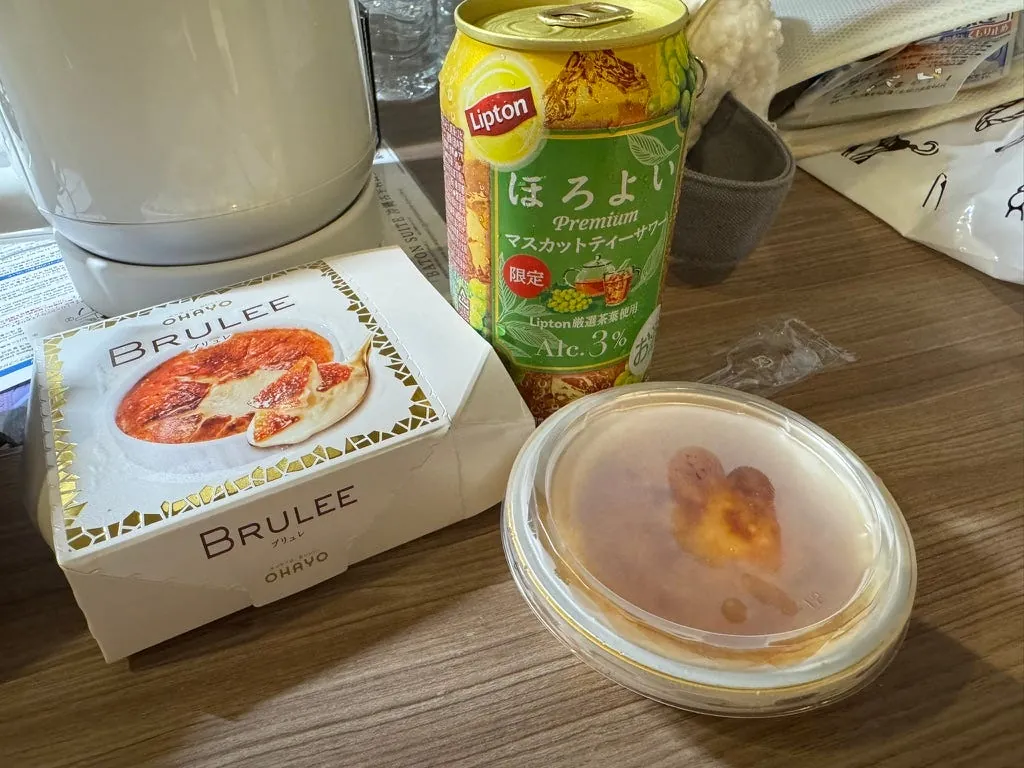
Ate too much meat, so let’s just have dessert tonight!
Also, a colleague bought donuts for us at Harajuku I’m donut? Harajuku. (No need to wait in line in Japan, unlike in Taiwan)
Day 5 (09/17 Wed) — Ueno Station, Return Trip
10:50 Leave before the final check-out time
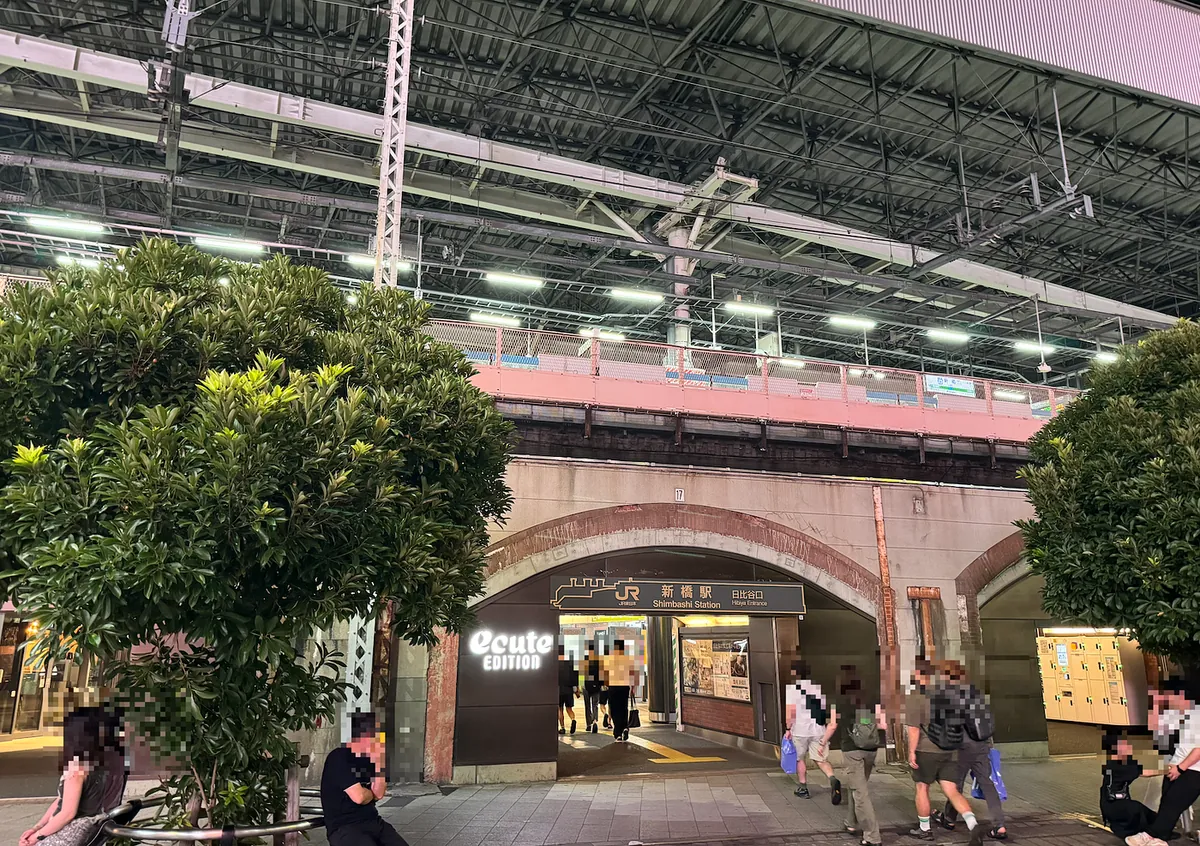
Goodbye Shimbashi.
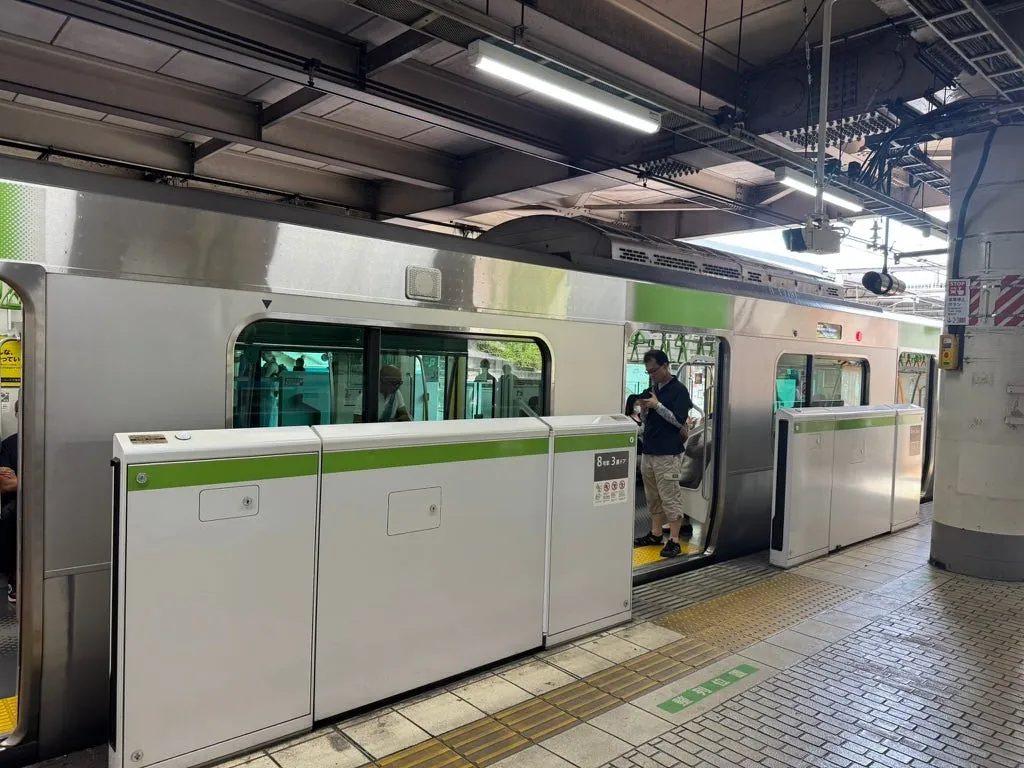
Take the Yamanote Line to Ueno.
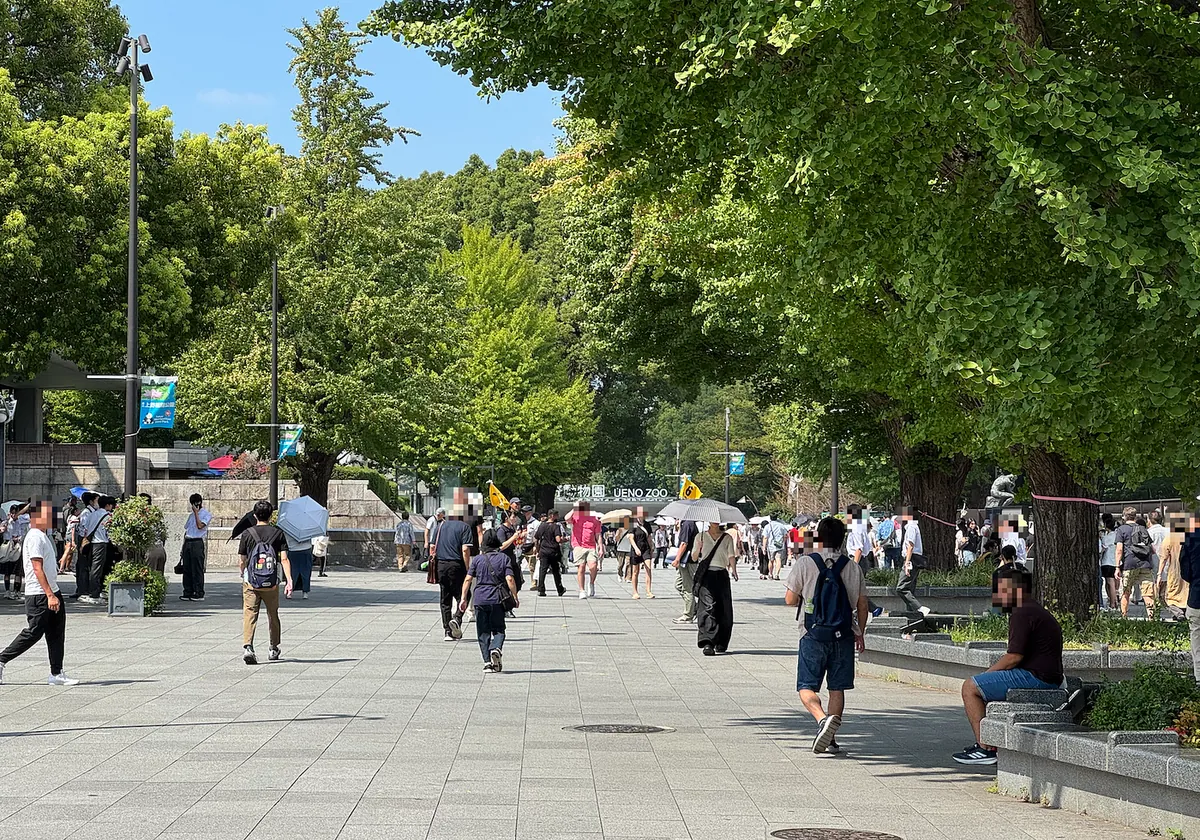
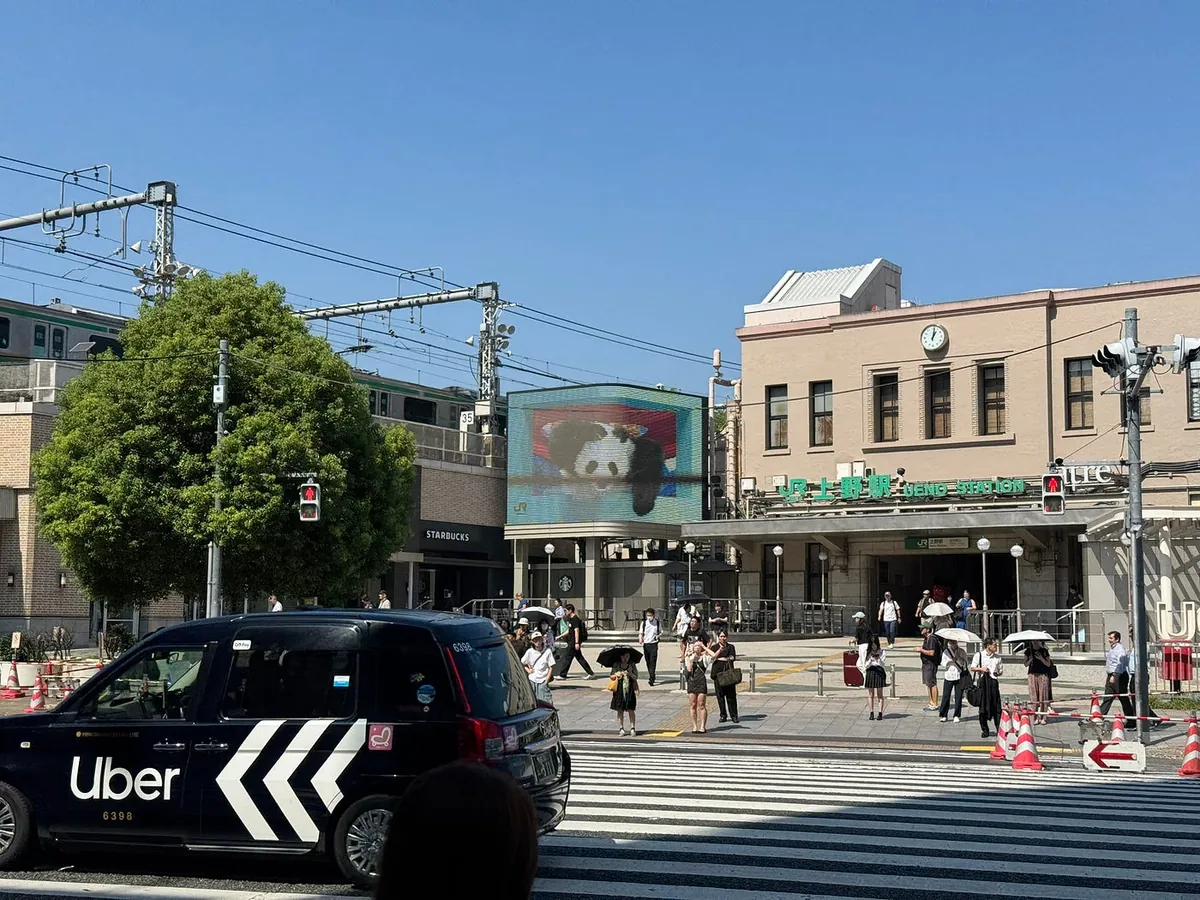
11:10 Arrive at Ueno Station
Didn’t explore much; worried about not finding a place to store luggage, so I used the locker counter inside the station.
Later found it not very cost-effective, as you need to pick up items and pay to enter the station, plus it’s expensive; the main issue is that it’s out of the way.
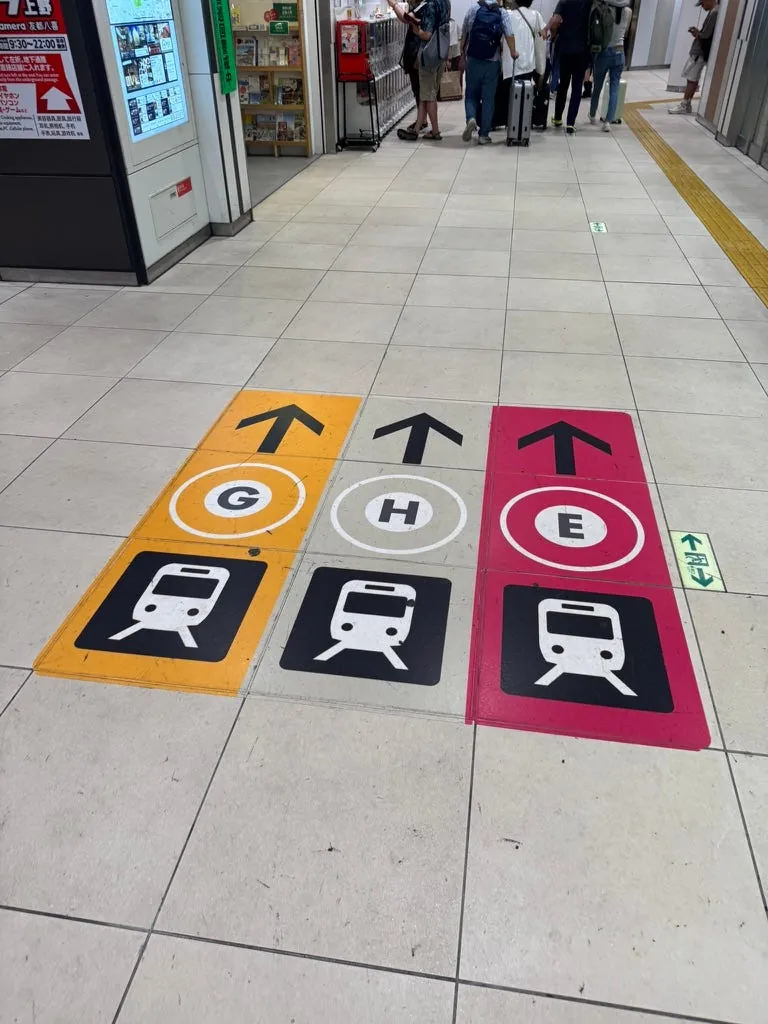
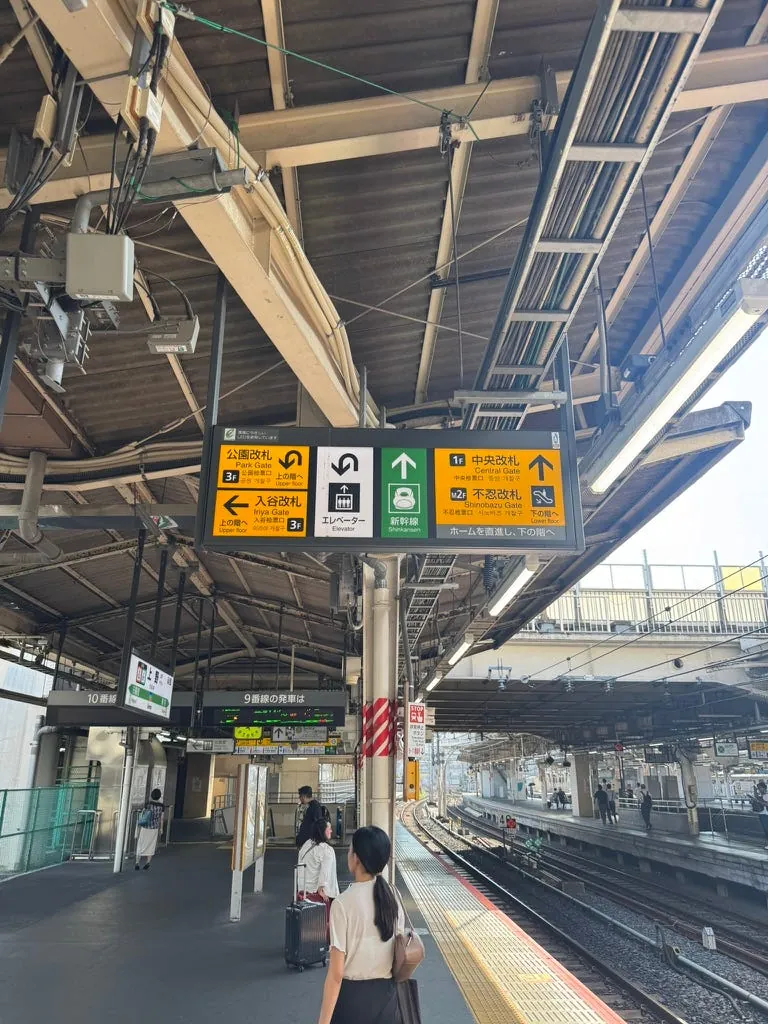
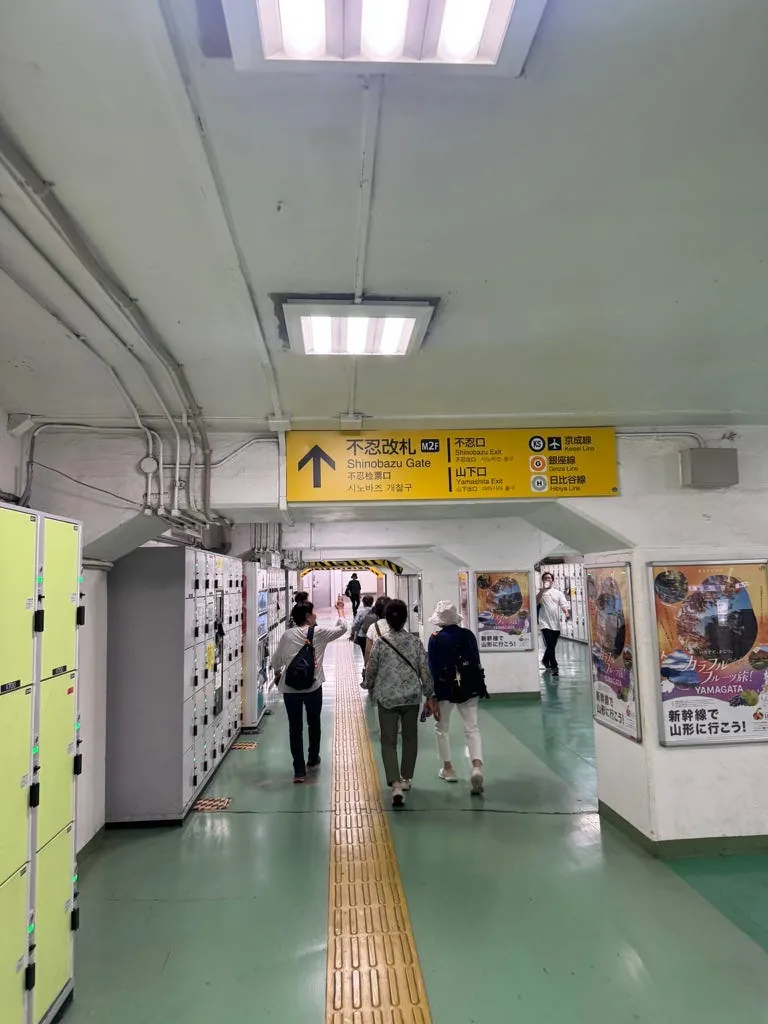
Later I found out that the Skyliner Keisei Ueno is at Ueno Station Yamashita Exit or Shinobazu Exit You can reach it inside the station without going outside in the sun (but it’s easy to get lost inside the station); if you want to use the lockers here, you have to walk back (about 15 minutes), and there are many coin lockers there as well.
Exit here and you’ll be at Ueno Zoo. Turn left, ready to reserve a seat for the Skyliner at Keisei Ueno.
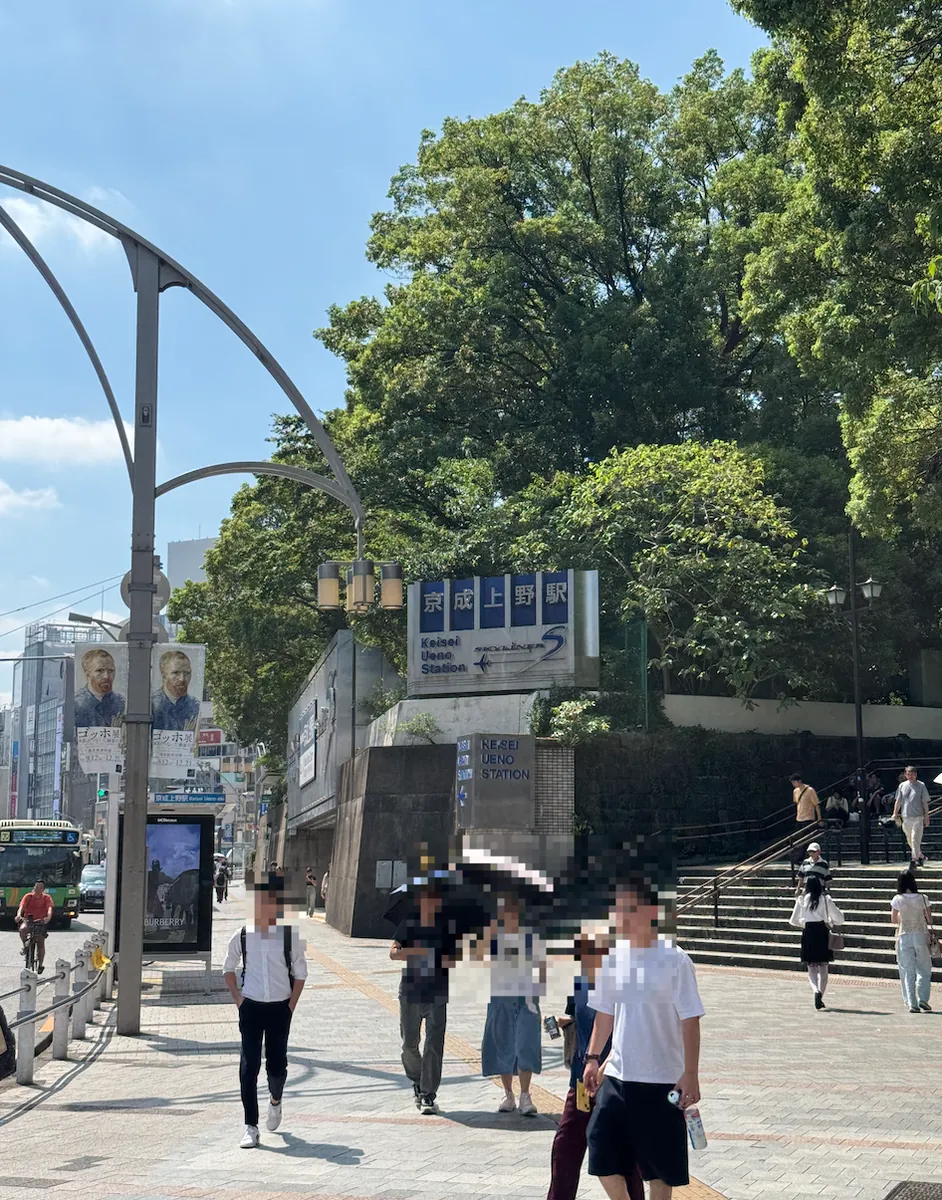
Finally saw the Skyliner Keisei Ueno Station.
Since all Skyliner seats are reserved, it is recommended to book your seat early for safety.
The station staff can speak Chinese (I just didn’t realize they were speaking Chinese at first).
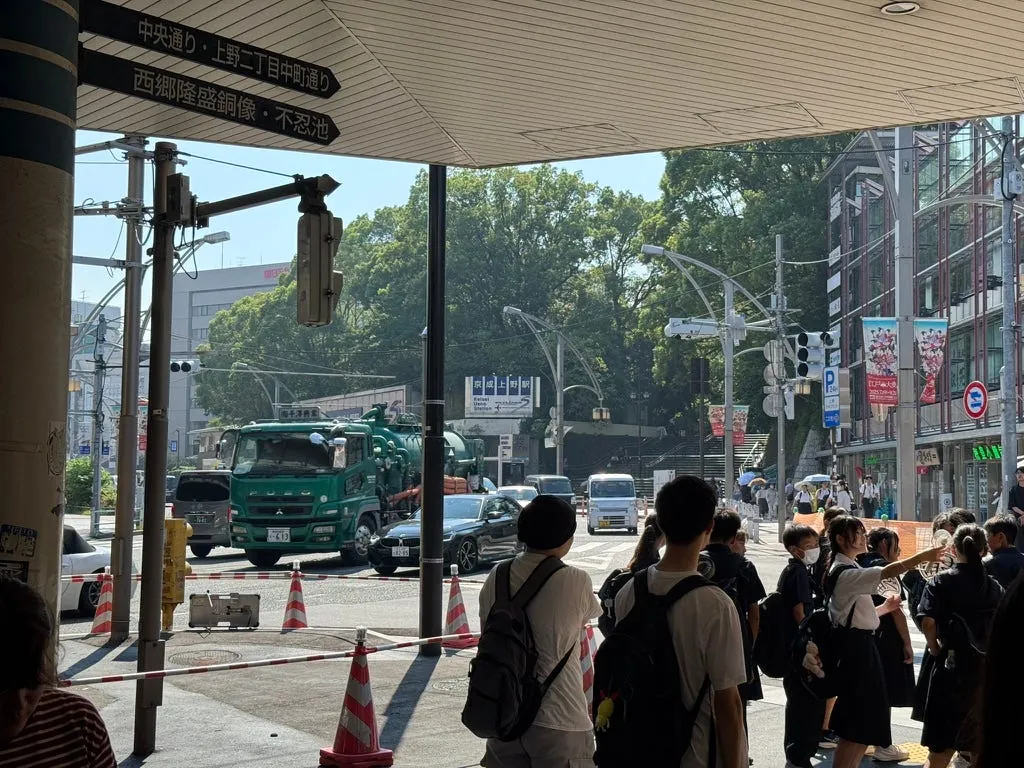
Spend the last moments strolling around Ueno.
Yodobashi Ueno
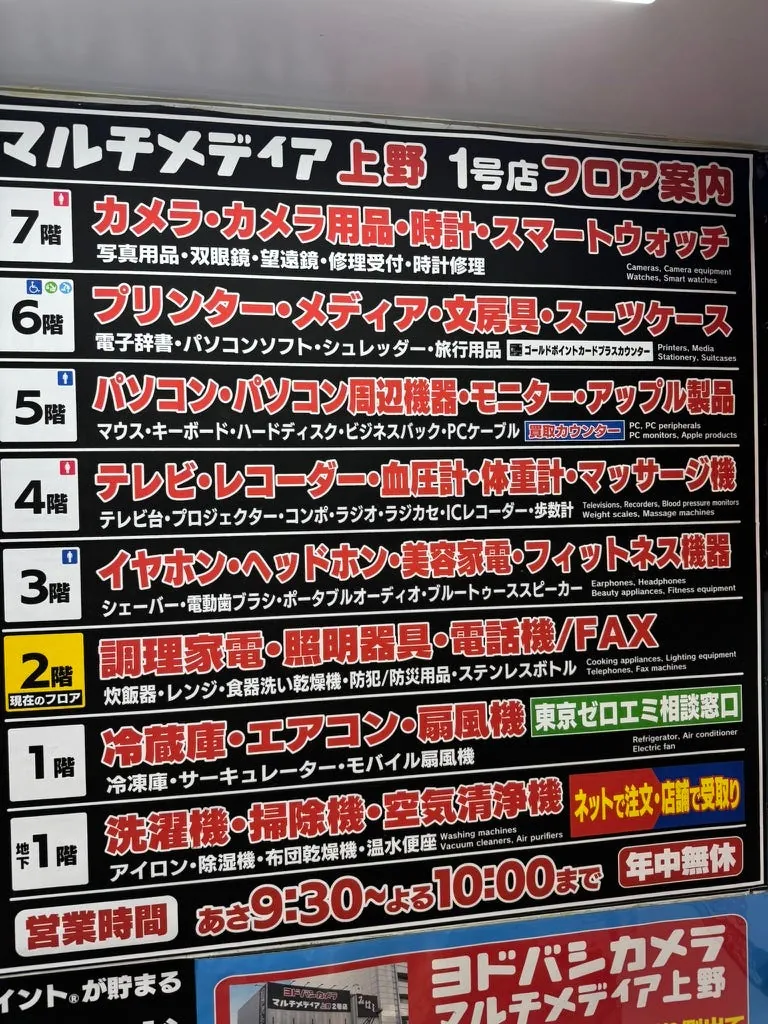
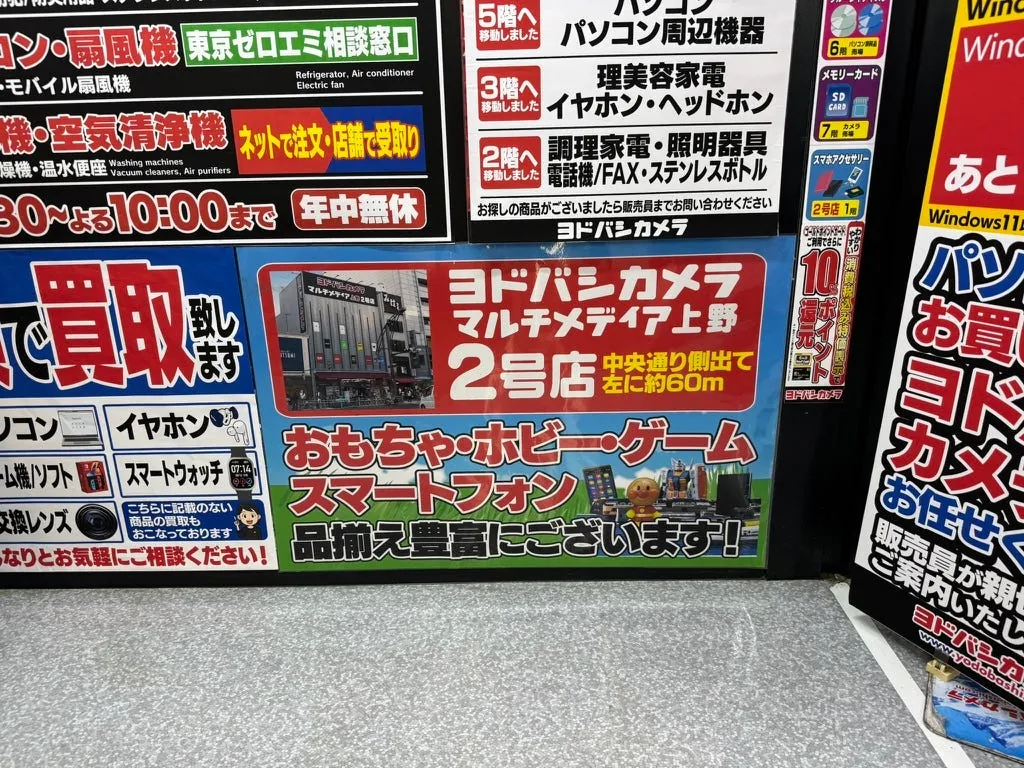
There is also a second store next door.
Walked all the way to Ueno Marui Department Store for shopping
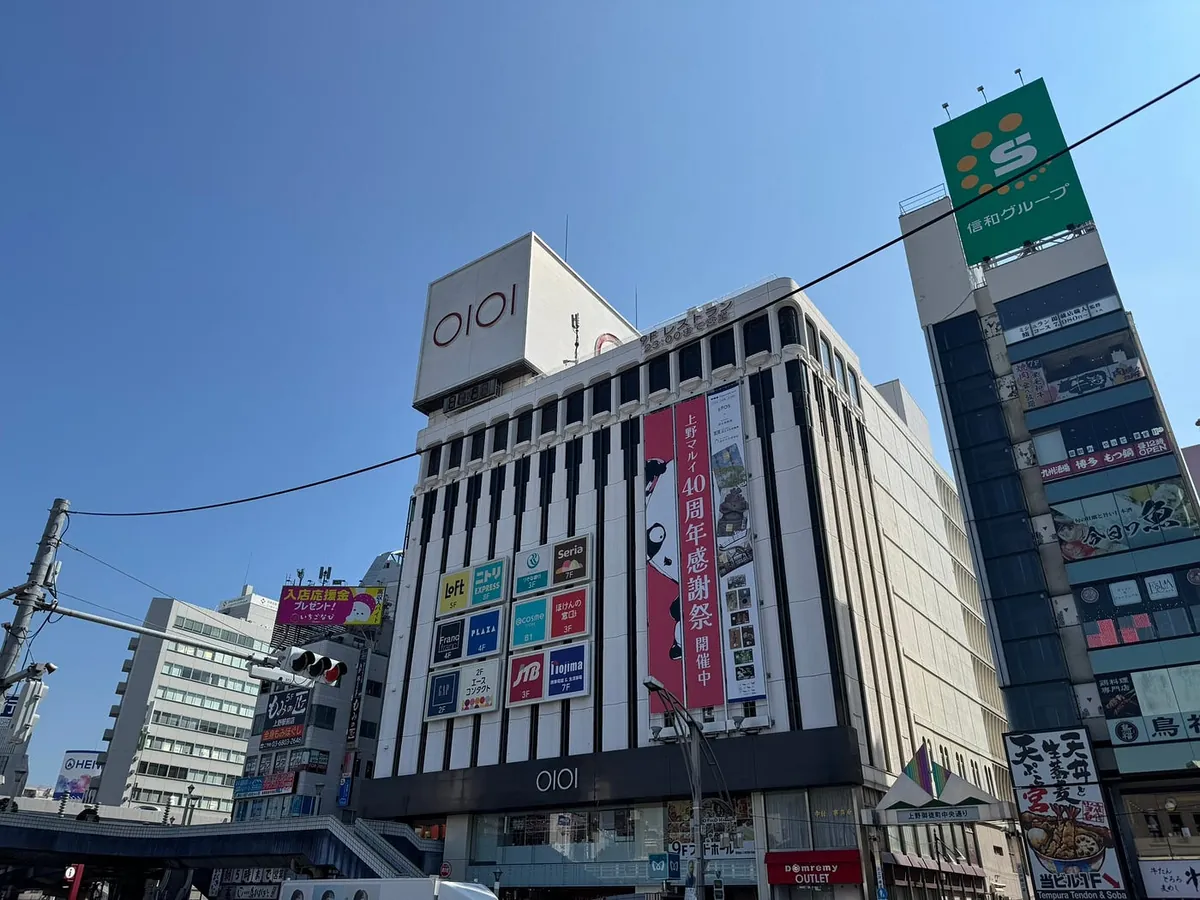
Opposite is another exit of Ueno Station. Ueno Station is really huge…
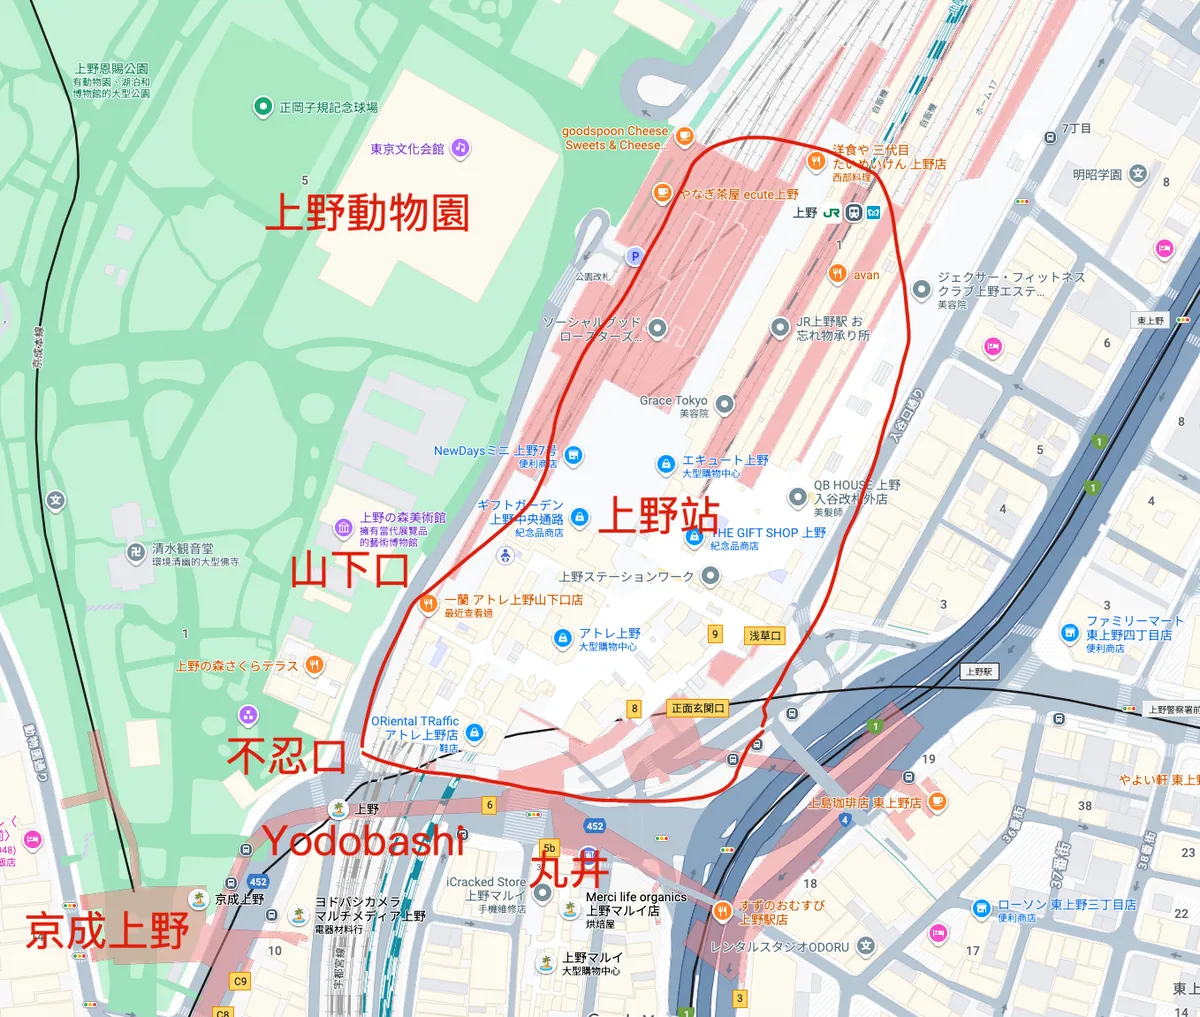
The general location is as shown in the image above.
12:00 Visit Marui Department Store
There is a gacha capsule toy area on the second floor.
Got a Shinkansen ticket capsule toy.
I also got tempted and bought a ReFa heart-shaped massage brush at Loft.
Ate croissants here to fill up.
13:20 Return to Ueno Station
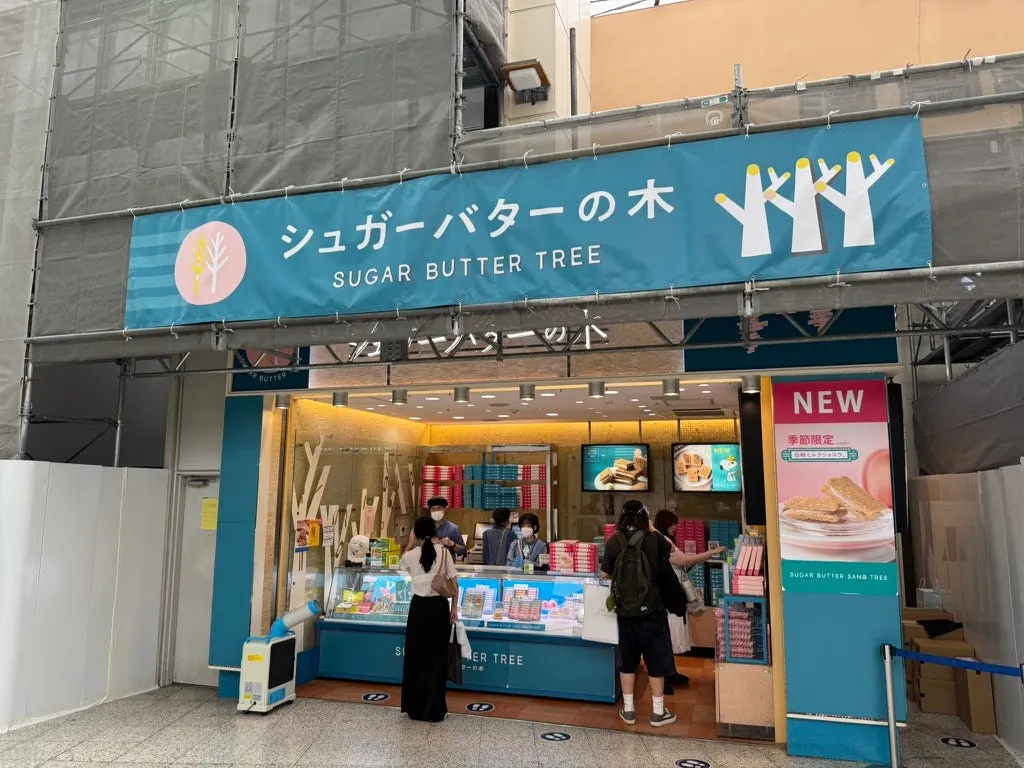
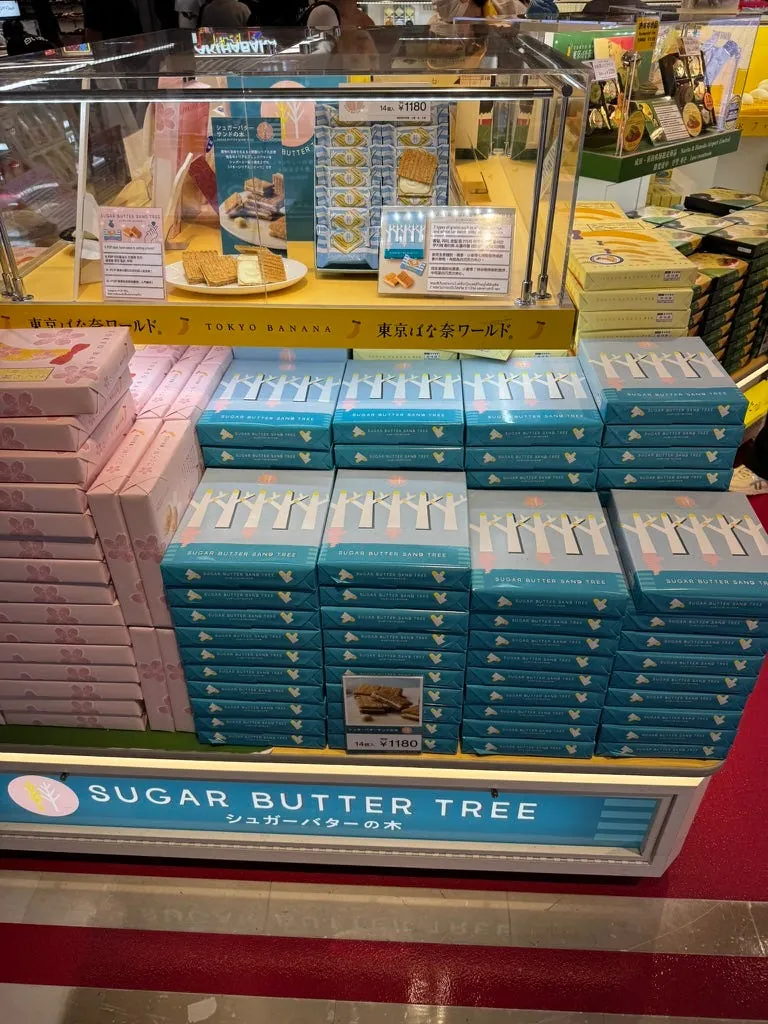
Also, buy Sugar Butter Tree as a souvenir.
Finally, I returned to the park exit to pick up my luggage, walked around a large area, and then went back to Keisei Ueno.
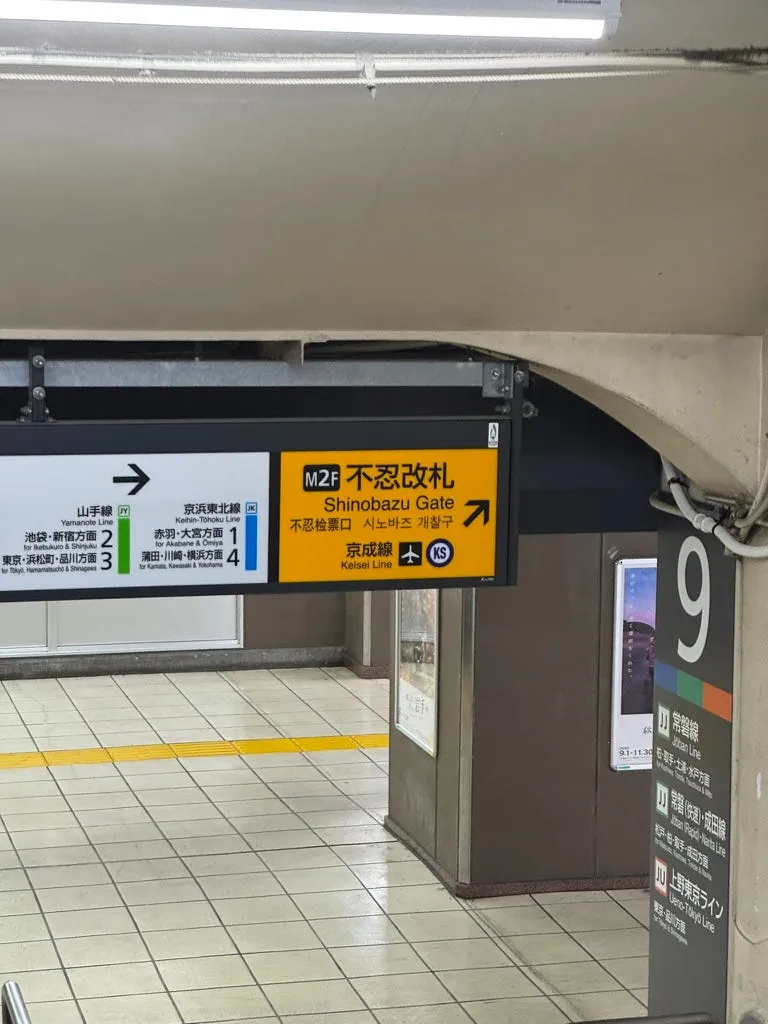
The route is a bit unusual; you need to go down to the platform first, then exit from another exit to reach Shinobazu Guchi.
This underground passage has many coin-operated lockers, and they are mostly empty.
I couldn’t help but say that crossing the street leads directly to the Skyliner at Keisei Ueno. (Not sure if there’s a closer exit, but I didn’t wander around to avoid getting lost.)
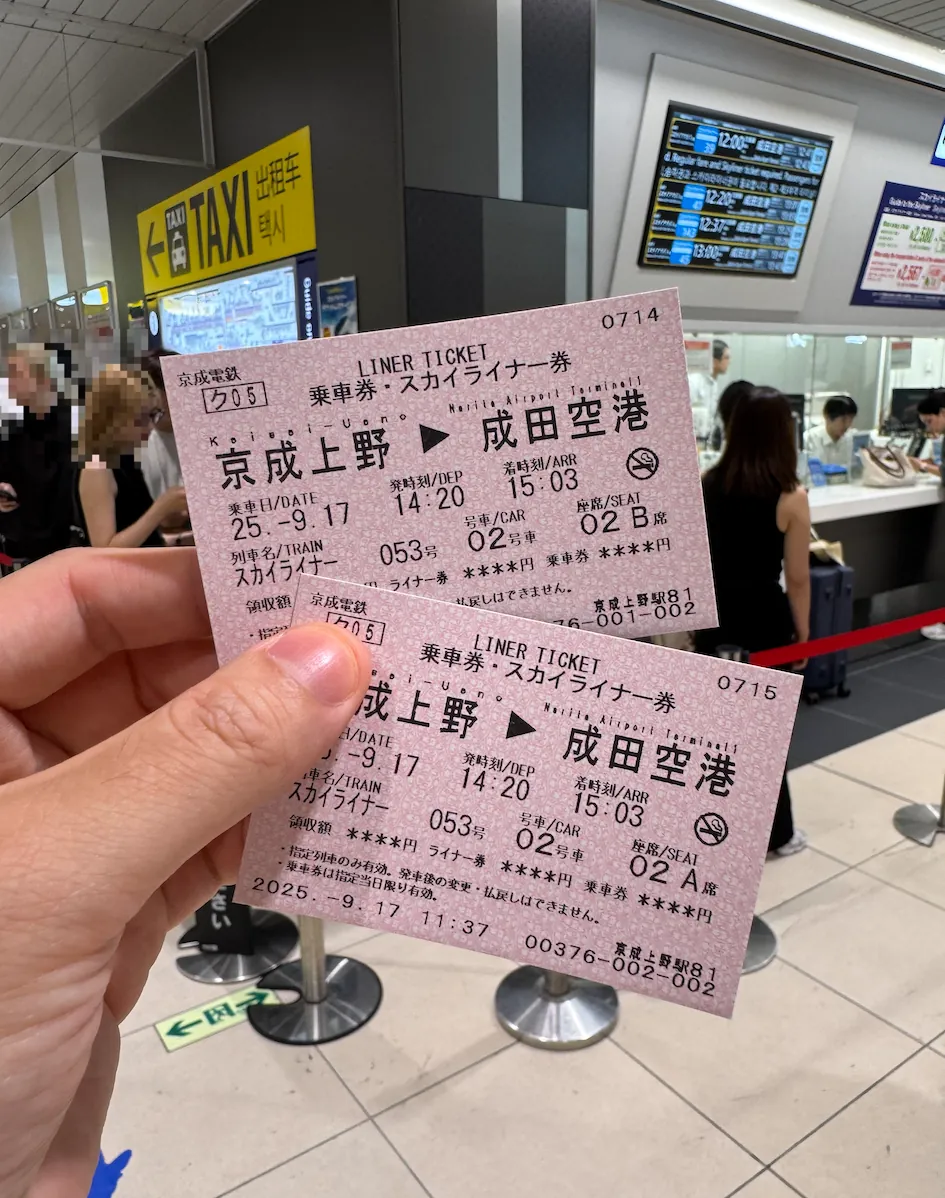
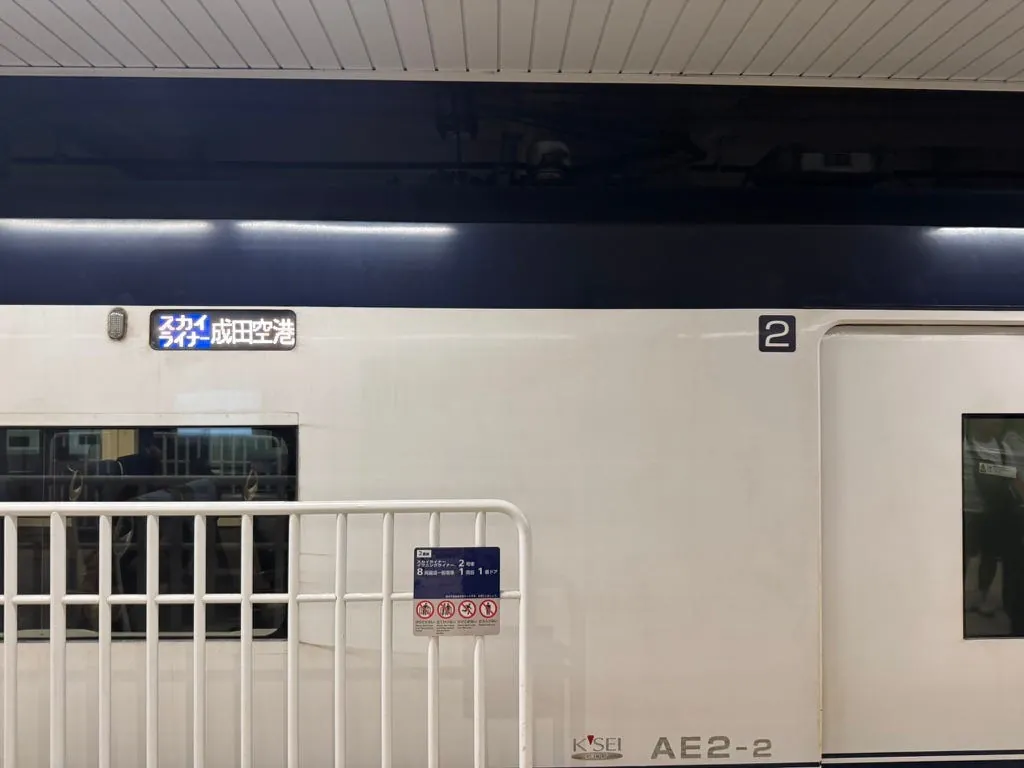
14:10 Return to Skyliner Keisei Ueno, prepare to take the train to Narita Airport
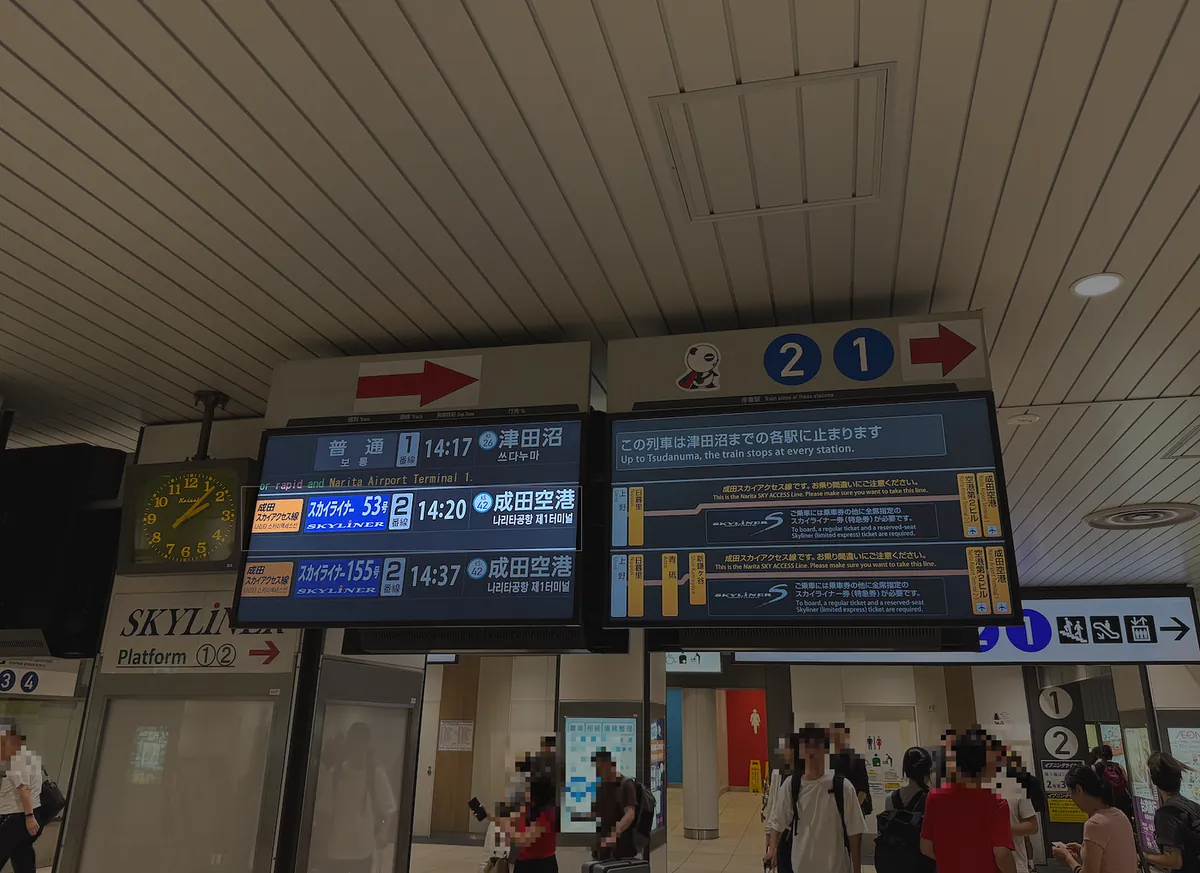
14:20 Depart for Narita Airport
Just stopped by a convenience store on the way to grab some food and drinks to recharge.
15:03 Arrive at Narita Airport Terminal 2
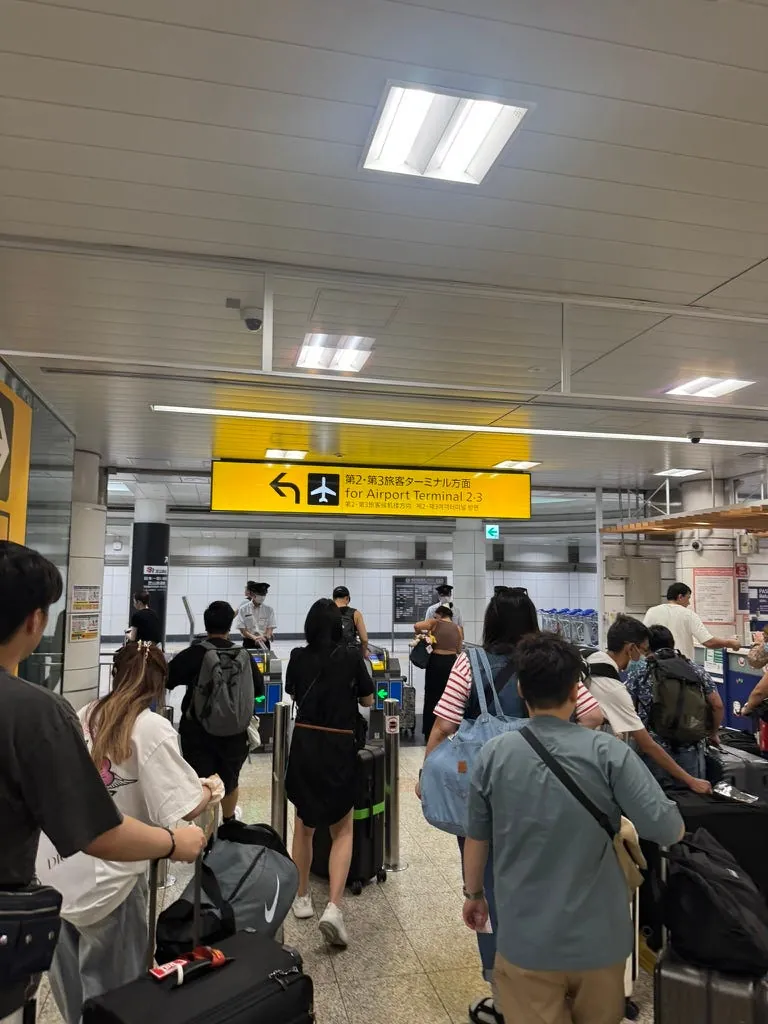
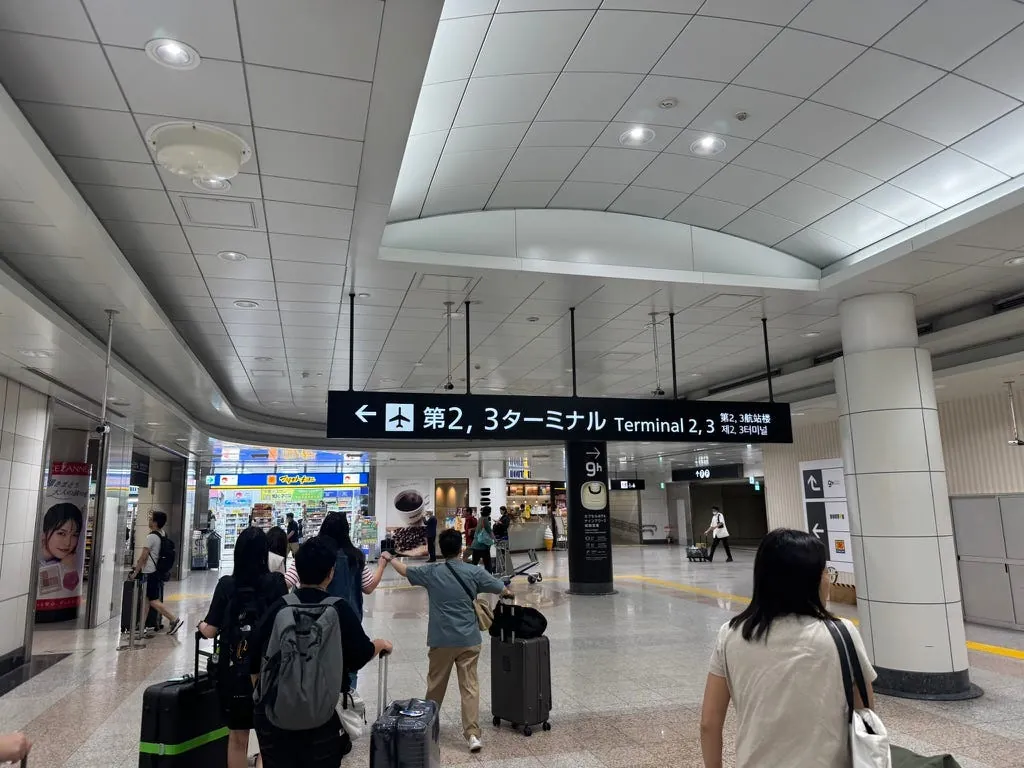

Once you go straight up, you’ll reach the international departures.
I originally planned to eat at the newly opened Shake Shack burger at Haneda Airport 新開幕的 Shake Shack 漢堡, but I was too tired to go.
15:40 Completed check-in
After checking in my luggage, I went straight to line up for departure (tired).
16:00 Complete security check and immigration clearance
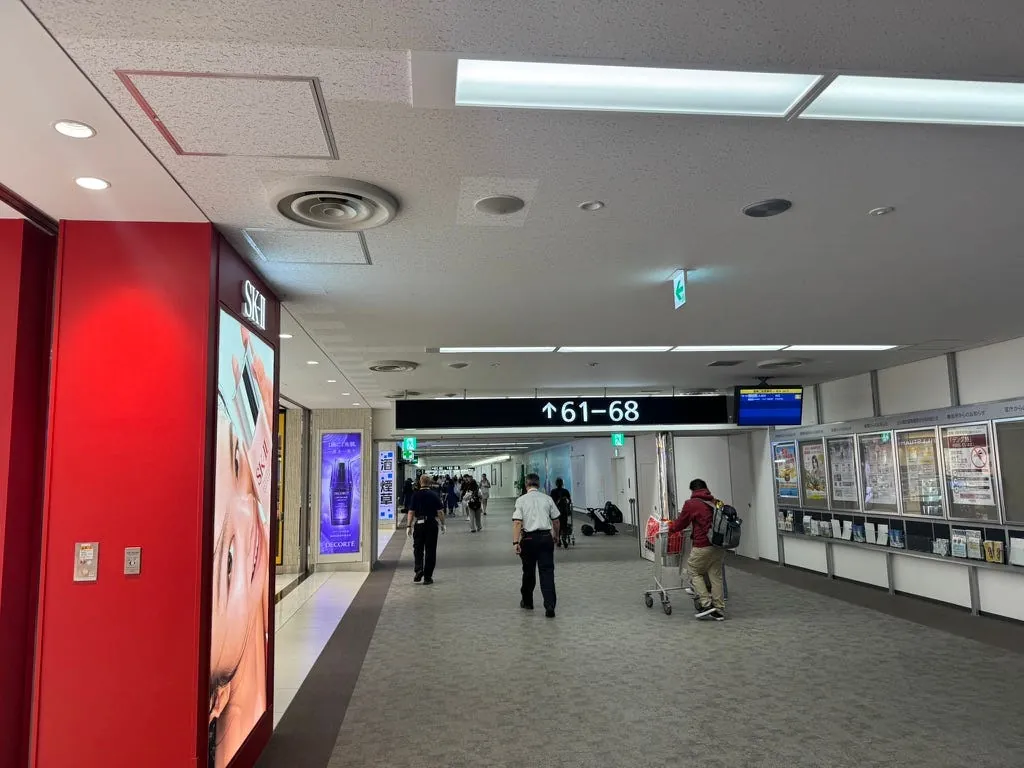
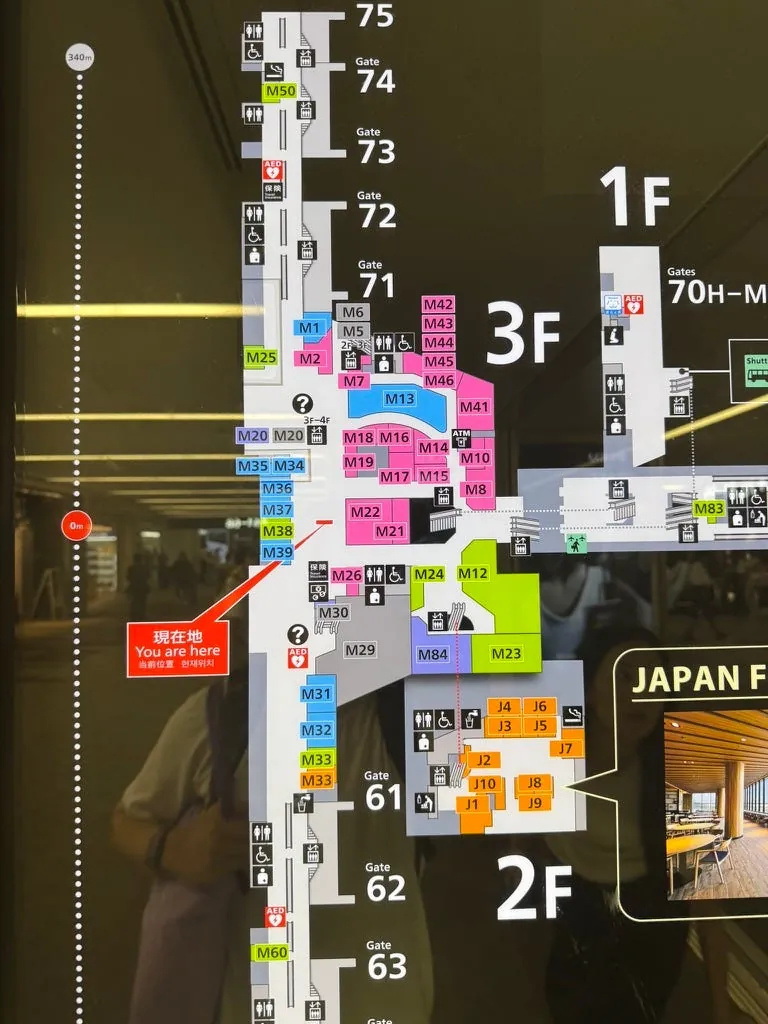
Walk toward the smaller numbers to reach the central connecting hall, where you can find food and shopping.
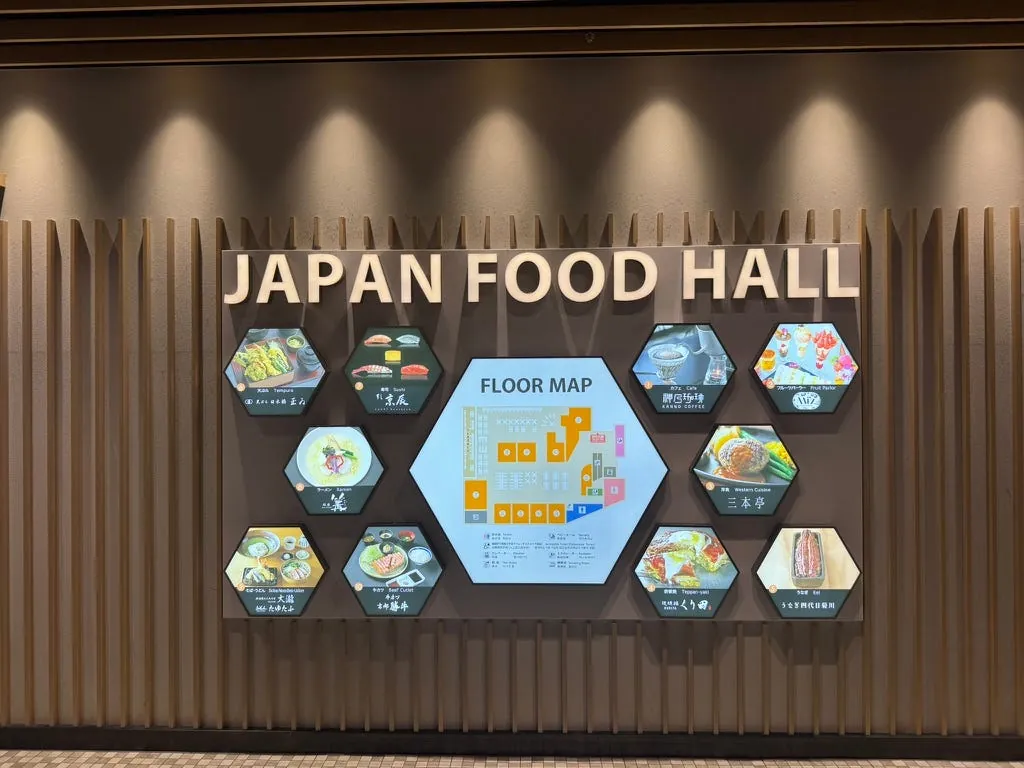
First, go to JAPAN FOOD HALL B1 to grab something to eat
16:25 Snack Time
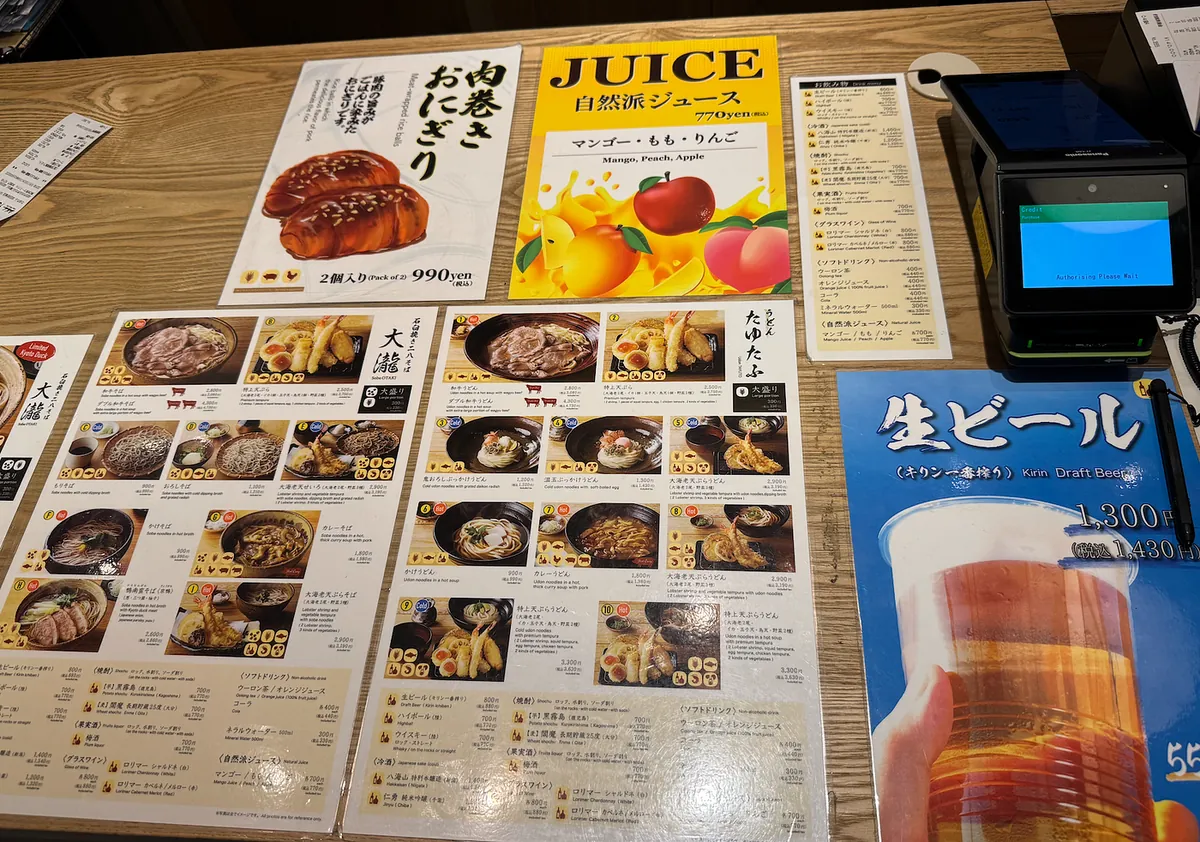
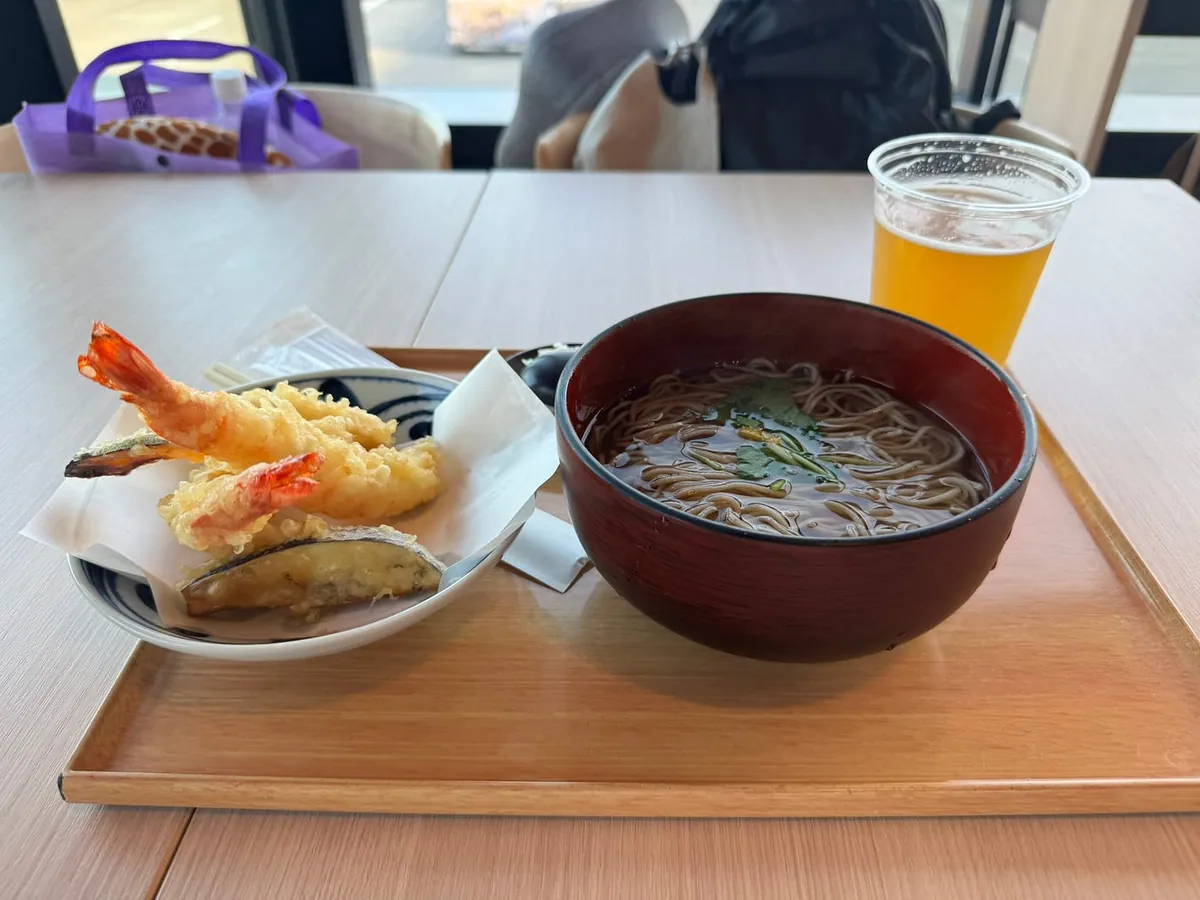
Ordered a tempura shrimp soba with a draft beer.
Actual spend: 955 TWD (Airport prices are just expensive…)
16:50 Shopping at Duty-Free and Souvenir Shops
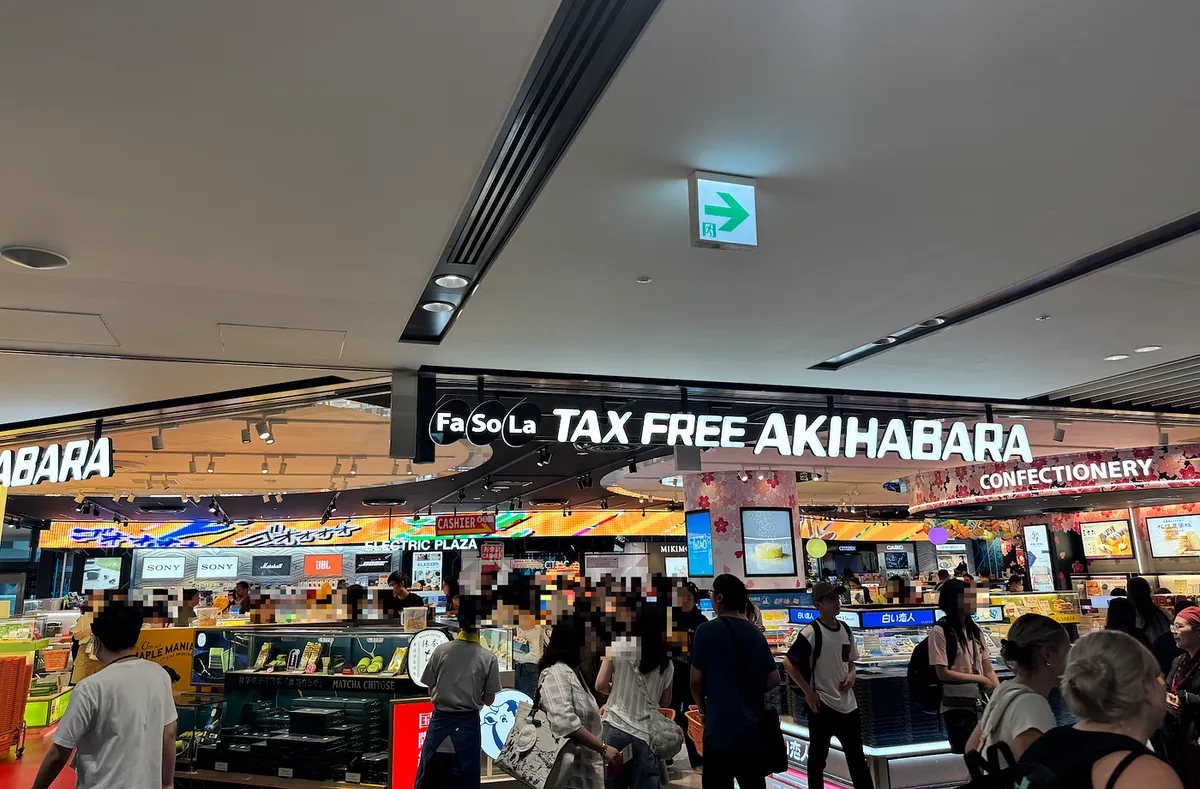
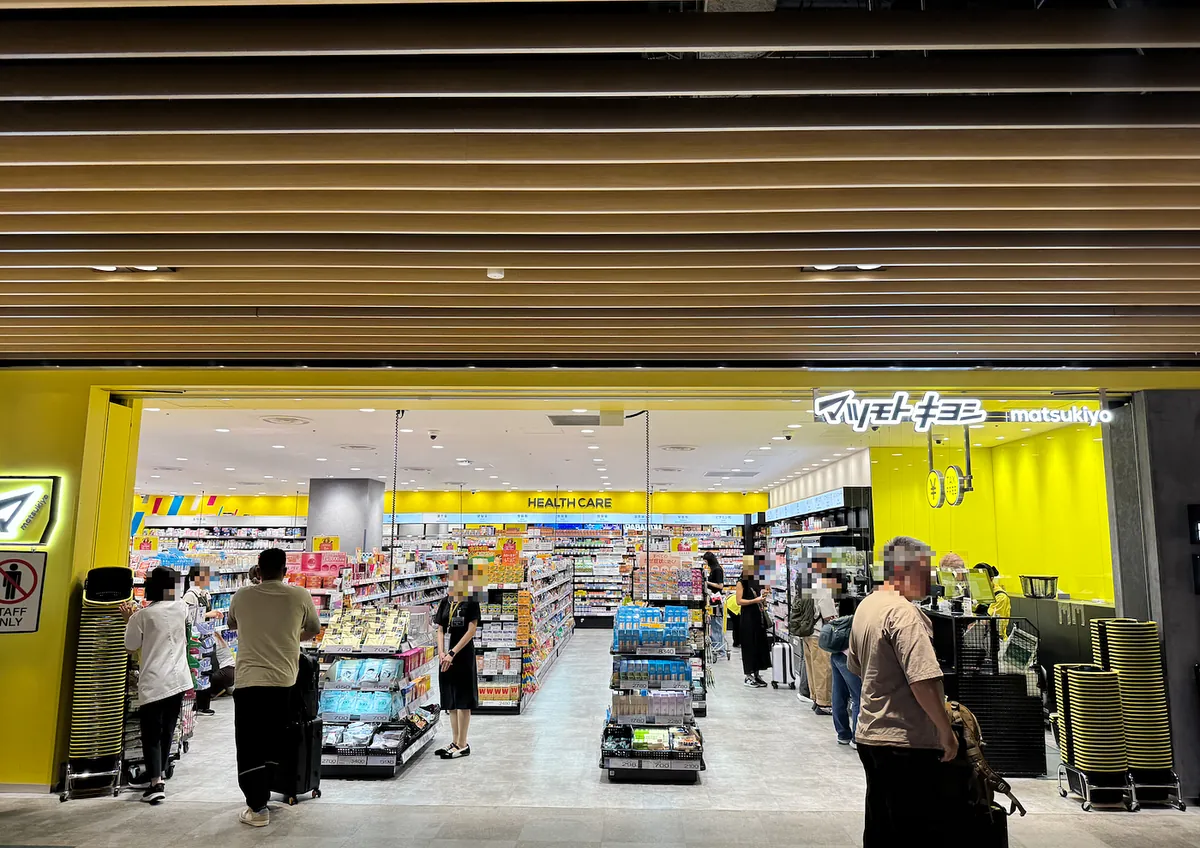

Narita Airport duty-free shops really have everything. Besides luxury goods, skincare products, tobacco, and alcohol, there are also fun souvenir shops with a wide variety of items. Prices are similar to or even cheaper than outside. If you haven’t bought enough, you can take advantage of last-minute shopping before boarding.
17:05 Le Labo
Actually, without specifically looking, I unexpectedly found La Lebo at Narita Airport in Fa-So-La DUTY FREE Cosmetics & Perfumery. According to the official website, both Terminal 1 and 2 have it.
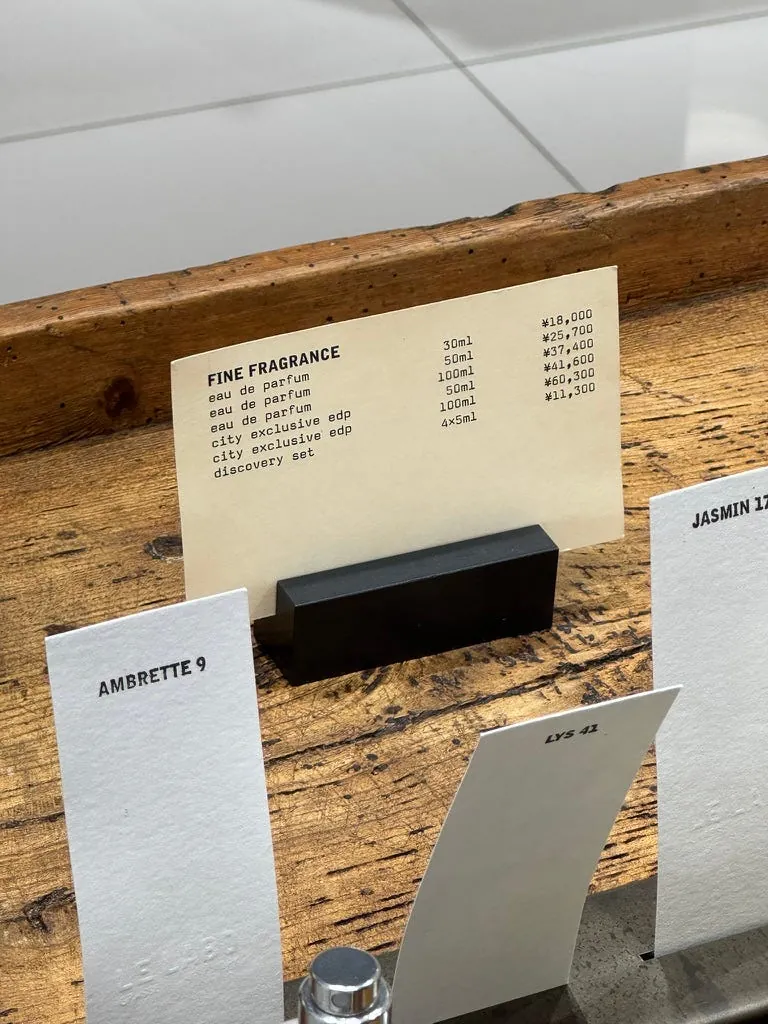
Even more surprising is the price, 50ml — ¥25,700, which is cheaper than the tax-refunded price of ¥28,500 within Japan.
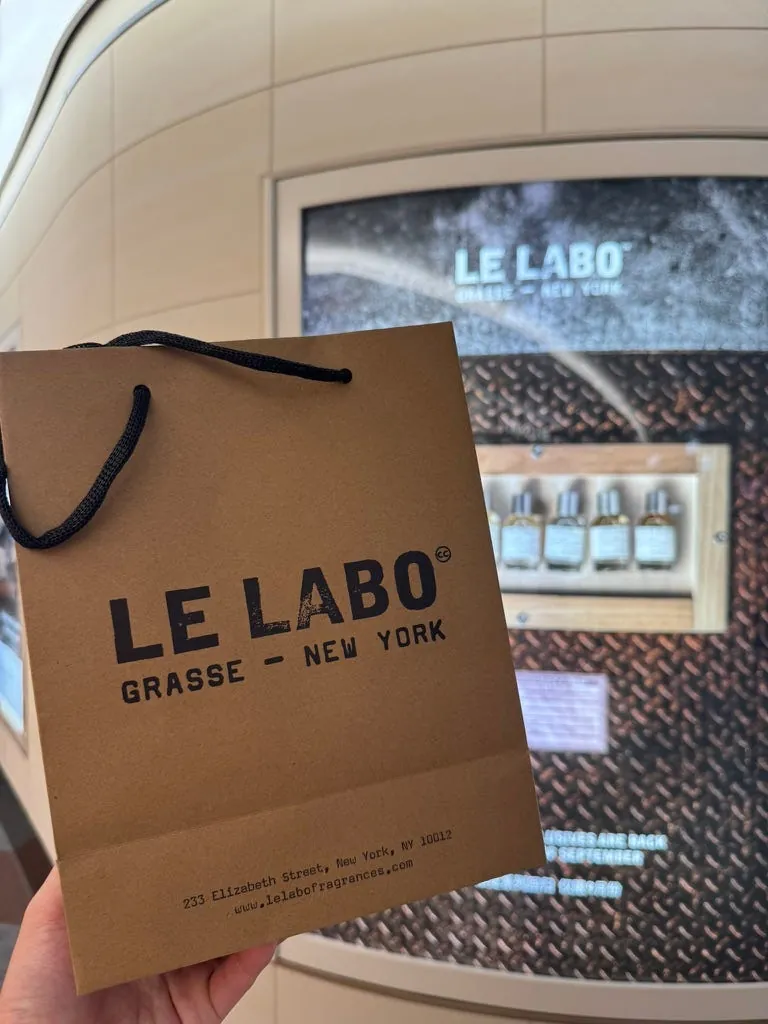
Finally, I couldn’t resist and bought a 26–30ml (airport exclusive size) bottle, spending NT$3,720.
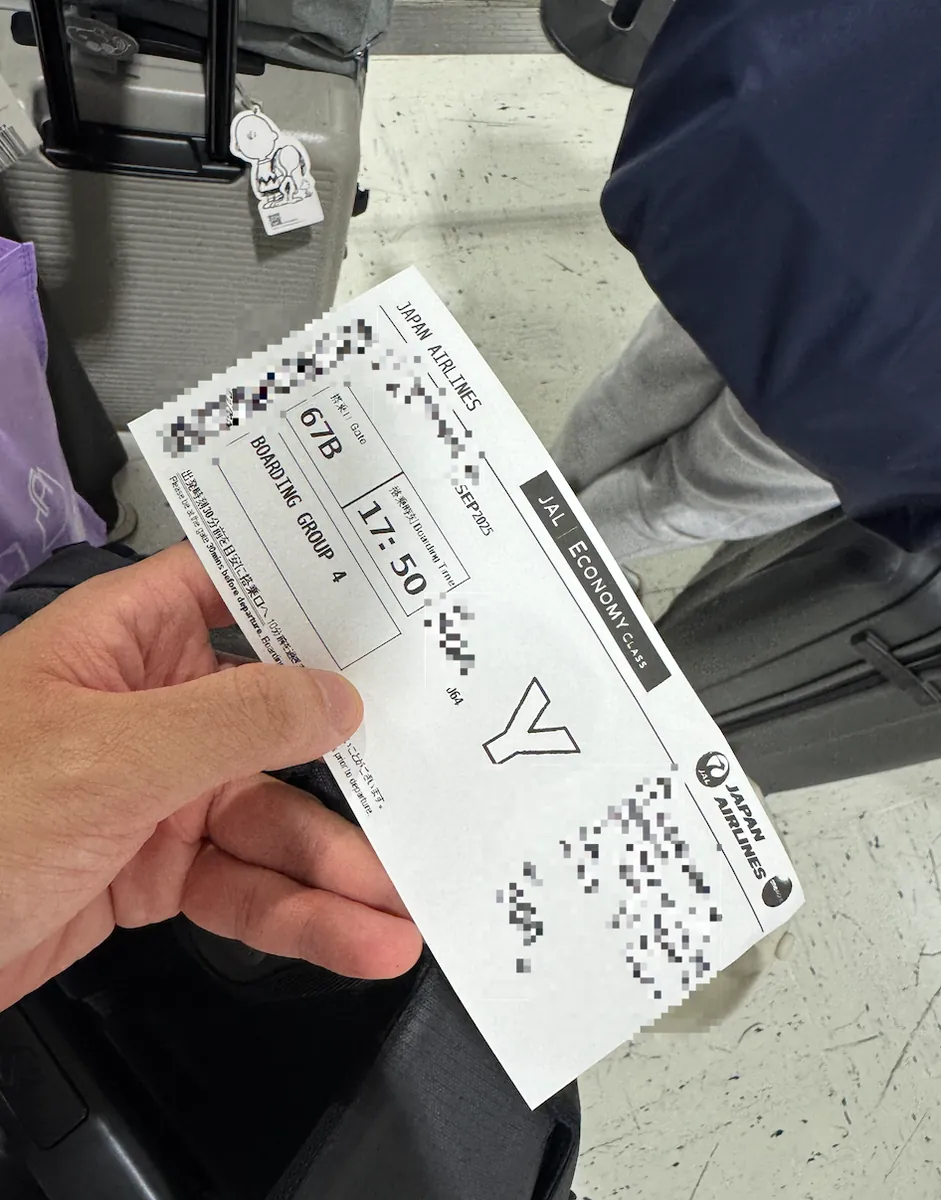
17:30 Head to the boarding gate and wait for boarding
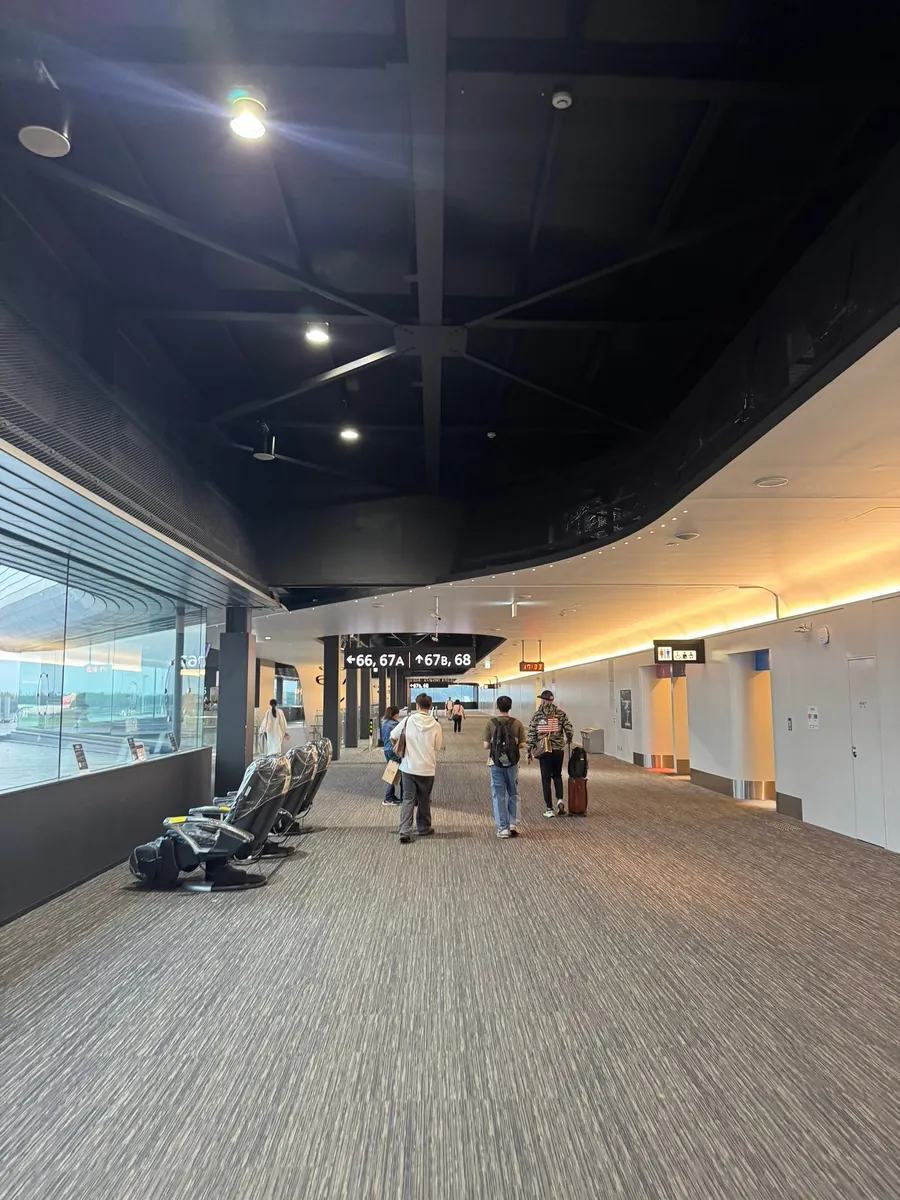
Gate 67B is in a remote corner, quite far away; unfortunately, there were no vending machines selling peach water along the way.
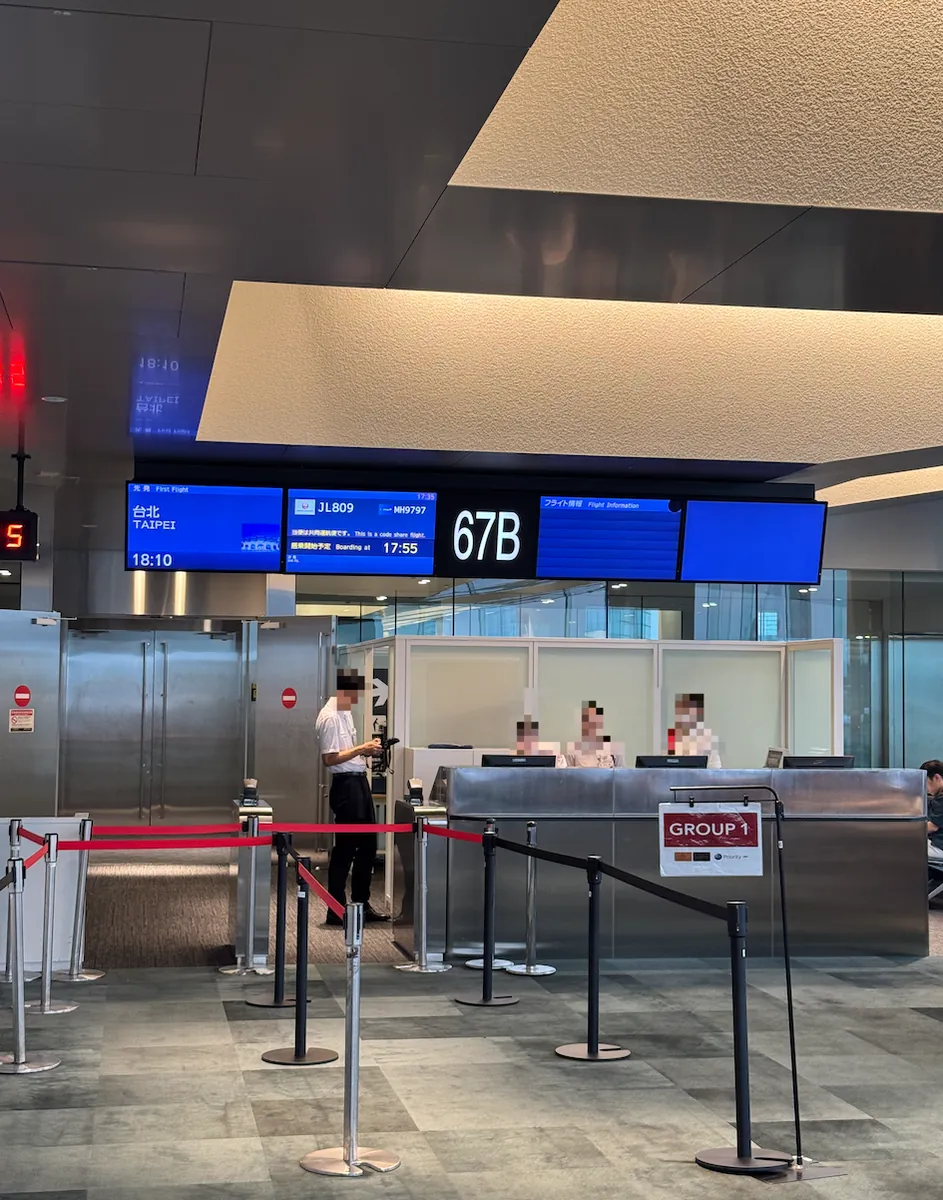
17:50 Boarding, goodbye Tokyo!
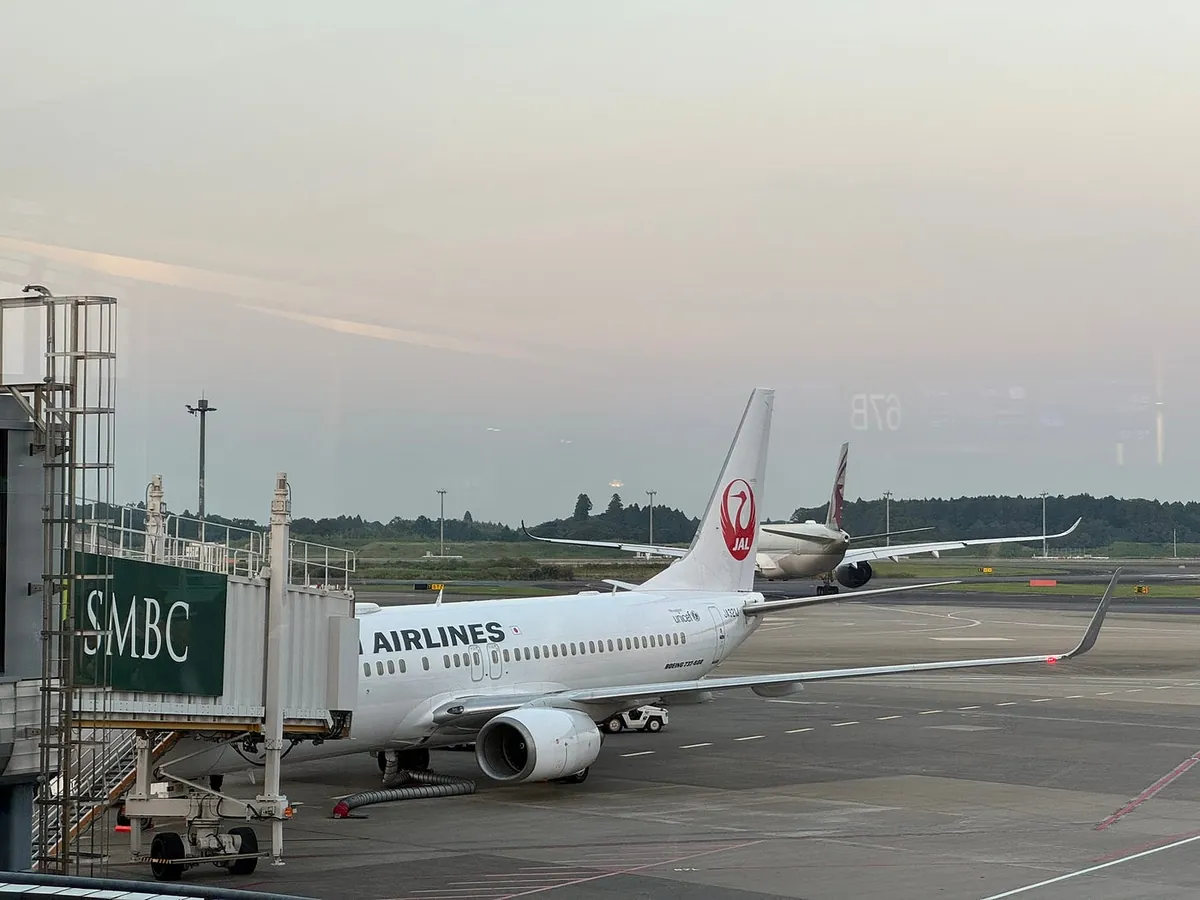
The aircraft model is BOEING 737–800, same as on the way here.
Narita Airport was extremely crowded; originally scheduled to depart at 18:10, but finally took off close to 19:00 after waiting in line.
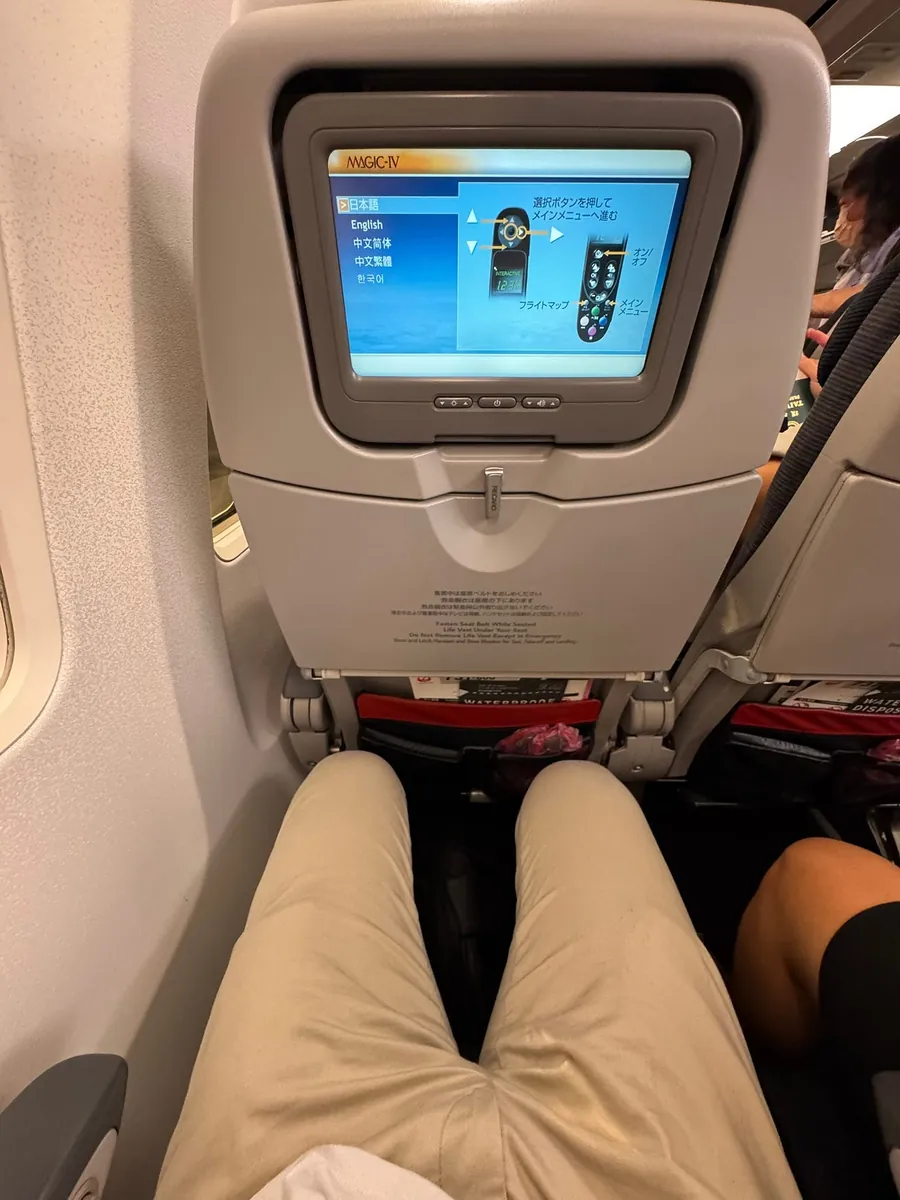
Japan Airlines Free In-flight WiFi
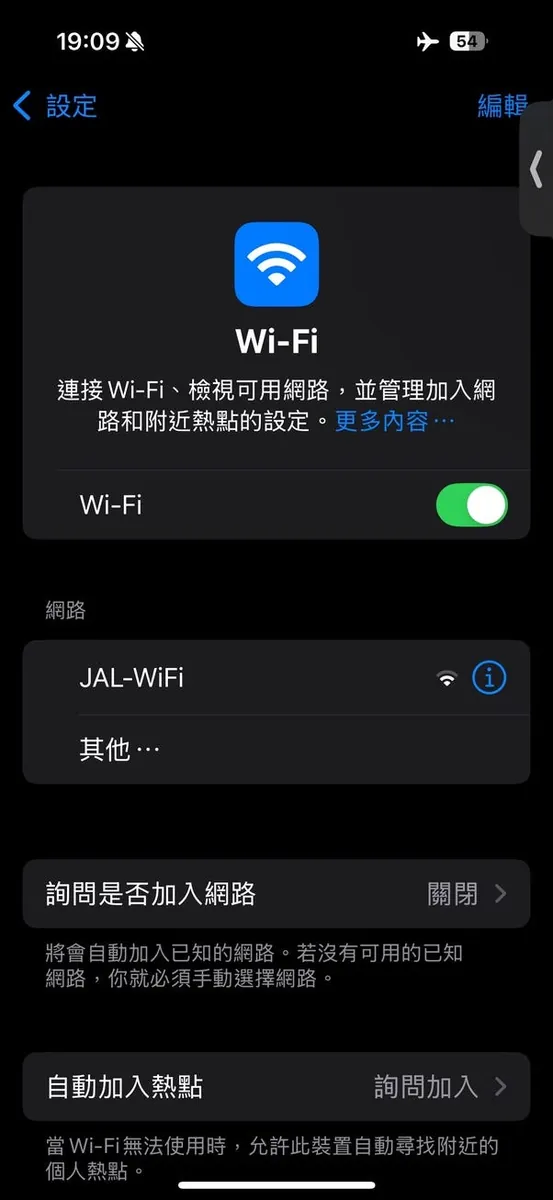
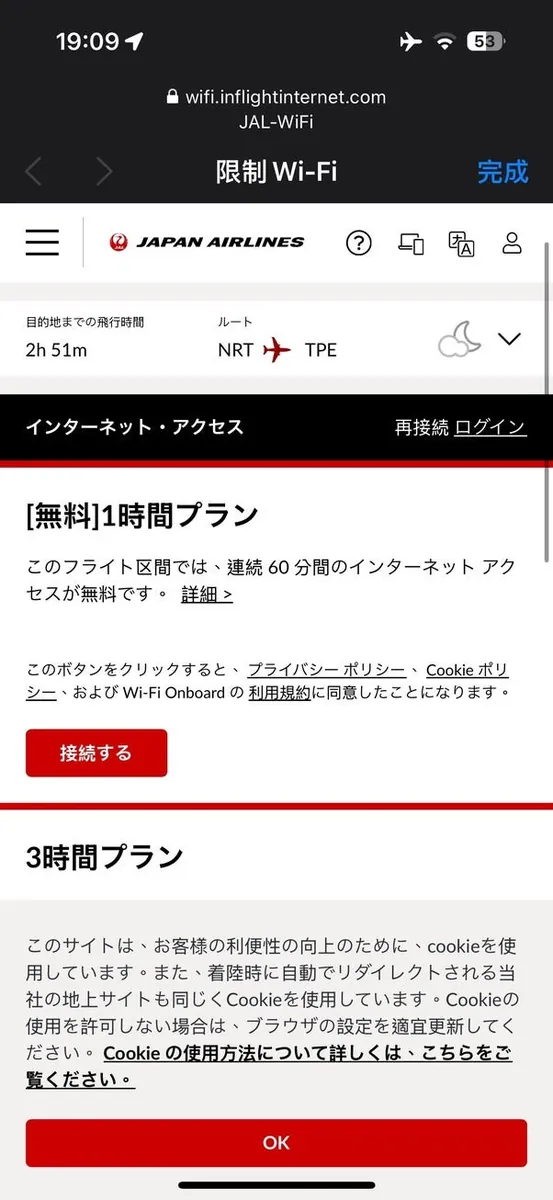
Accidentally discovered that the plane offers one hour of free WiFi.
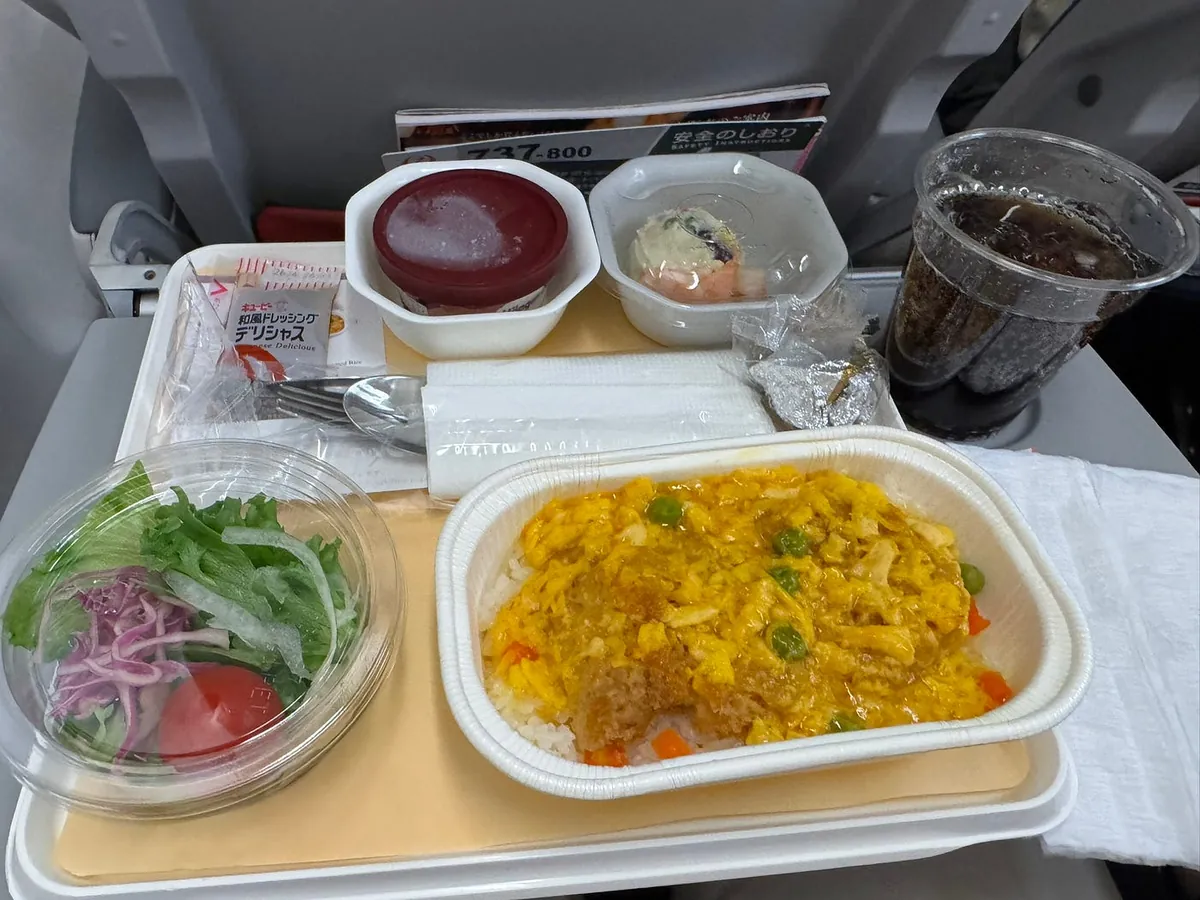
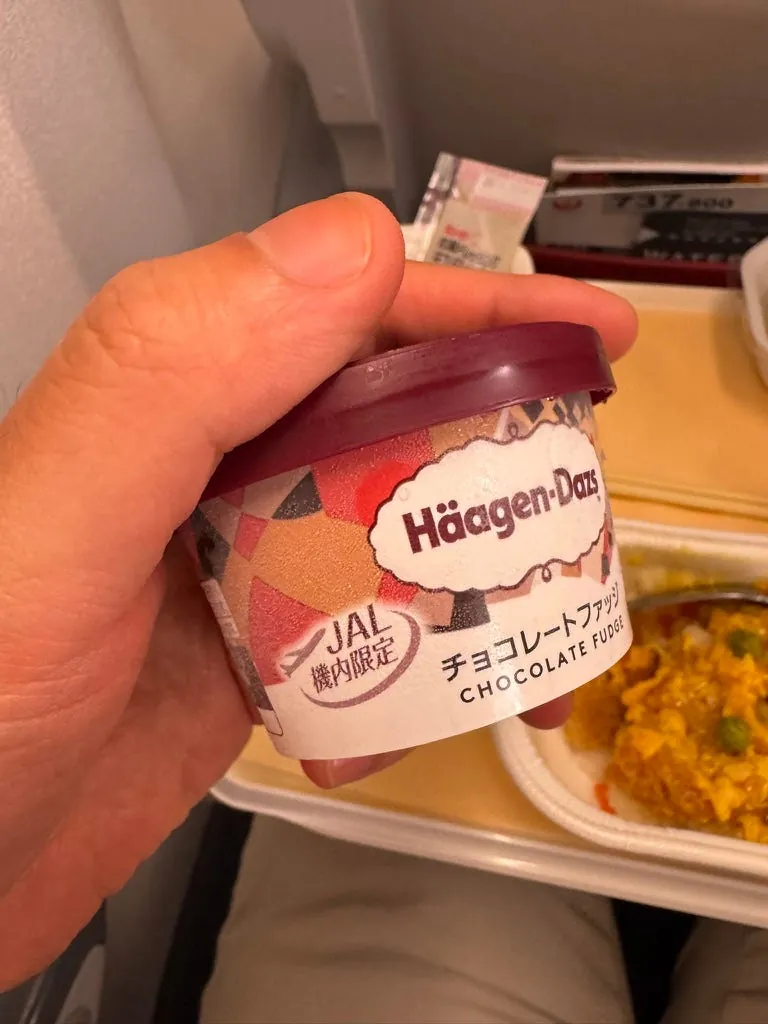
The airplane meal was also excellent, featuring curry pork cutlet rice and Haagen-Dazs dessert.
21:07 Return to Taiwan
Souvenirs
Thank you for reading
Thank you for joining me on this five-day trip to Tokyo. I hope the information in this article helps with your next travel adventure.
More Travelogues
-
[Travelogue] 8 Days 7 Nights Free Trip to Busan, South Korea in 2025
-
[Travelogue] Second Visit to Kyushu in 2024: 9-Day Free Trip via Busan → Hakata Cruise Entry
-
[Travelogue] 2024 San’in Region Shimane Izumo Matsue Tottori Himeji Osaka Kobe 7-Day Solo Trip
-
[Travelogue] 2023 Tokyo 5-Day Free Trip
-
[Travelogue] 2023 Kansai 8-Day Free Trip
Comments