
Using Google Apps Script to Forward Gmail Emails to Slack
Using Gmail Filter + Google Apps Script to Automatically Forward Customized Content to Slack Channel Upon Receiving Emails

Photo by Lukas Blazek
Origin
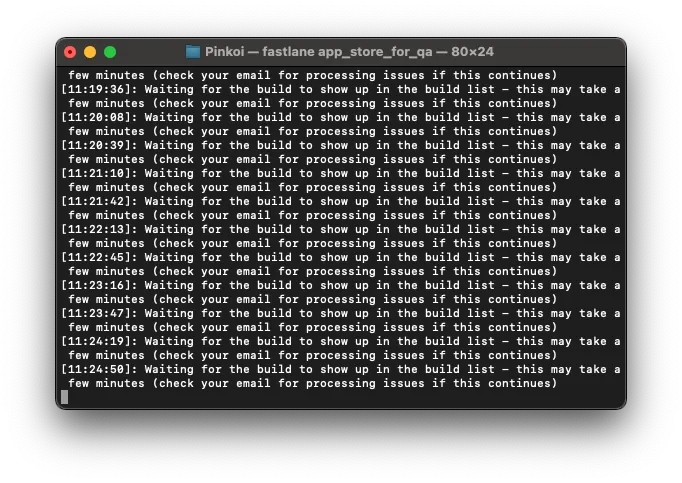
Recently, I have been optimizing the iOS App CI/CD process using Fastlane as the automation tool. After packaging and uploading, if you want to continue with the automatic submission step (skip_submission=false), you need to wait for Apple to complete processing, which wastes about 30-40 minutes of CI server time. This is because Apple’s App Store Connect API is not fully developed, and Fastlane can only check once per minute whether the uploaded build has finished processing, which is very resource-consuming.
-
Bitrise CI Server: Limits the number of simultaneous builds and sets a maximum execution time of 90 mins. While 90 mins is sufficient, one build can block others from running.
-
Travis CI Server: Charges based on Build Time, so you can’t afford to wait—money goes down the drain.
A Different Approach
No more waiting, finish immediately after upload! Trigger follow-up actions by notifying completed emails.
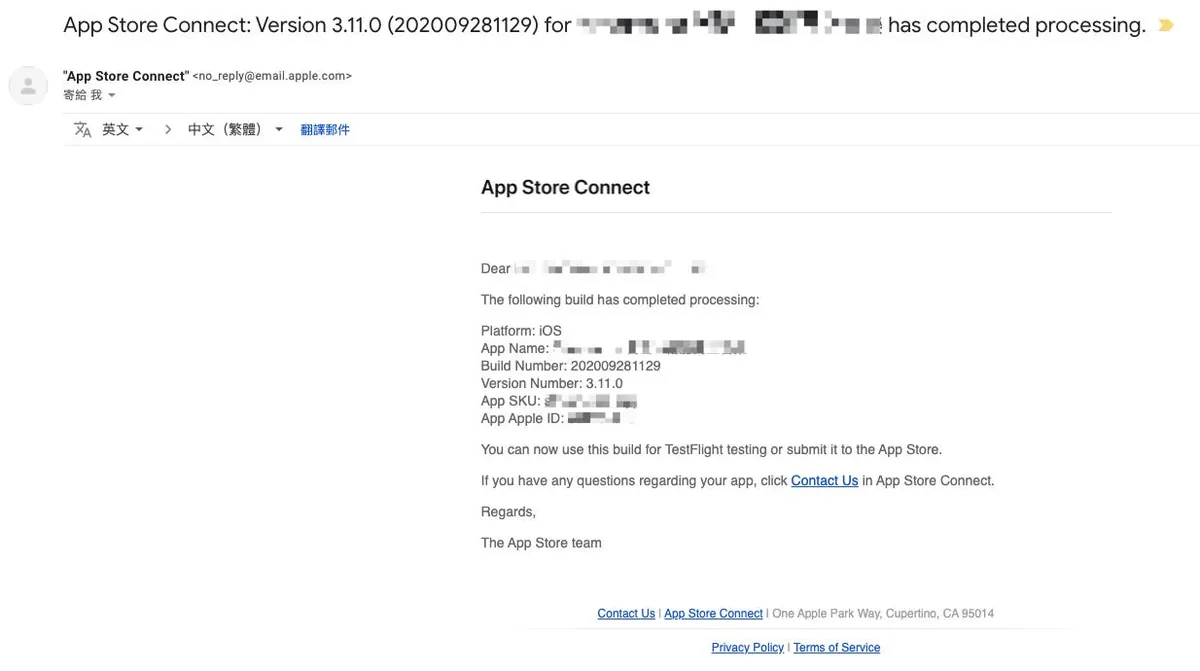
However, I haven’t received this email recently, and I’m not sure if it’s a setting issue or if Apple has stopped sending this type of notification.
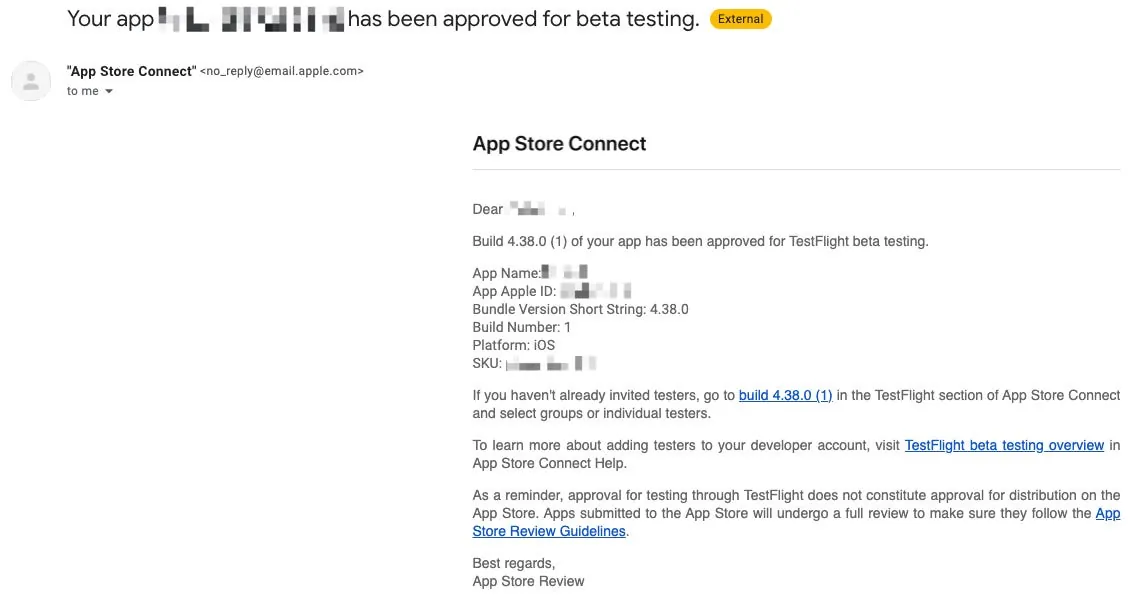
This article will use the Testflight email notification indicating that testing can begin as an example.
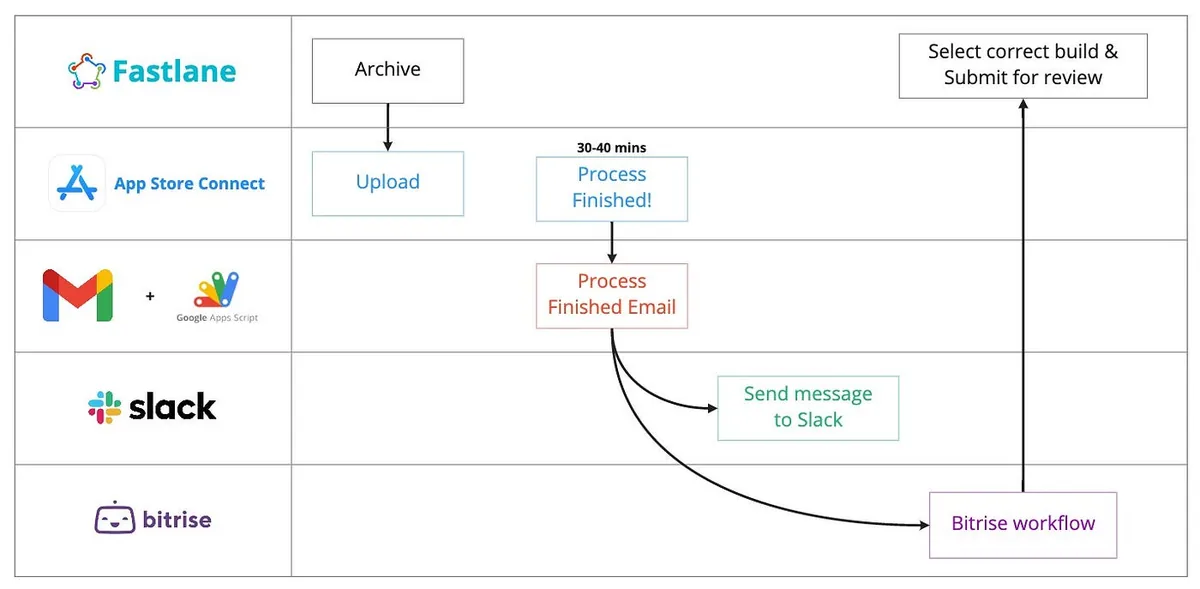
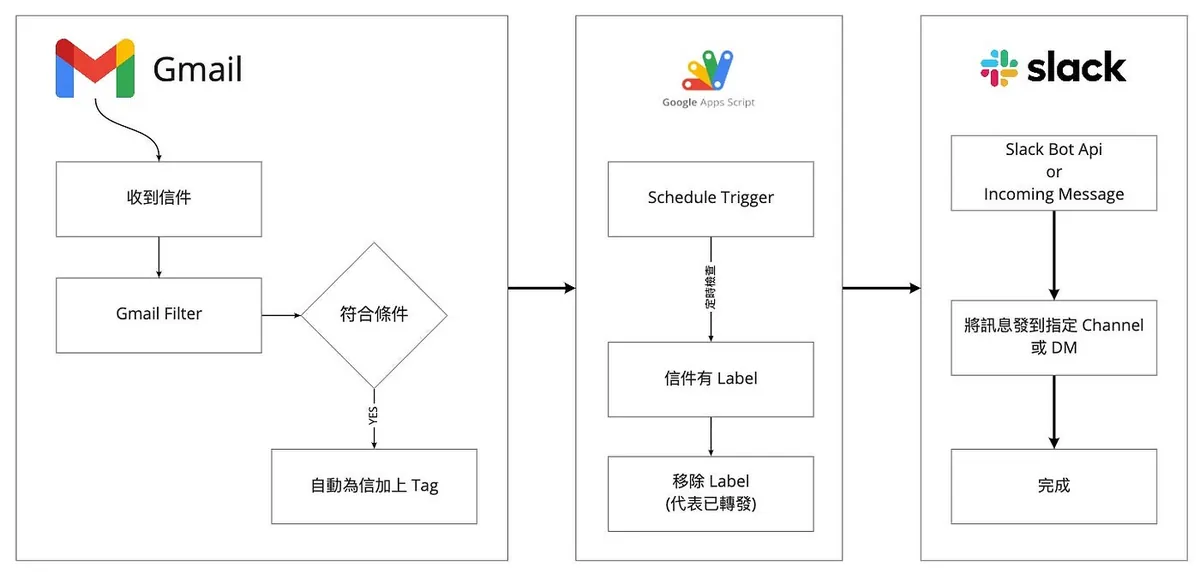
The complete process is shown in the above diagram and is feasible in principle; however, this is not the focus of this article. This article will concentrate on receiving emails and using Apps Script to forward them to a Slack Channel.
How to Forward Received Emails to a Slack Channel
Both paid and free Slack plans can achieve email forwarding to Slack channels or DMs using different methods.
You can refer to the official documentation for setup: Send emails to Slack
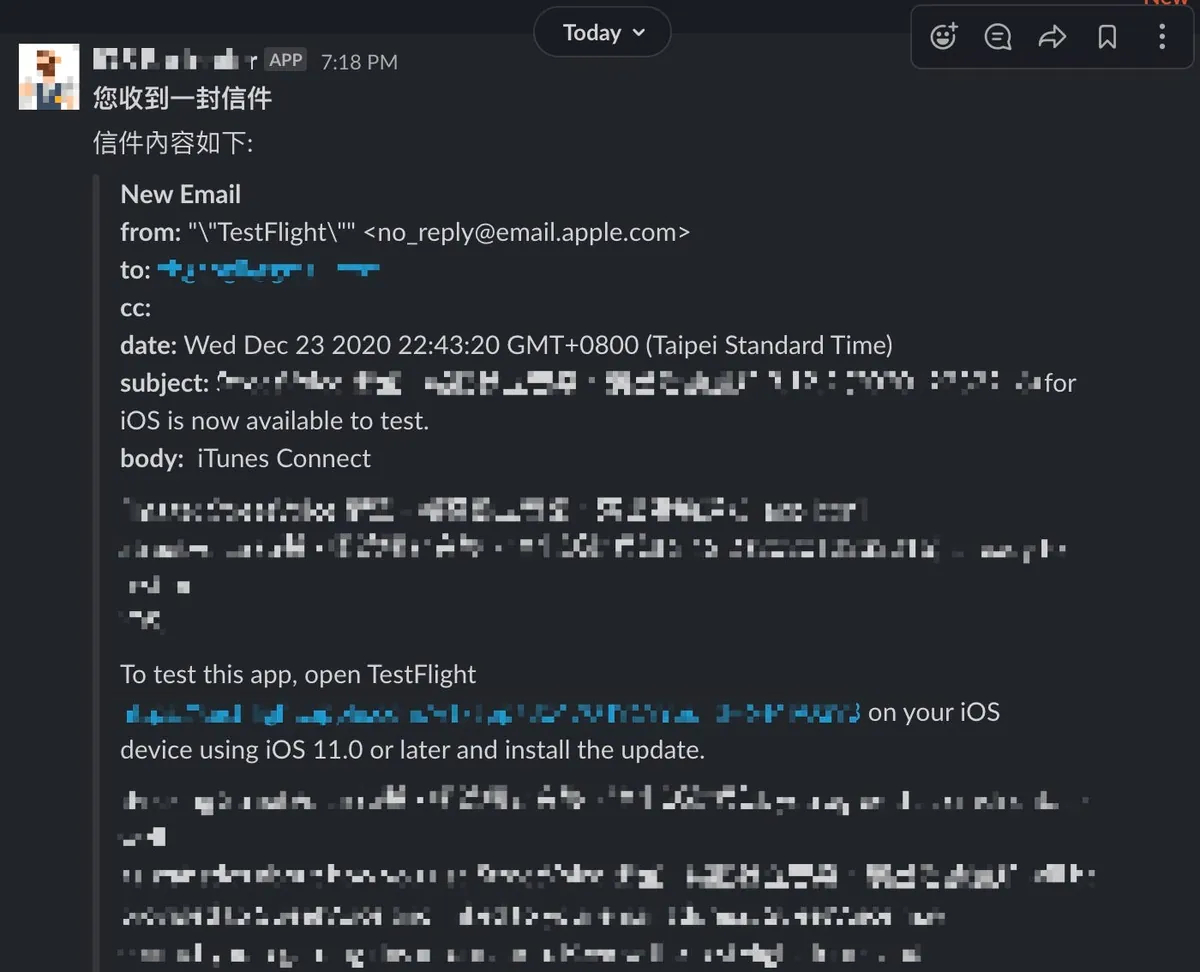
The results are the same regardless of the method:
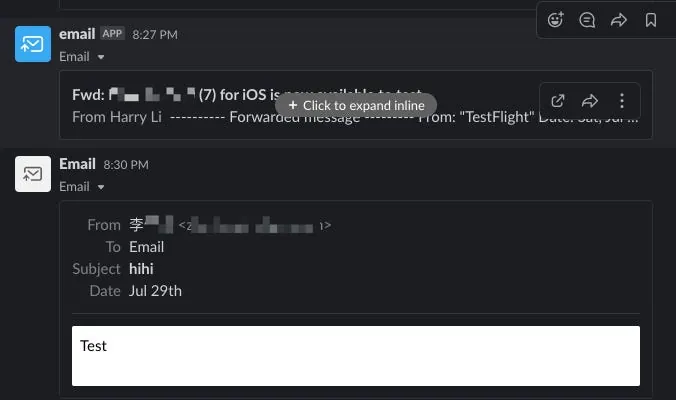
By default, the email content is collapsed; click to expand and view the full content.
Advantages:
-
Simple and Fast
-
Zero Technical Barrier
-
Real-time Forwarding
Disadvantages:
-
Cannot customize the content
-
Display style cannot be changed
Custom Forwarded Content
This is the main focus of this article.
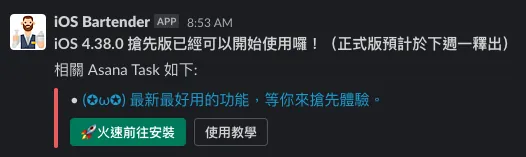
Translate the email content data into your desired presentation style, as shown in the example above.
Here’s a complete workflow diagram:
-
Use Gmail Filter to Add Identification Label to Emails for Forwarding
-
Apps Script periodically fetches emails labeled with the specified Label
-
Read Email Content
-
Render the desired display style
-
Send messages to Slack via Slack Bot API or directly using Incoming Message
-
Remove Email Label (Indicates Forwarded)
-
Completed
First, create a filter in Gmail
Filters can automate actions when receiving matching emails, such as automatically marking as read, tagging, moving to spam, or categorizing them.
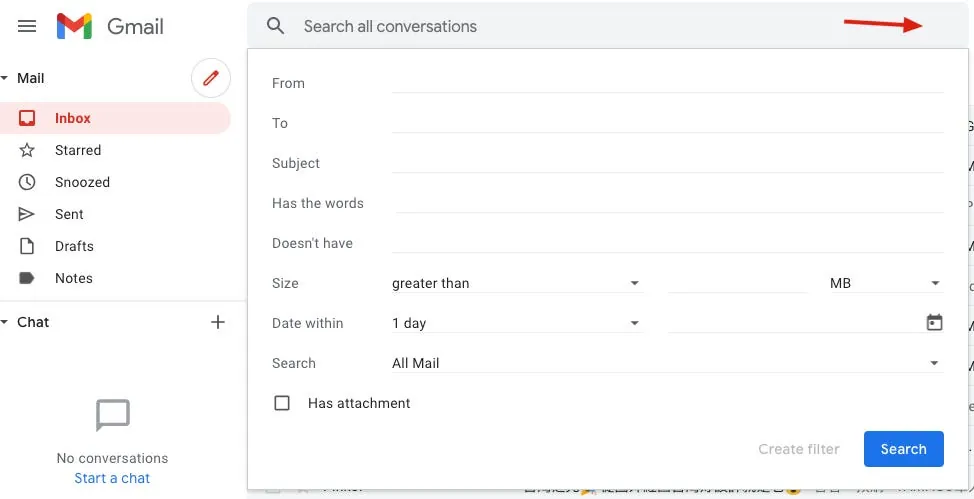
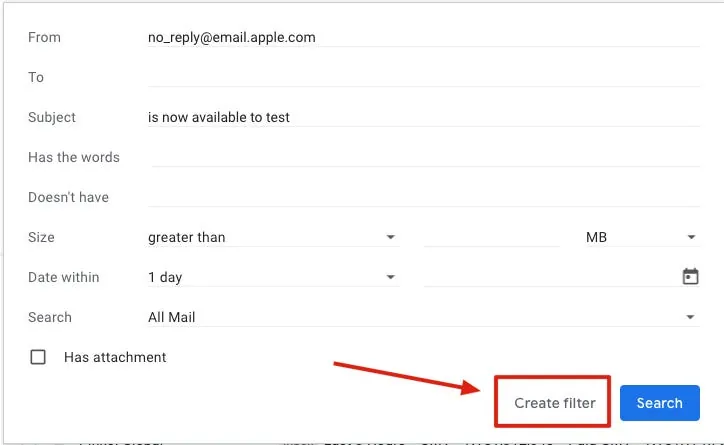
In Gmail, click the advanced search icon button at the top right, enter the filter criteria for the emails to forward, such as From: [email protected] + Subject contains is now available to test., then click “Search” to check if the filter results are as expected; if correct, click the “Create filter” button next to Search.
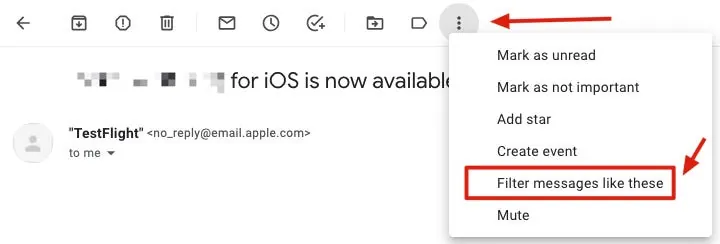
Or simply click “Filter messages like these” at the top of the email to quickly create a filter.
This button design is very user-unfriendly; I couldn’t find it the first time.
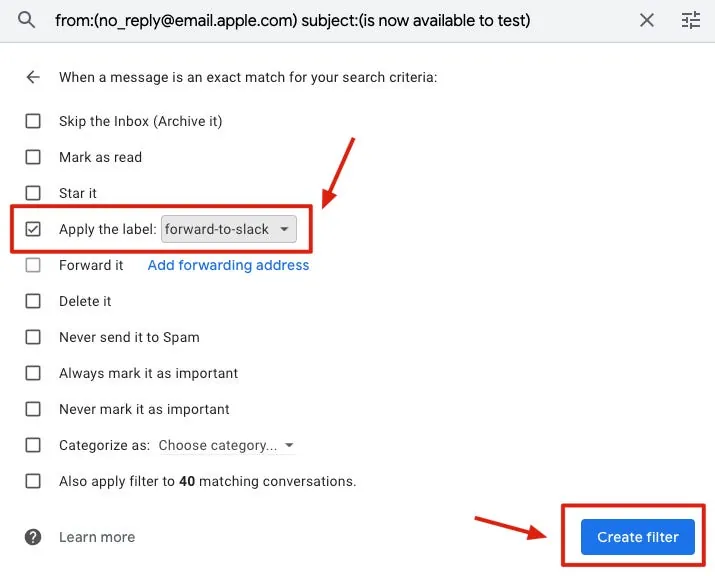
Next, set the action for this filter condition. Here, select “Apply the label” and create a new label named “forward-to-slack” for identification. Click “Create filter” to finish.
From then on, all emails labeled with this Label will be forwarded to Slack.
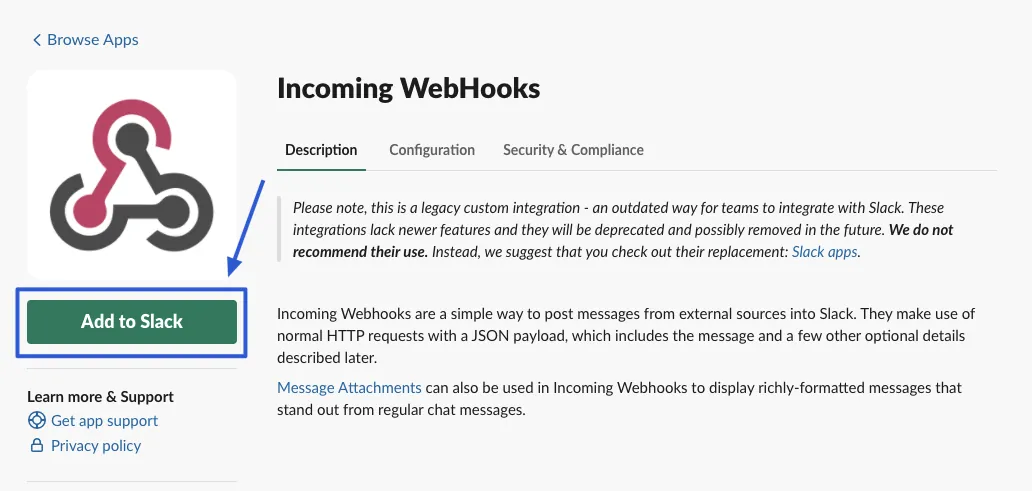
Get Incoming WebHooks App URL
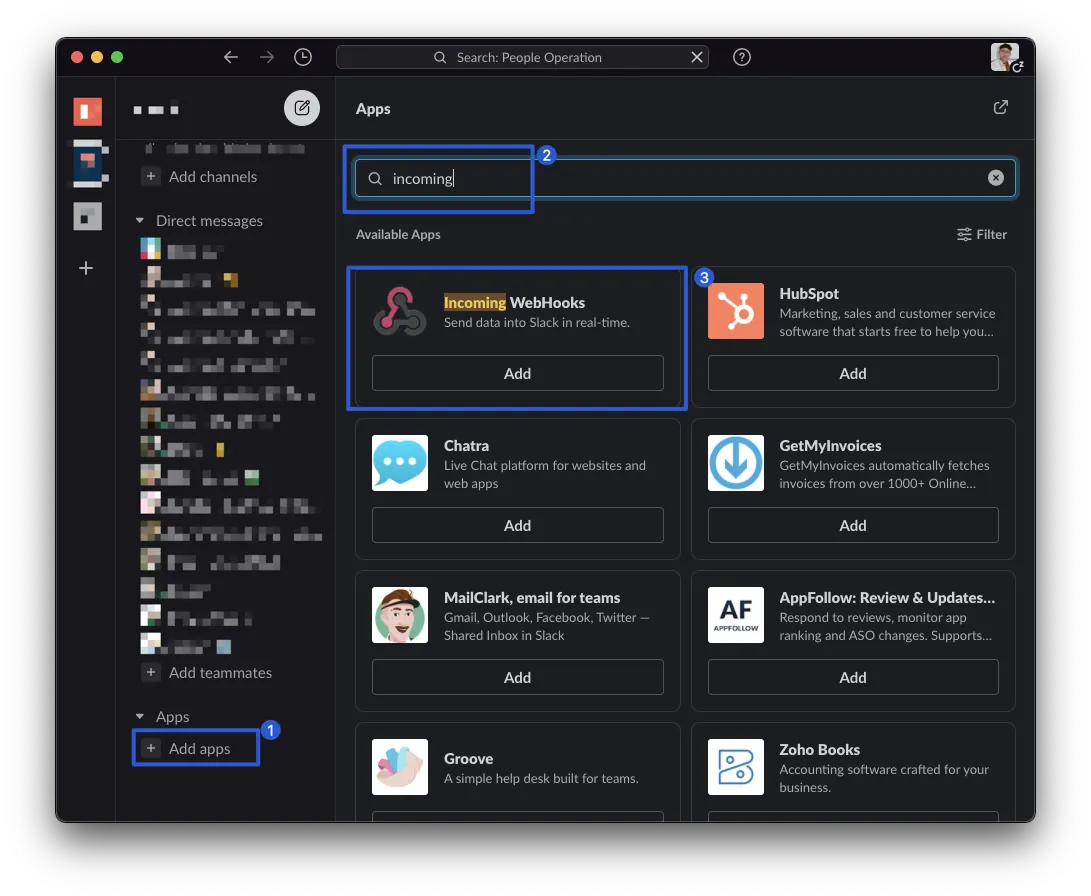
First, we need to add the Incoming WebHooks App to the Slack Channel. We will use this to send messages.
-
Slack bottom left “Apps” -> “Add apps”
-
Search for “incoming” in the search box on the right side.
-
Click “Incoming WebHooks” -> “Add”
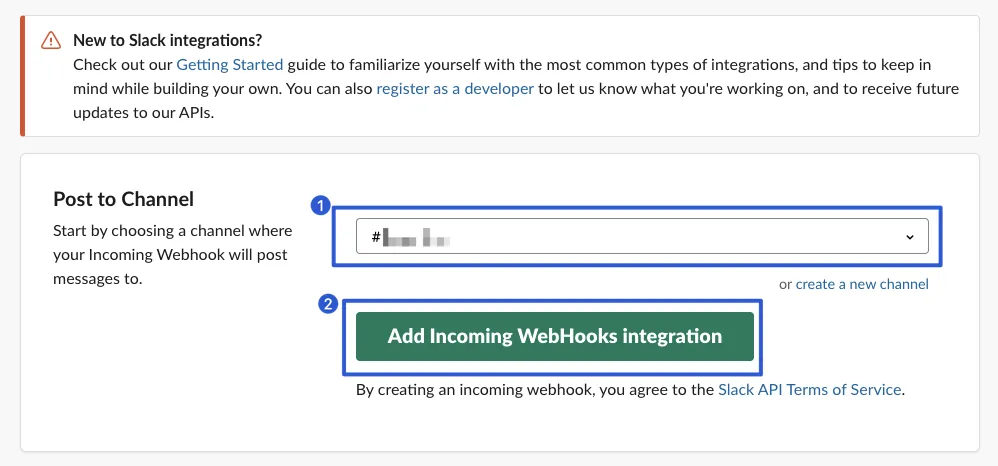
Choose the channel where you want to send the message.

Note down the “Webhook URL” at the top.
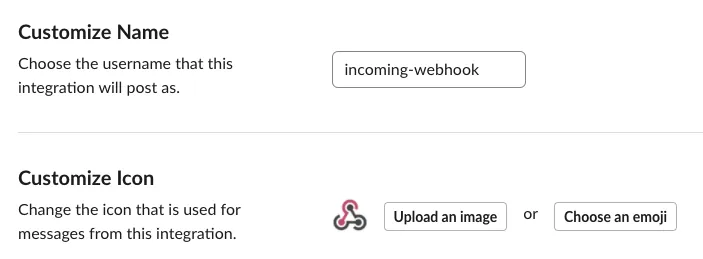
Scroll down to set the Bot’s display name and avatar for sending messages; remember to click “Save Settings” after making changes.
Note
Please note that the official recommendation is to use the new Slack APP Bot API chat.postMessage to send messages. The simpler Incoming Webhook method will be deprecated in the future. This article uses the simpler method for convenience but it can be updated along with the next chapter “Import Employee List” to use the new Slack App API method.

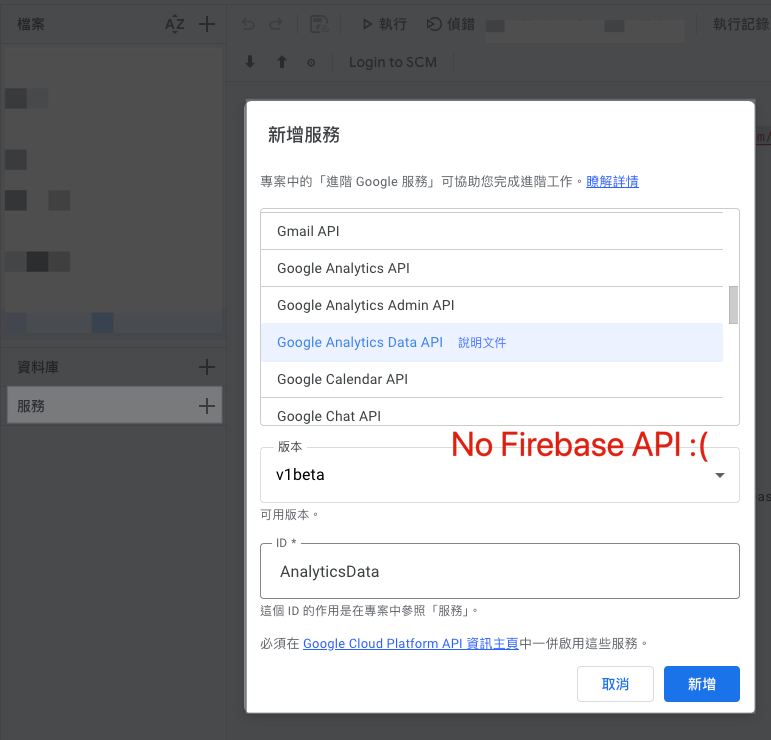
Writing the Apps Script Code
-
Click the top left “New Project”
-
After creating, you can click the project name to rename it, e.g., ForwardEmailsToSlack
Paste the following base code and modify it to your desired version:
function sendMessageToSlack(content) {
    var payload = {
      "text": "*You have received an email*",
      "attachments": [{
          "pretext": "The email content is as follows:",
          "text": content,
        }
      ]
    };
    var res = UrlFetchApp.fetch('Paste your Slack incoming Webhook URL',{
      method             : 'post',
      contentType        : 'application/json',
      payload            : JSON.stringify(payload)
    })
}

function forwardEmailsToSlack() {
    // Reference: https://gist.github.com/andrewmwilson/5cab8367dc63d87d9aa5

    var label = GmailApp.getUserLabelByName('forward-to-slack');
    var messages = [];
    var threads = label.getThreads();

    if (threads == null) {
      return;
    }

    for (var i = 0; i < threads.length; i++) {
        messages = messages.concat(threads[i].getMessages())
    }

    for (var i = 0; i < messages.length; i++) {
        var message = messages[i];
        Logger.log(message);

        var output = '*New Email*';
        output += '\n*from:* ' + message.getFrom();
        output += '\n*to:* ' + message.getTo();
        output += '\n*cc:* ' + message.getCc();
        output += '\n*date:* ' + message.getDate();
        output += '\n*subject:* ' + message.getSubject();
        output += '\n*body:* ' + message.getPlainBody();

        sendMessageToSlack(output);
   }

   label.removeFromThreads(threads);
}
Advanced:
-
Slack message styles can be referenced in this official structure document.
-
You can use JavaScript’s Regex Match Function to extract content from the email.
EX: Extracting Version Number Information from Testflight Approval Emails:
Email Subject: Your app XXX has been approved for beta testing.
Email Content:
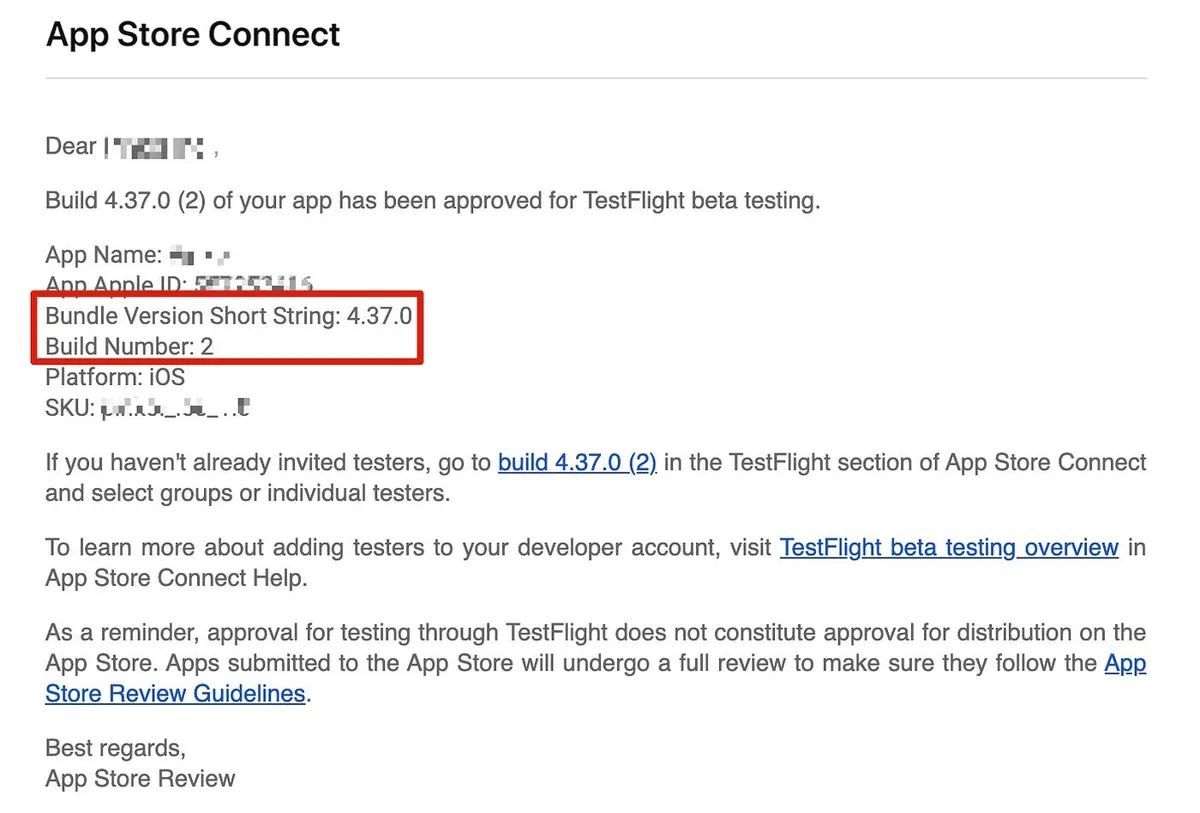
We want to get the values after Bundle Version Short String and Build Number.
var results = subject.match(/(Bundle Version Short String: ){1}(\S+){1}[\S\s]*(Build Number: ){1}(\S+){1}/);
if (results == null \\|\\| results.length != 5) {
  // not valid
} else {
  var version = results[2];
  var build = results[4];
}
output:
version = 3.37.0
build = 2
-
You can test if your Regex is correct online using this website
Give it a try
-
Go back to Gmail and pick any email, then manually add the label — “forward-to-slack”
-
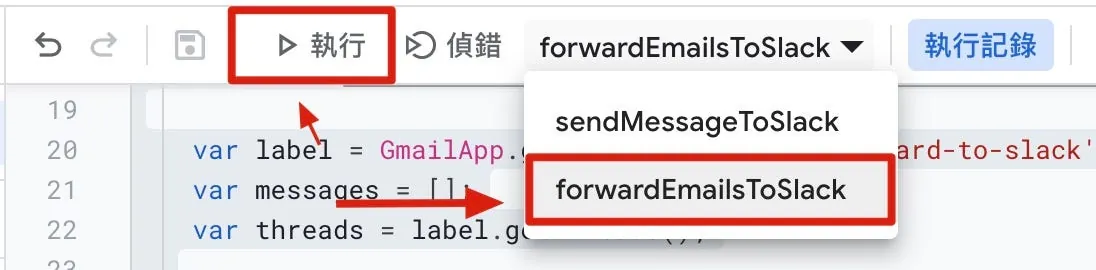
In the Apps Script code editor, select “forwardEmailsToSlack” and then click the “Run” button.
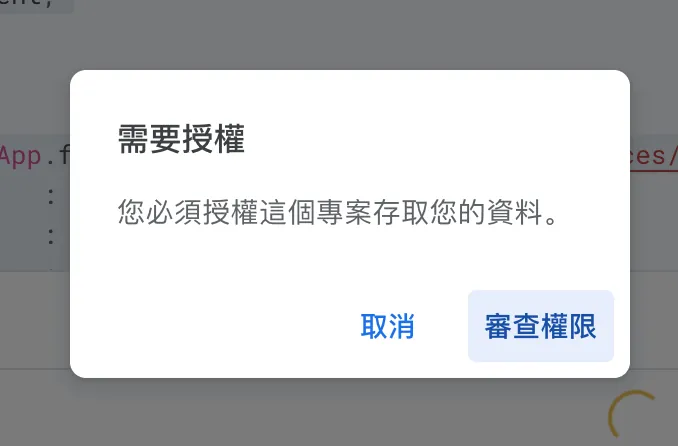
If “Authorization Required” appears, click “Continue” to complete the verification.
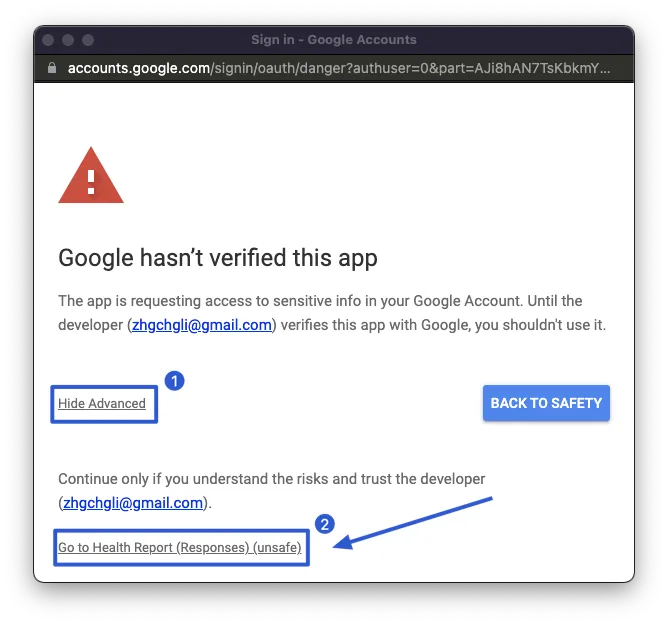
During the authentication process, the message “Google hasn’t verified this app” may appear. This is normal because the App Script we wrote is not verified by Google. However, it’s fine since this is for personal use.
You can click the bottom left “Advanced” -> “Go to ForwardEmailsToSlack (unsafe)”
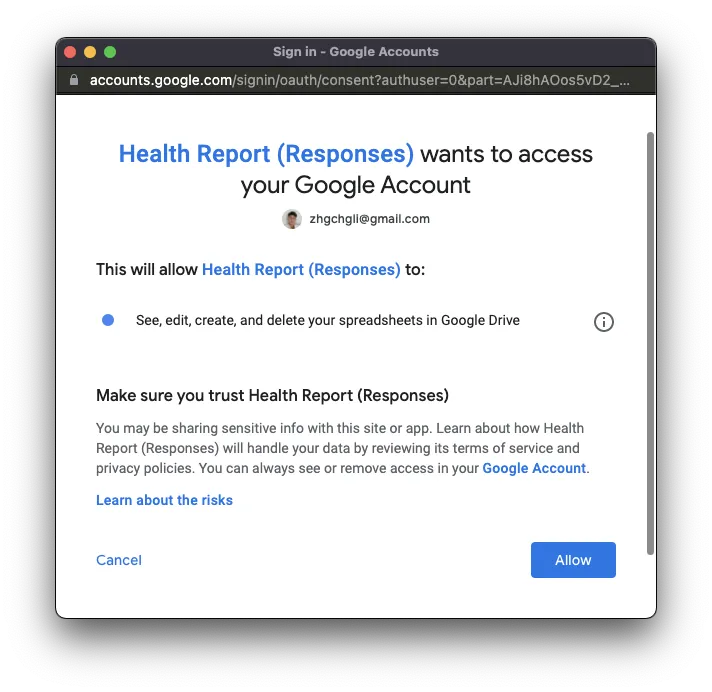
Click “Allow”
Forwarded successfully!!!
Set Up Trigger (Schedule) for Automatic Checking & Forwarding
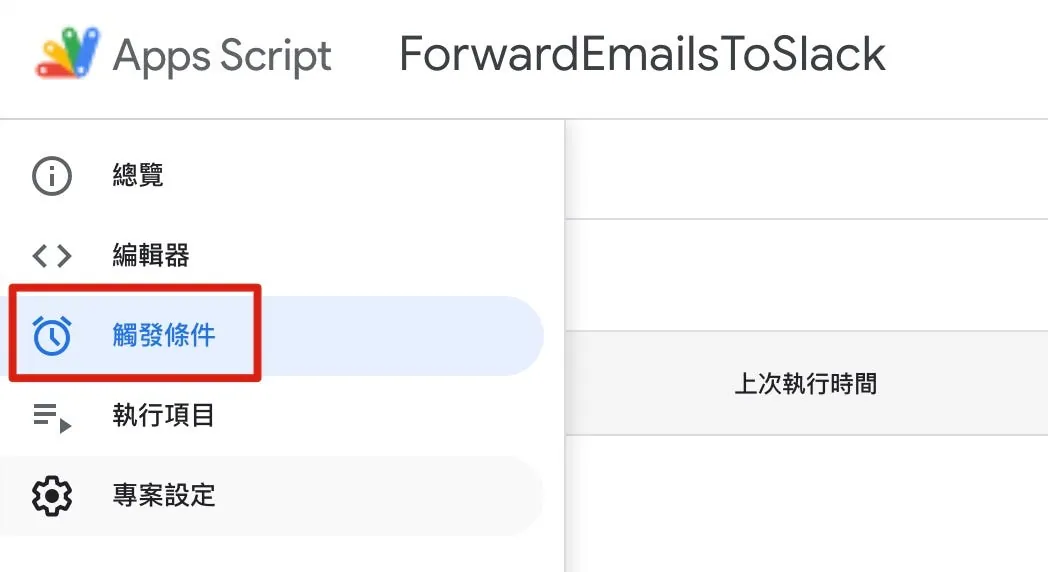
In the left menu of Apps Script, select “Triggers”.
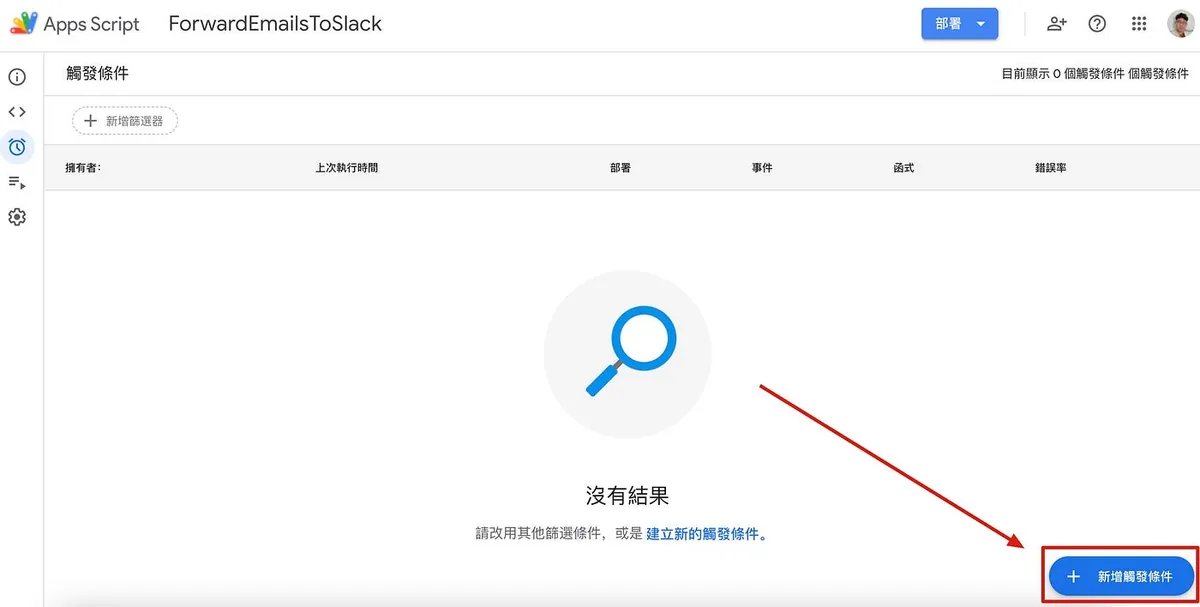
Bottom left corner “+ Add trigger condition”.
-
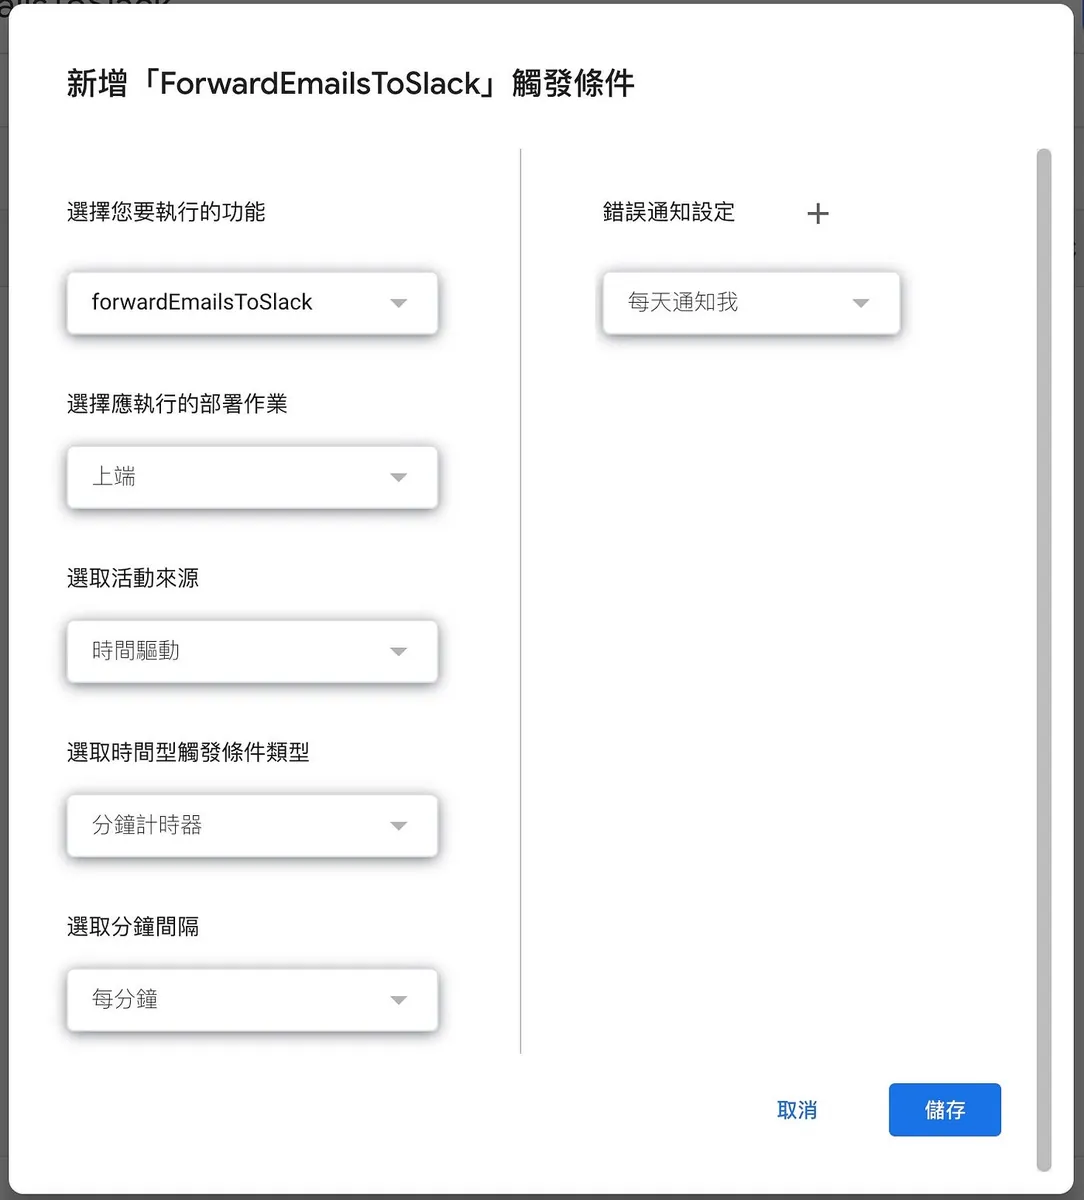
Error Notification Settings: You can set how to notify you when the script encounters an error during execution
-
Select the function you want to execute: choose the Main Function
sendMessageToSlack -
Select Event Source: You can choose from Calendar or Time-driven (scheduled or specific)
-
Select time-based trigger type: choose to run at a specific date or once every minute/hour/day/week/month
-
Select interval in minutes/hours/days/weeks/months: e.g., every minute, every 15 minutes…
Here, it is set to run every minute for demonstration purposes, but I think checking emails once per hour is sufficient for timely updates.

-
Go back to Gmail and manually add the label “forward-to-slack” to any email.
-
Wait for the scheduled trigger to run
Automatic Check & Forwarding Successful!
Completion
With this feature, you can achieve customized email forwarding and even use it as a trigger, for example: automatically run a script when receiving an email from XXX.
Returning to Chapter 1 Origins, we can use this mechanism to improve the CI/CD process; no need to wait idly for Apple to finish processing, while still integrating automation!
Further Reading
-
Crashlytics + Big Query to Build a More Real-Time and Convenient Crash Tracking Tool
-
Crashlytics + Google Analytics Automatic Query for App Crash-Free Users Rate
-
Automate Routine Tasks Using Python + Google Cloud Platform + Line Bot
-
Slack Builds a Fully Automated WFH Employee Health Status Reporting System
-
The app uses HTTPS for transmission, but the data was still stolen.

Comments