
iOS ≥ 10 Notification Service Extension Application (Swift)
Image Push Notifications, Notification Display Statistics, Pre-processing Before Notification Display
There is plenty of online information about basic push notification setup and principles, so this article will not cover those. The main focus here is how to enable image push notifications in the app and use new features to achieve more accurate push display statistics.
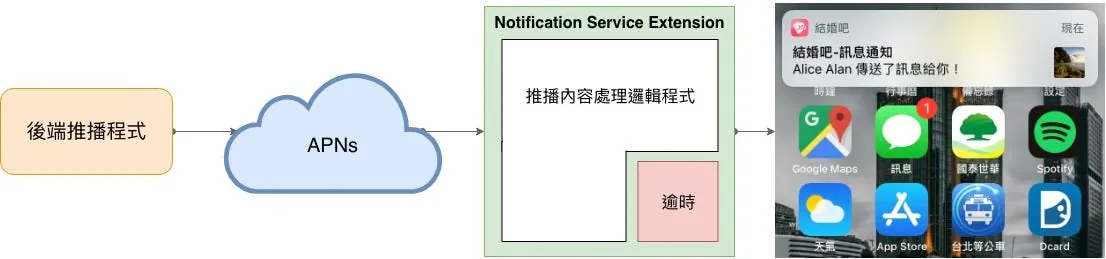
As shown in the above image, the Notification Service Extension allows you to preprocess the notification after the app receives it, before displaying the notification content.
The official documentation states that when processing incoming push notification content, the time limit is about 30 seconds. If the callback is not made within 30 seconds, the notification will continue to be delivered and appear on the user’s device.
Support Level
iOS ≥ 10.0
What can be done in 30 seconds?
- (Goal 1) Download the image from the image URL field in the push notification content and attach it to the notification 🏆

-
(Goal 2) Track Whether the Notification Was Displayed 🏆
-
Modifying and Reorganizing Push Notification Content
-
Push Notification Content Encryption and Decryption (Decryption) Display
-
Can you decide whether to display the notification? => Answer: No
First, the Payload part of the backend push notification program
The backend must add the line "mutable-content":1 in the push payload for the system to execute the Notification Service Extension upon receiving the push.
{
    "aps": {
        "alert": {
            "title": "New Article Recommended for You",
            "body": "Check it out now"
        },
        "mutable-content":1,
        "sound": "default",
        "badge": 0
    }
}
And… Step 1, Create a New Target for the Project
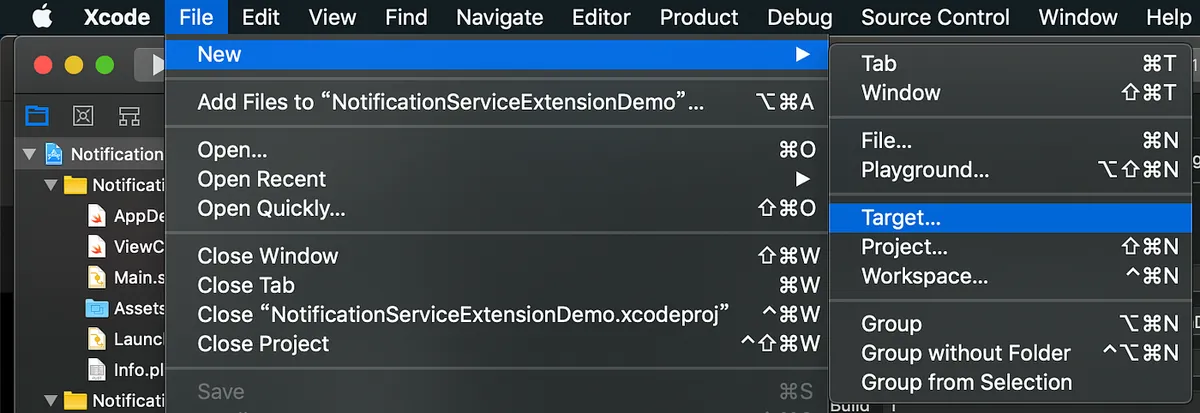
Step 1. Xcode -> File -> New -> Target
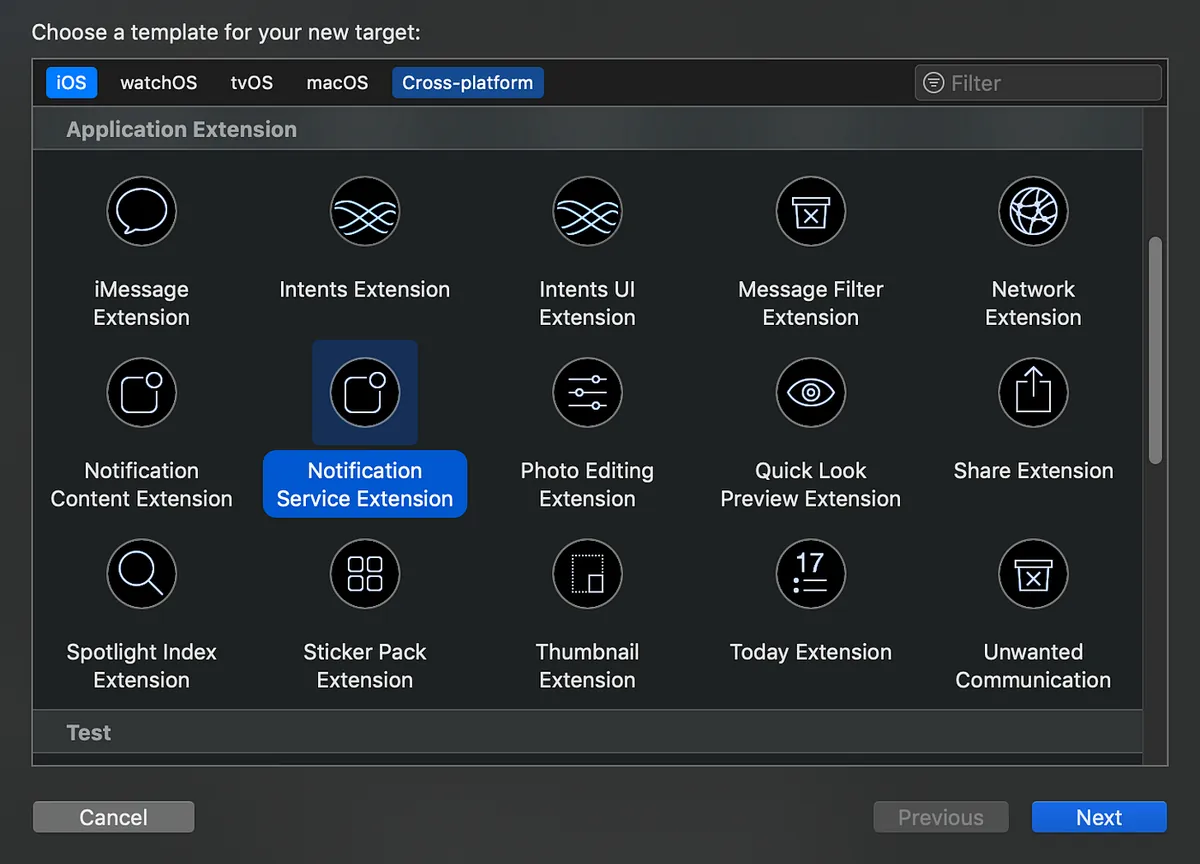
Step 2. iOS -> Notification Service Extension -> Next
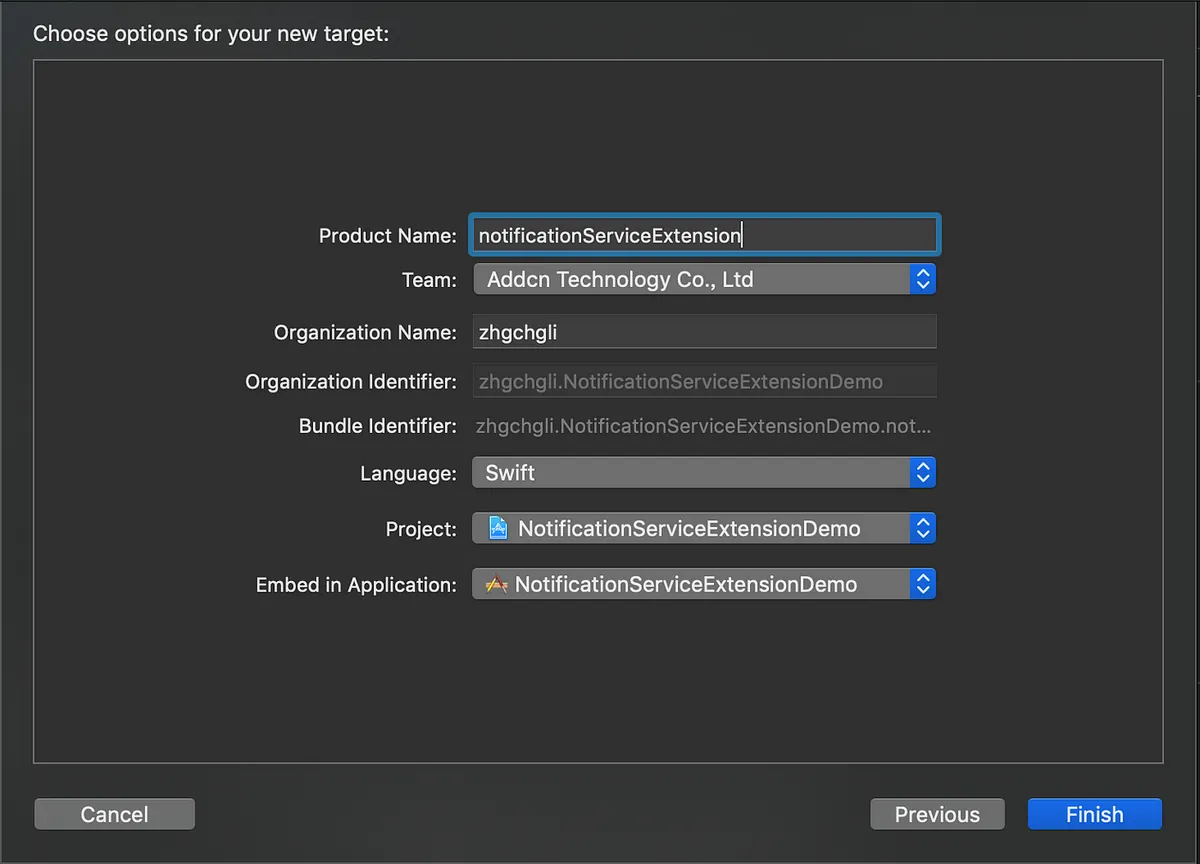
Step 3. Enter Product Name -> Finish
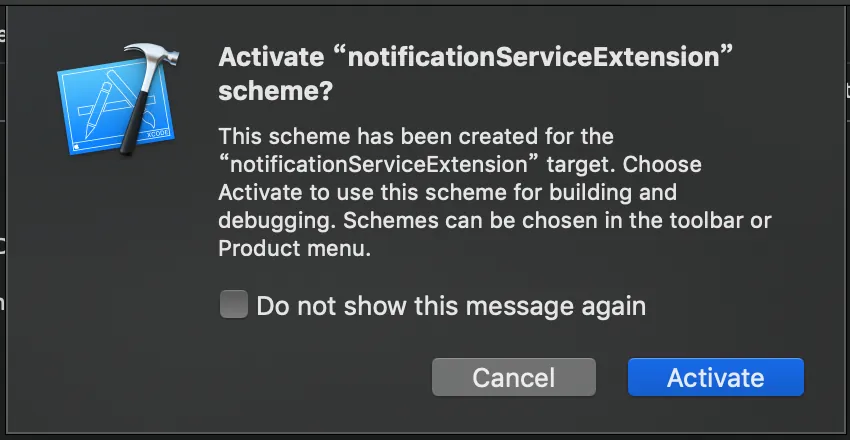
Step 4. Click Activate
Step 2: Write the Notification Content Handling Code
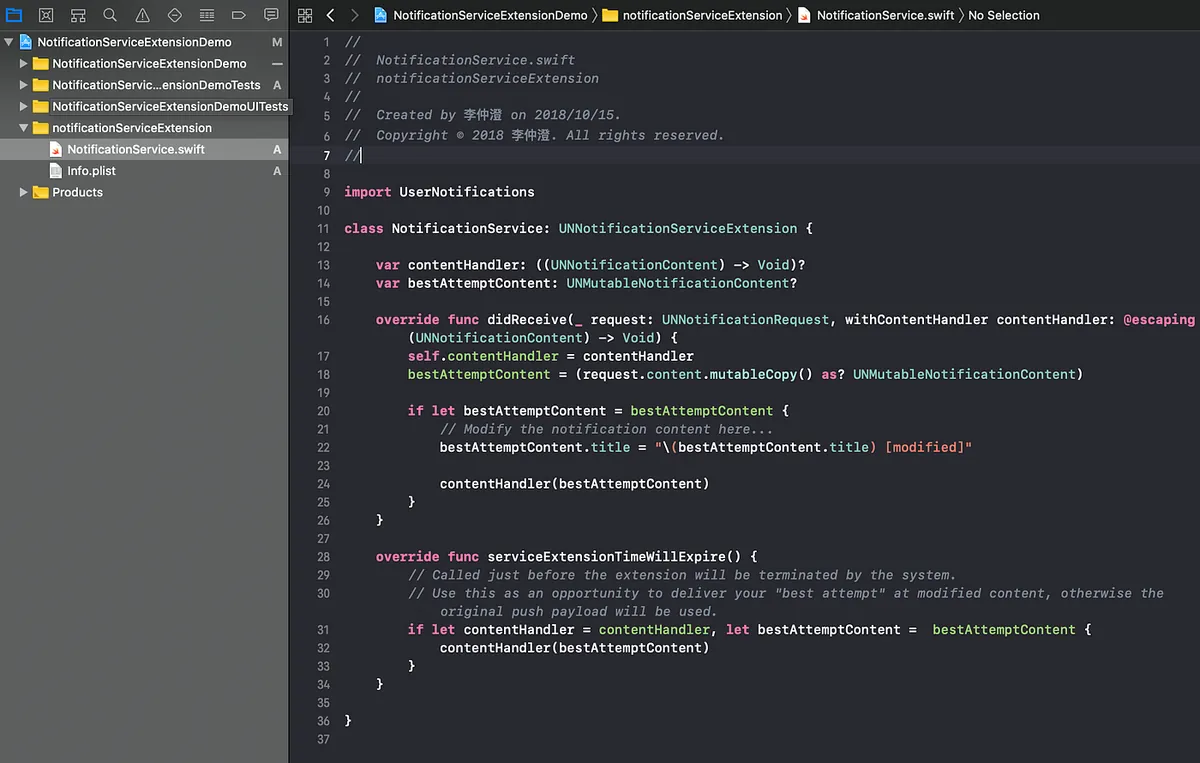
Find the Product Name/NotificationService.swift file
import UserNotifications

class NotificationService: UNNotificationServiceExtension {

    var contentHandler: ((UNNotificationContent) -> Void)?
    var bestAttemptContent: UNMutableNotificationContent?

    override func didReceive(_ request: UNNotificationRequest, withContentHandler contentHandler: @escaping (UNNotificationContent) -> Void) {
        self.contentHandler = contentHandler
        bestAttemptContent = (request.content.mutableCopy() as? UNMutableNotificationContent)

        if let bestAttemptContent = bestAttemptContent {
            // Modify the notification content here...
            // Handle push content here, load image back
            bestAttemptContent.title = "\(bestAttemptContent.title) [modified]"

            contentHandler(bestAttemptContent)
        }
    }

    override func serviceExtensionTimeWillExpire() {
        // Called just before the extension will be terminated by the system.
        // Use this as an opportunity to deliver your "best attempt" at modified content, otherwise the original push payload will be used.
        // Time is running out, just modify the title without the image
        if let contentHandler = contentHandler, let bestAttemptContent =  bestAttemptContent {
            contentHandler(bestAttemptContent)
        }
    }

}
As shown in the code above, NotificationService has two methods; the first is didReceive, which is triggered when a push notification arrives. After processing, you need to call the contentHandler(bestAttemptContent) callback method to notify the system.
If the callback method is not called within the time limit, the second function serviceExtensionTimeWillExpire() will be triggered. At this point, it is basically too late to recover, and you can only perform some cleanup actions (e.g., simply modify the title or content without loading network data).
Practical Example
Here we assume our Payload is as follows
{
    "aps": {
        "alert": {
            "push_id":"2018001",
            "title": "New Article Recommended for You",
            "body": "Check it out now",
            "image": "https://d2uju15hmm6f78.cloudfront.net/image/2016/12/04/3113/2018/09/28/trim_153813426461775700_450x300.jpg"
        },
        "mutable-content":1,
        "sound": "default",
        "badge": 0
    }
}
“push_id” and “image” are custom fields. “push_id” is used to identify the push notification, making it easier for us to send back data to the server for tracking; “image” is the URL of the image to be attached to the push notification.
override func didReceive(_ request: UNNotificationRequest, withContentHandler contentHandler: @escaping (UNNotificationContent) -> Void) {
    self.contentHandler = contentHandler
    bestAttemptContent = (request.content.mutableCopy() as? UNMutableNotificationContent)

    if let bestAttemptContent = bestAttemptContent {

        guard let info = request.content.userInfo["aps"] as? NSDictionary,let alert = info["alert"] as? Dictionary<String,String> else {
            contentHandler(bestAttemptContent)
            return
            // Notification content format is not as expected, do not process
        }

        // Goal 2:
        // Send back to server to notify that the notification was displayed
        if let push_id = alert["push_id"],let url = URL(string: "顯示統計API網址") {
            var request = URLRequest(url: url, cachePolicy: .reloadIgnoringLocalCacheData, timeoutInterval: 30)
            request.httpMethod = "POST"
            request.addValue(UserAgent, forHTTPHeaderField: "User-Agent")

            var httpBody = "push_id=\(push_id)"
            request.addValue("application/x-www-form-urlencoded", forHTTPHeaderField: "Content-Type")
            request.httpBody = httpBody.data(using: .utf8)

            let task = URLSession.shared.dataTask(with: request) { (data, response, error) in

            }
            DispatchQueue.global().async {
                task.resume()
                // Handle asynchronously, no need to wait
            }
        }

        // Goal 1:
        guard let imageURLString = alert["image"],let imageURL = URL(string: imageURLString) else {
            contentHandler(bestAttemptContent)
            return
            // If no image attached, no special handling needed
        }


        let dataTask = URLSession.shared.dataTask(with: imageURL) { (data, response, error) in
            guard let fileURL = NSURL(fileURLWithPath: NSTemporaryDirectory()).appendingPathComponent(imageURL.lastPathComponent) else {
                contentHandler(bestAttemptContent)
                return
            }
            guard (try? data?.write(to: fileURL)) != nil else {
                contentHandler(bestAttemptContent)
                return
            }

            guard let attachment = try? UNNotificationAttachment(identifier: "image", url: fileURL, options: nil) else {
                contentHandler(bestAttemptContent)
                return
            }
            // Above downloads the image from the URL, saves it locally, and creates a UNNotificationAttachment

            bestAttemptContent.categoryIdentifier = "image"
            bestAttemptContent.attachments = [attachment]
            // Add the image attachment to the notification

            bestAttemptContent.body = (bestAttemptContent.body == "") ? ("View Now") : (bestAttemptContent.body)
            // If the body is empty, use the default text "View Now"

            contentHandler(bestAttemptContent)
        }
        dataTask.resume()
    }
}
I didn’t handle anything special in the serviceExtensionTimeWillExpire part, so I won’t include it; the key is still the didReceive code above.
You can see that when a push notification is received, we first call an API to inform the backend that the notification was received and displayed, which helps with backend push statistics; then, if there is an attached image, we process the image.
When In-App:
It will still trigger Notification Service Extension didReceive, then trigger AppDelegate’s func application( _ application: UIApplication, didReceiveRemoteNotification userInfo: [AnyHashable : Any ], fetchCompletionHandler completionHandler: @escaping (UIBackgroundFetchResult) -> Void) method.
Note: Regarding image push notifications, you can also….
Use Notification Content Extension to customize the UIView displayed when the notification is pressed (can be custom-made), as well as the press action.
You can refer to this article: iOS10推送通知进阶(Notification Extension)
iOS 12 and later support more action handling: iOS 12 New Notification Features: Adding Interactivity Implementing Complex Functions in Notifications
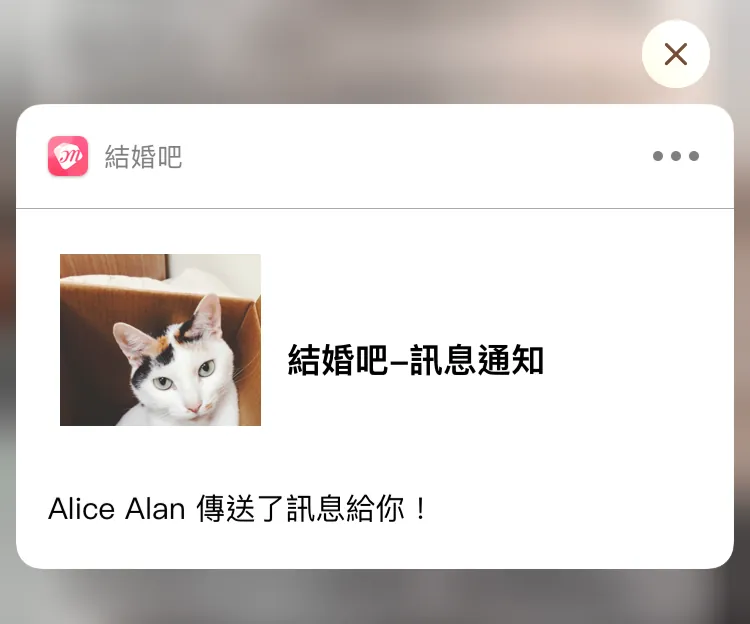
For the Notification Content Extension part, I only added a UIView that can display image notifications without much refinement:
Comments