
Identify Your Own Calls (Swift)
iOS Homemade Whoscall Caller Identification and Phone Number Labeling Feature
Origin
I have always been a loyal Whoscall user, starting from when I used an Android phone. It could instantly display unknown caller information, allowing me to decide whether to answer right away. Later, when I switched to the Apple ecosystem, my first Apple phone was the iPhone 6 (iOS 9). Using Whoscall on it was very awkward because it couldn’t identify calls in real time; I had to copy the phone number and search in the app. Later, Whoscall offered a service to install the unknown caller database locally on the phone. Although this solved the real-time identification issue, it easily messed up your phone contacts!
It was not until iOS 10+ that Apple opened the Call Directory Extension permission to developers, allowing apps like whoscall to offer an experience comparable to the Android version, if not better (the Android version has many ads, which is understandable from a developer’s perspective).
Purpose?
Call Directory Extension What can it do?
-
Phone Outgoing Caller ID Labeling
-
Phone Incoming Call Identification Label
-
Call History Identification Label
-
Phone Reject Blacklist Setup
Limitations?
-
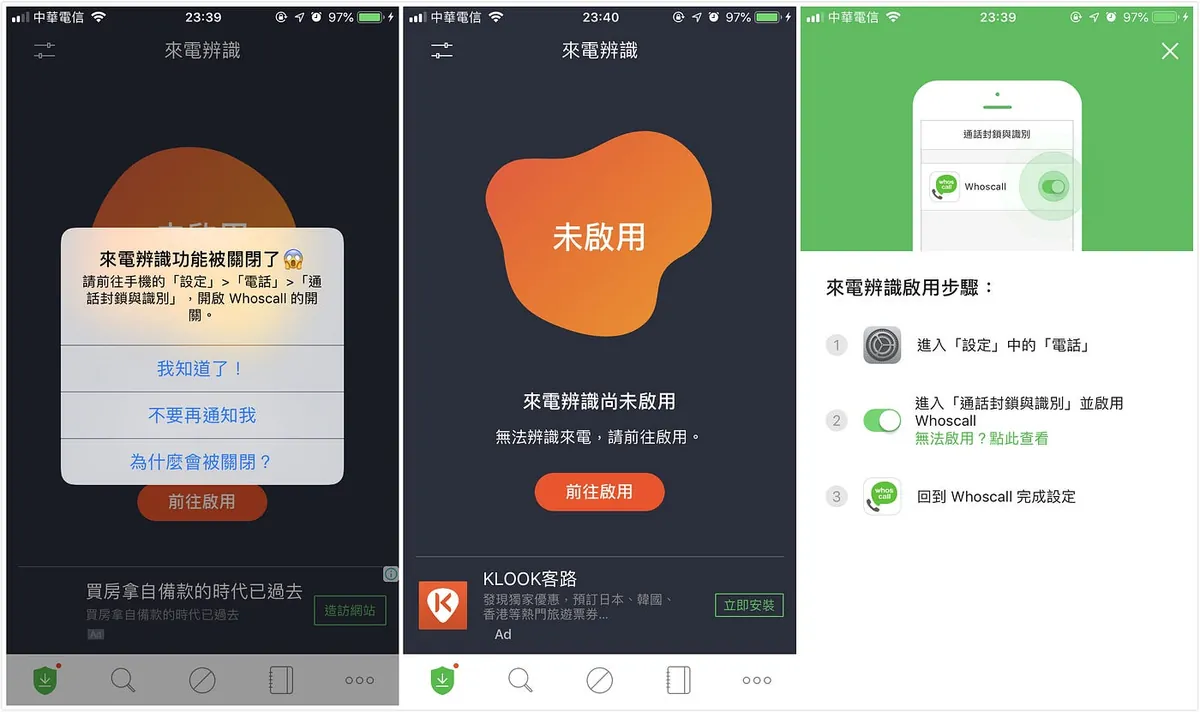
Users must manually go to “Settings” > “Phone” > “Call Blocking & Identification” to enable your app before use.
-
Only offline database recognition is supported (real-time incoming call information cannot be obtained to call APIs for lookup; the number-to-name mapping must be pre-written in the phone’s database).
Therefore, Whoscall regularly pushes notifications asking users to open the app to update the call identification database. -
Quantity limit? Currently, no information is found. It likely depends on the user’s phone storage with no specific limit; however, if the recognition or block list is large, it should be processed and written in batches!
-
Software limitation: iOS version must be ≥ 10
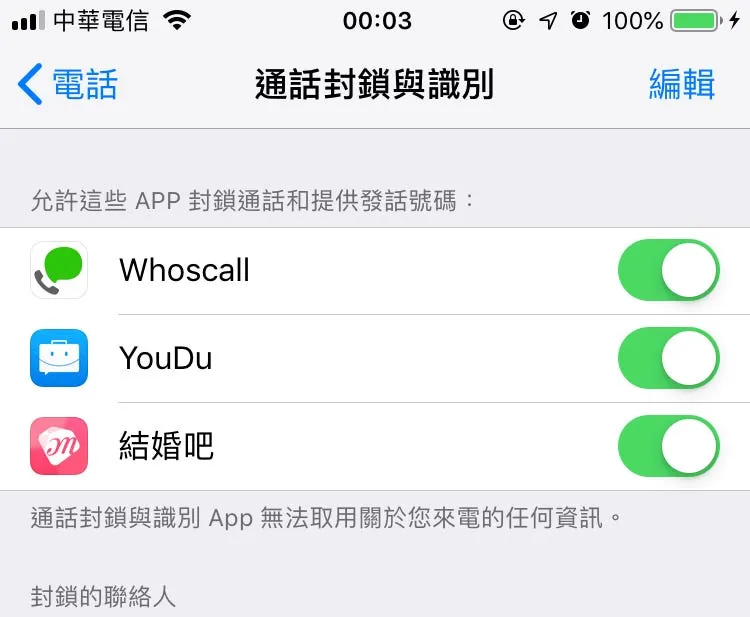
“Settings” -> “Phone” -> “Call Blocking & Identification”
Use Cases?
-
Messaging apps and office communication software; within the app, you may have the other person’s contact, but their phone number is not actually saved in your phone’s contacts. This feature helps prevent missing calls from colleagues or even your boss by mistakenly treating them as unknown numbers.
-
Our site (結婚吧) or my private site (591房屋交易) uses forwarding numbers when users contact stores or landlords. The calls are routed through a forwarding center to the target phone. The general process is as follows:
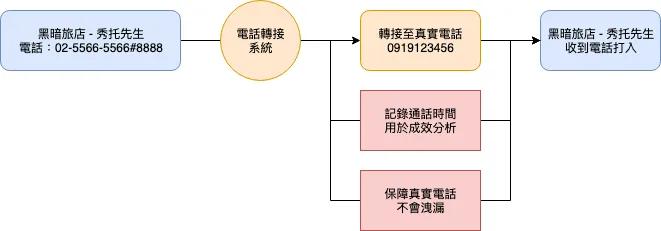
The phone numbers dialed by users are all representative numbers of the call center (#extension), so the real phone numbers are not known. This both protects personal privacy and allows tracking how many people contact the business (to evaluate effectiveness). It can also identify where the call was made from (e.g., webpage shows #1234, app shows #5678). Additionally, free services can be promoted, with our side covering the phone communication costs.
However, this approach brings an unavoidable issue: messy phone numbers. Users cannot identify who they are calling or who is calling back from a store. Using the call identification feature can greatly solve this problem and improve the user experience!
A finished product screenshot directly:
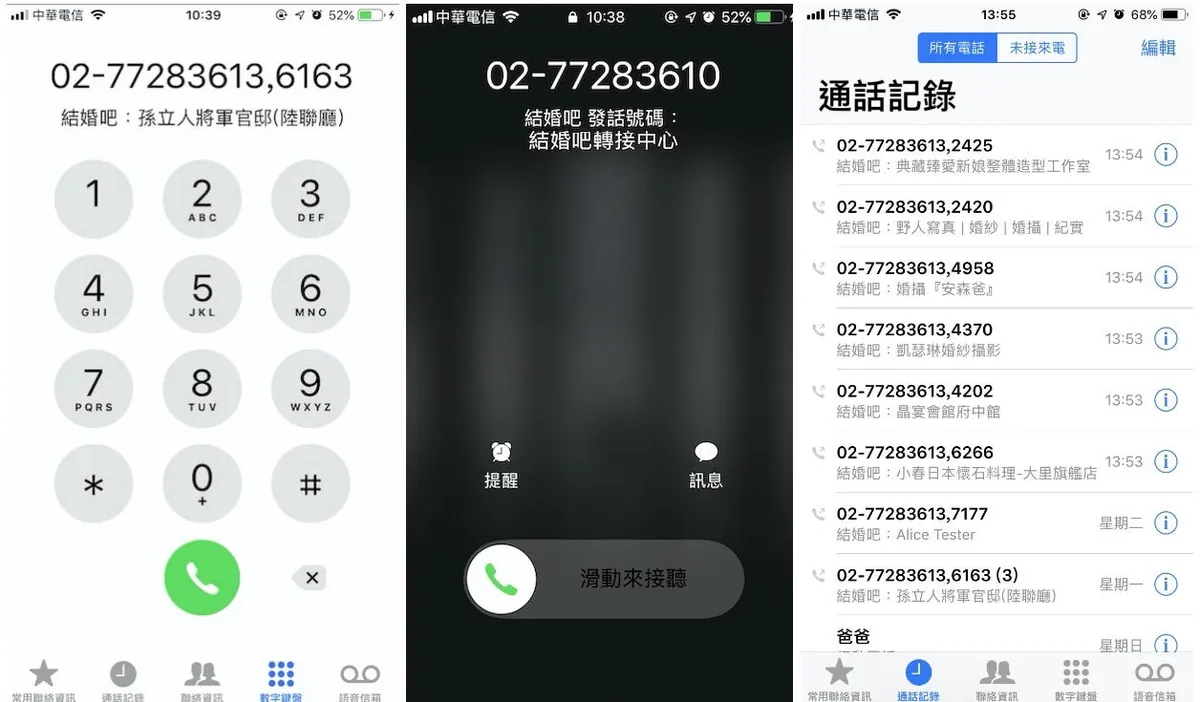
You can see that when entering a phone number or receiving a call, the identification result is displayed directly, and the call history list also shows the identification result clearly at the bottom.
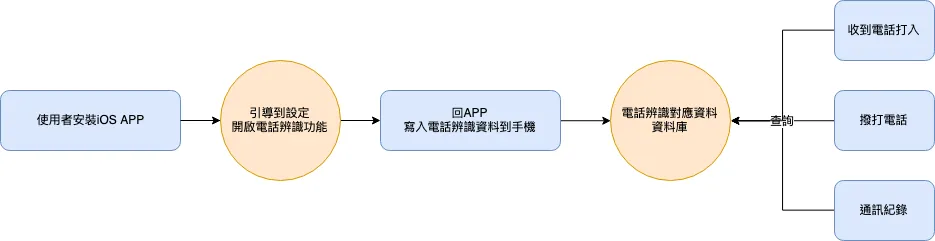
Call Directory Extension Call Identification Workflow:
Start Work:
Let’s get started!
1. Add Call Directory Extension to iOS Project
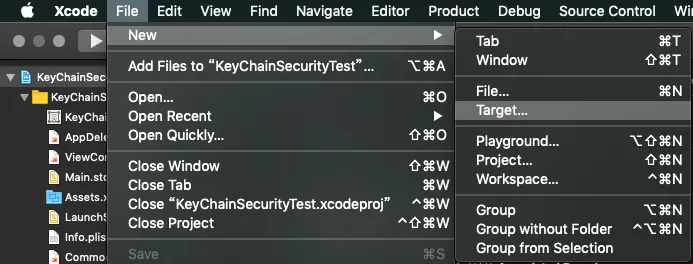
Xcode -> File -> New -> Target
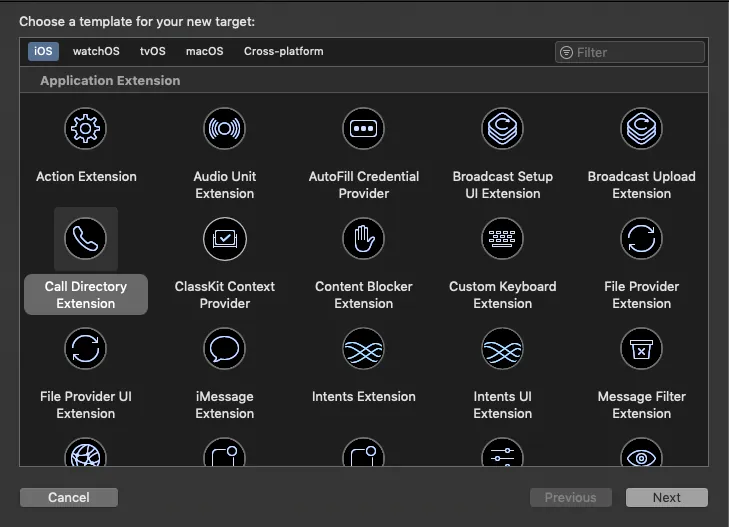
Select Call Directory Extension
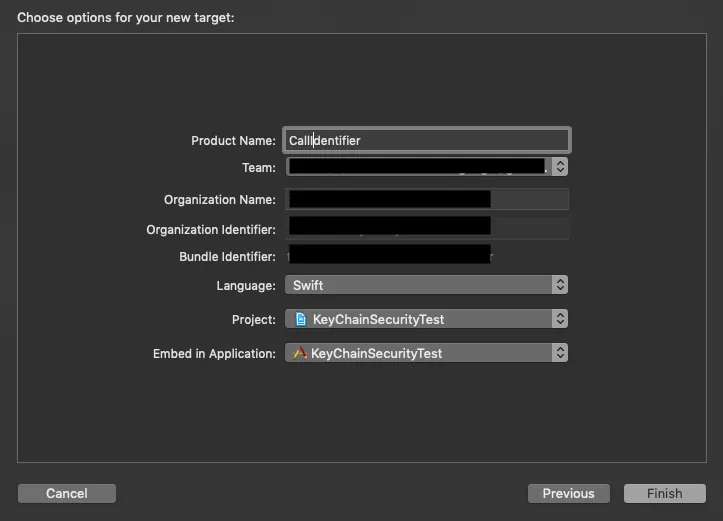
Enter Extension Name
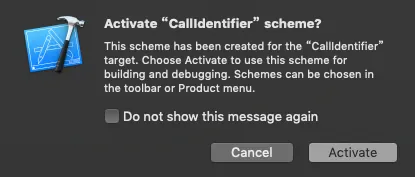
You can also add a Scheme for easier debugging.

Under the directory, the Call Directory Extension folder and files will appear.
2. Start Writing Call Directory Extension Related Code
First, return to the main iOS project.
The first question is how to determine whether the user’s device supports Call Directory Extension or if the “Call Blocking & Identification” setting is already enabled:
import CallKit
//
//......
//
if #available(iOS 10.0, *) {
    CXCallDirectoryManager.sharedInstance.getEnabledStatusForExtension(withIdentifier: "Enter the call directory extension's bundle identifier here", completionHandler: { (status, error) in
        if status == .enabled {
          // Enabled
        } else if status == .disabled {
          // Disabled
        } else {
          // Unknown, not supported
        }
    })
}
As mentioned earlier, the call identification works by maintaining a local identification database; next is the main question: how to achieve this functionality?
Unfortunately, you cannot directly write data to the Call Directory Extension. Therefore, you need to maintain an additional corresponding structure, which the Call Directory Extension will then read to write into the identification database. The process is as follows:

This means we need to maintain our own database file and have the Extension read and write it to the phone.
What should the identification data and files look like?
It’s basically a dictionary structure, like: [“phone”: “Wang Daming”]
Local files can use some Local DB (but the Extension must also be able to access it). Here, a .json file is directly stored on the device; storing directly in UserDefaults is not recommended. It may be fine for testing or small data, but strongly discouraged for real applications!
Alright, let’s begin:
if #available(iOS 10.0, *) {
    if let dir = FileManager.default.containerURL(forSecurityApplicationGroupIdentifier: "Your cross Extension, Group Identifier name") {
        let fileURL = dir.appendingPathComponent("phoneIdentity.json")
        var datas:[String:String] = ["8869190001234":"Mr. Lee","886912002456":"Big Guy"]
        if let content = try? String(contentsOf: fileURL, encoding: .utf8),let text = content.data(using: .utf8),let json2 = try? JSONSerialization.jsonObject(with: text, options: .mutableContainers) as? Dictionary<String,String>,let json = json2 {
            datas = json
        }
        if let data = jsonToData(jsonDic: datas) {
            DispatchQueue(label: "phoneIdentity").async {
                if let _ = try? data.write(to: fileURL) {
                    // JSON file writing completed
                }
            }
        }
    }
}
It’s just regular local file maintenance; the key point is that the directory must be accessible from the Extension as well.
Additional — Phone Number Format:
-
In Taiwan, landline and mobile numbers must replace the leading 0 with 886: for example, 0255667788 -> 886255667788
-
The phone number format must be a string composed of digits only, without any symbols such as “-“, “,”, “#” and so on.
-
For landline numbers that include an extension to be identified, simply append it directly without any symbols: for example, 0255667788,0718 -> 8862556677880718
-
To convert the standard iOS phone number format into a format accepted by the identification database, you can refer to the following two replacement methods:
var newNumber = "0255667788,0718"
if let regex = try? NSRegularExpression(pattern: "^0{1}") {
    newNumber = regex.stringByReplacingMatches(in: newNumber, options: [], range: NSRange(location: 0, length: newNumber.count), withTemplate: "886")
}
if let regex = try? NSRegularExpression(pattern: ",") {
    newNumber = regex.stringByReplacingMatches(in: newNumber, options: [], range: NSRange(location: 0, length: newNumber.count), withTemplate: "")
}
Next, following the process, once the identification data is maintained, you need to notify the Call Directory Extension to refresh the data on the phone:
if #available(iOS 10.0, *) {
    CXCallDirectoryManager.sharedInstance.reloadExtension(withIdentifier: "tw.com.marry.MarryiOS.CallDirectory") { errorOrNil in
        if let error = errorOrNil as? CXErrorCodeCallDirectoryManagerError {
            print("reload failed")

            switch error.code {
            case .unknown:
                print("error is unknown")
            case .noExtensionFound:
                print("error is noExtensionFound")
            case .loadingInterrupted:
                print("error is loadingInterrupted")
            case .entriesOutOfOrder:
                print("error is entriesOutOfOrder")
            case .duplicateEntries:
                print("error is duplicateEntries")
            case .maximumEntriesExceeded:
                print("maximumEntriesExceeded")
            case .extensionDisabled:
                print("extensionDisabled")
            case .currentlyLoading:
                print("currentlyLoading")
            case .unexpectedIncrementalRemoval:
                print("unexpectedIncrementalRemoval")
            }
        } else if let error = errorOrNil {
            print("reload error: \(error)")
        } else {
            print("reload succeeded")
        }
    }
}
Use the above method to notify the Extension to refresh and get the execution result. (At this point, the beginRequest in the Call Directory Extension will be called, please continue reading)
The main iOS project’s code ends here!
3. Start Modifying the Call Directory Extension Code
Open the Call Directory Extension folder and find the pre-created file CallDirectoryHandler.swift.
The only method you can implement is beginRequest, which handles the phone number data. The default example has it set up for us, so there’s usually no need to modify it:
-
addAllBlockingPhoneNumbers: Handles adding blacklist numbers (full addition)
-
addOrRemoveIncrementalBlockingPhoneNumbers: Handles adding phone numbers to the blacklist (incremental method)
-
addAllIdentificationPhoneNumbers: Handles adding all identification phone numbers (full addition)
-
addOrRemoveIncrementalIdentificationPhoneNumbers: Handles adding call identification numbers (incremental method)
We only need to complete the above function implementation. The blacklist feature works on the same principle as call identification, so it will not be further explained here.
private func fetchAll(context: CXCallDirectoryExtensionContext) {
    if let dir = FileManager.default.containerURL(forSecurityApplicationGroupIdentifier: "Your cross-Extension, Group Identifier name") {
        let fileURL = dir.appendingPathComponent("phoneIdentity.json")
        if let content = try? String(contentsOf: fileURL, encoding: .utf8), let text = content.data(using: .utf8), let numbers = try? JSONSerialization.jsonObject(with: text, options: .mutableContainers) as? Dictionary<String,String> {
            numbers?.sorted(by: { (Int($0.key) ?? 0) < Int($1.key) ?? 0 }).forEach({ (obj) in
                if let number = CXCallDirectoryPhoneNumber(obj.key) {
                    autoreleasepool{
                        if context.isIncremental {
                            context.removeIdentificationEntry(withPhoneNumber: number)
                        }
                        context.addIdentificationEntry(withNextSequentialPhoneNumber: number, label: obj.value)
                    }
                }
            })
        }
    }
}

private func addAllIdentificationPhoneNumbers(to context: CXCallDirectoryExtensionContext) {
    // Retrieve phone numbers to identify and their identification labels from data store. For optimal performance and memory usage when there are many phone numbers,
    // consider only loading a subset of numbers at a given time and using autorelease pool(s) to release objects allocated during each batch of numbers which are loaded.
    //
    // Numbers must be provided in numerically ascending order.
    //        let allPhoneNumbers: [CXCallDirectoryPhoneNumber] = [ 1_877_555_5555, 1_888_555_5555 ]
    //        let labels = [ "Telemarketer", "Local business" ]
    //
    //        for (phoneNumber, label) in zip(allPhoneNumbers, labels) {
    //            context.addIdentificationEntry(withNextSequentialPhoneNumber: phoneNumber, label: label)
    //        }
    fetchAll(context: context)
}

private func addOrRemoveIncrementalIdentificationPhoneNumbers(to context: CXCallDirectoryExtensionContext) {
    // Retrieve any changes to the set of phone numbers to identify (and their identification labels) from data store. For optimal performance and memory usage when there are many phone numbers,
    // consider only loading a subset of numbers at a given time and using autorelease pool(s) to release objects allocated during each batch of numbers which are loaded.
    //        let phoneNumbersToAdd: [CXCallDirectoryPhoneNumber] = [ 1_408_555_5678 ]
    //        let labelsToAdd = [ "New local business" ]
    //
    //        for (phoneNumber, label) in zip(phoneNumbersToAdd, labelsToAdd) {
    //            context.addIdentificationEntry(withNextSequentialPhoneNumber: phoneNumber, label: label)
    //        }
    //
    //        let phoneNumbersToRemove: [CXCallDirectoryPhoneNumber] = [ 1_888_555_5555 ]
    //
    //        for phoneNumber in phoneNumbersToRemove {
    //            context.removeIdentificationEntry(withPhoneNumber: phoneNumber)
    //        }

    //context.removeIdentificationEntry(withPhoneNumber: CXCallDirectoryPhoneNumber("886277283610")!)
    //context.addIdentificationEntry(withNextSequentialPhoneNumber: CXCallDirectoryPhoneNumber("886277283610")!, label: "TEST")

    fetchAll(context: context)
    // Record the most-recently loaded set of identification entries in data store for the next incremental load...
}
Because our site’s data won’t be too large and my local data structure is quite simple, incremental updates are not possible; therefore, we will uniformly use a full replacement approach. If using incremental updates, you must delete the old data first (this step is very important, otherwise reloading the extension will fail!)
Done!
That’s it! The implementation is very simple!
Tips:
-
If the app keeps loading or cannot identify numbers after enabling it in “Settings” > “Phone” > “Call Blocking & Identification,” first check if the numbers are correct, verify the locally maintained .json data, and confirm whether reloading the extension was successful. You can also try restarting the device. If the issue persists, select the Call Directory Extension scheme build to check for error messages.
-
The most challenging part of this feature is not the programming but guiding users to manually enable the setting. For specific methods and guidance, you can refer to whoscall:

Comments